
How to create a product from Album/Composition
In the Product category of the menu on the left, go to the Products section located in the top bar. In the top right corner, there is a green “+ Add” butto…
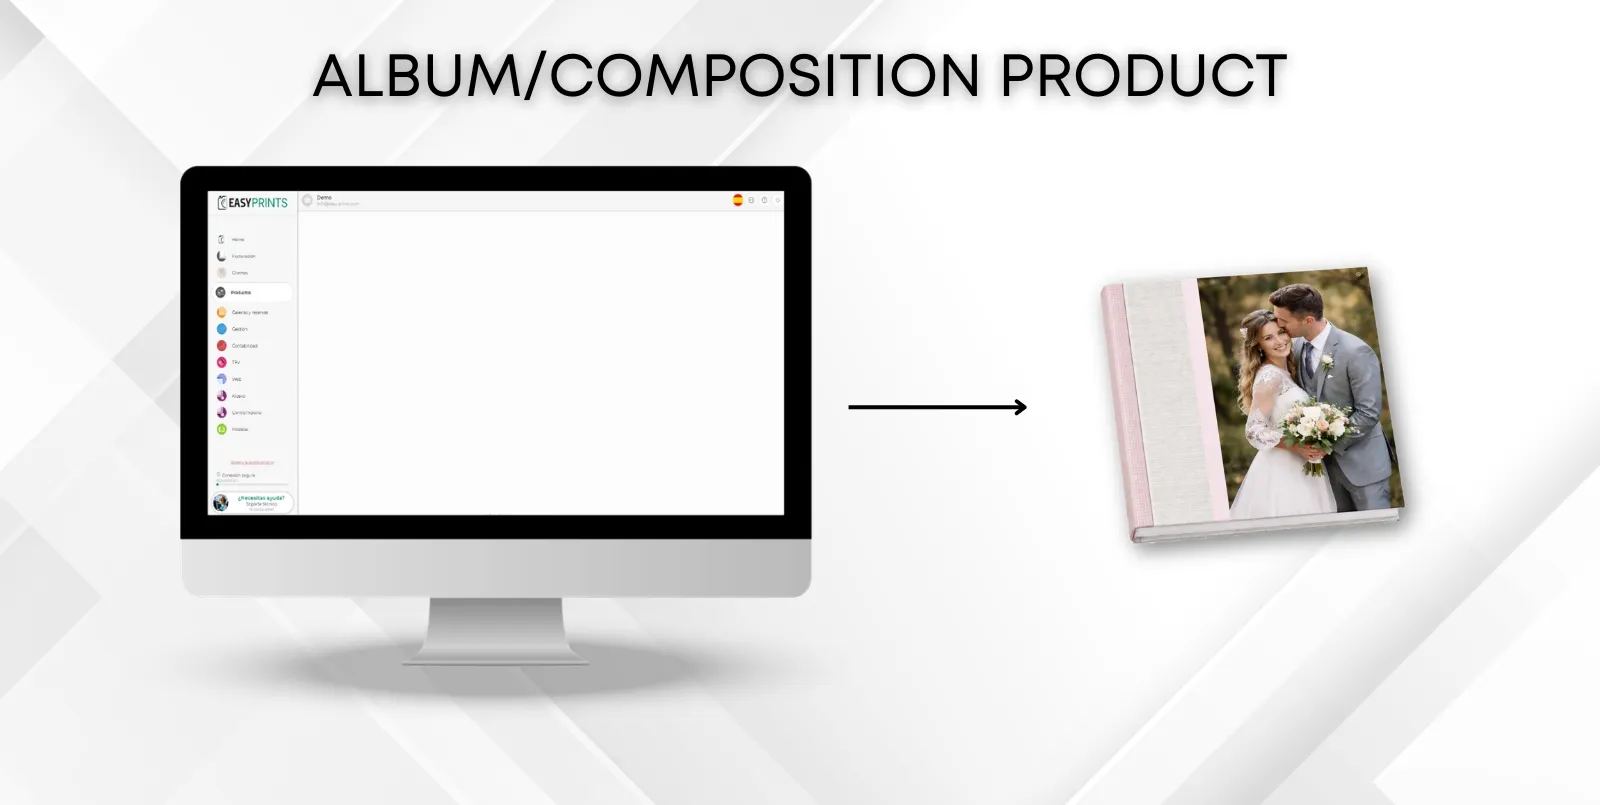
Step 1
In the Product category of the menu on the left, go to the Products section located in the top bar.
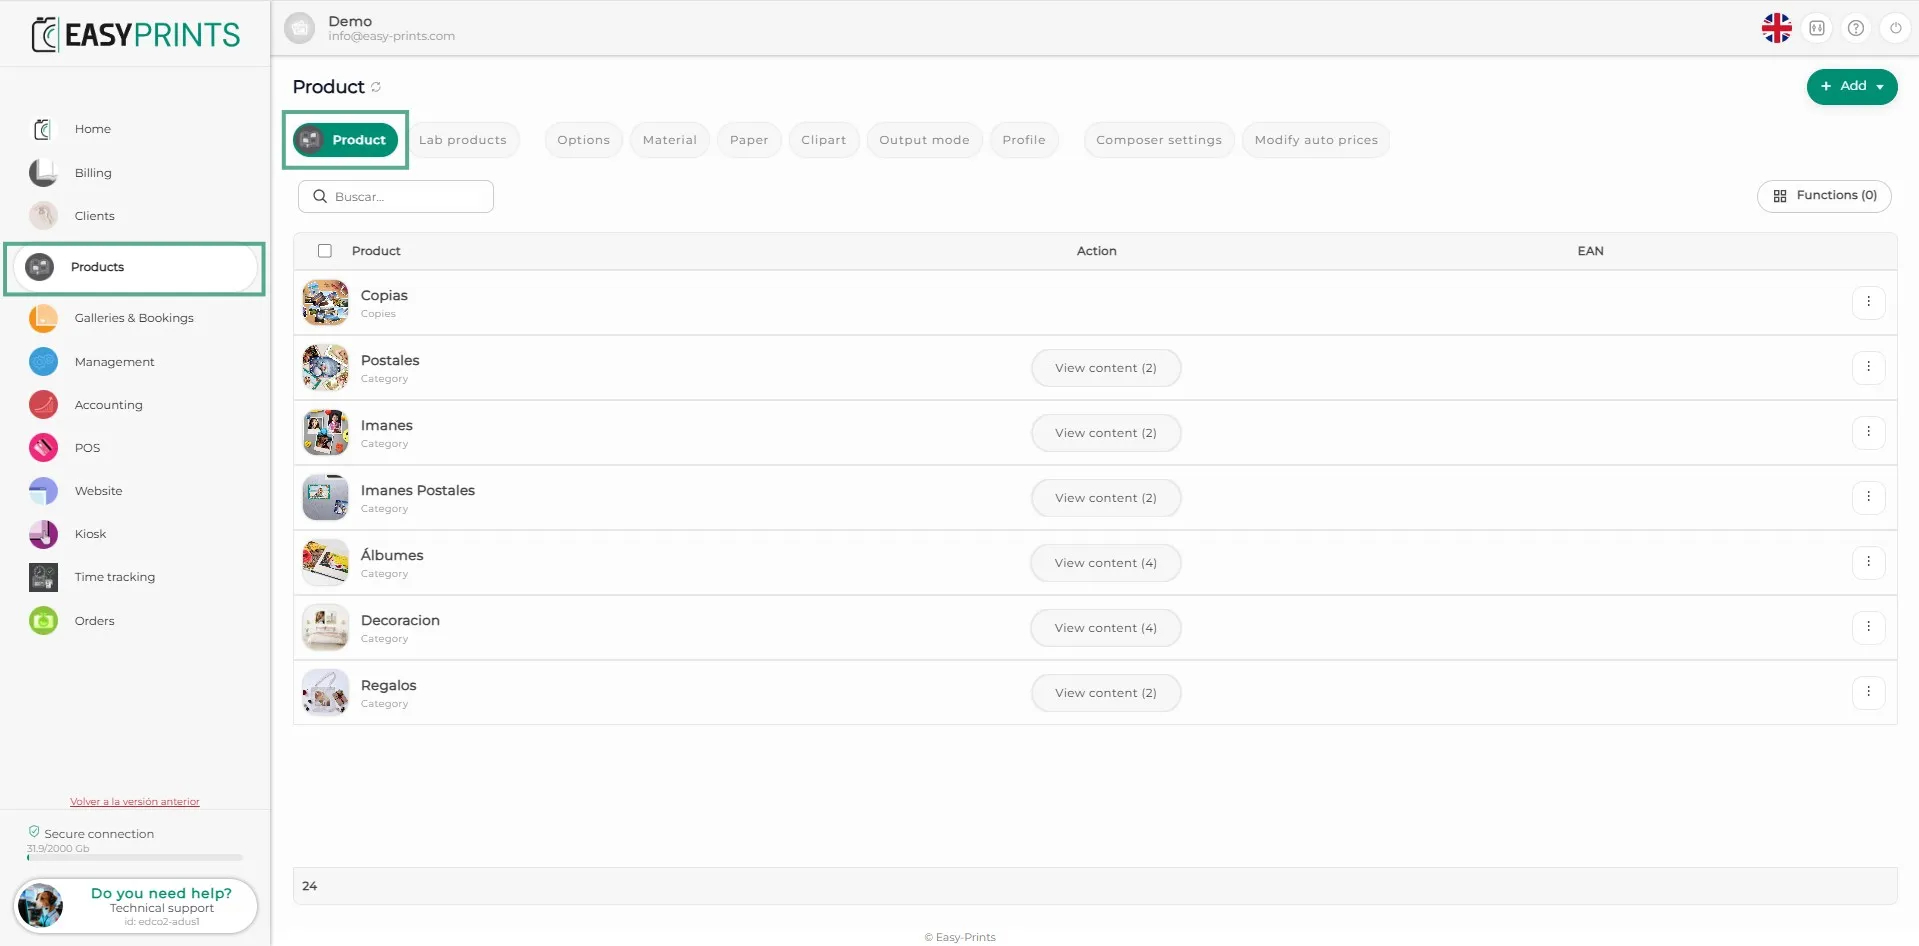
Step 2
In the top right corner, there is a green “+ Add” button. When you click on it, a dropdown menu opens. Click on “New product”.
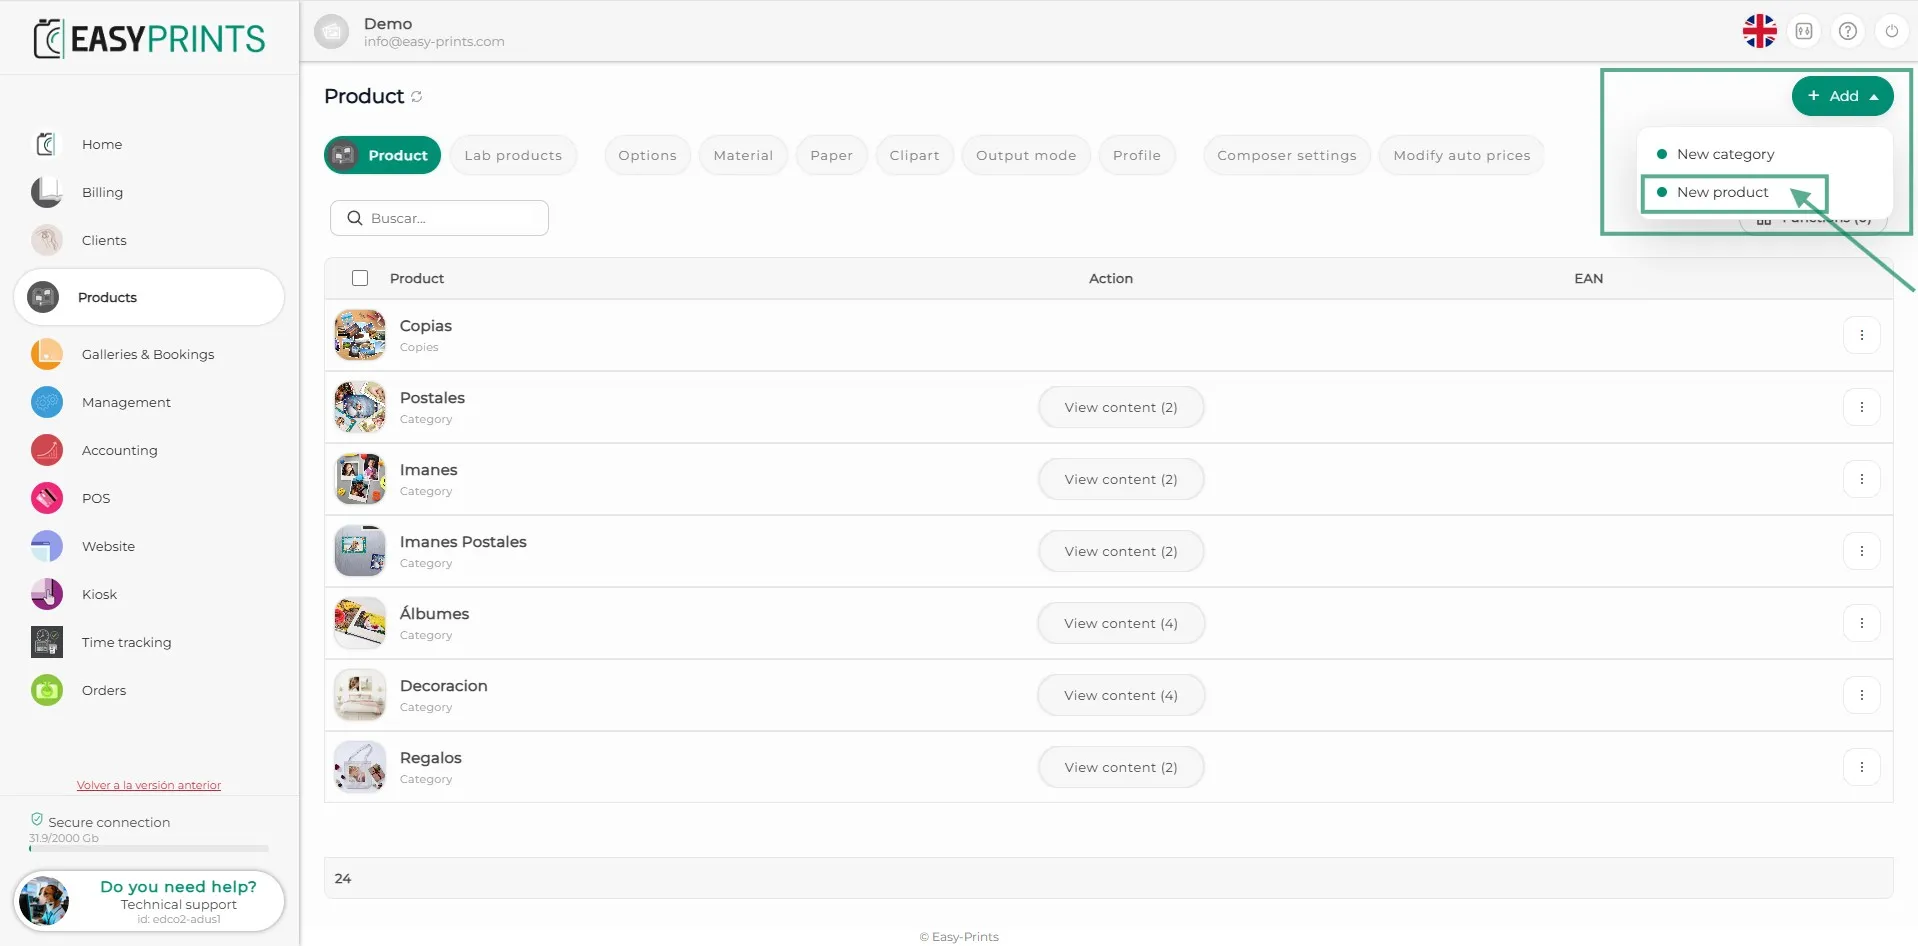
Step 3
In the new window, click on the Album section.
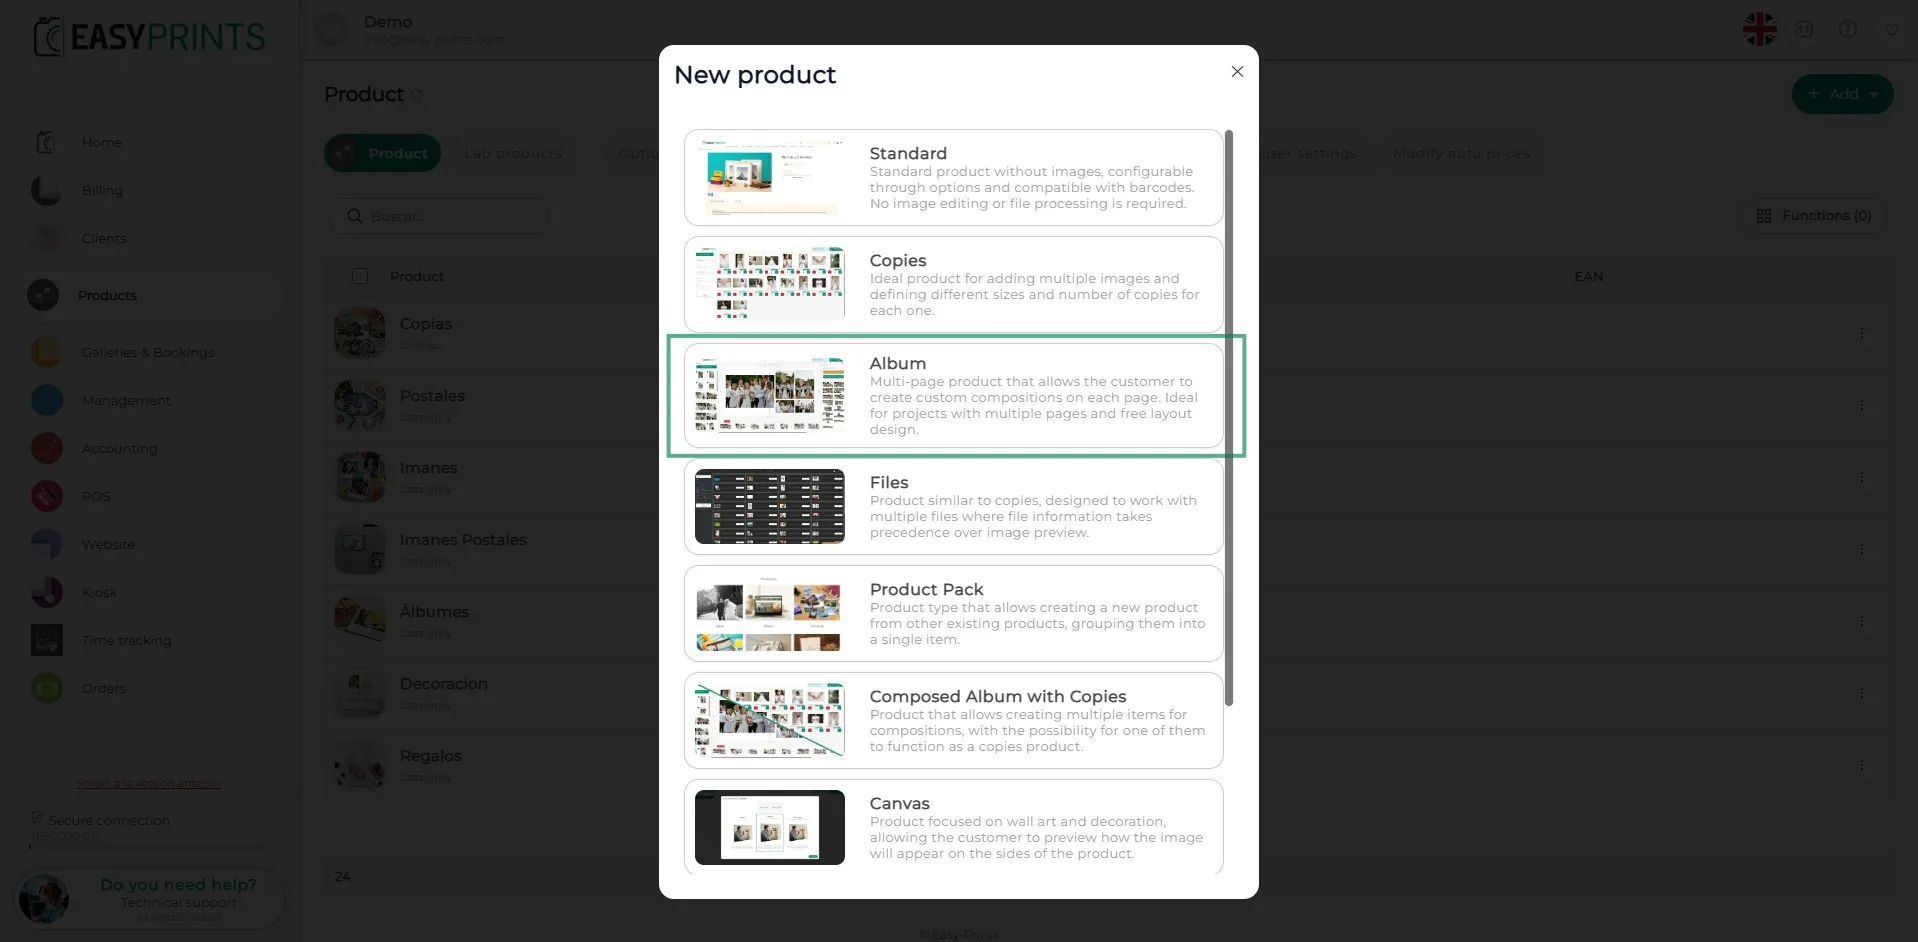
Step 4
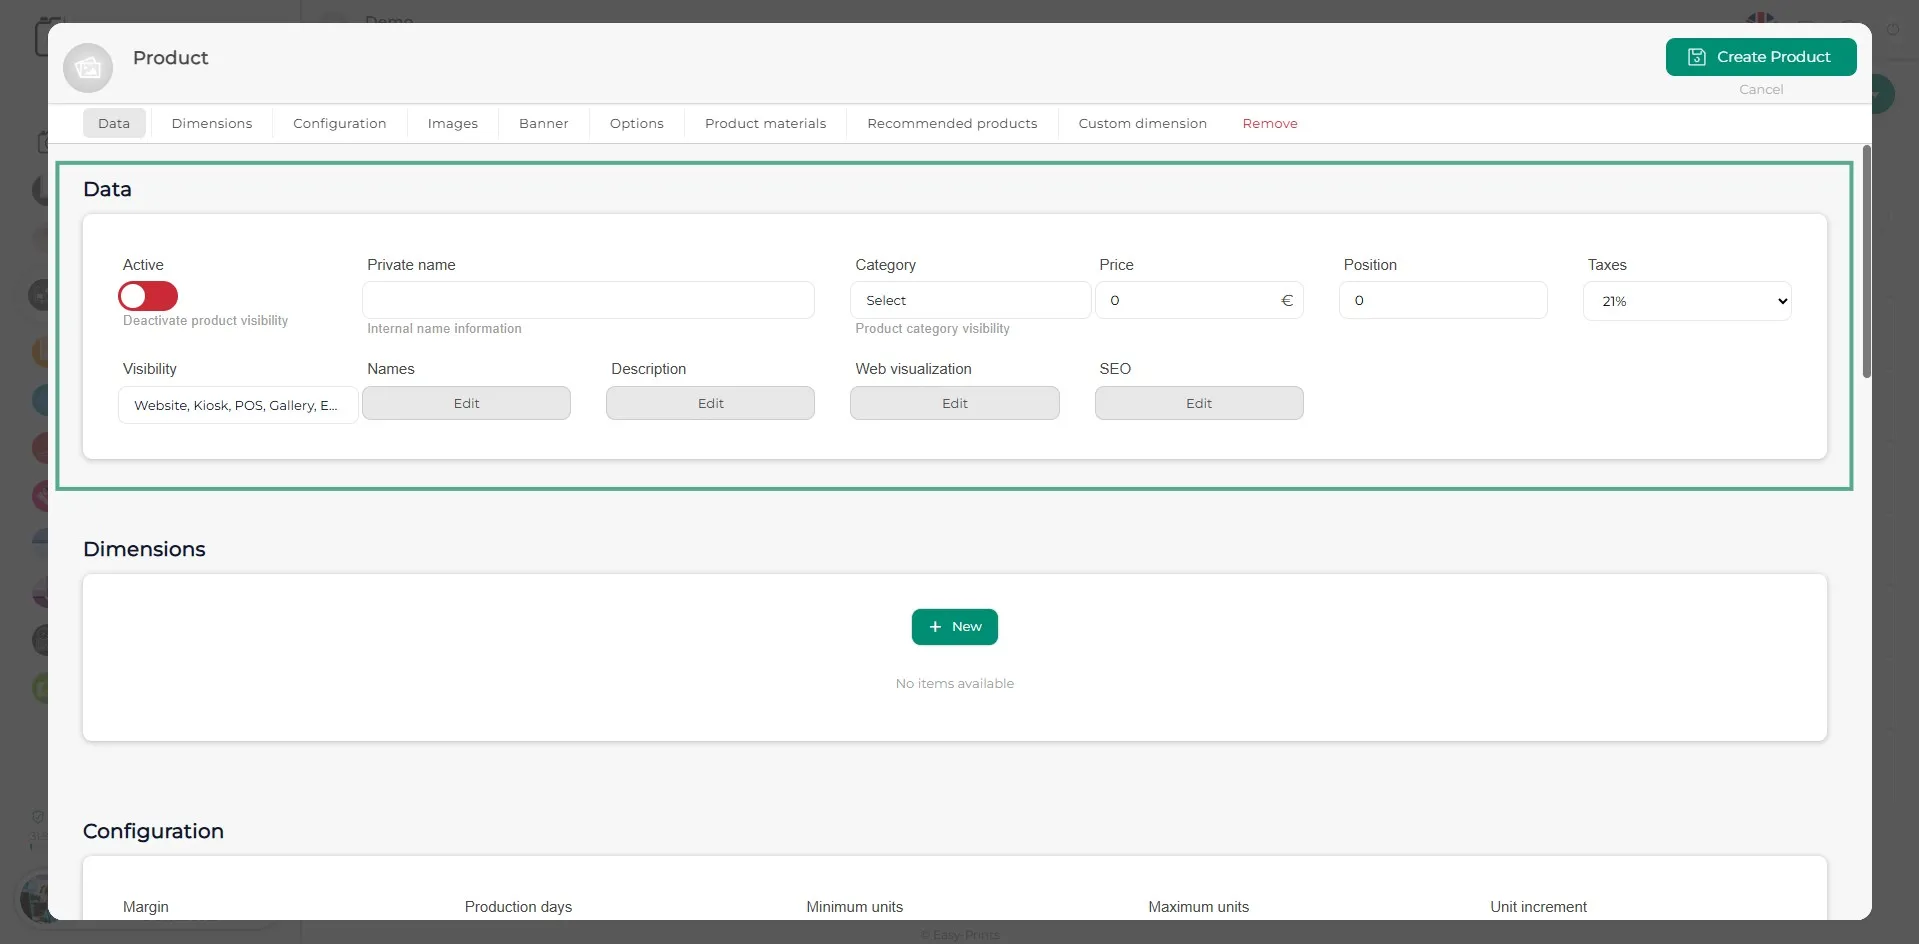
Once the product window opens, fill in the general information, such as the internal name, the display name, the description, the price, the category, the position, etc. Make sure to activate the product.
Step 5
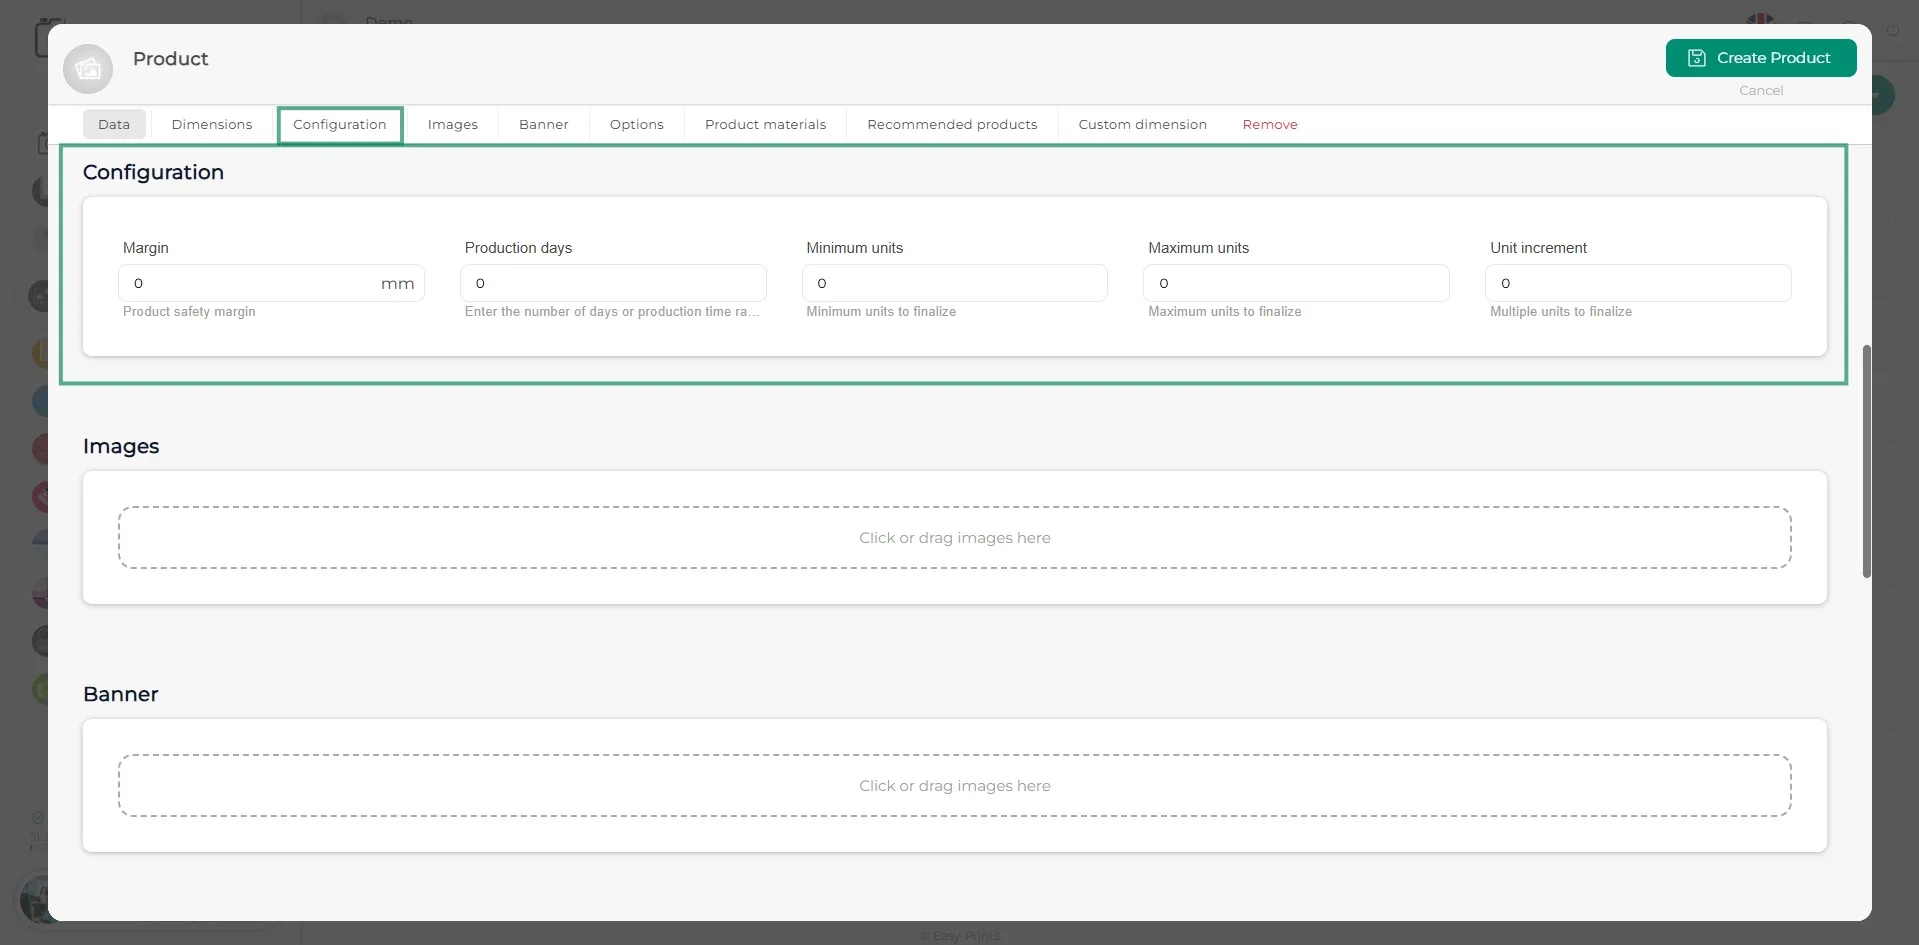
In the configuration section, you must specify the minimum and maximum units of the product, as well as the production days (working days).
Step 6
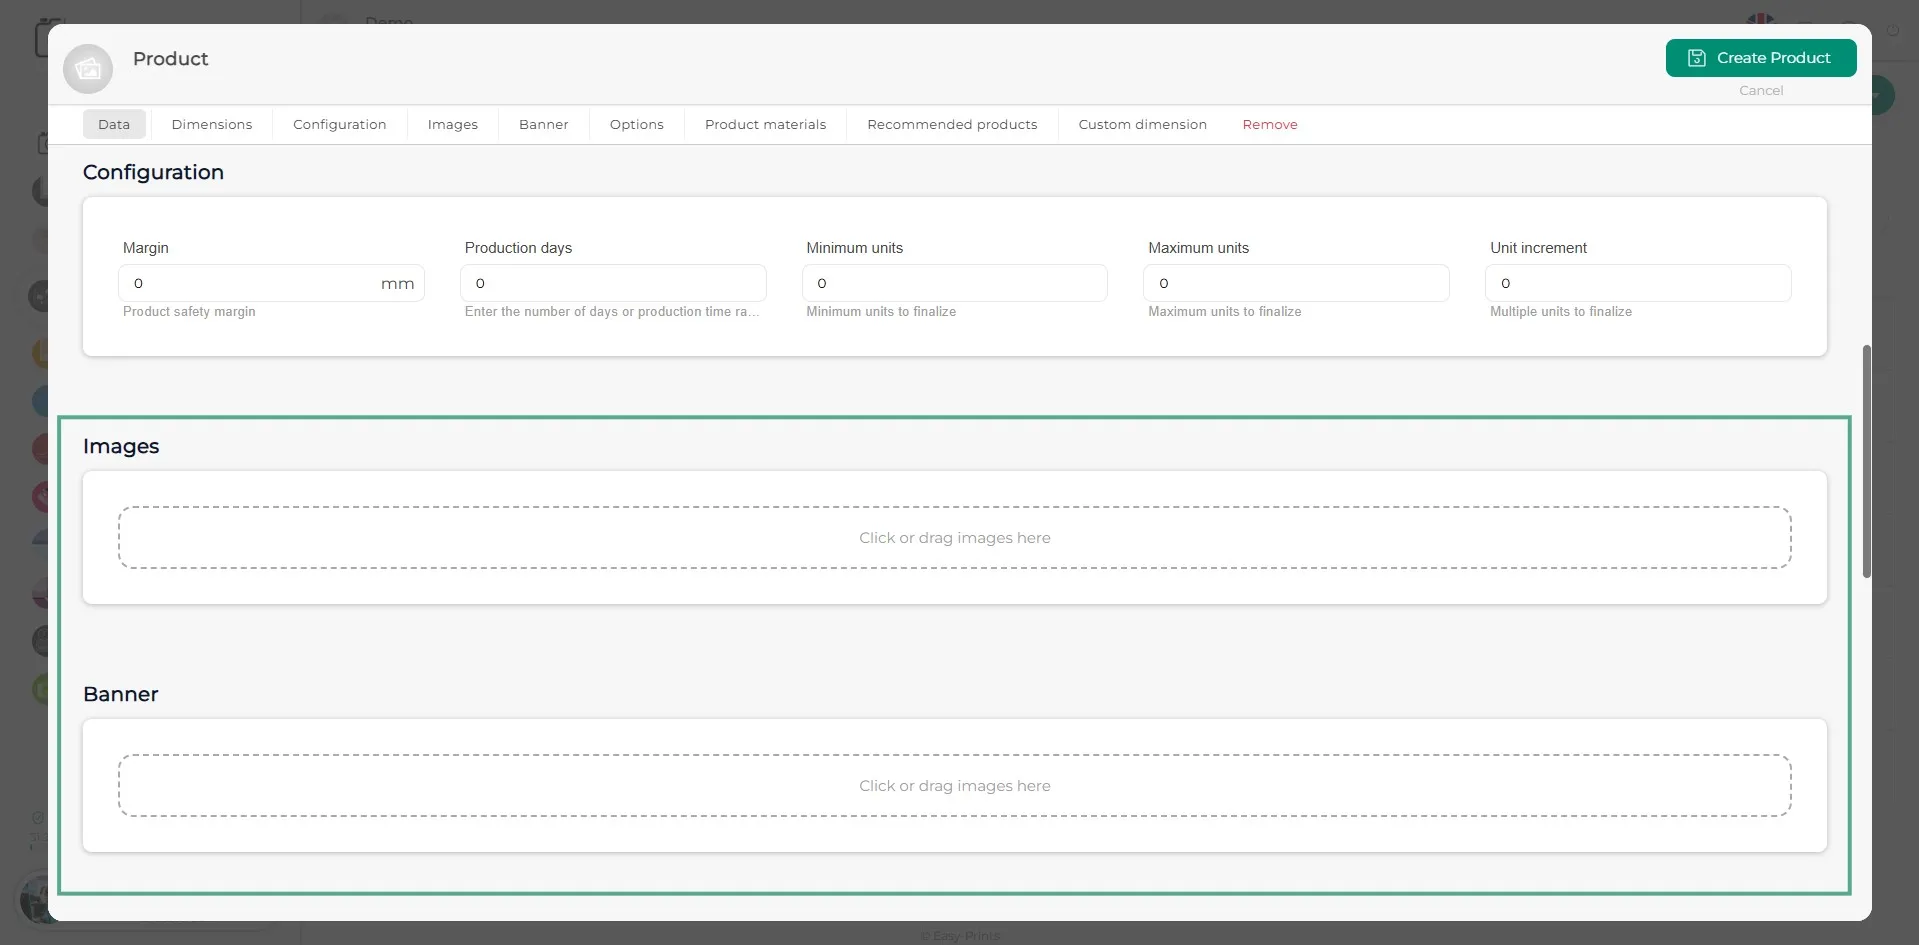
Add product photos (as many as you want) by clicking on the gray indicated area. You can also add a banner if desired.
Step 7
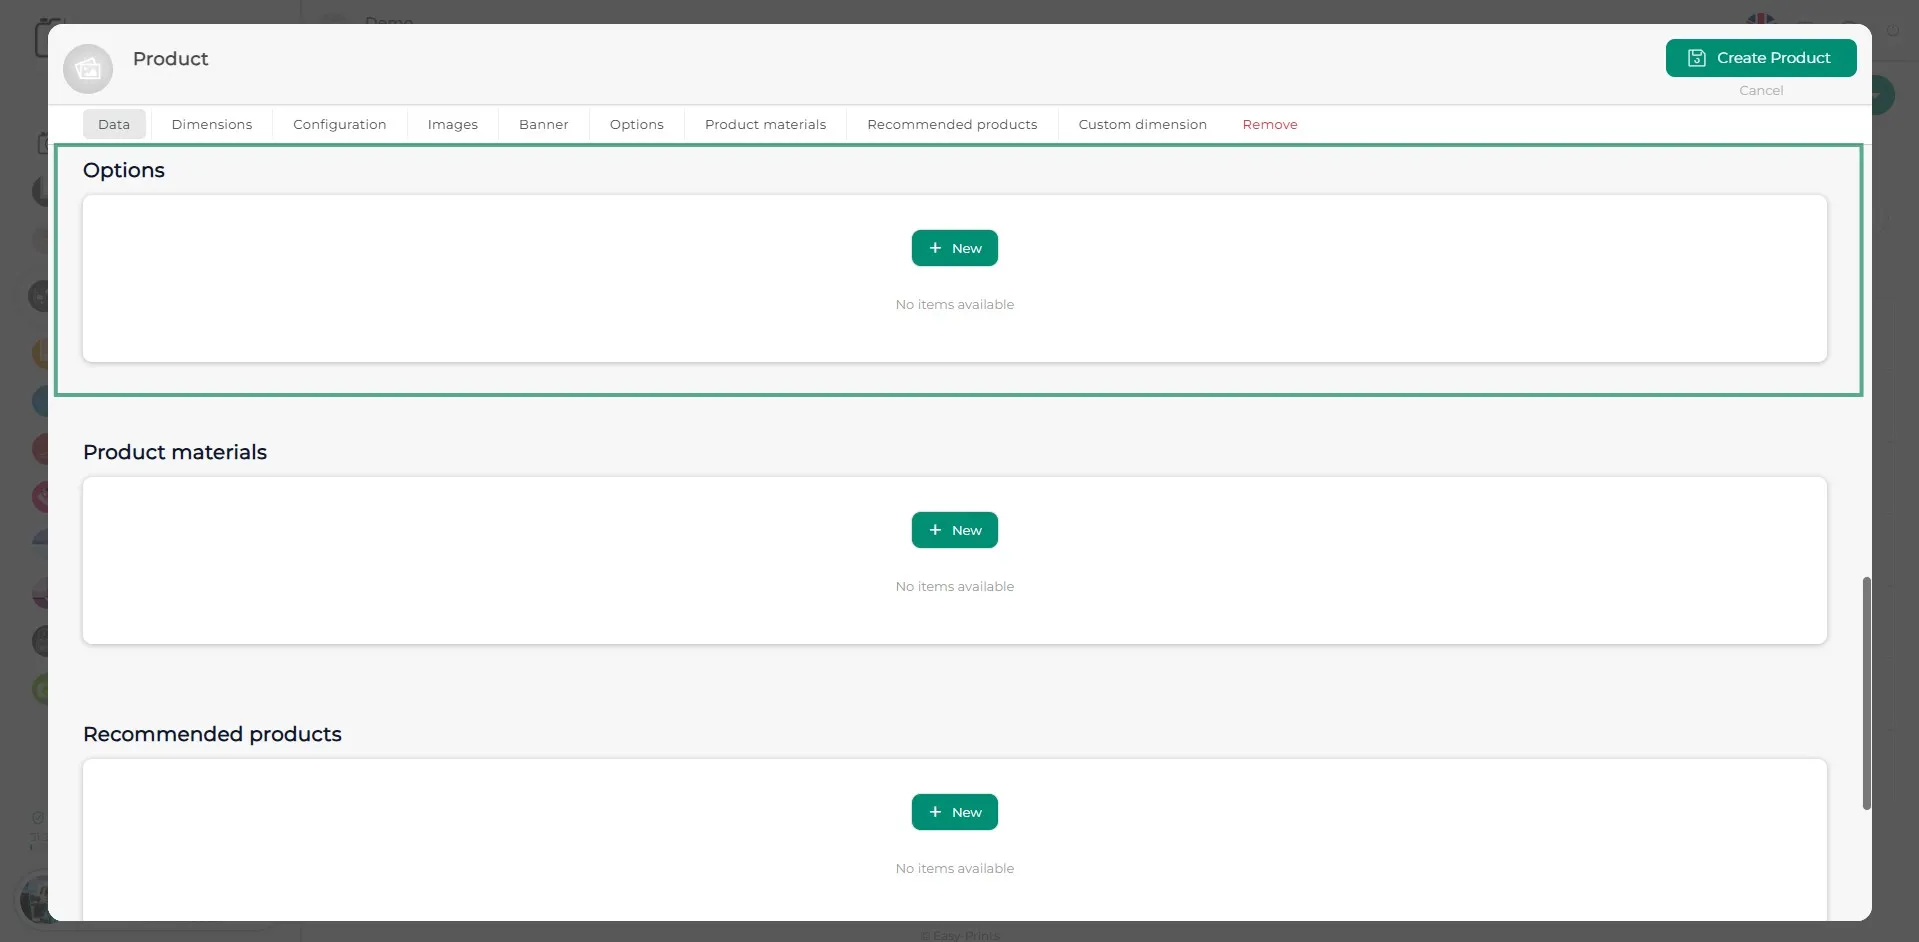
In the Options section, add new options by clicking the green “+ New” button. This section can be used, for example, if there are different paper types, finishes, etc.
Step 8
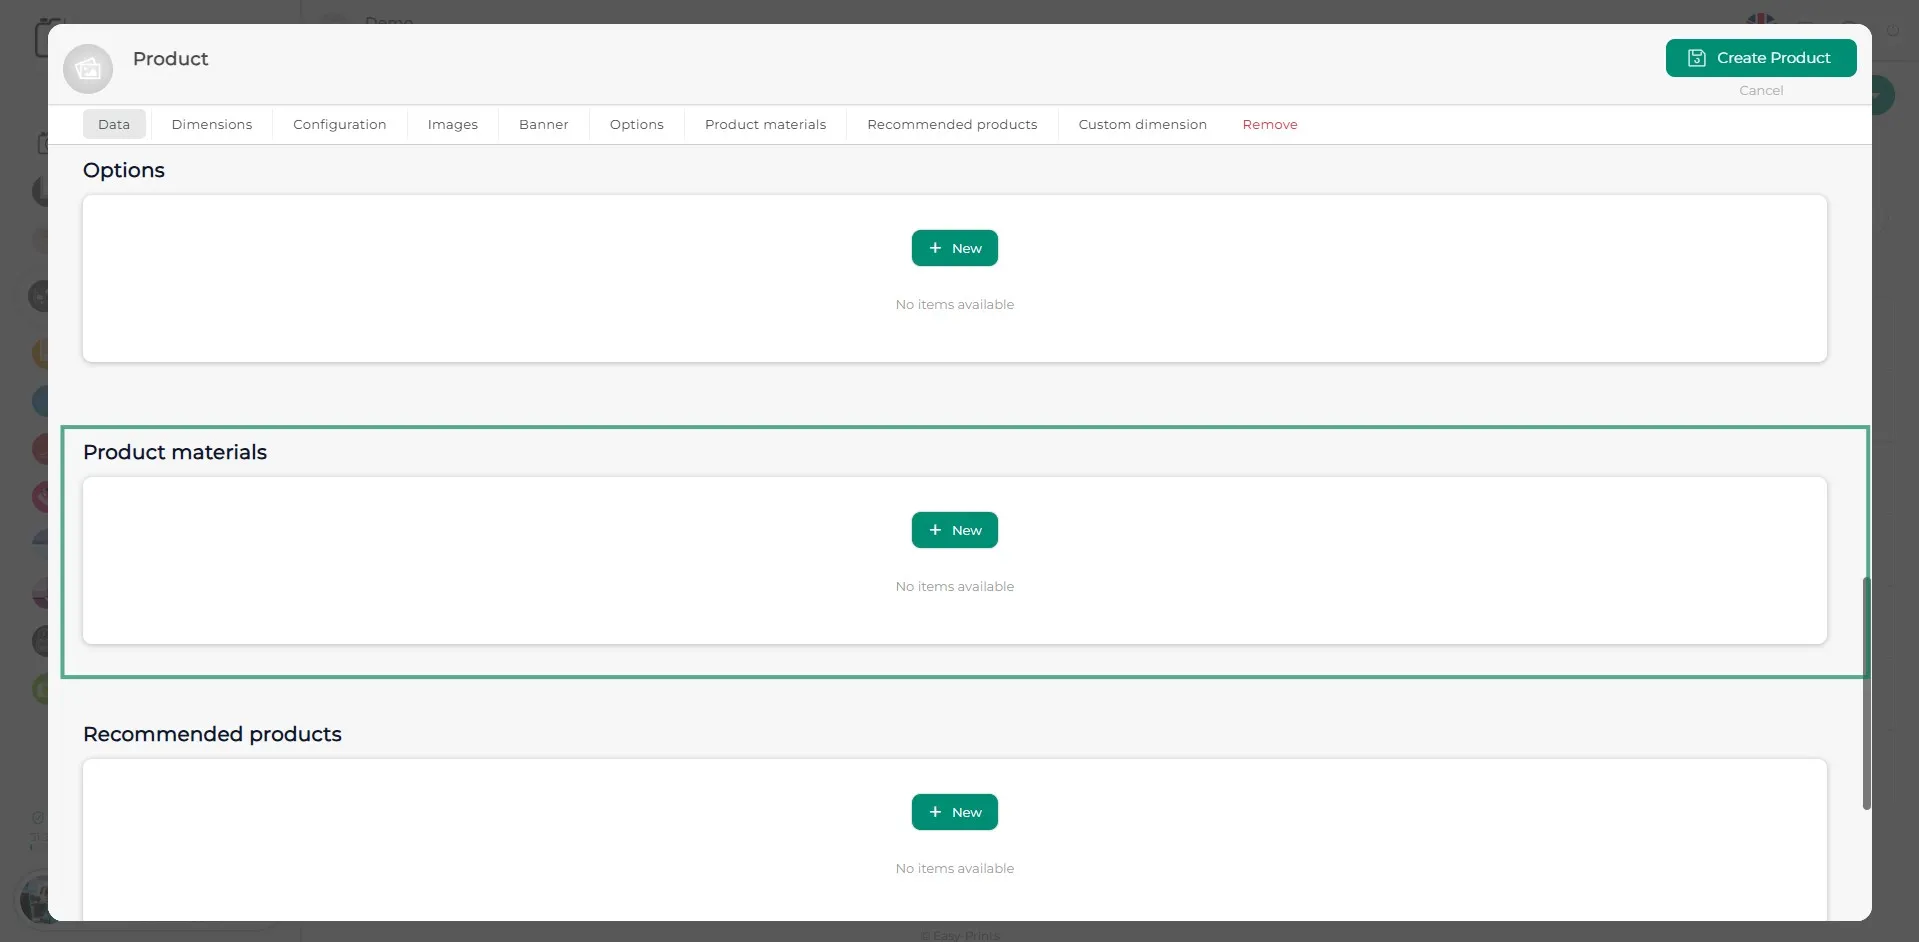
In the Product Materials section, you should specify the material that the customer cannot choose. For example, if the product includes a ribbon as a closure, you should indicate the type of material of the ribbon.
Step 9
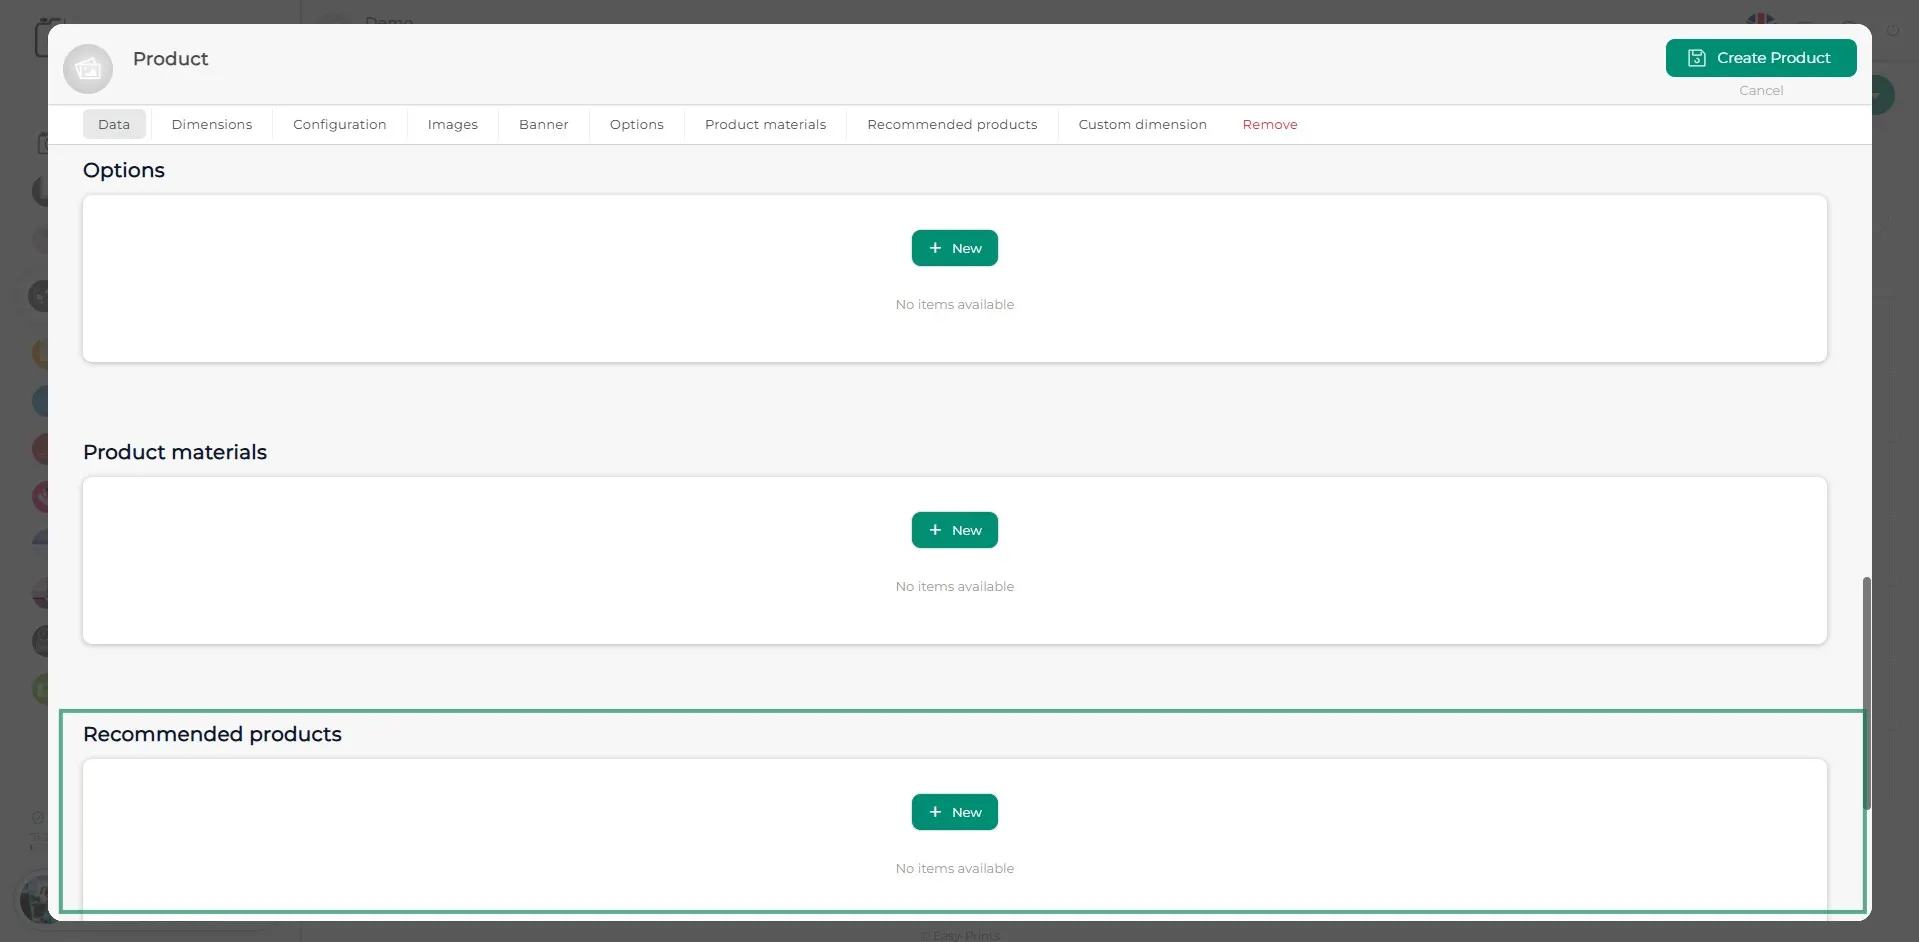
In Recommended Products, you can add the option to link a product to the one you are creating, so that when the customer requests this product, the selected product is recommended.
Step 10
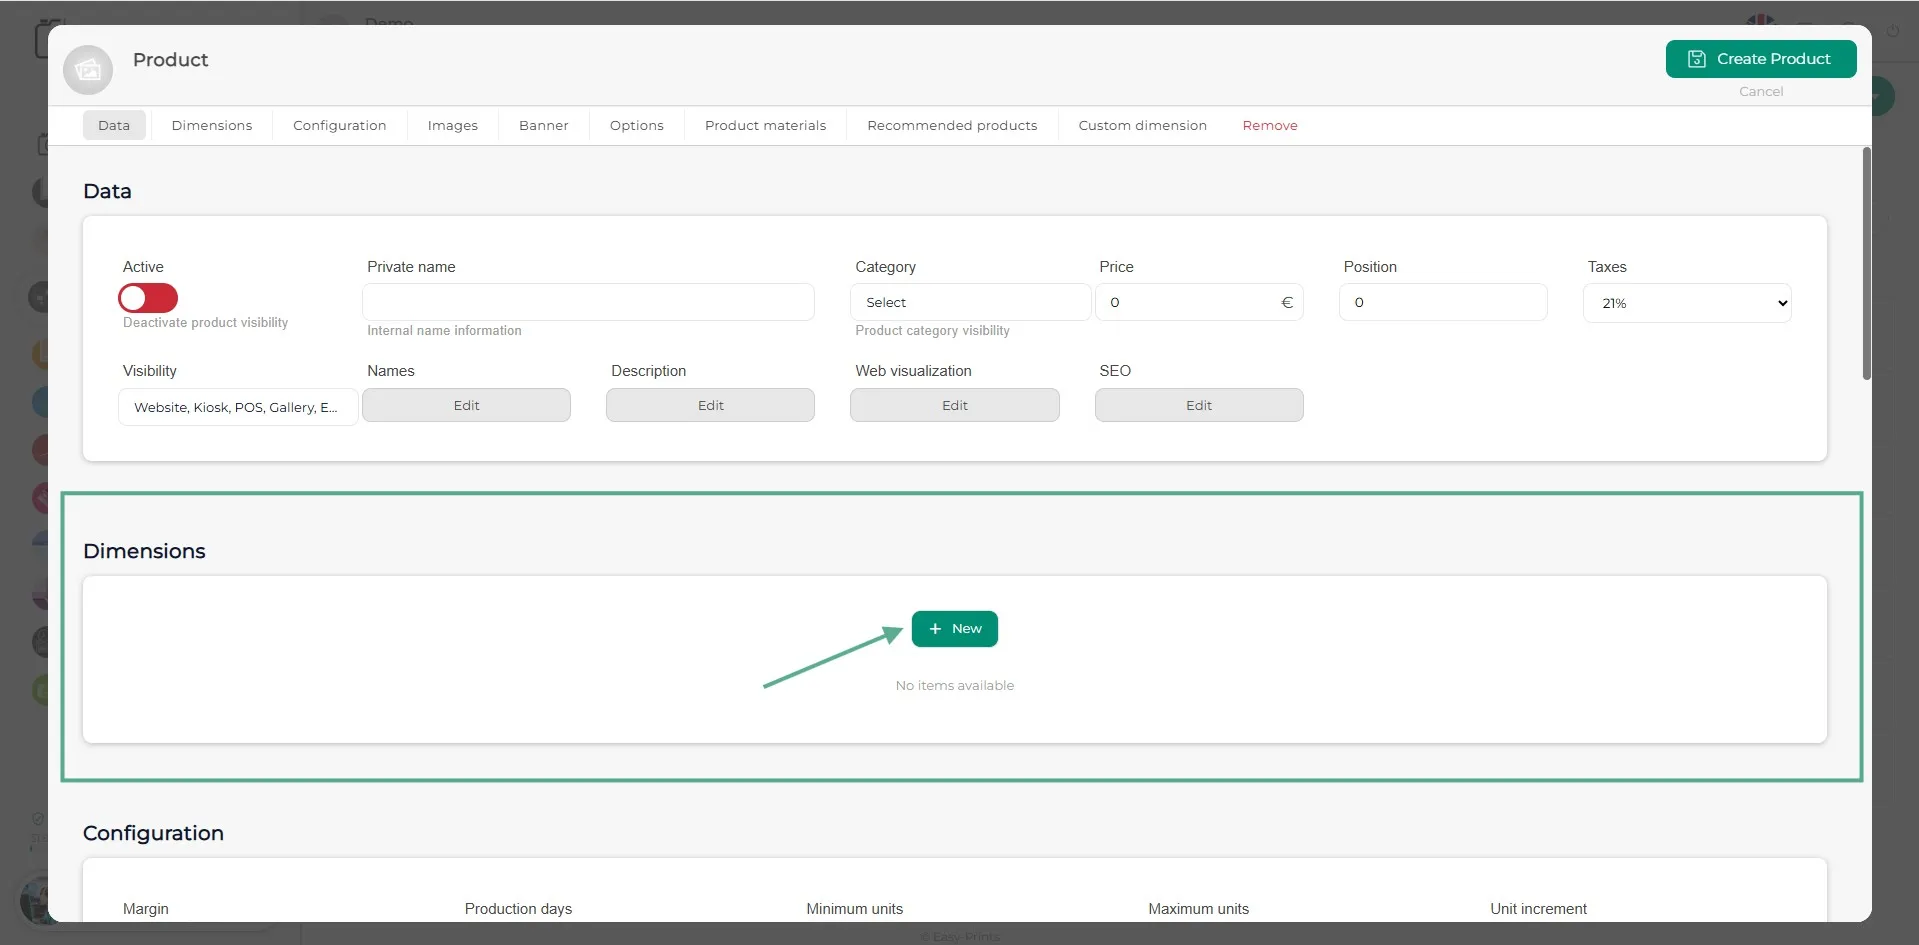
To create the product dimension, go to the Dimension section and click on the green “+ New” button.
Step 11
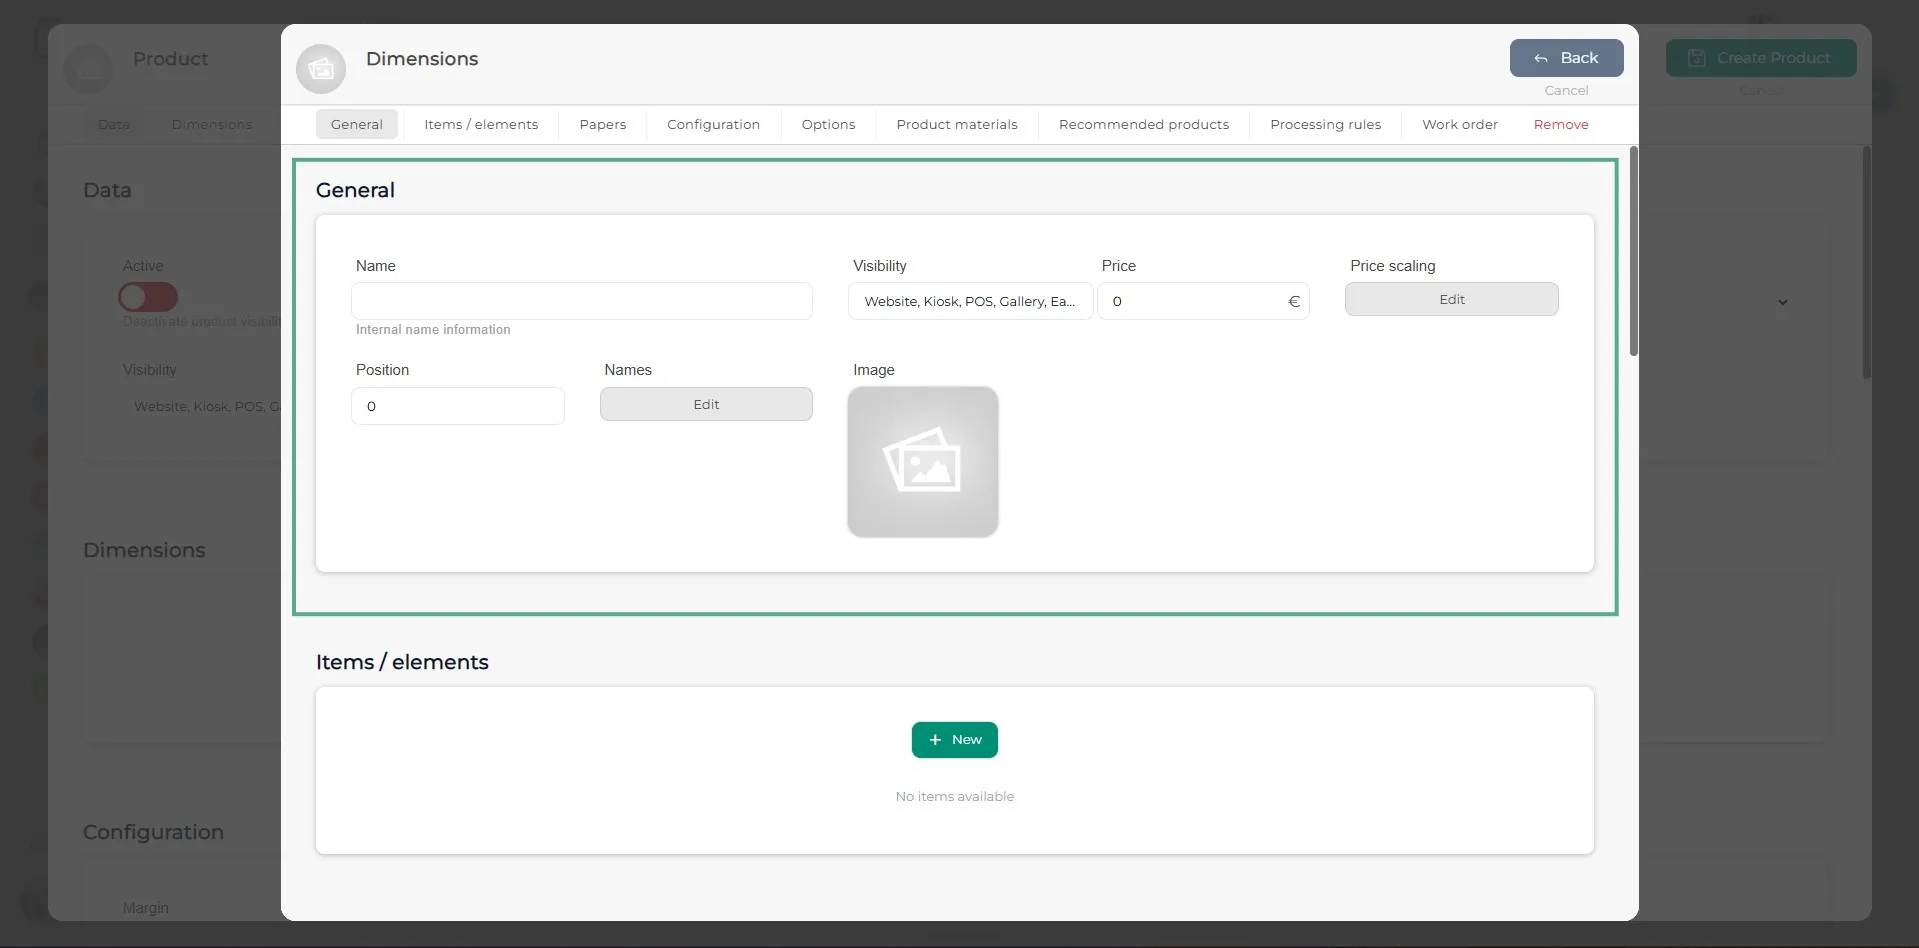
A new window will open. Complete the fields in the General section.
Step 12
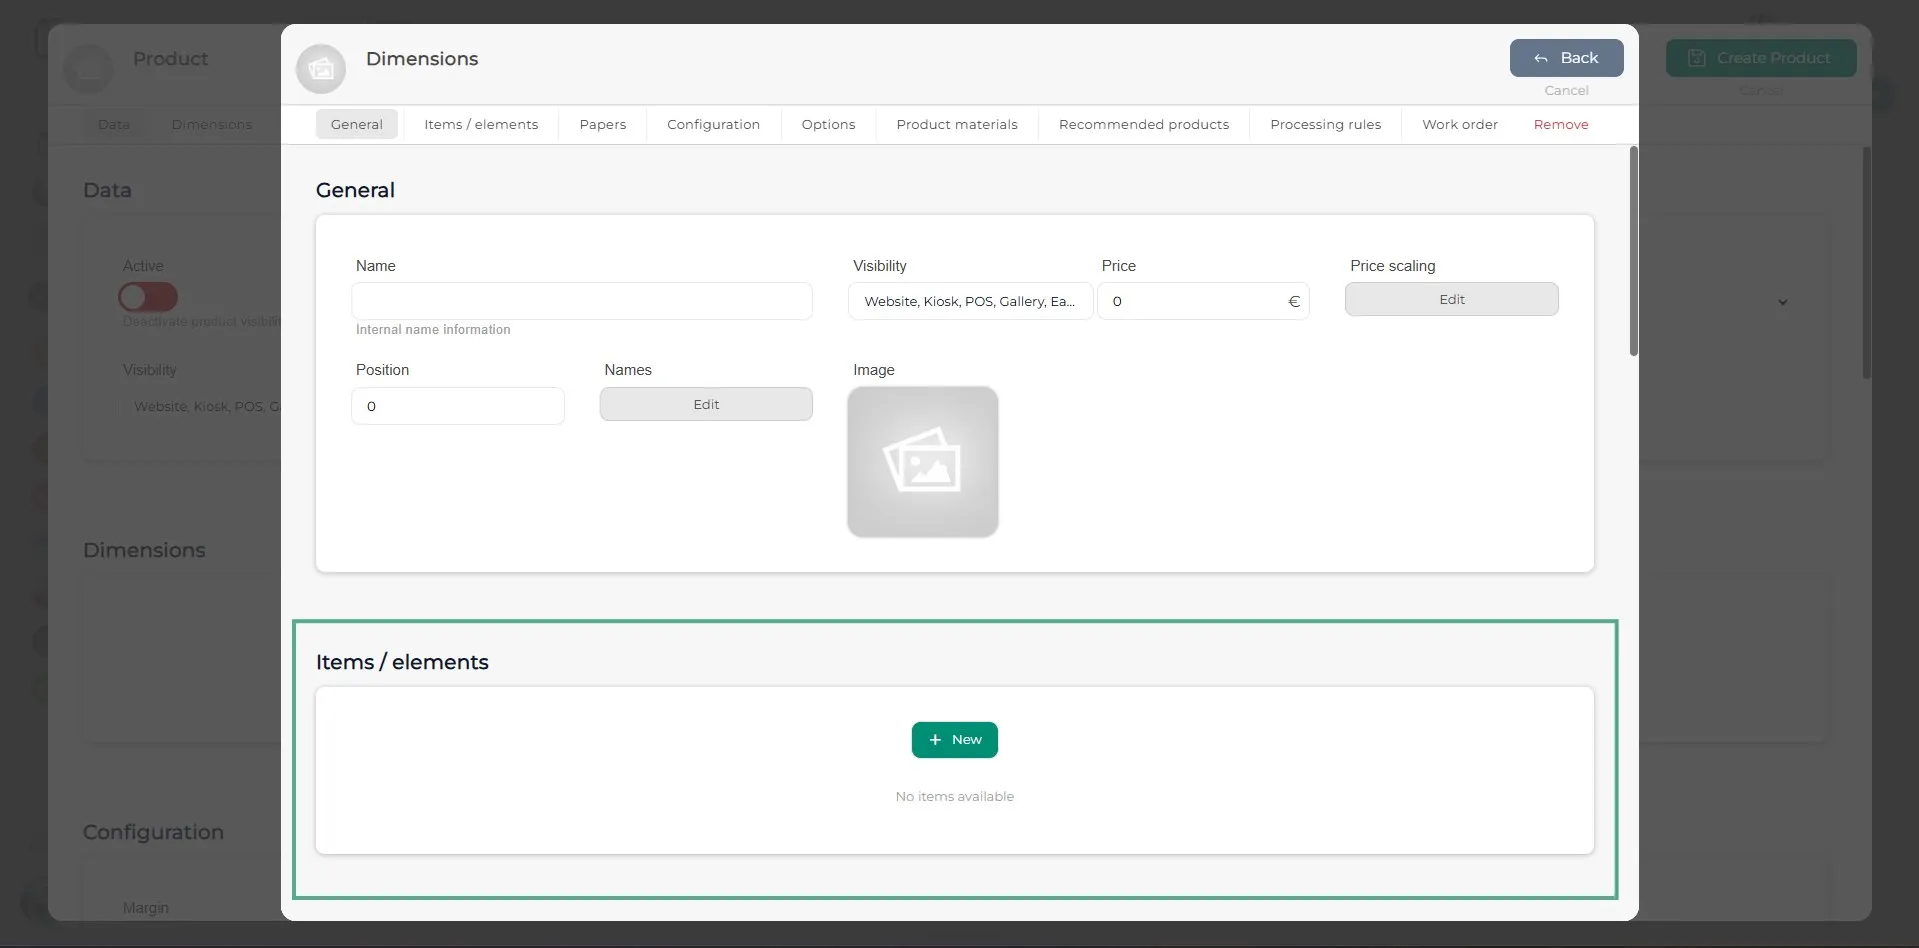
In the Items/Elements section, you will add the parts of the product. For example, for an album, there would be two items/elements: the outer part (cover and back cover) and the inner part (the spreads/pages).
Step 13
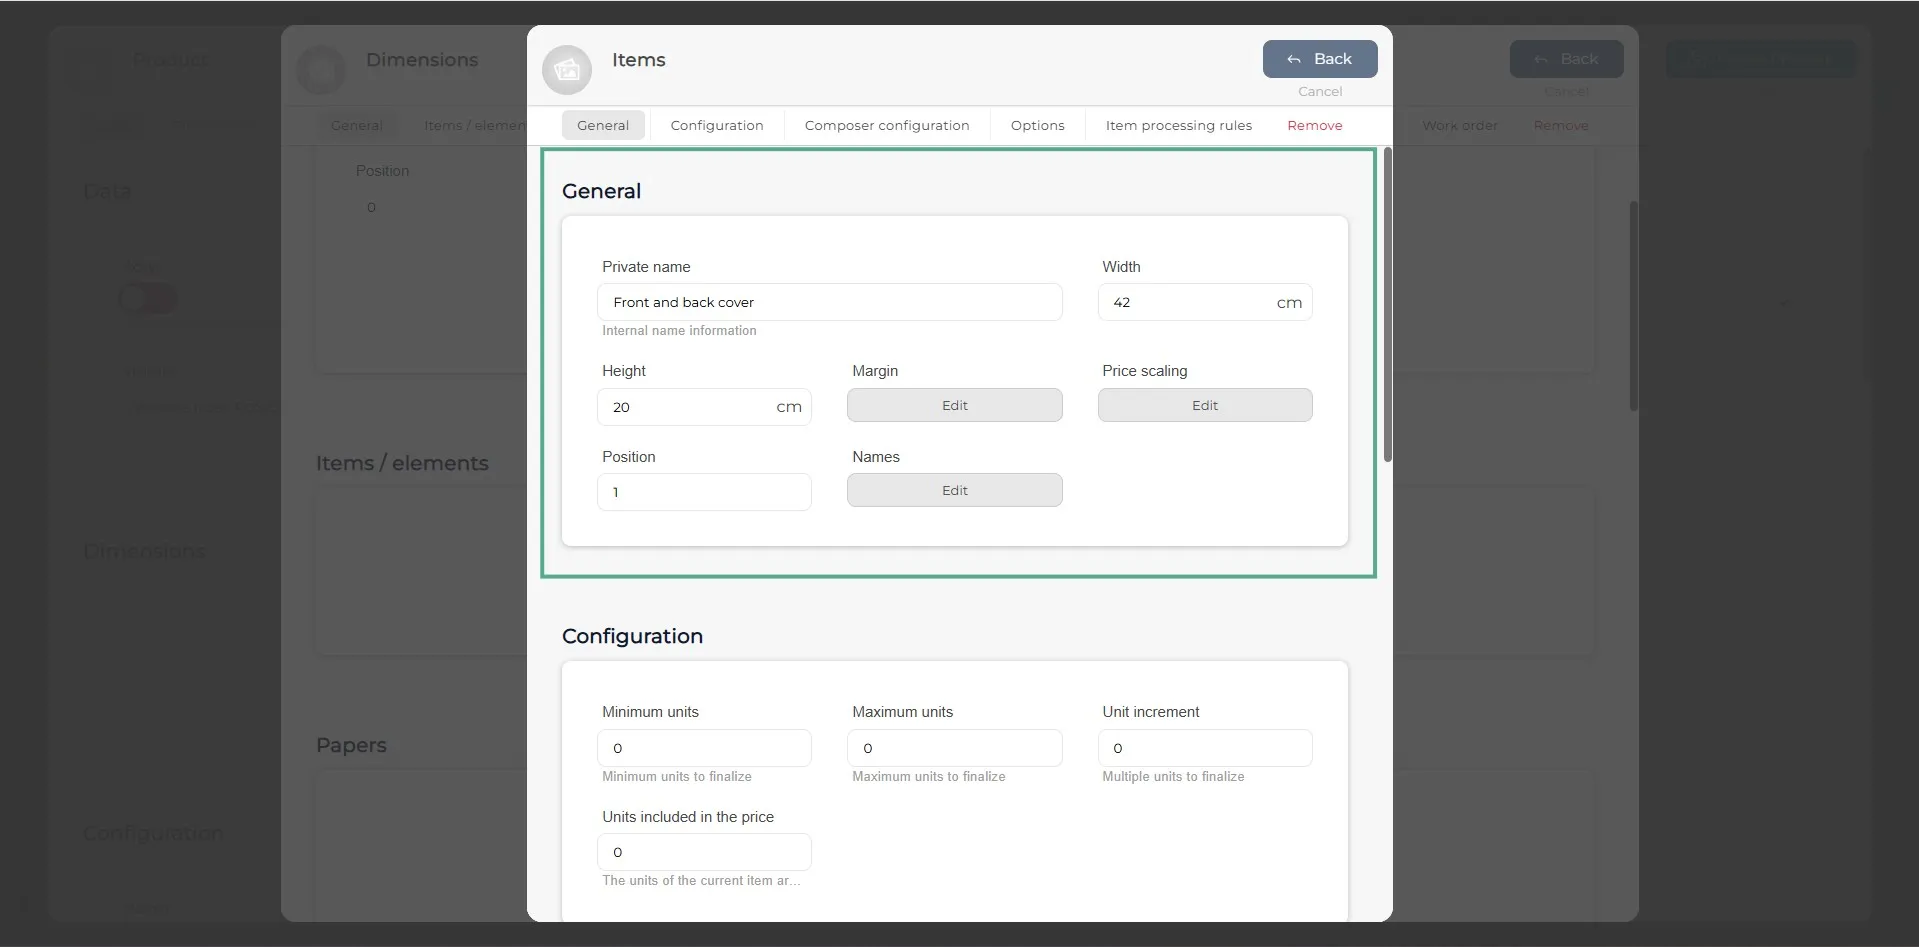
When creating the item, in the new window, in the General section, you must fill in the empty fields. In this case, you should enter the internal name of the item/element and its size (width and height). You should also specify the position in which it should be displayed first, the safety margin, and, if there is price scaling, indicate it in its corresponding section. In this case, we use as an example the front and back cover of a 20x20 album.
Step 14
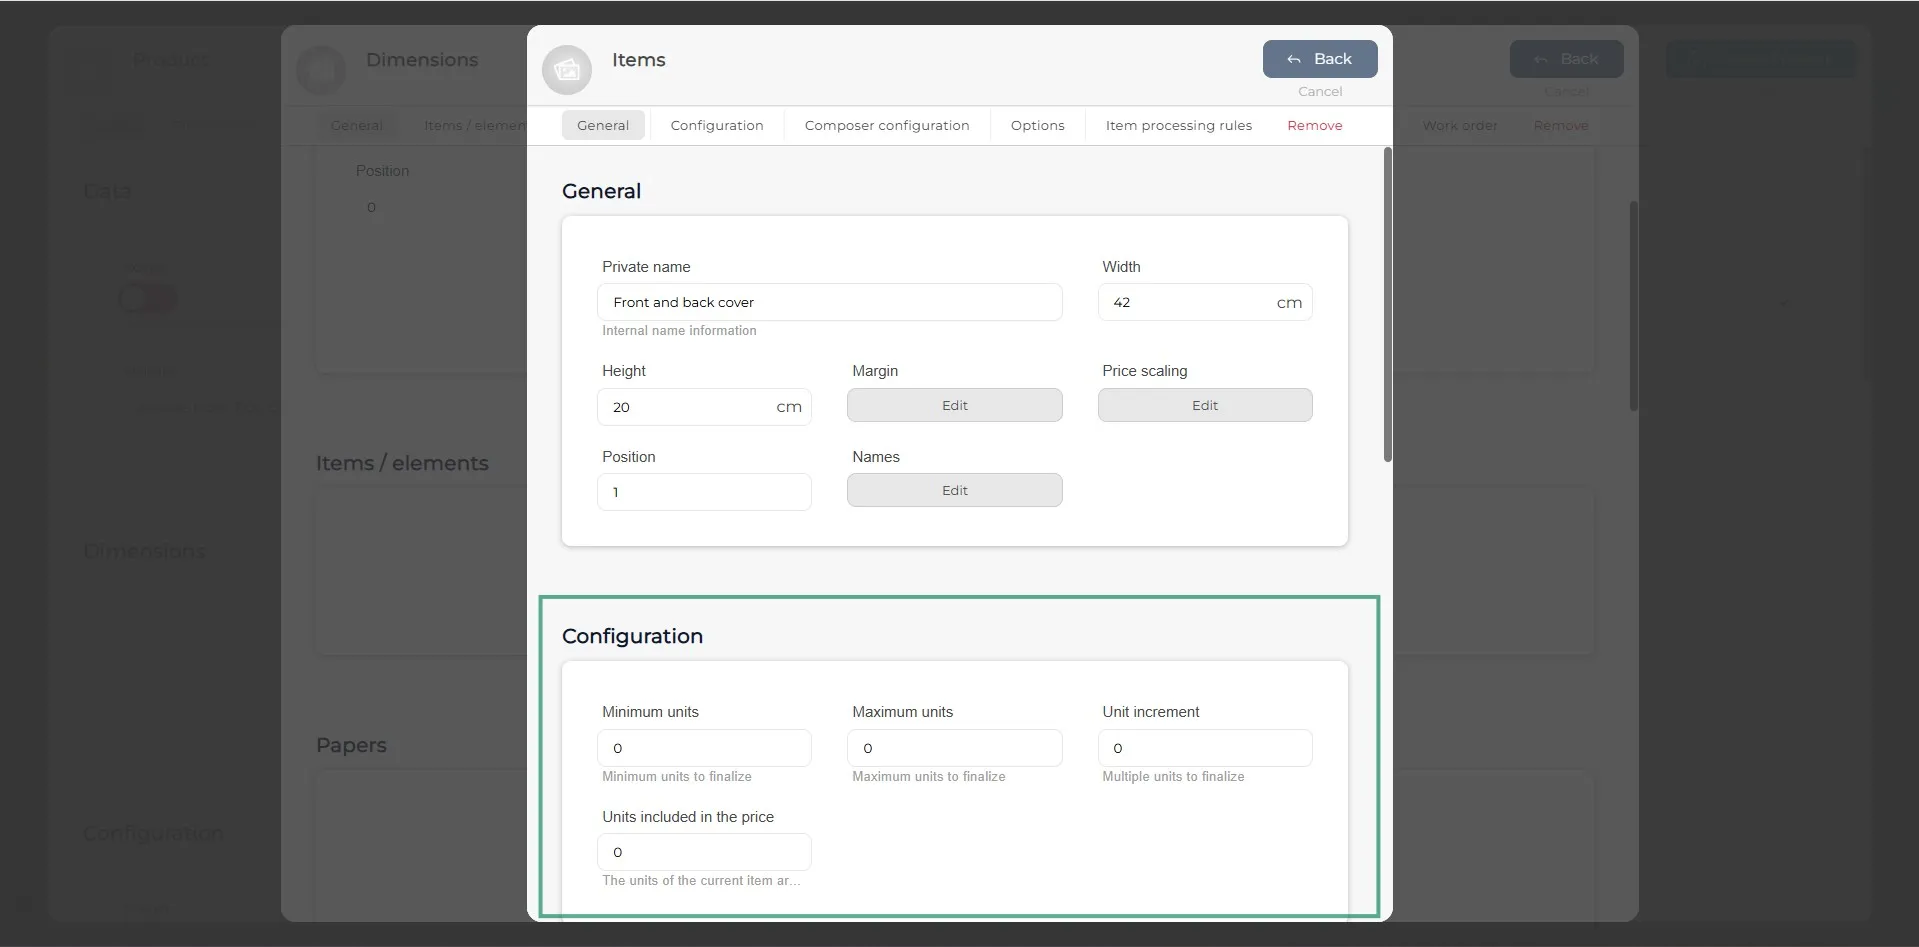
In the item configuration section, specify the minimum and maximum units, as well as how many units are included in the price.
Step 15
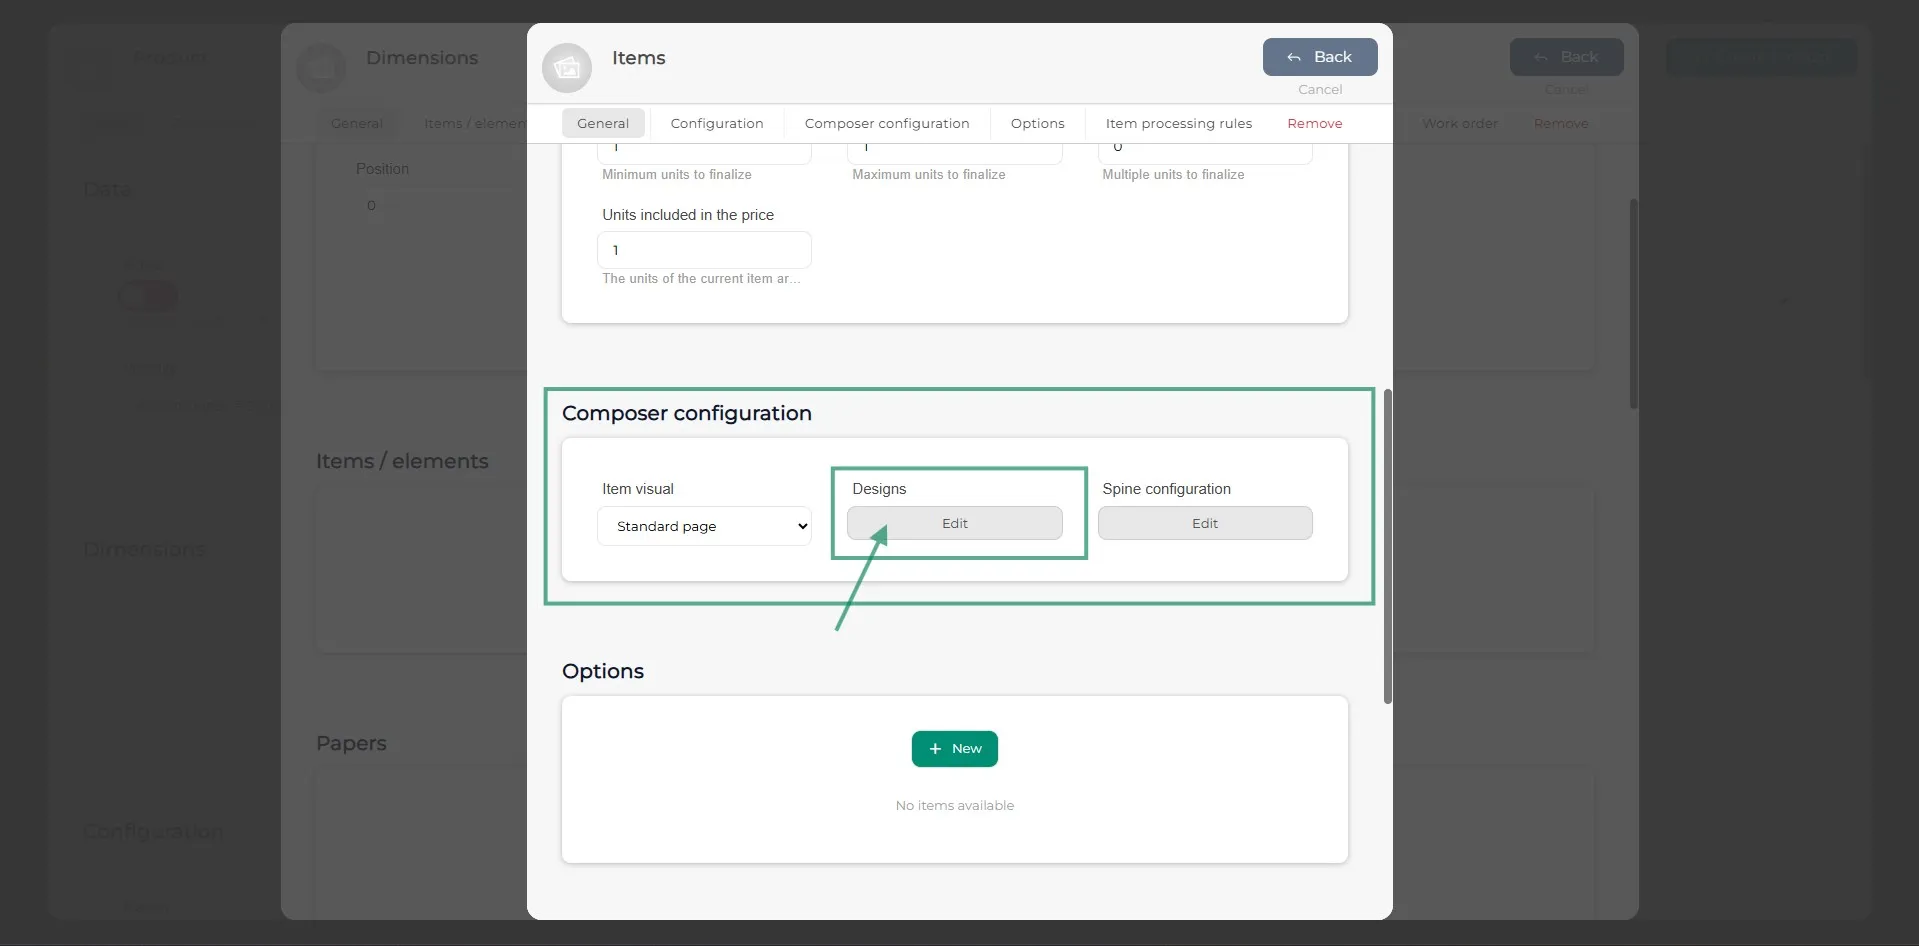
In the Composer section, go to Designs to create the part of the product you are configuring, if necessary. For example, when configuring the front and back cover, you can specify the materials included, the position of each element, etc.
Step 16
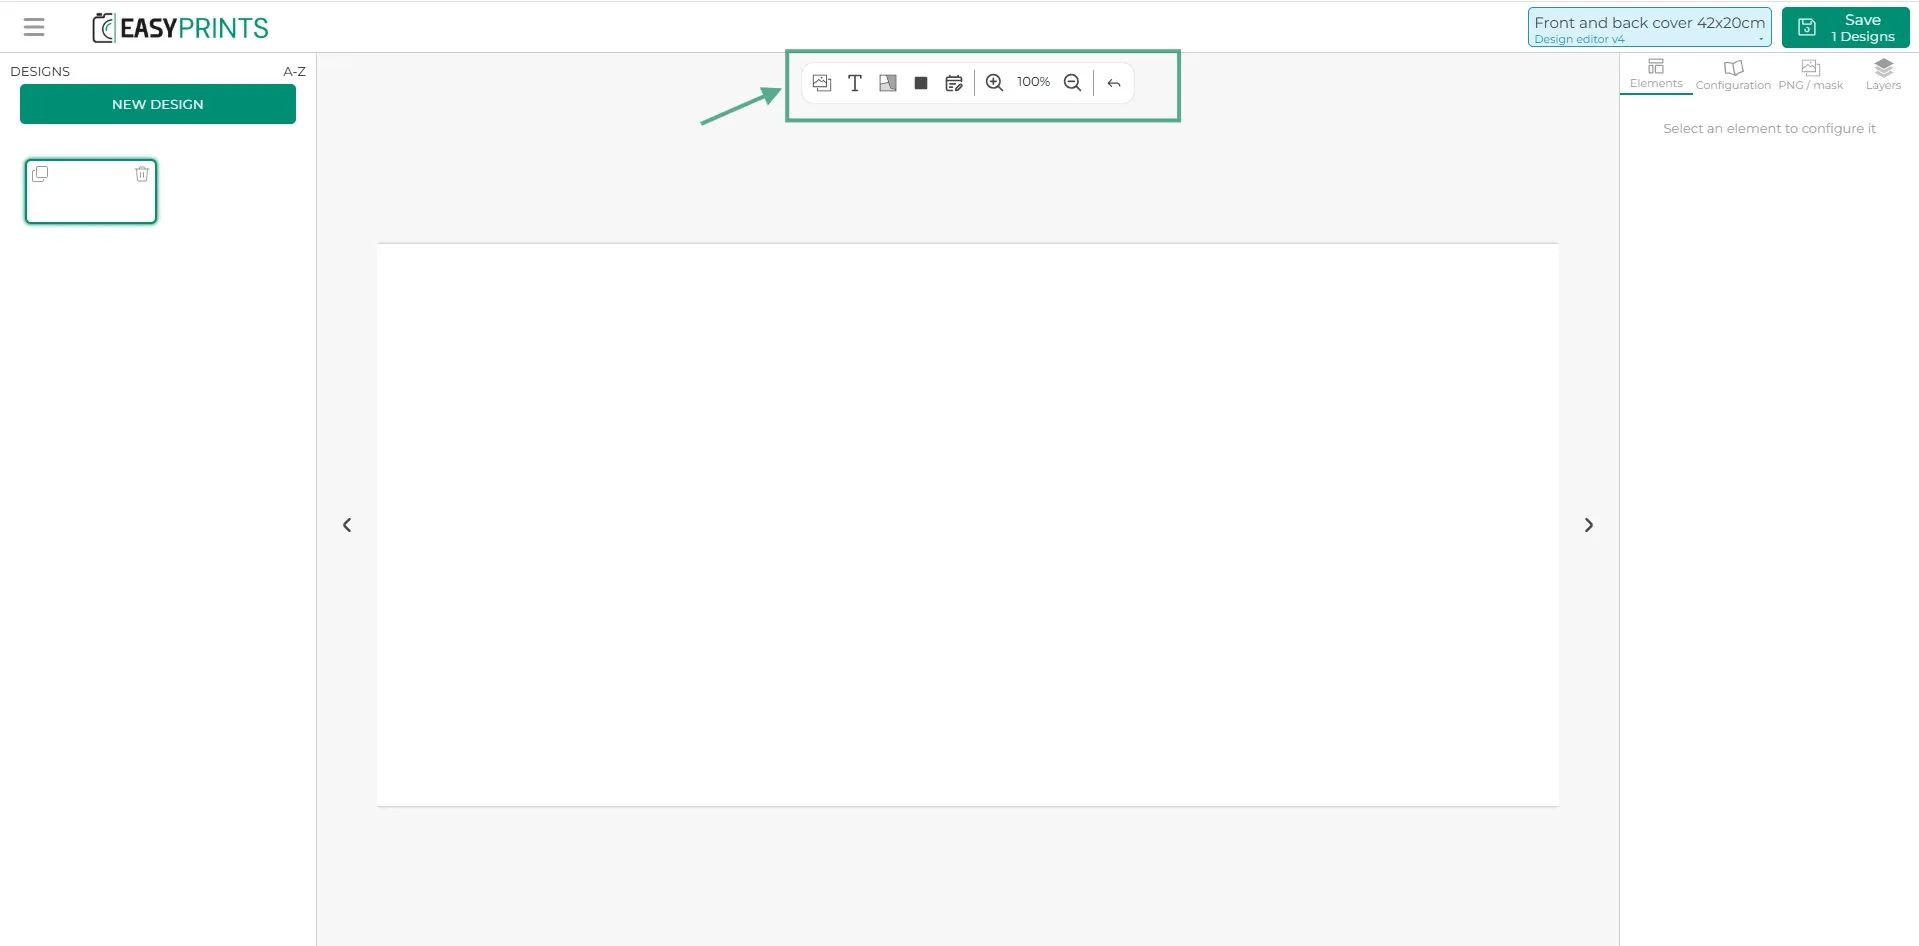
In the composer configuration, in the top center area, you will find different options, such as adding image boxes, text, material areas, and hidden areas.
Step 17
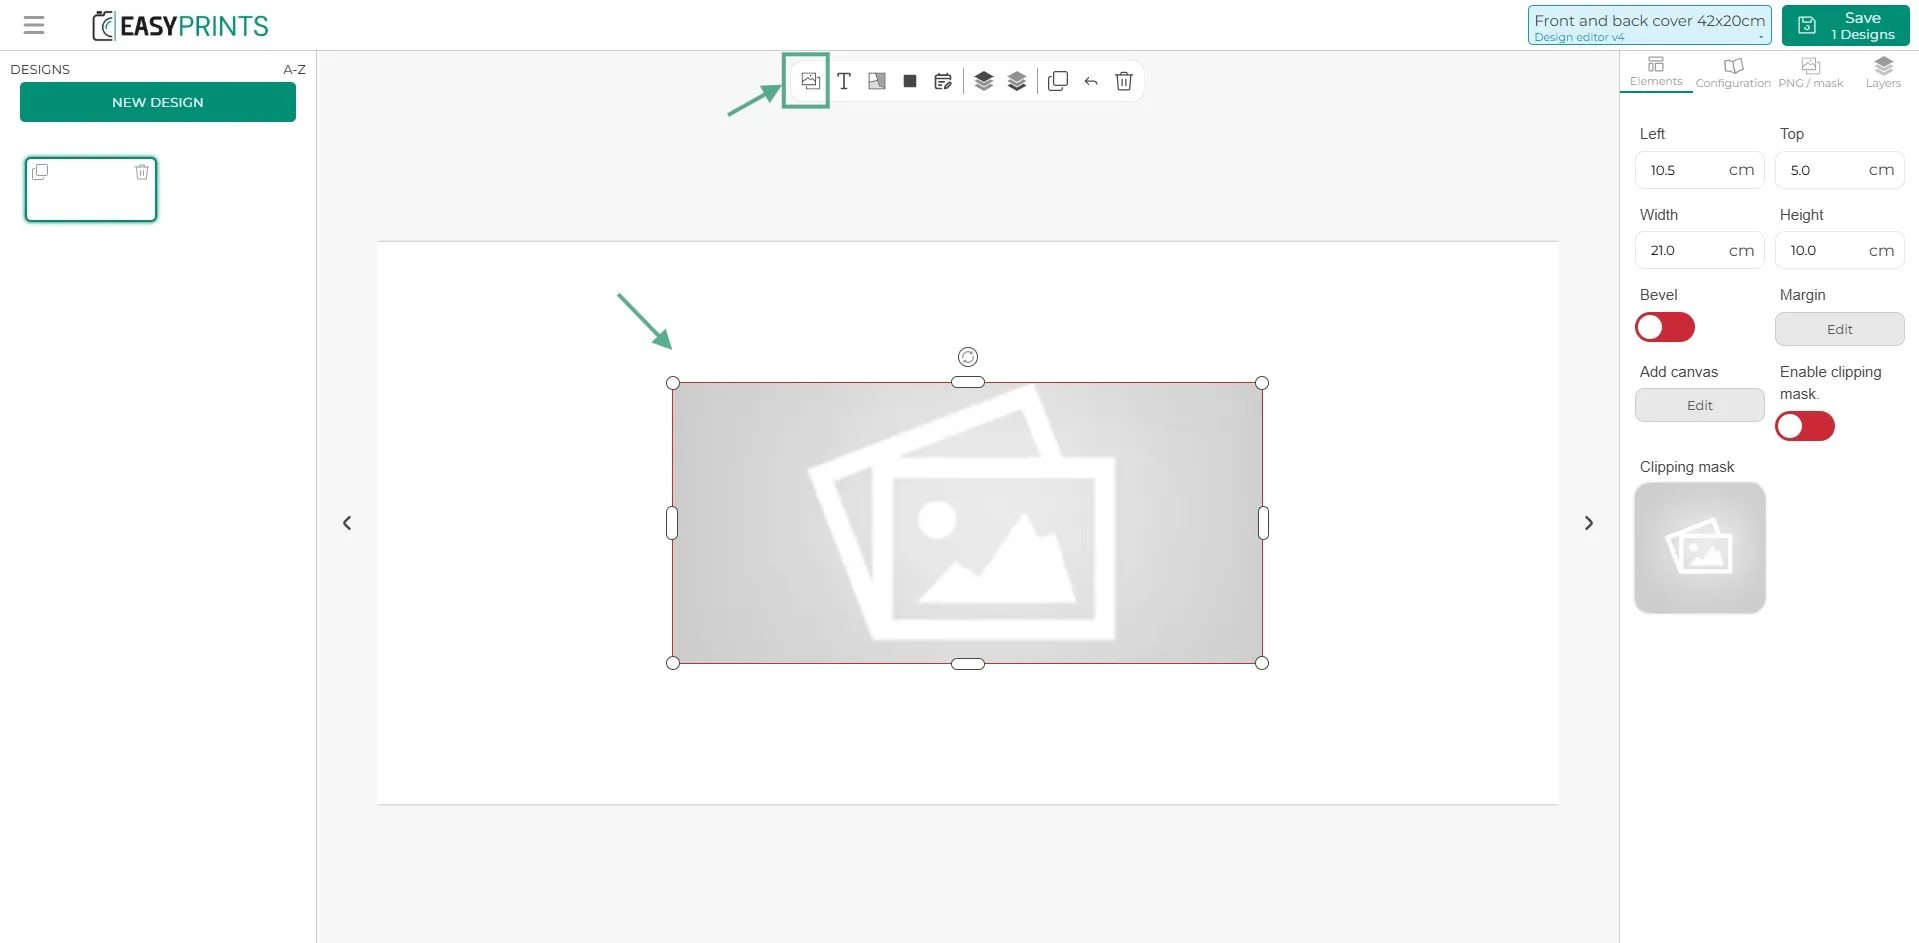
Starting from left to right, the first option is the image box. When you click on it, you can set the height and width and drag it to the desired position. You can also add a margin (shown in red to the customer to indicate the image cut area) and a canvas (adds extra space to the image that is not visible to the customer and serves as an additional printing area).
Step 18
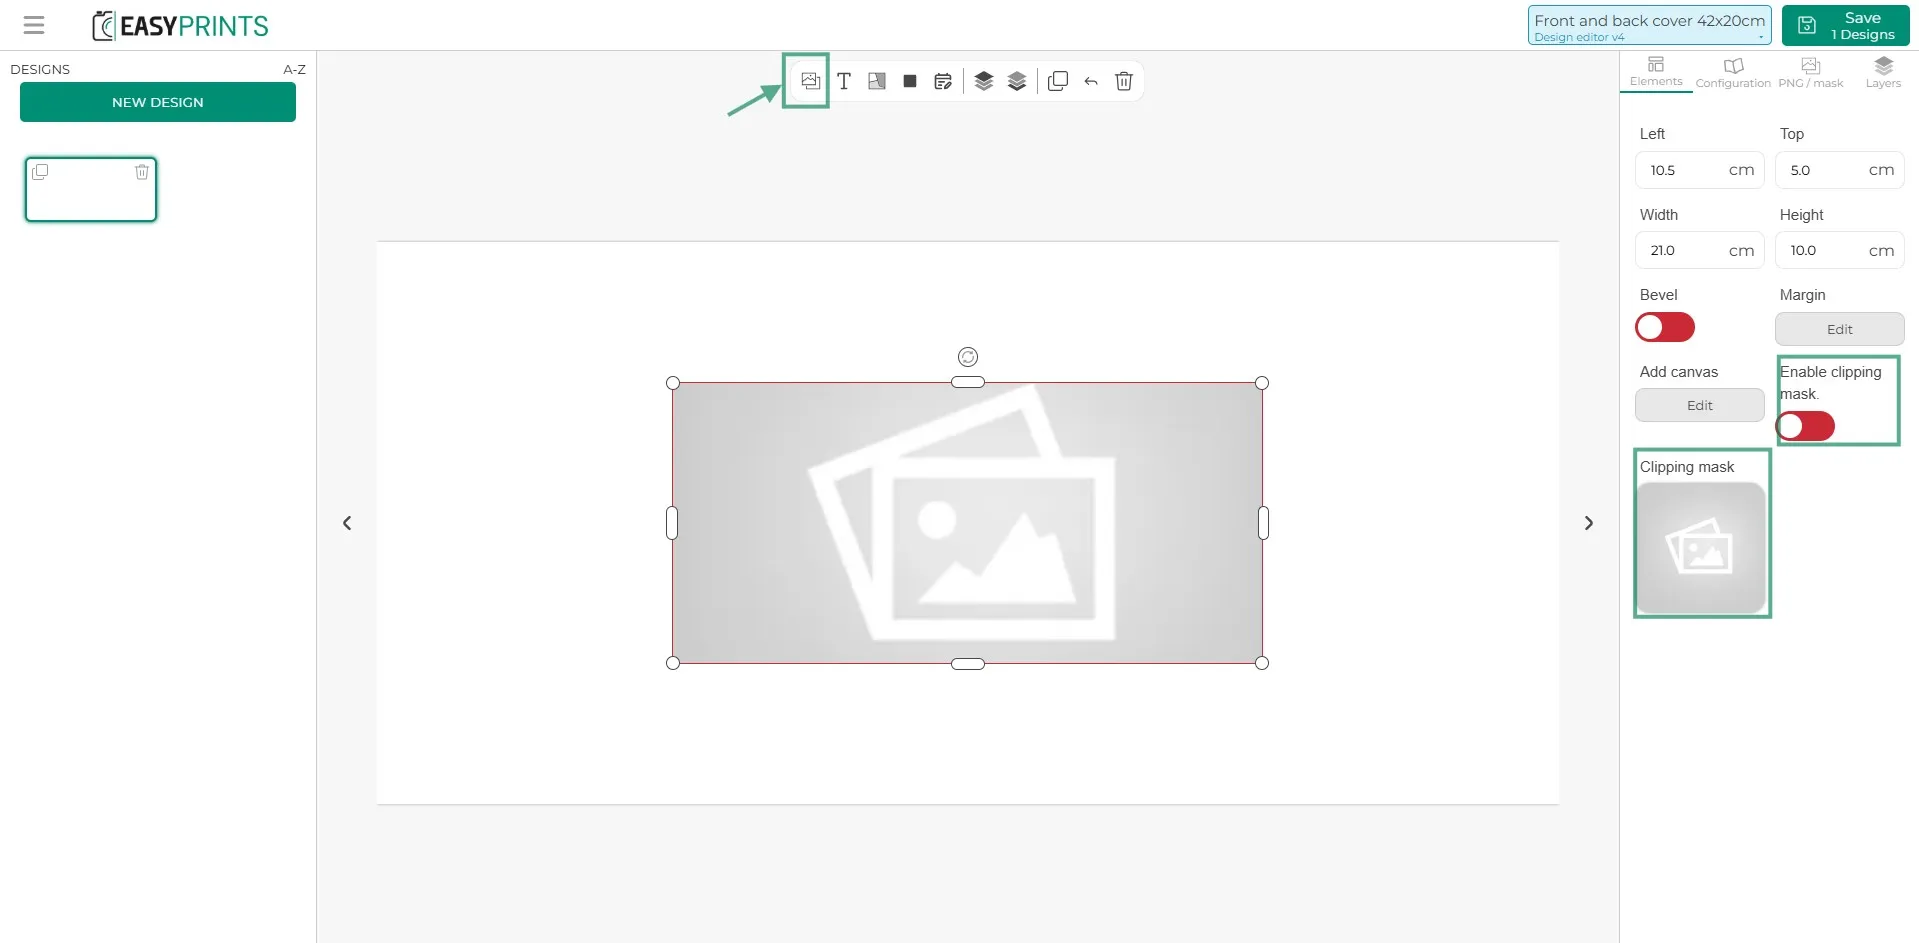
Suppose the image has a specific shape. You can add a clipping mask to the indicated area of the image and activate it.
Step 19
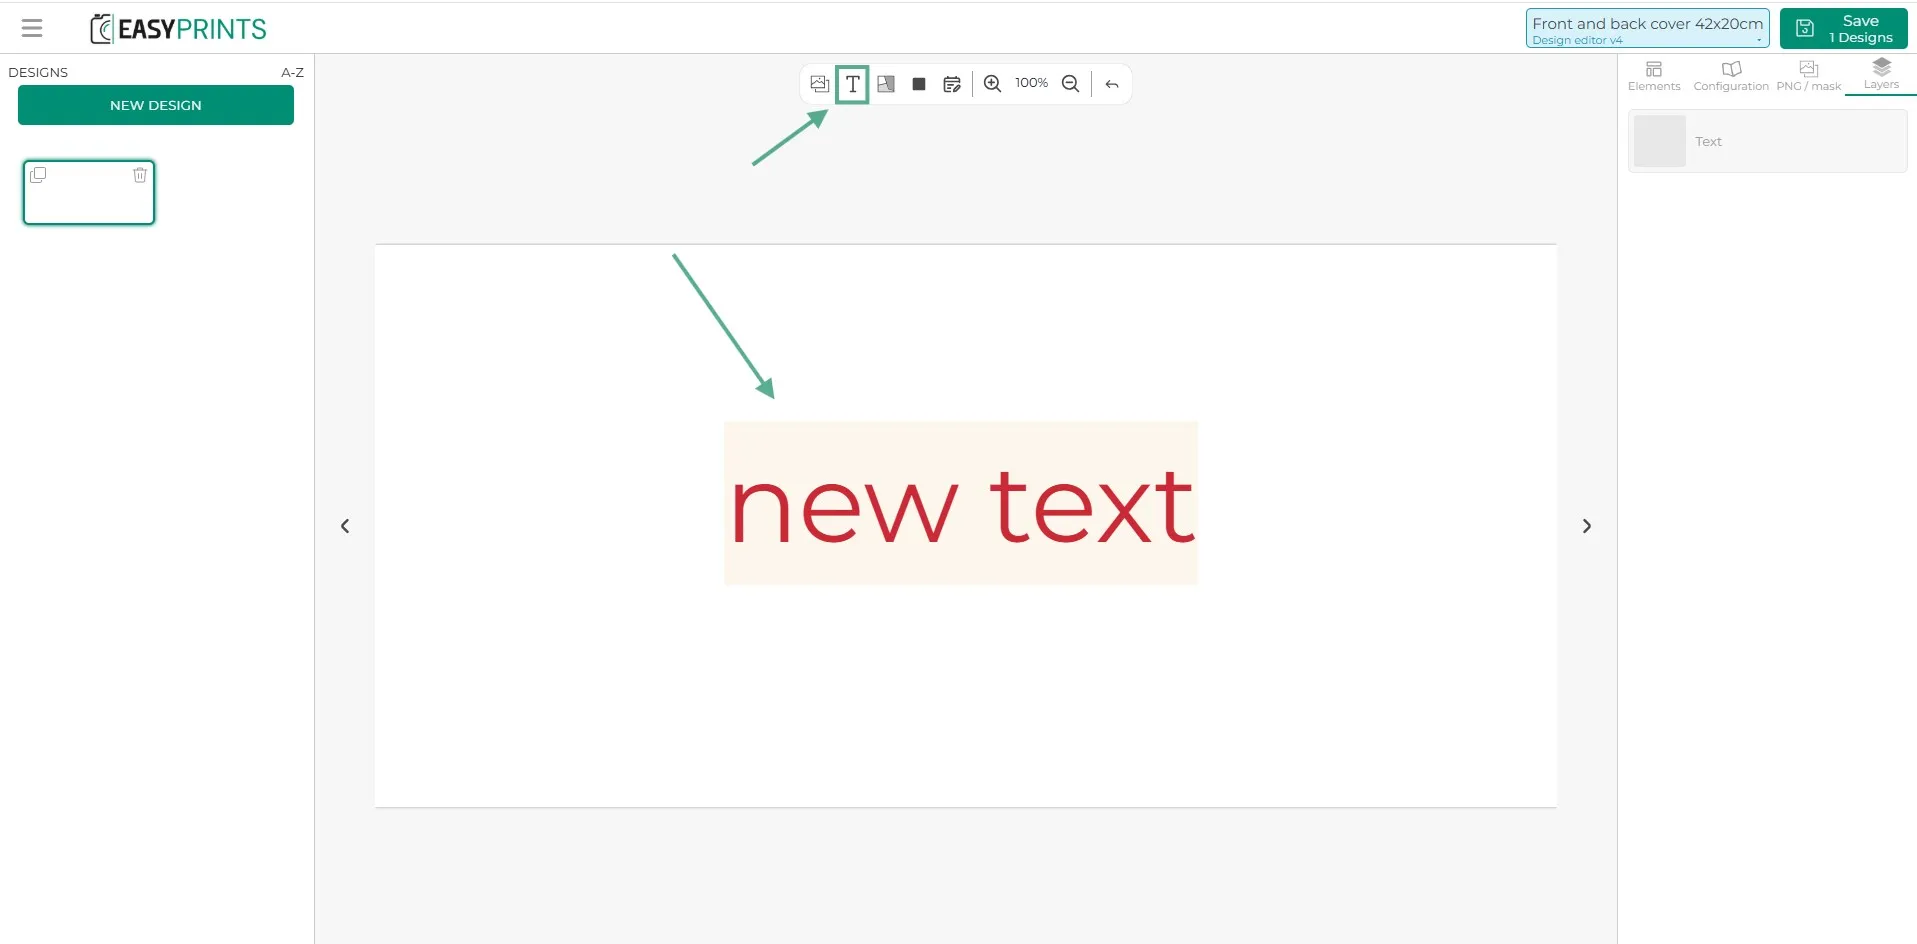
The second option in the top bar is to add text. You can choose different fonts, colors, sizes, etc.
Step 20
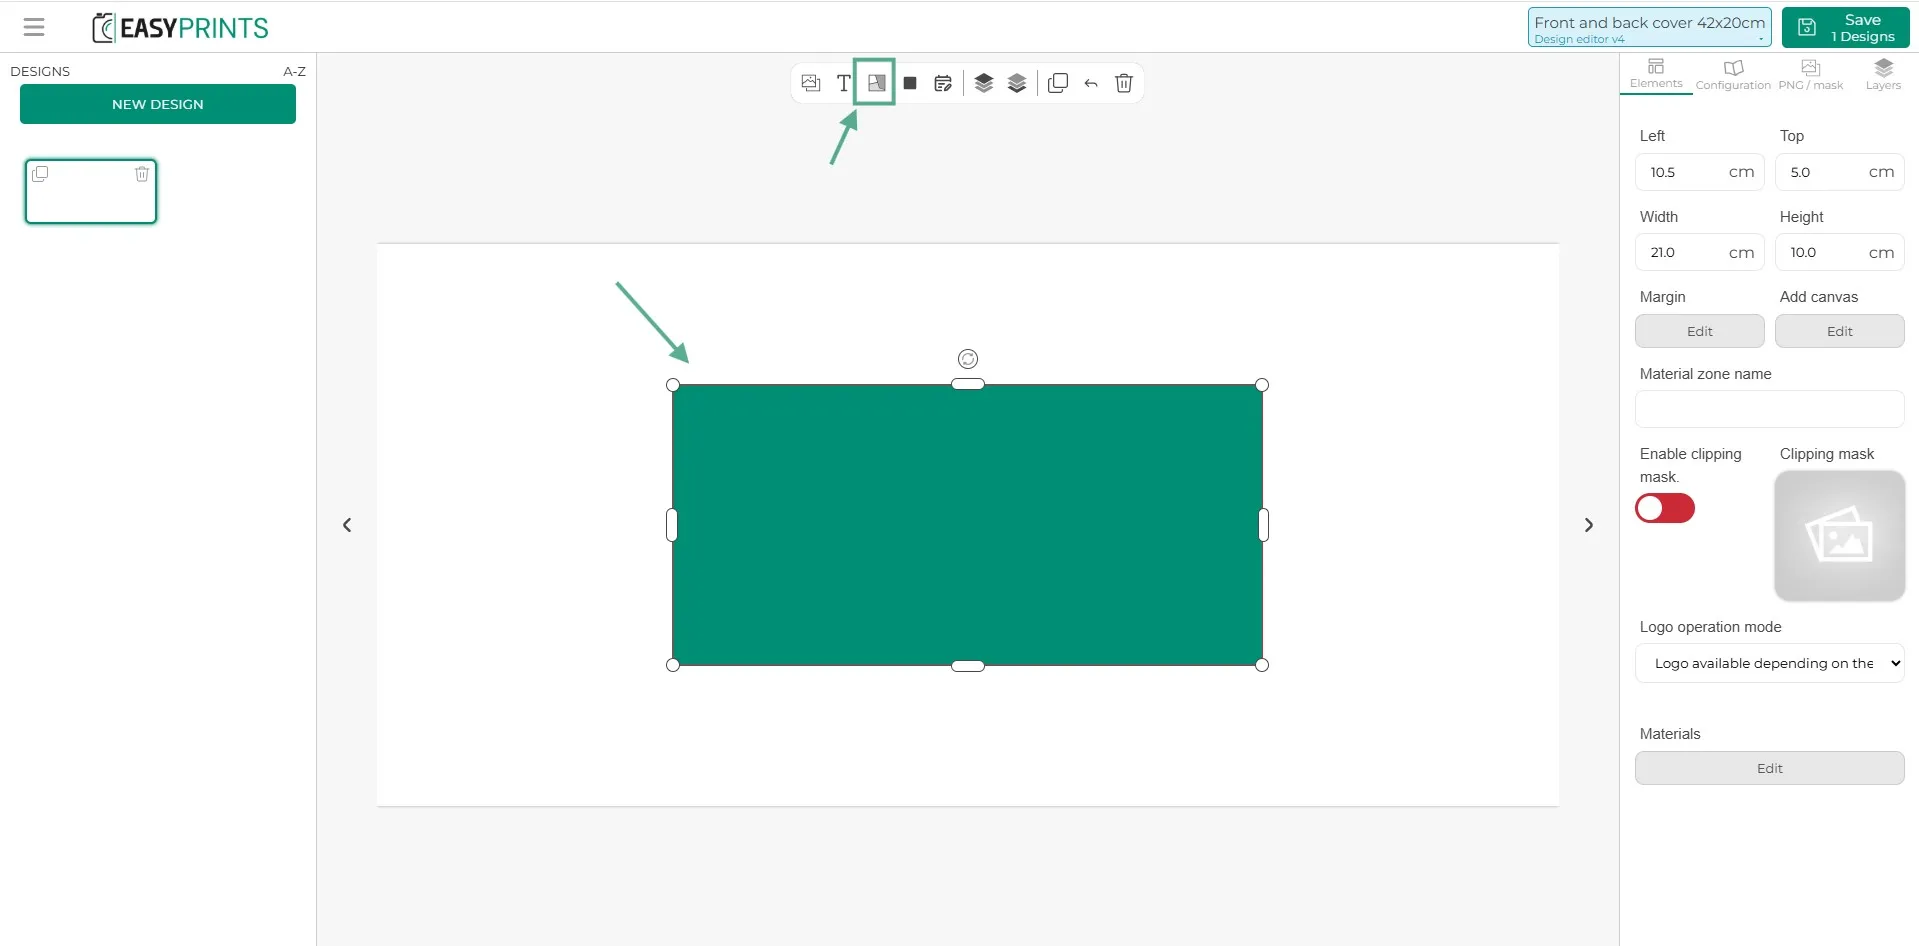
Next, there is the materials option. In this section, you will include the materials of the item/element. As with the image, you must specify the width and height of the material. If needed, you can also define a margin and a canvas.
Step 21
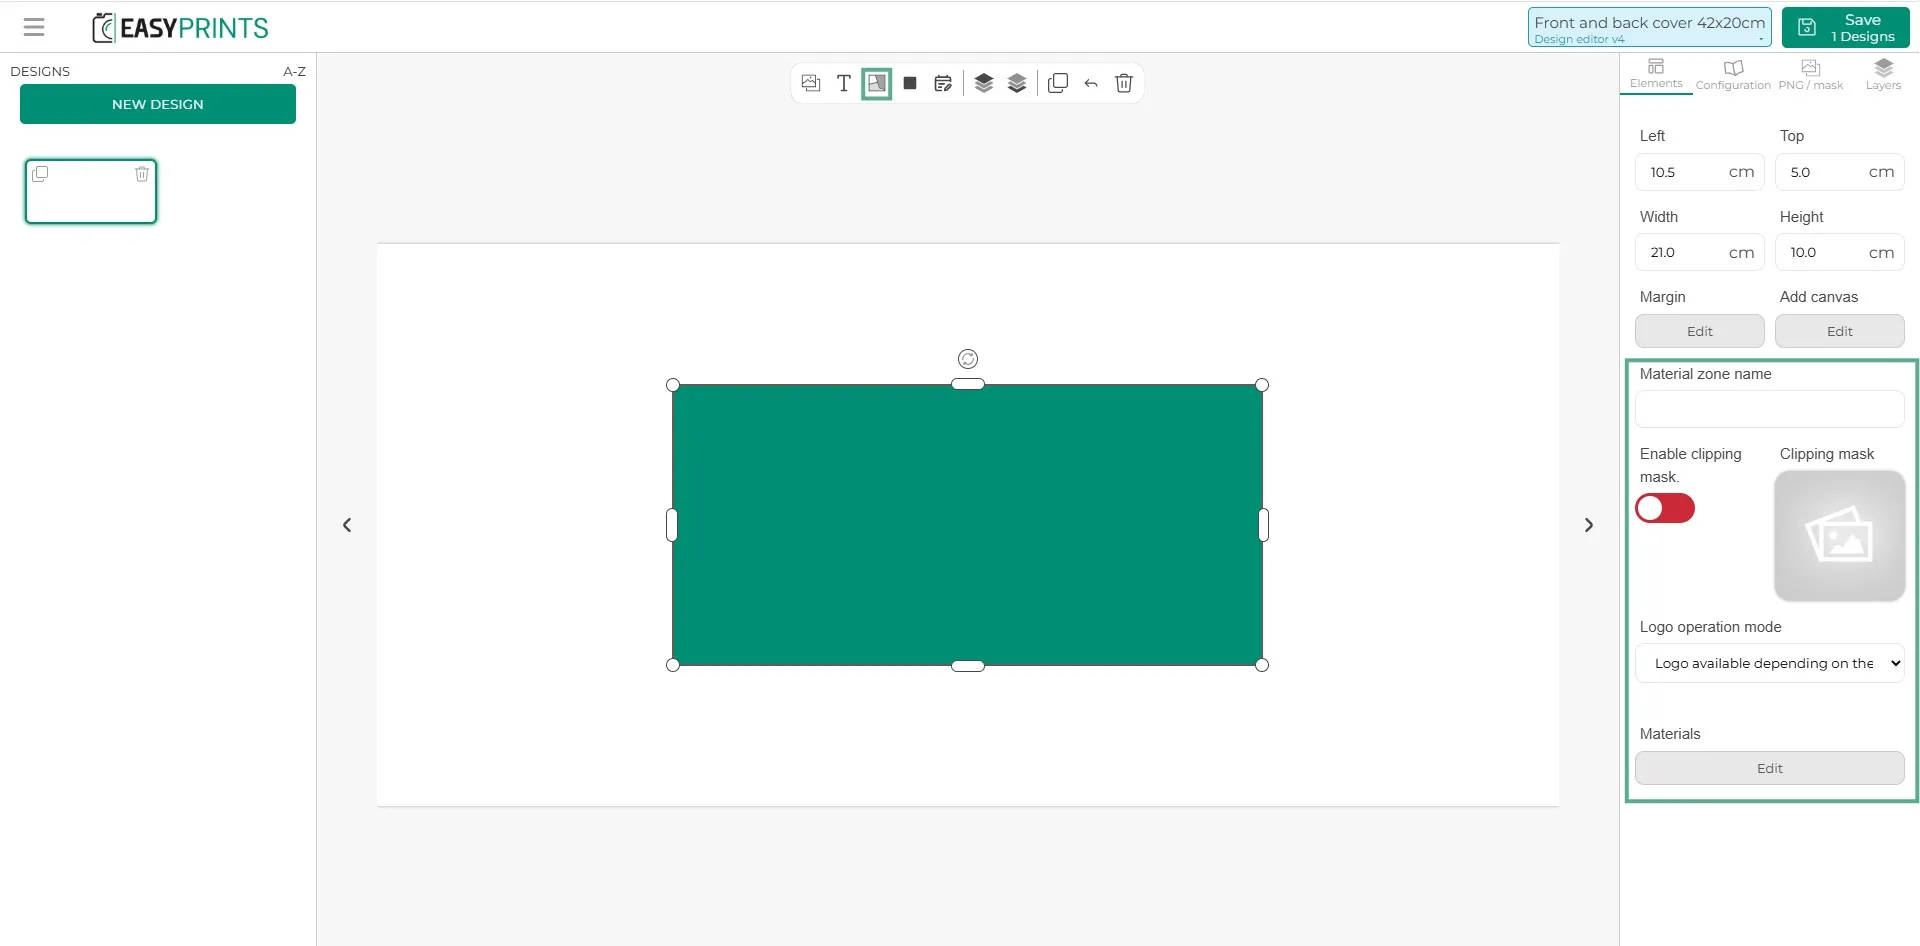
When clicking on the material, in the right-hand column you can also specify the name of the area, for example, “back cover”. If the material includes a clipping mask, it can be added by clicking on the gray image box and activating it. Finally, in the last section, there is the Materials button. By clicking on it, you can assign materials to the area.
Step 22
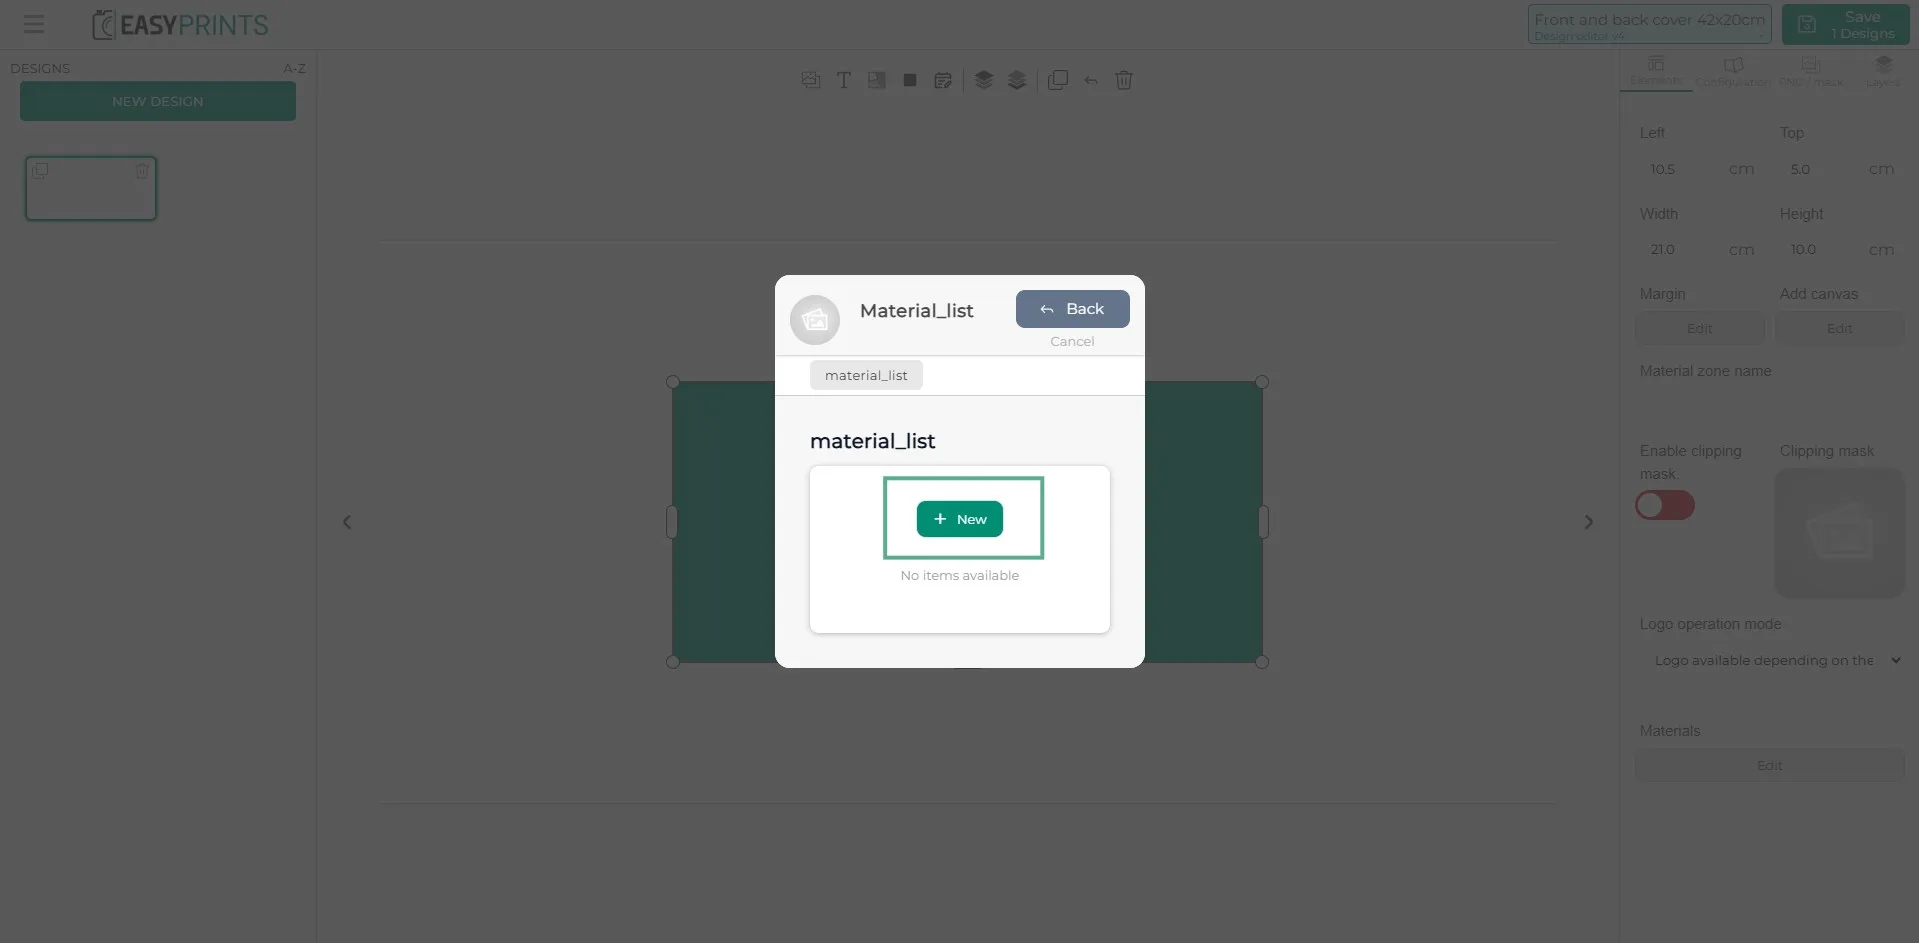
By clicking the gray edit button located below the word “Materials”, a new window will open. In this window, you can add the materials one by one.
Step 23
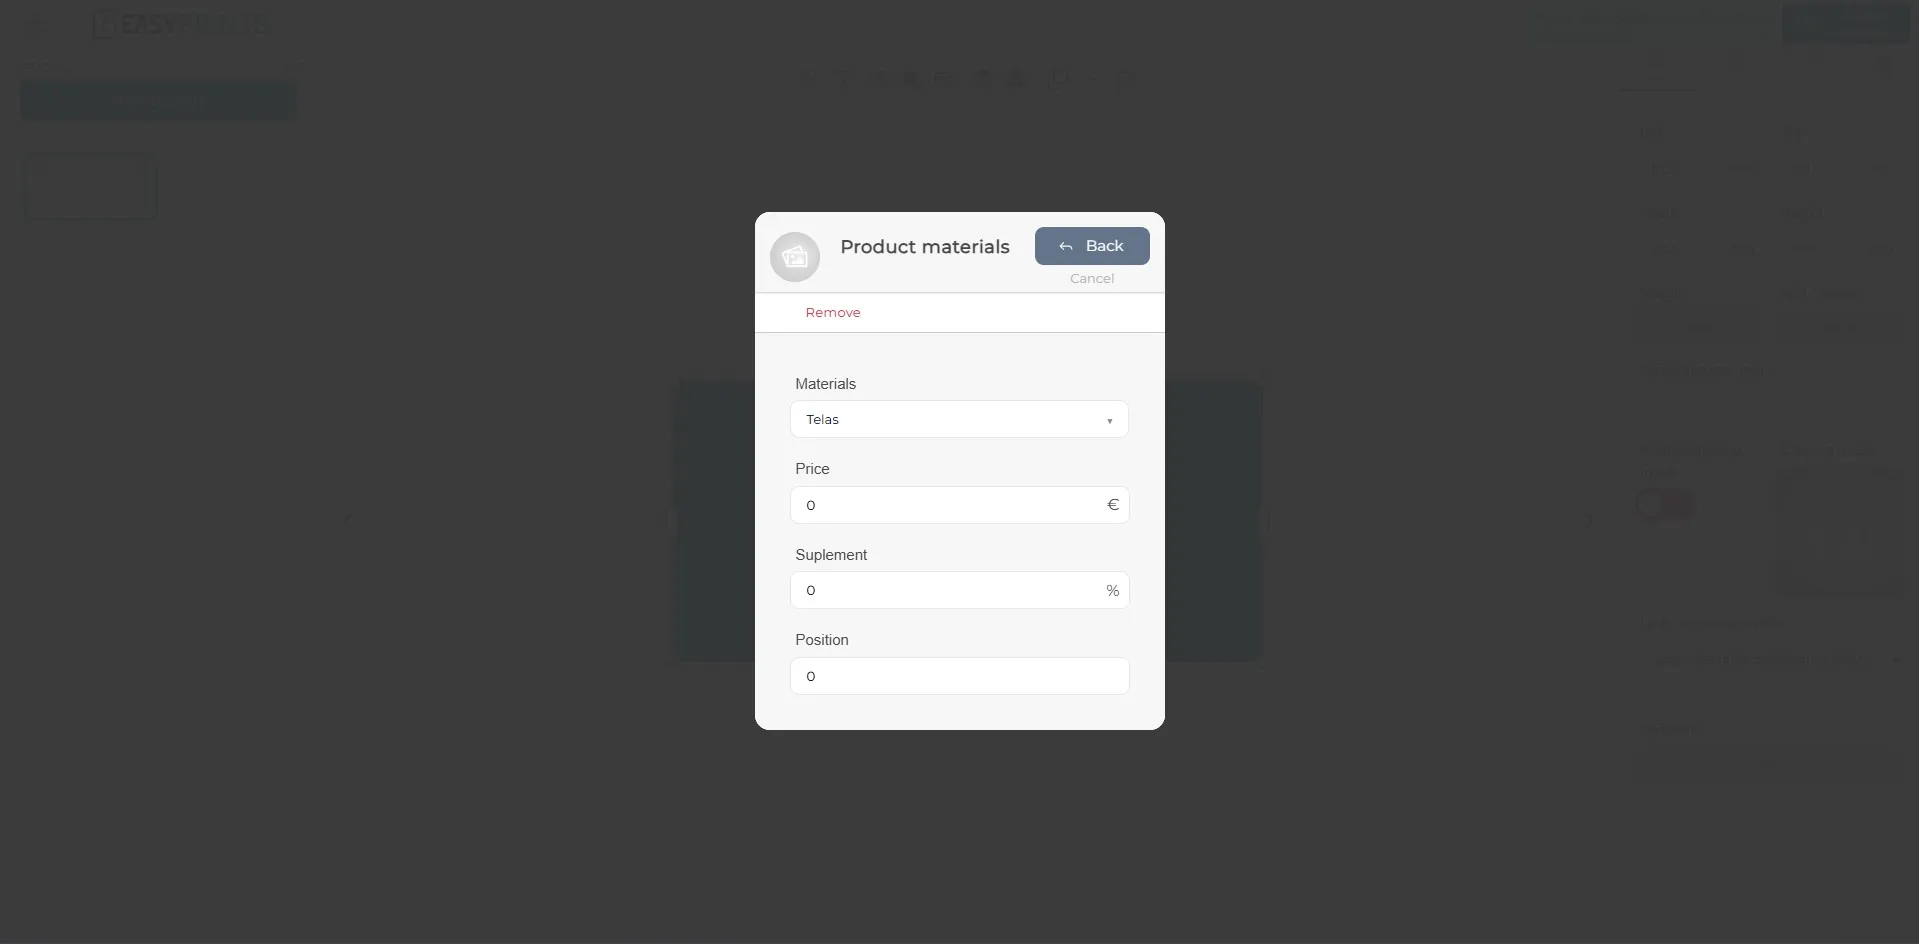
By clicking the green “+ New” button, another window will open. By expanding the dropdown, you can select the previously created material. If this material has an additional cost for this product, you can specify it in this section. You can also define the position in which it should be displayed.
Step 24
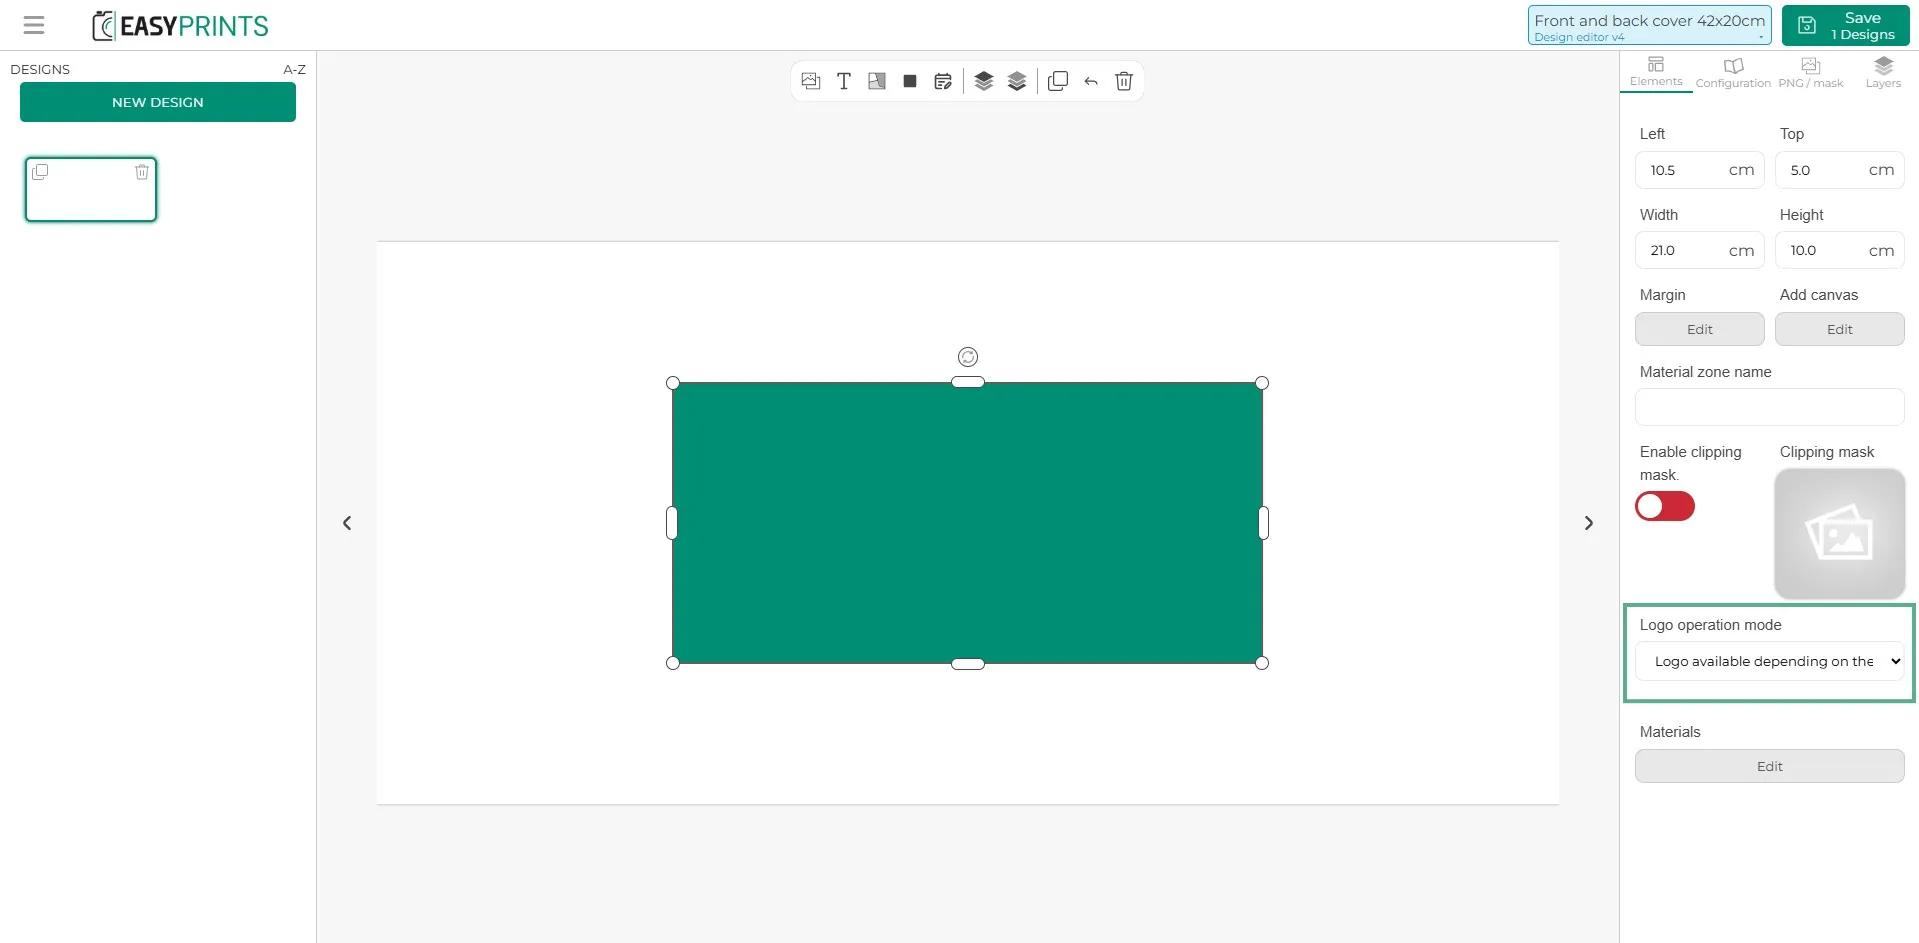
If the material allows adding a logo, select the material and, in the right-hand column, you will find a dropdown where you can indicate whether the logo has an extra cost, is free, or if the material does not allow a logo.
Step 25
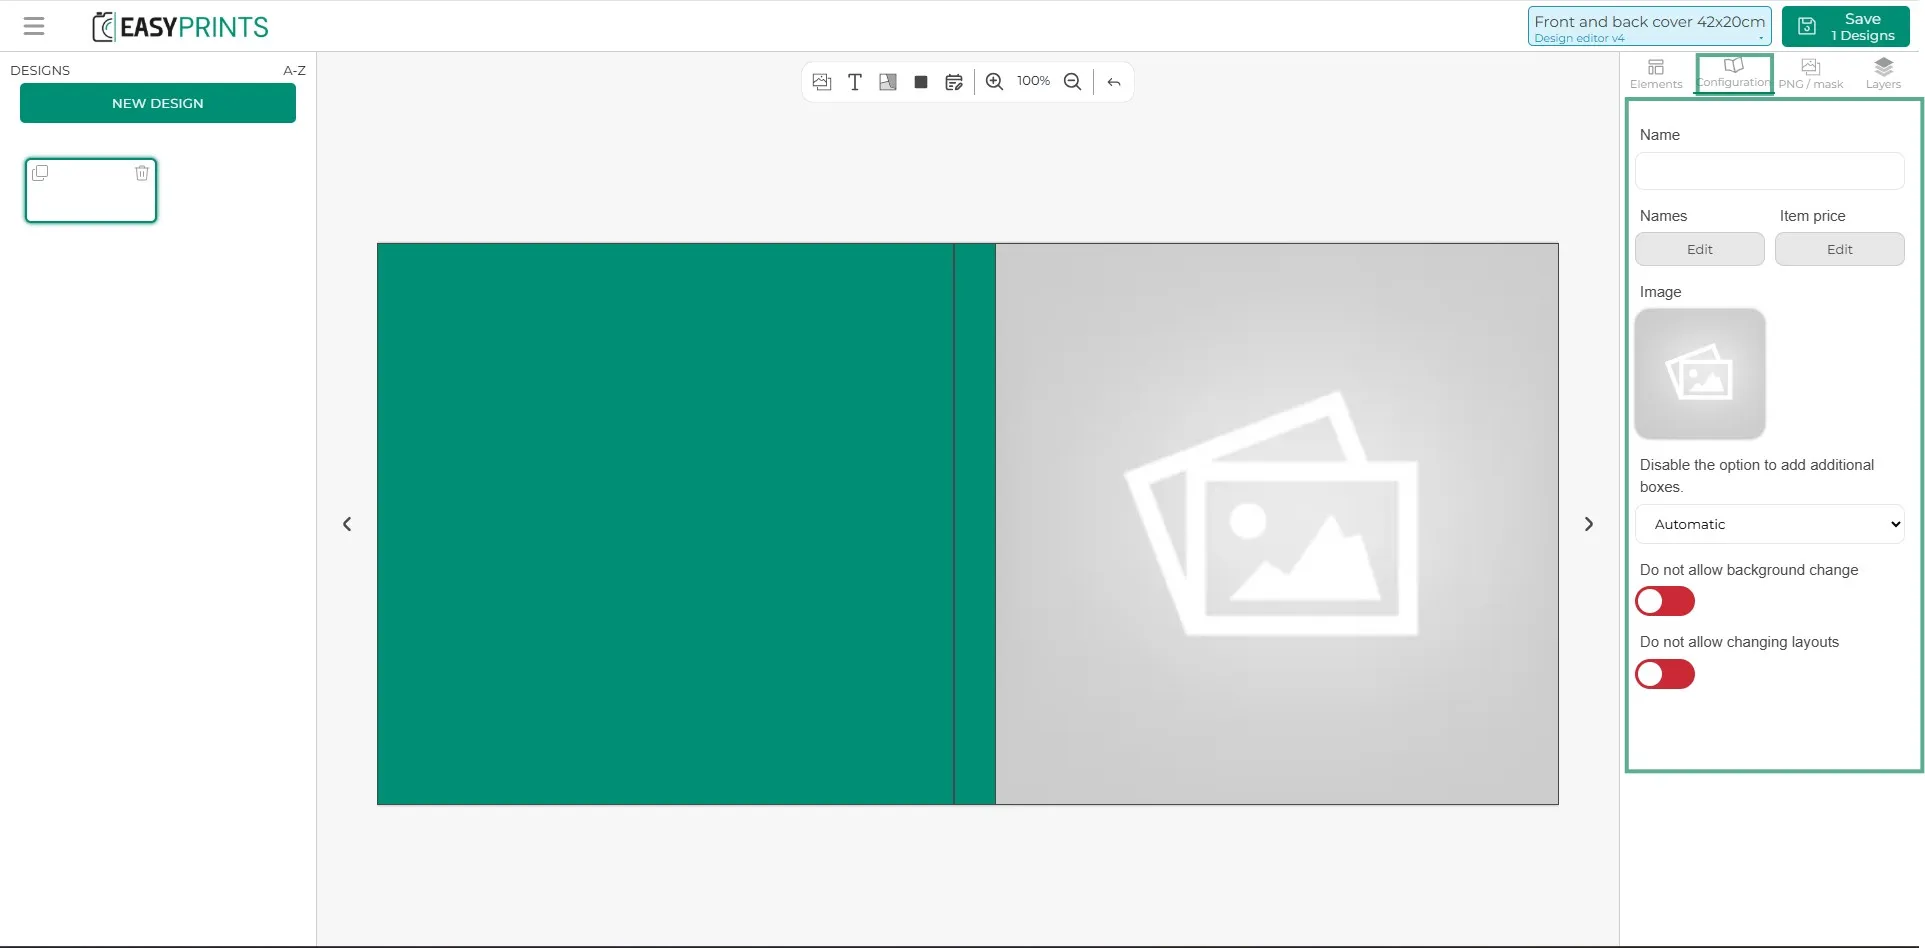
In the right-hand column, in the configuration section, you can enter a name for the design (internal and user-visible), an image, and enable or disable the following options: do not allow background change and do not allow changing layouts.
Step 26
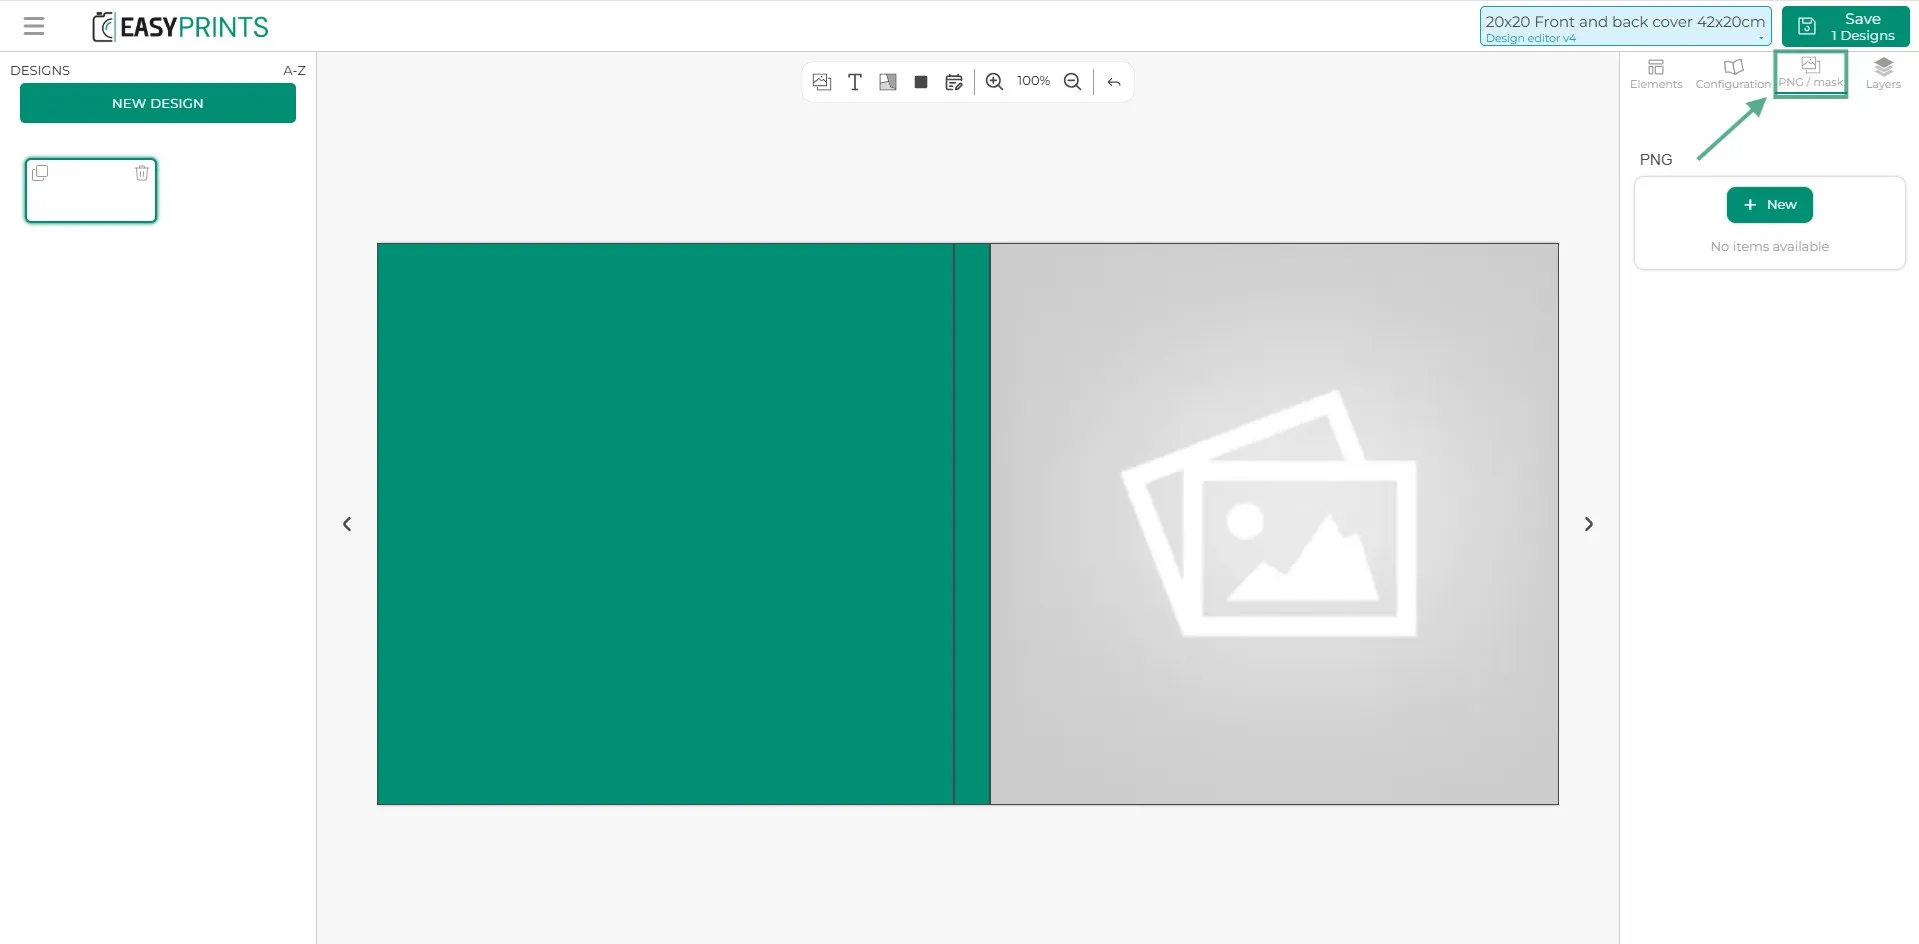
If the product includes a PNG or a mask, it can be added in the third section of the right-hand column by clicking the green “+ New” button.
Step 27
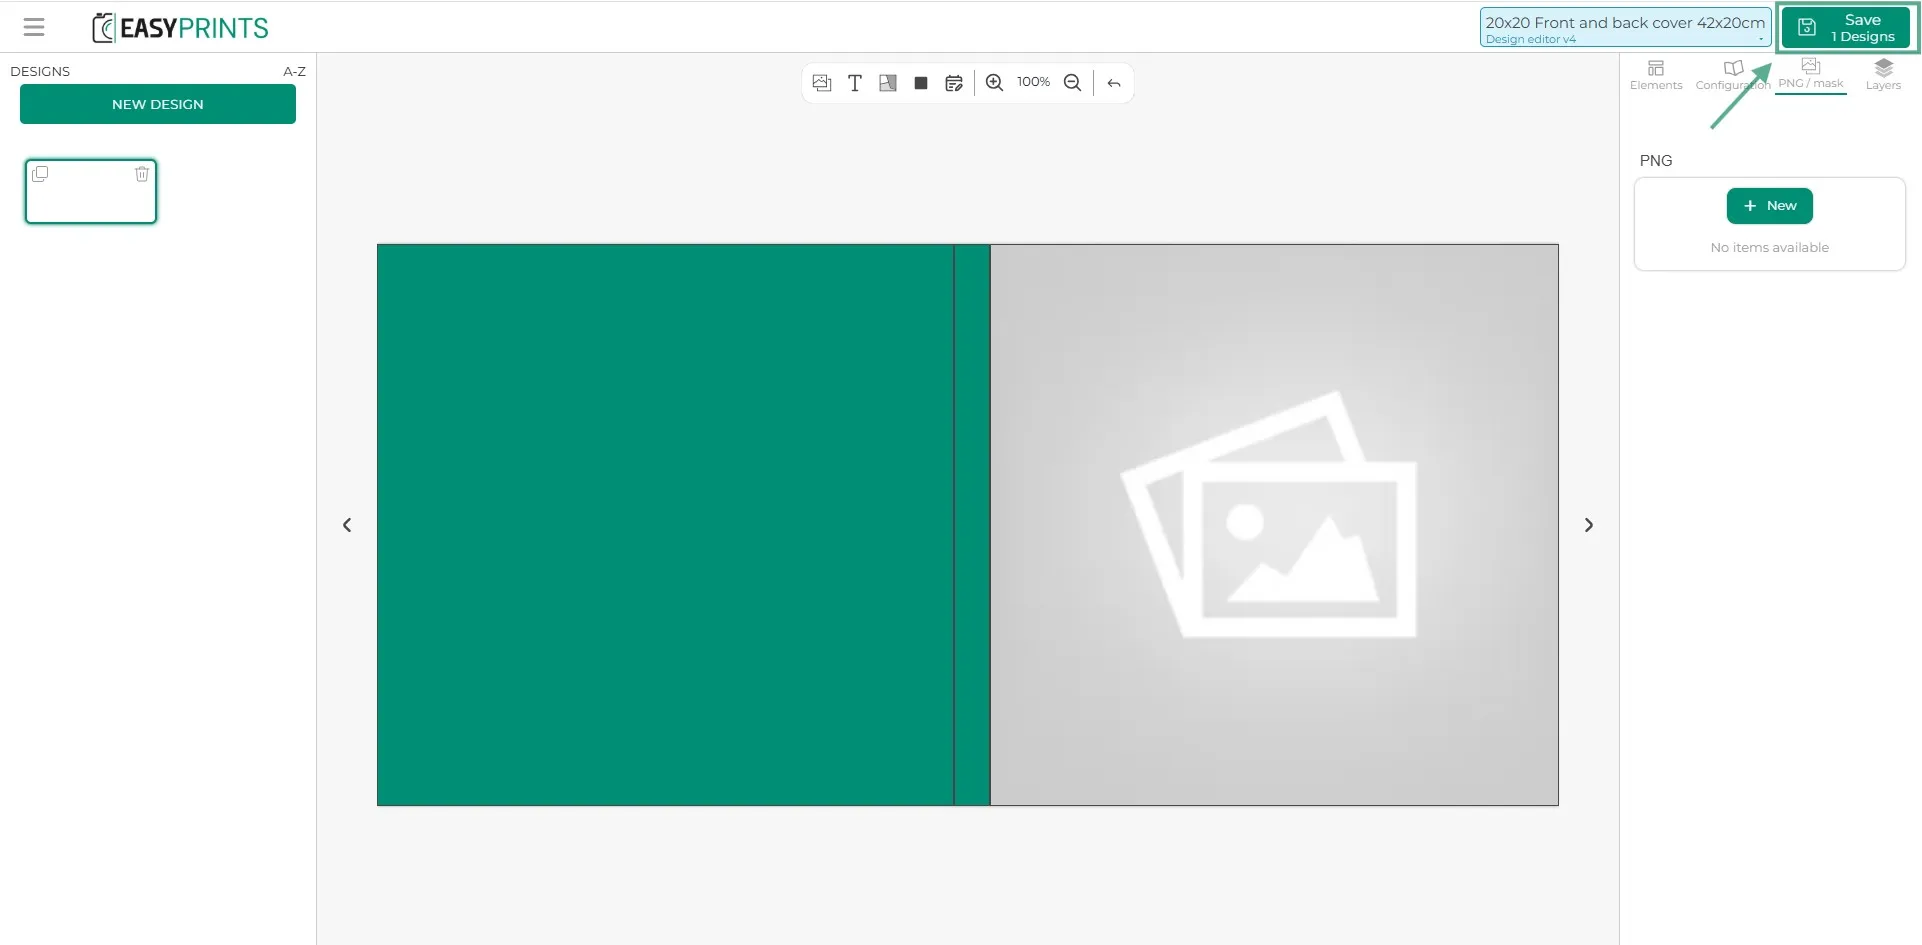
Once all item/element areas are configured, click the Save button located in the top right corner of the screen.
Step 28
Add as many items/elements as needed to your product. In this case, since the example is creating an album, you would still need to add the spreads/pages.
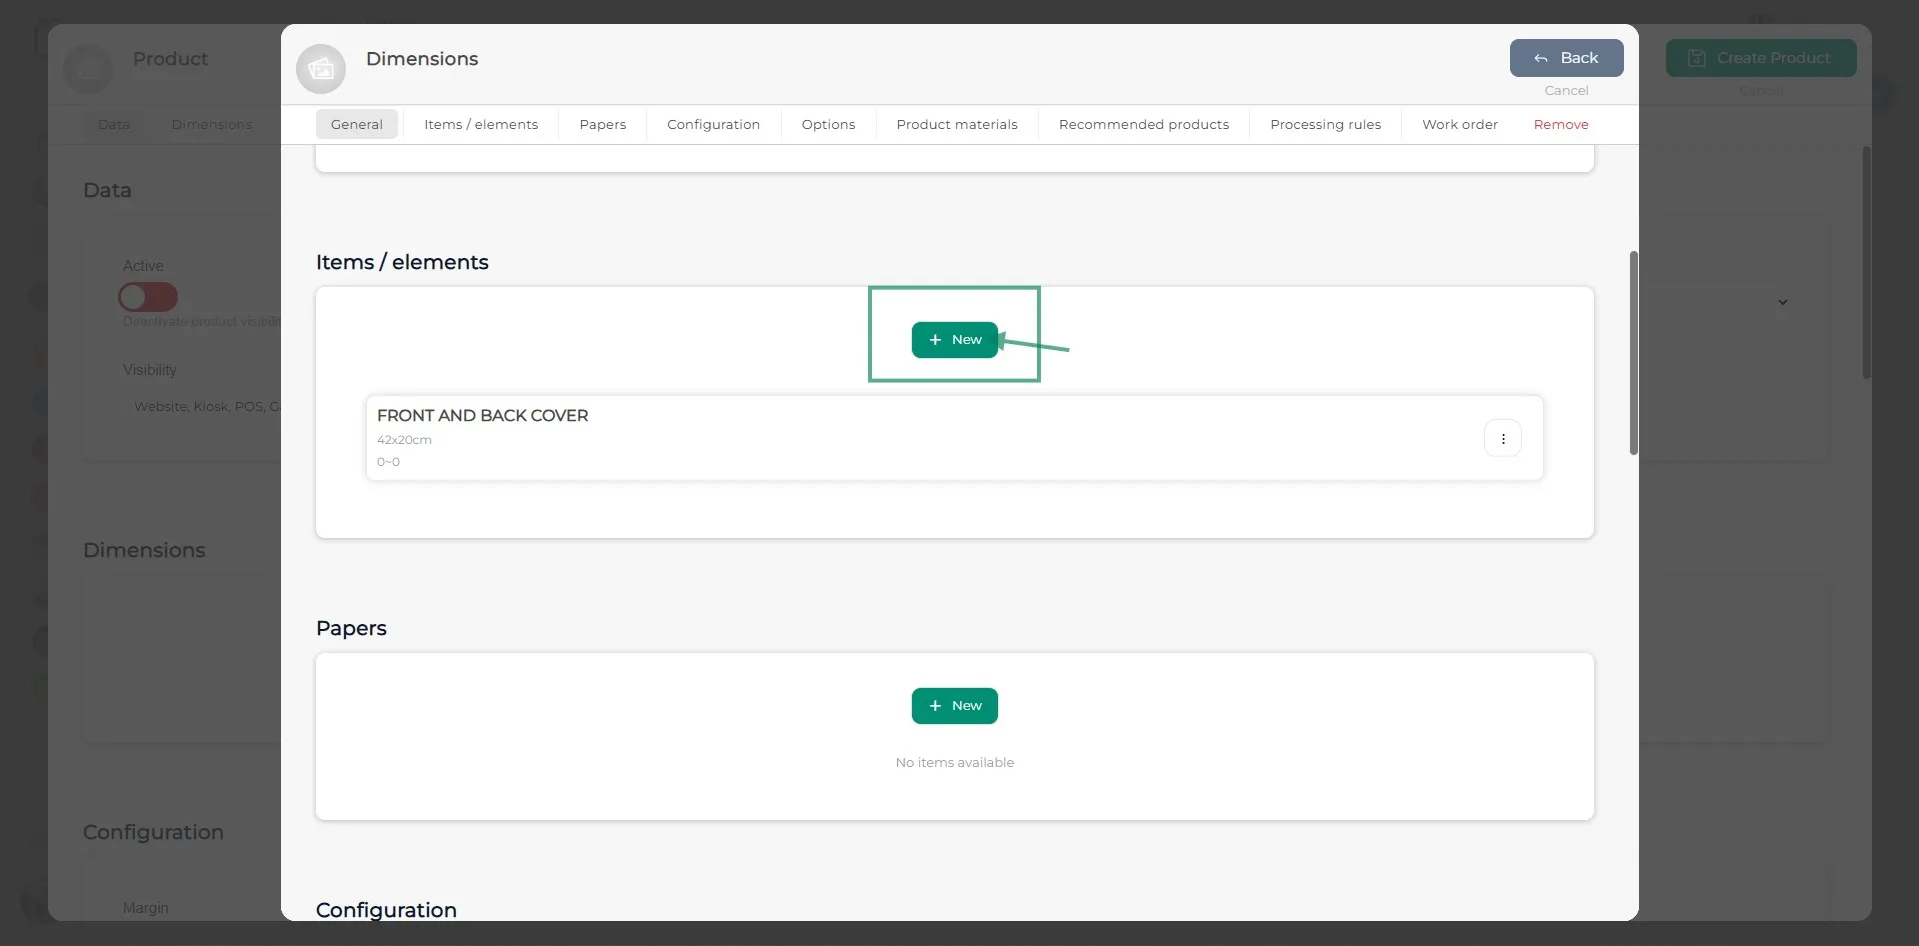
Step 29
To add an item such as spreads/pages, you only need to specify the size (width and height), the minimum and maximum number of units, and which ones are included in the price. You must also define the price scaling so that additional spreads are charged if the customer adds extra ones.
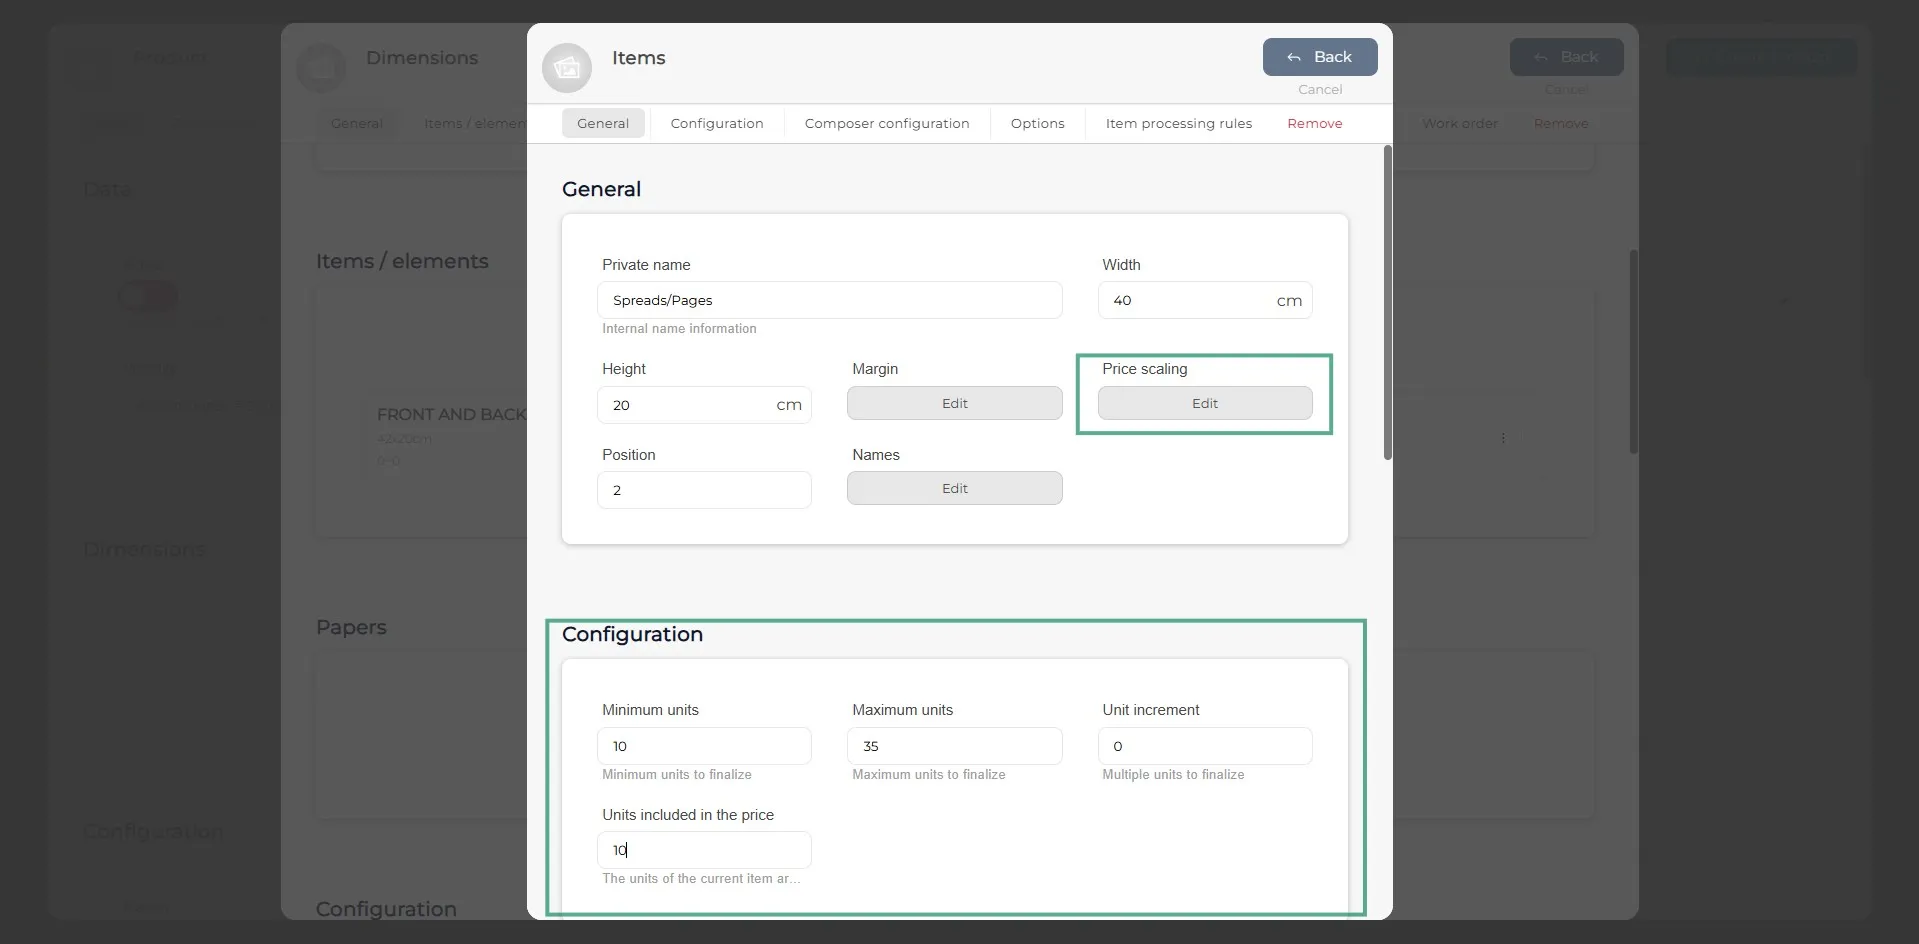
Step 30
In the price scaling window, click the green “+ New price scaling” button to display a blank row with the price fields. Enter the amount and the number of units it includes. Once the data has been entered, click the gray back button located in the top right corner of the window.
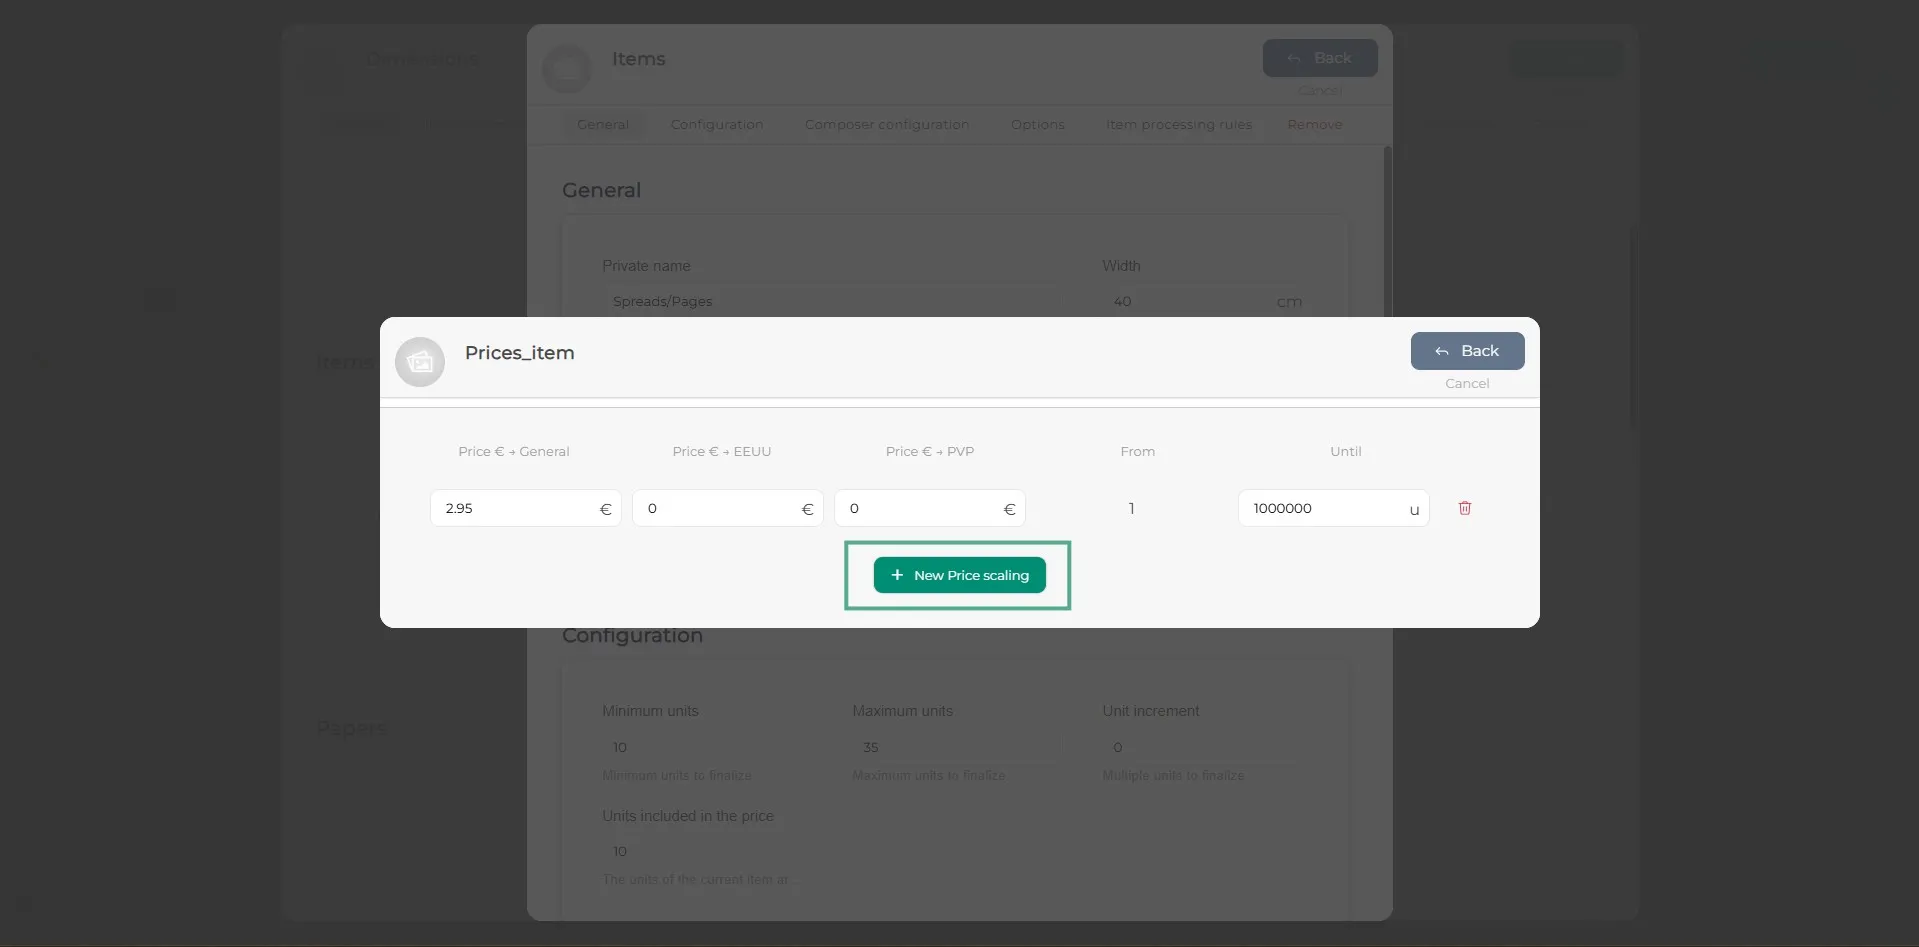
Step 31
Finally, once all desired dimensions have been added, make sure to click the Save button located in the top right corner.
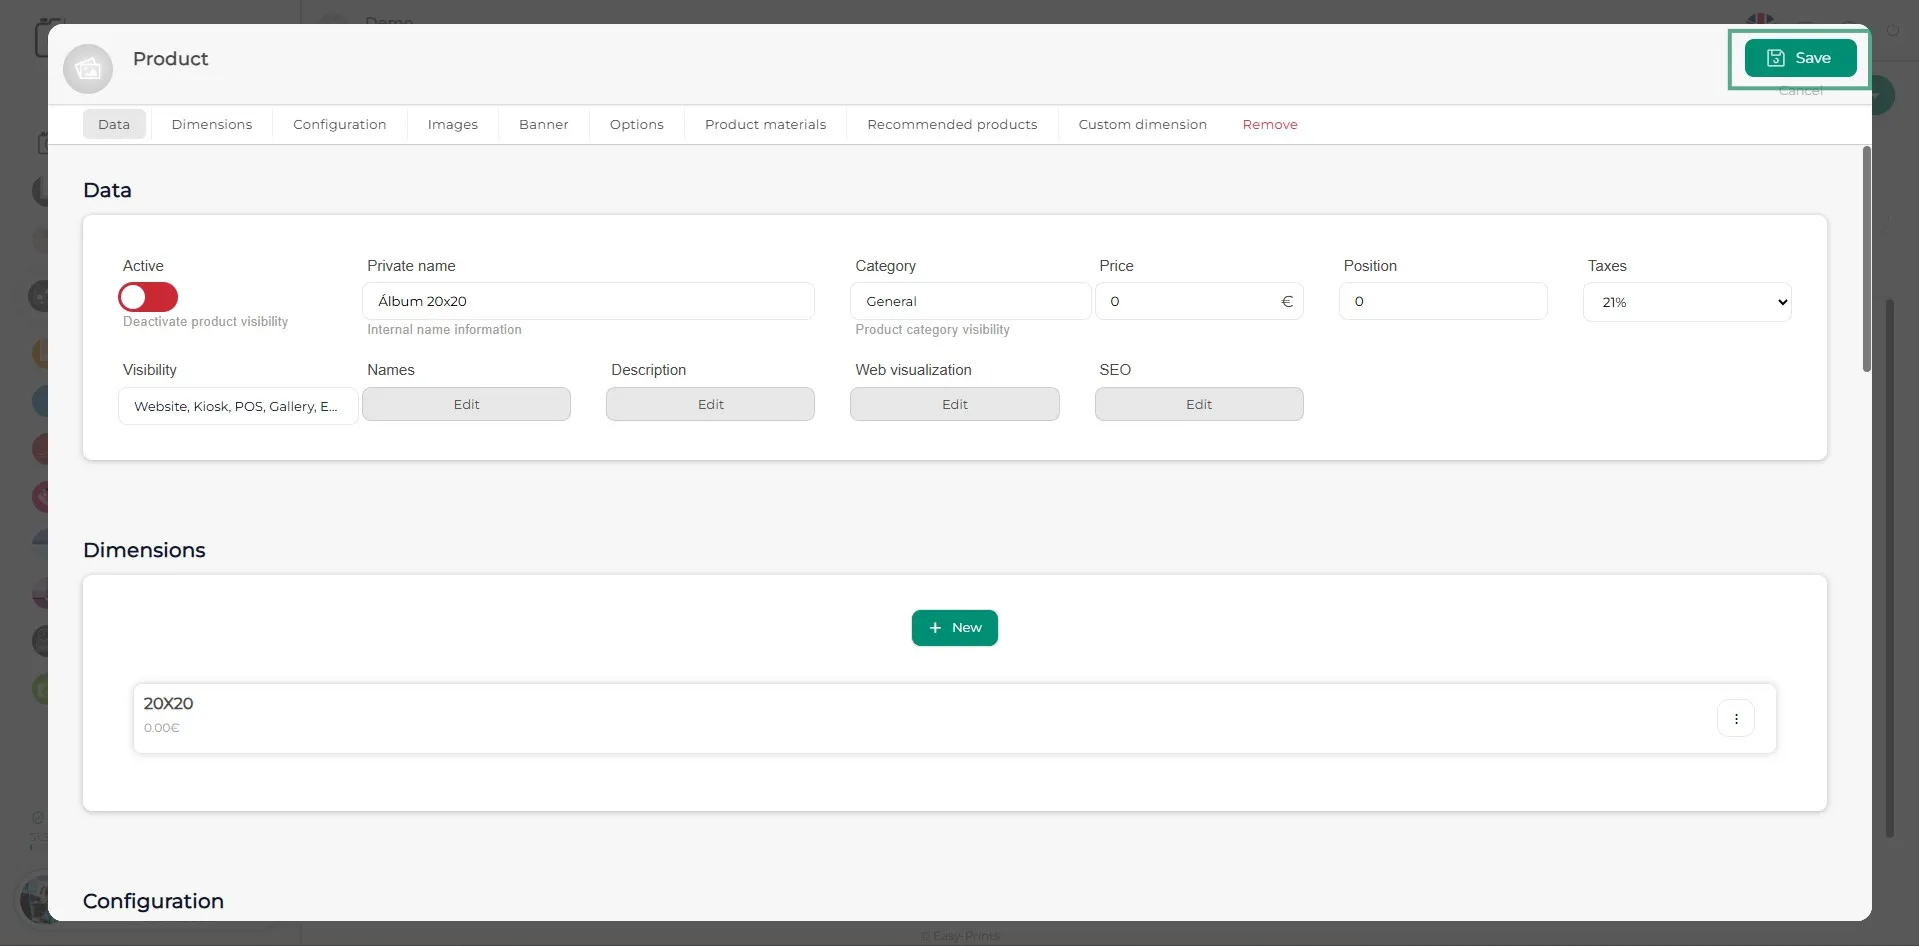
Go back to the Help Center or contact Easy-Prints.
← Back to Help Center