
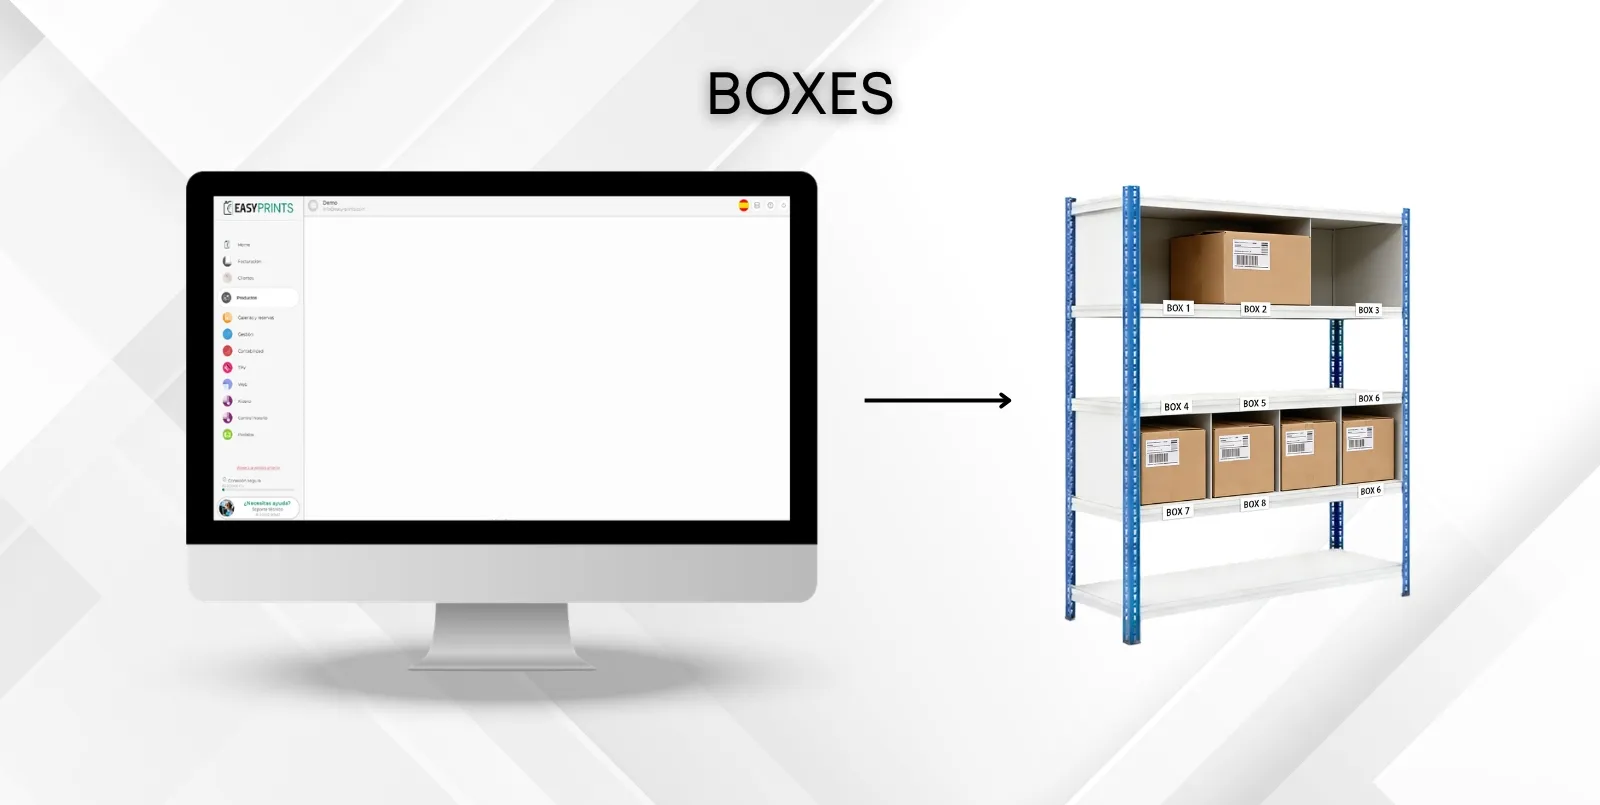
How BOXES works.
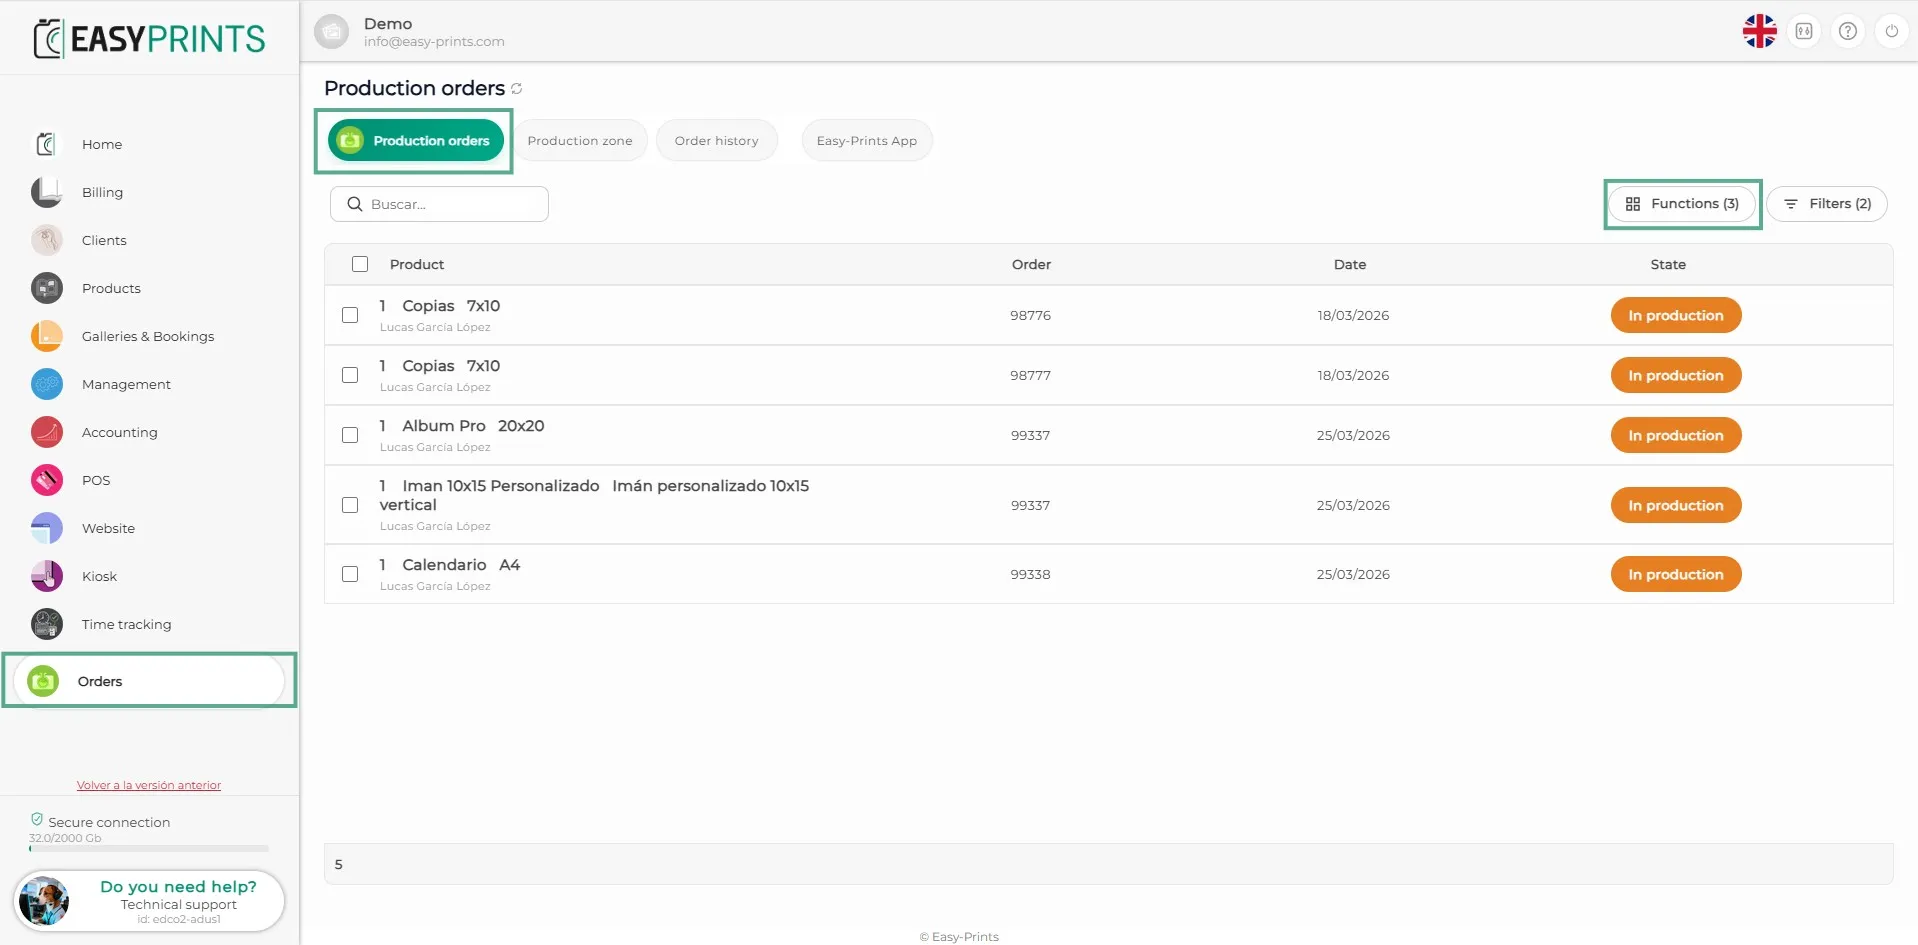
To access the Boxes section, go to the Orders section in the left-hand menu. In the top bar, go to Production orders. Once there, click on Functions.
Step 1
To access the Boxes section, go to the Orders section in the left-hand menu. In the top bar, go to Production orders. Once there, click on Functions.
Step 2
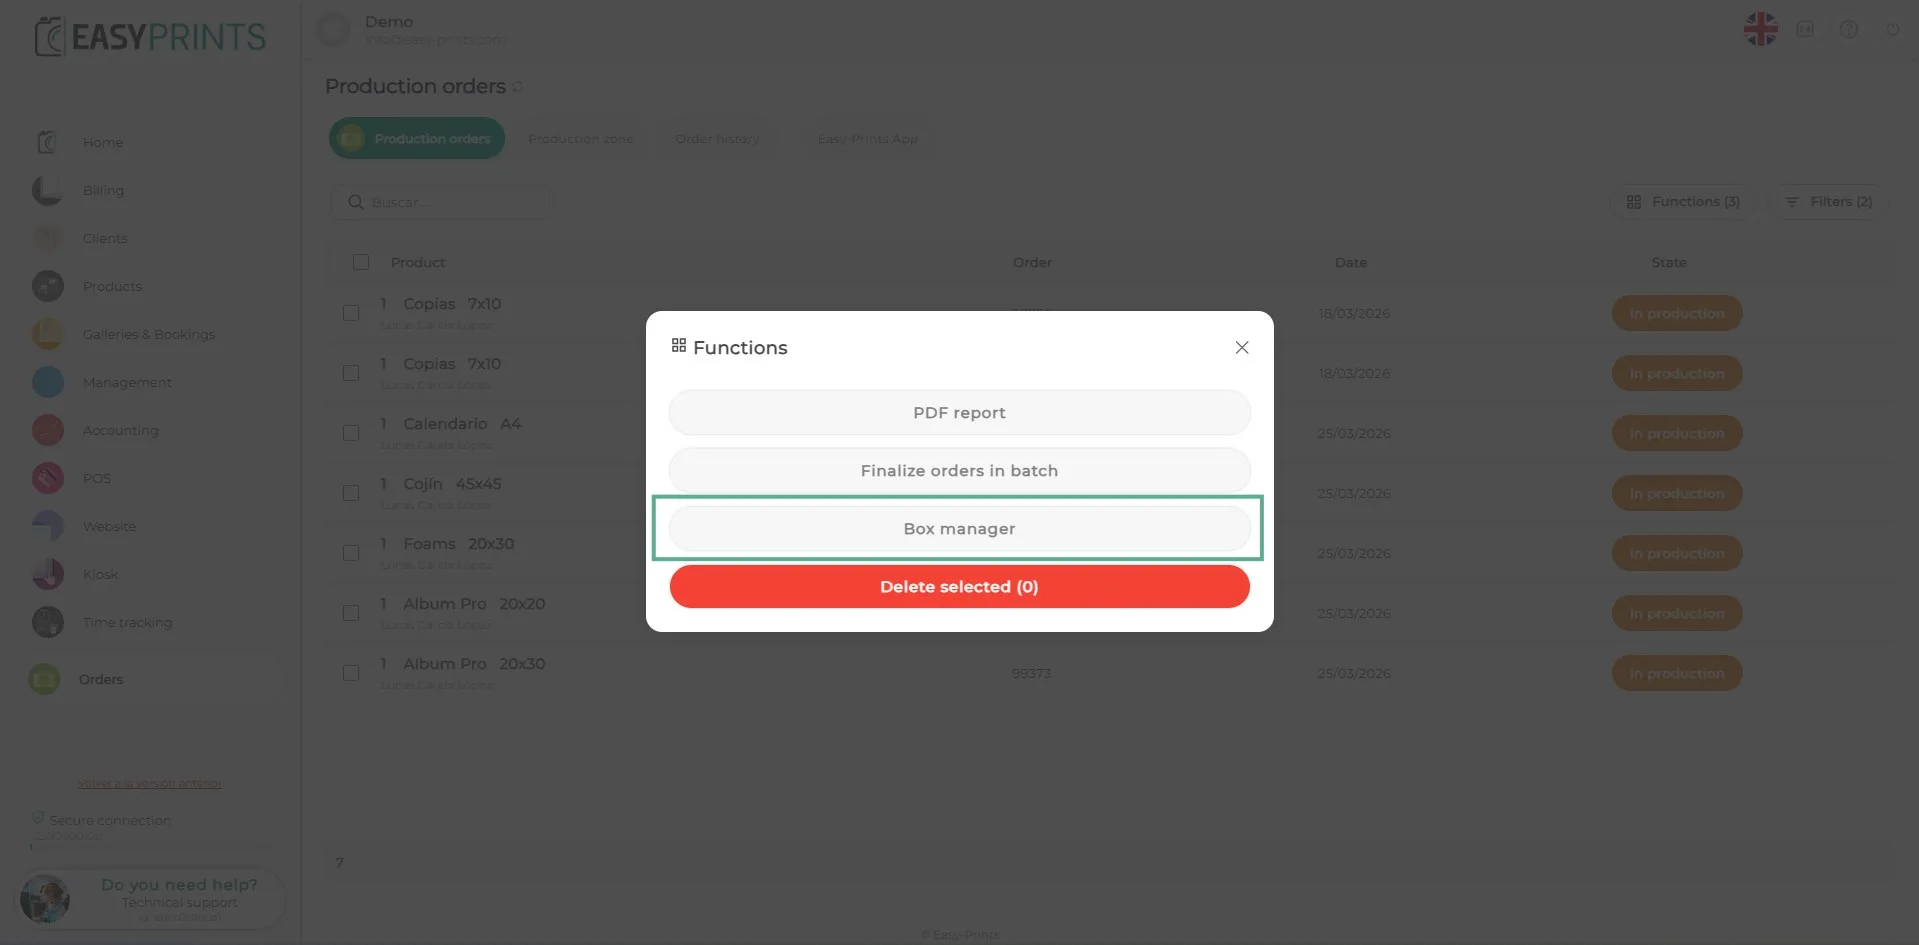
In the Functions window, click on Box Manager.
Step 3
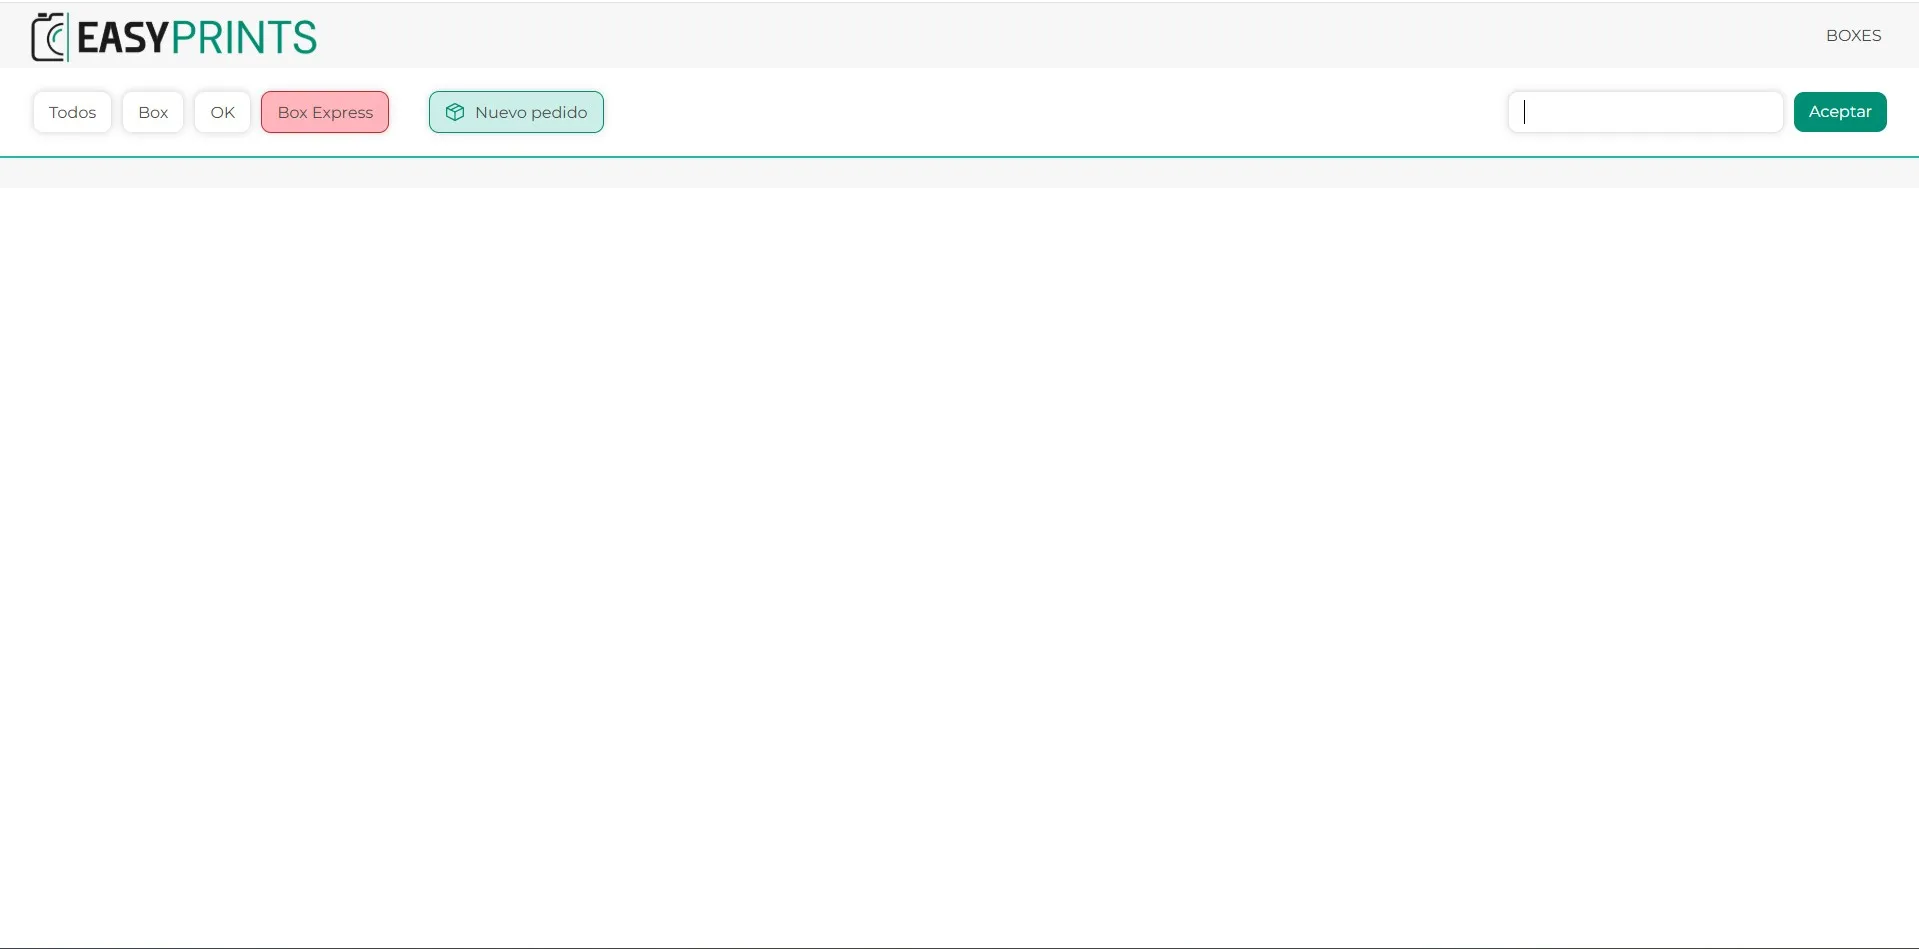
A new browser tab will open with the Box Manager.
Step 4
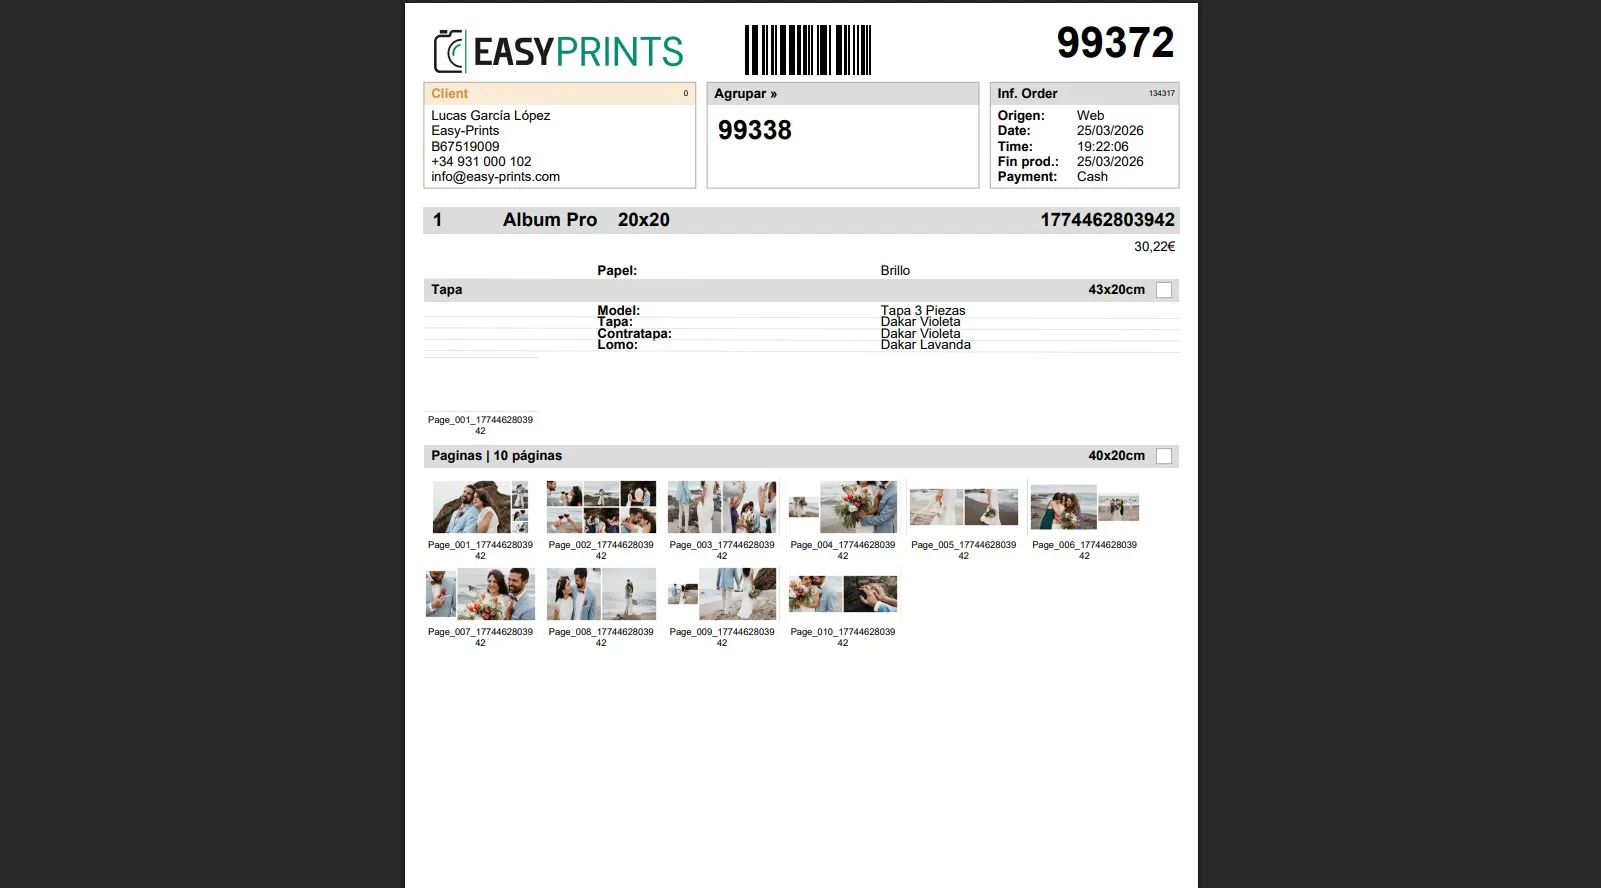
In the order sheets, at the top of the page, you can see whether the order is grouped with another order or not.
Step 5
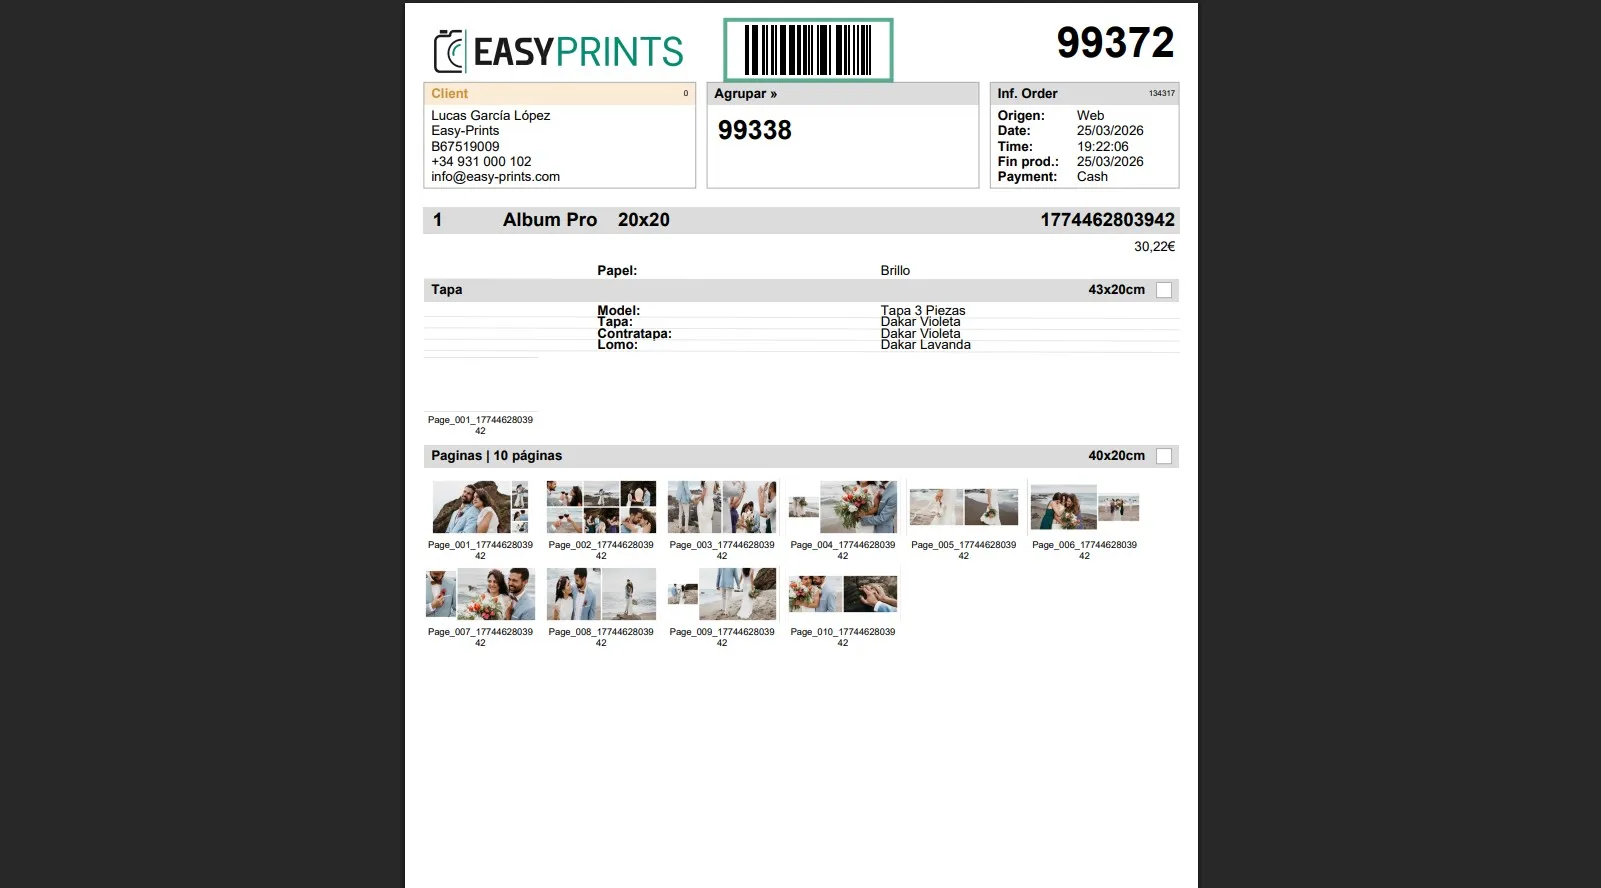
Using the barcode at the top of the work order, scan it with the barcode scanner.
Step 6
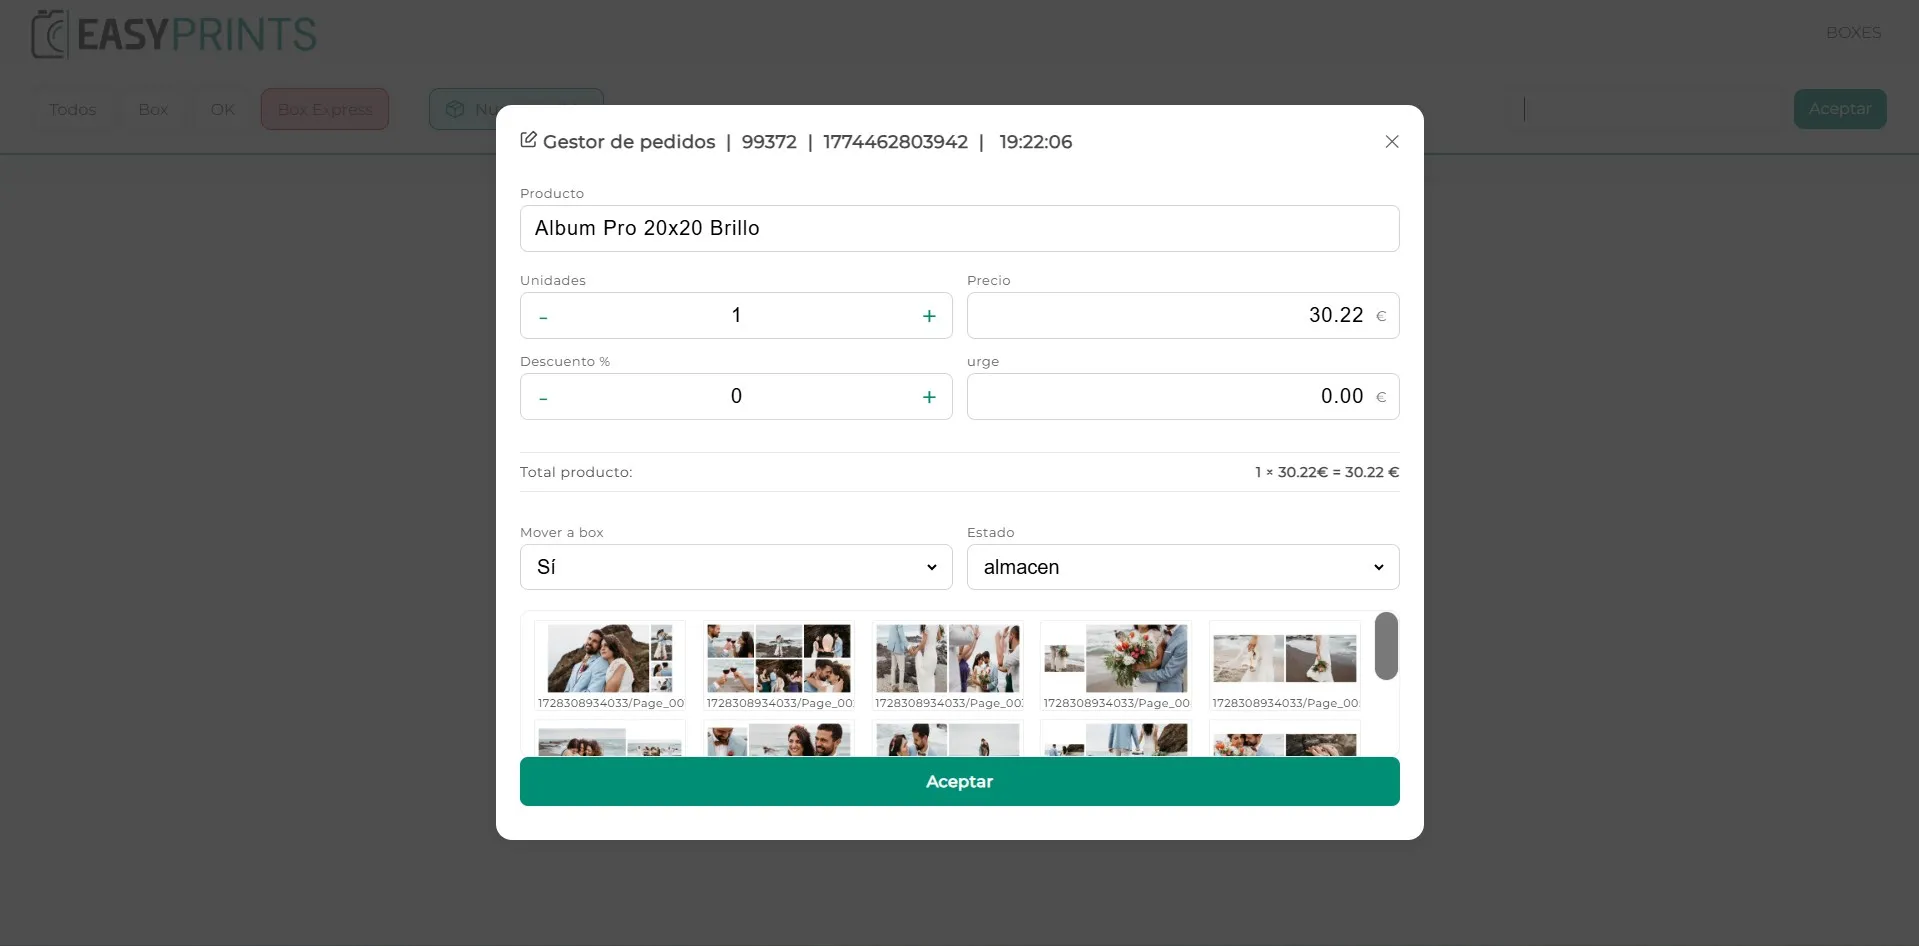
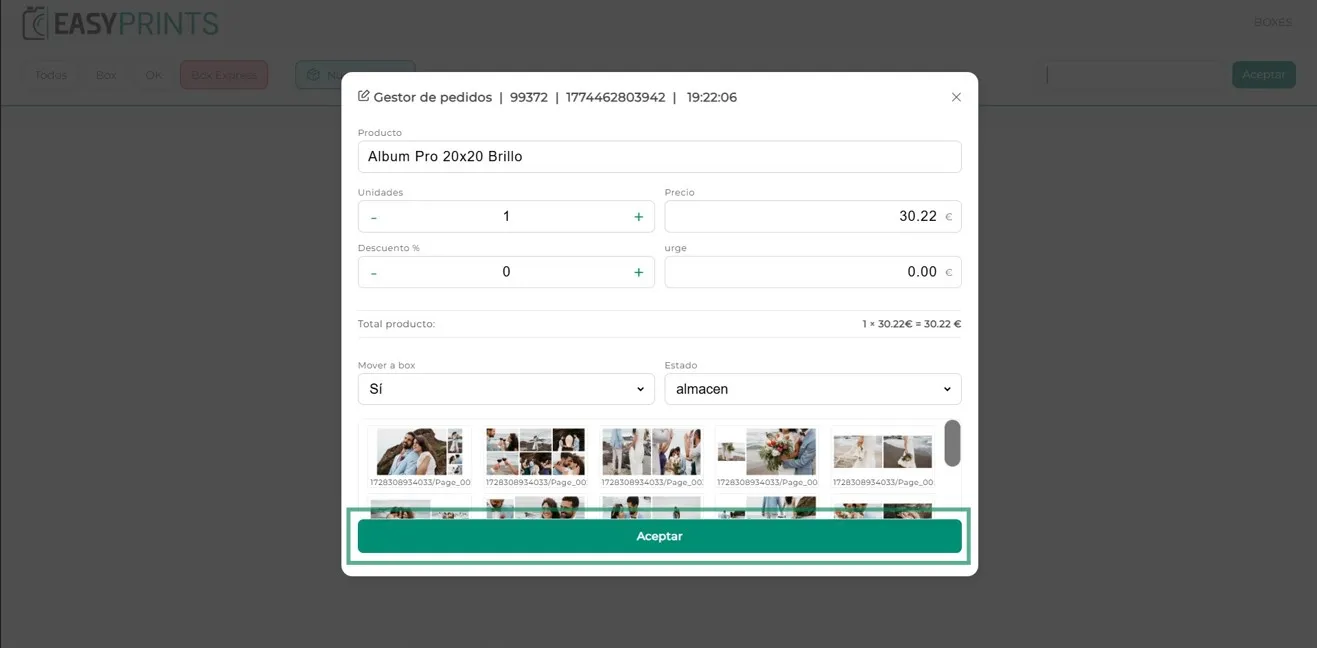
After scanning it with the barcode reader, a new window will open. In this window, you can modify the product name, the number of units, the price, add a discount, or set an urgent price.
Step 7
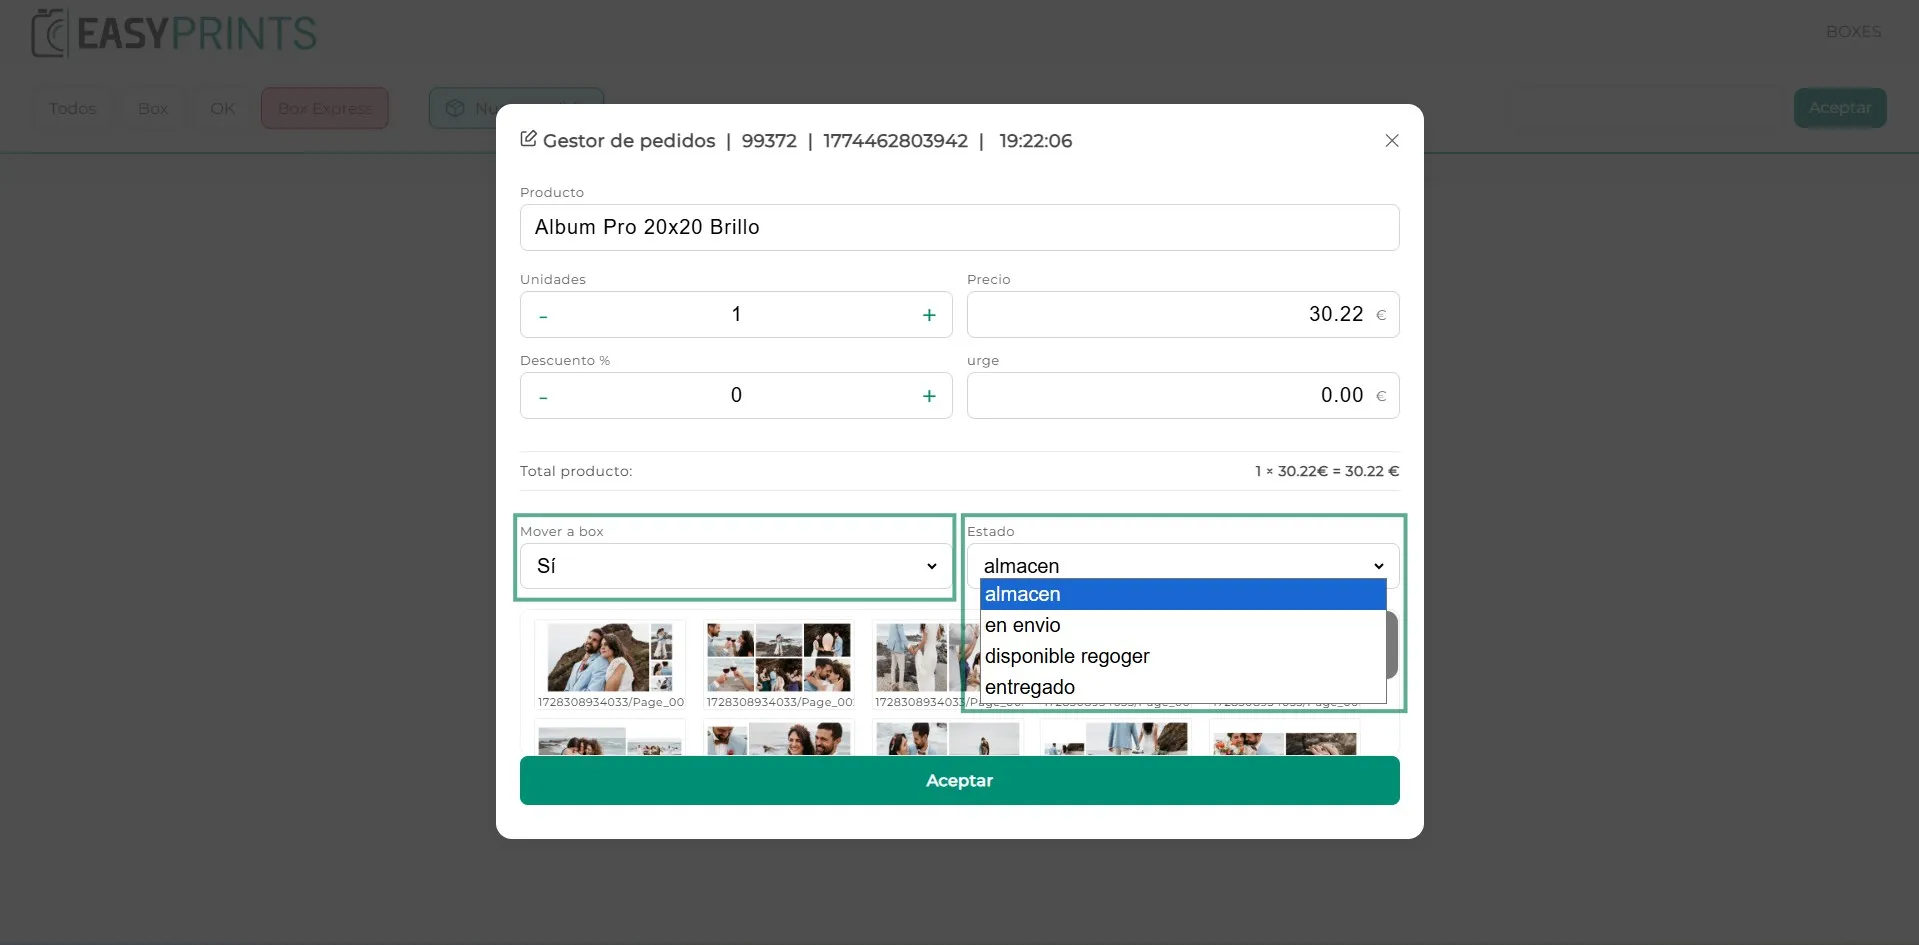
At the bottom of the window, there are two options. The first asks whether it should be moved to the box; by default, the answer will be yes. The second option is the order status. The dropdown shows four options: warehouse, in shipping, ready for pickup, or delivered. In this case, since the customer wants to group several orders, we will leave it as delivered by default.
Step 8
Click the Accept button to continue.
Step 9
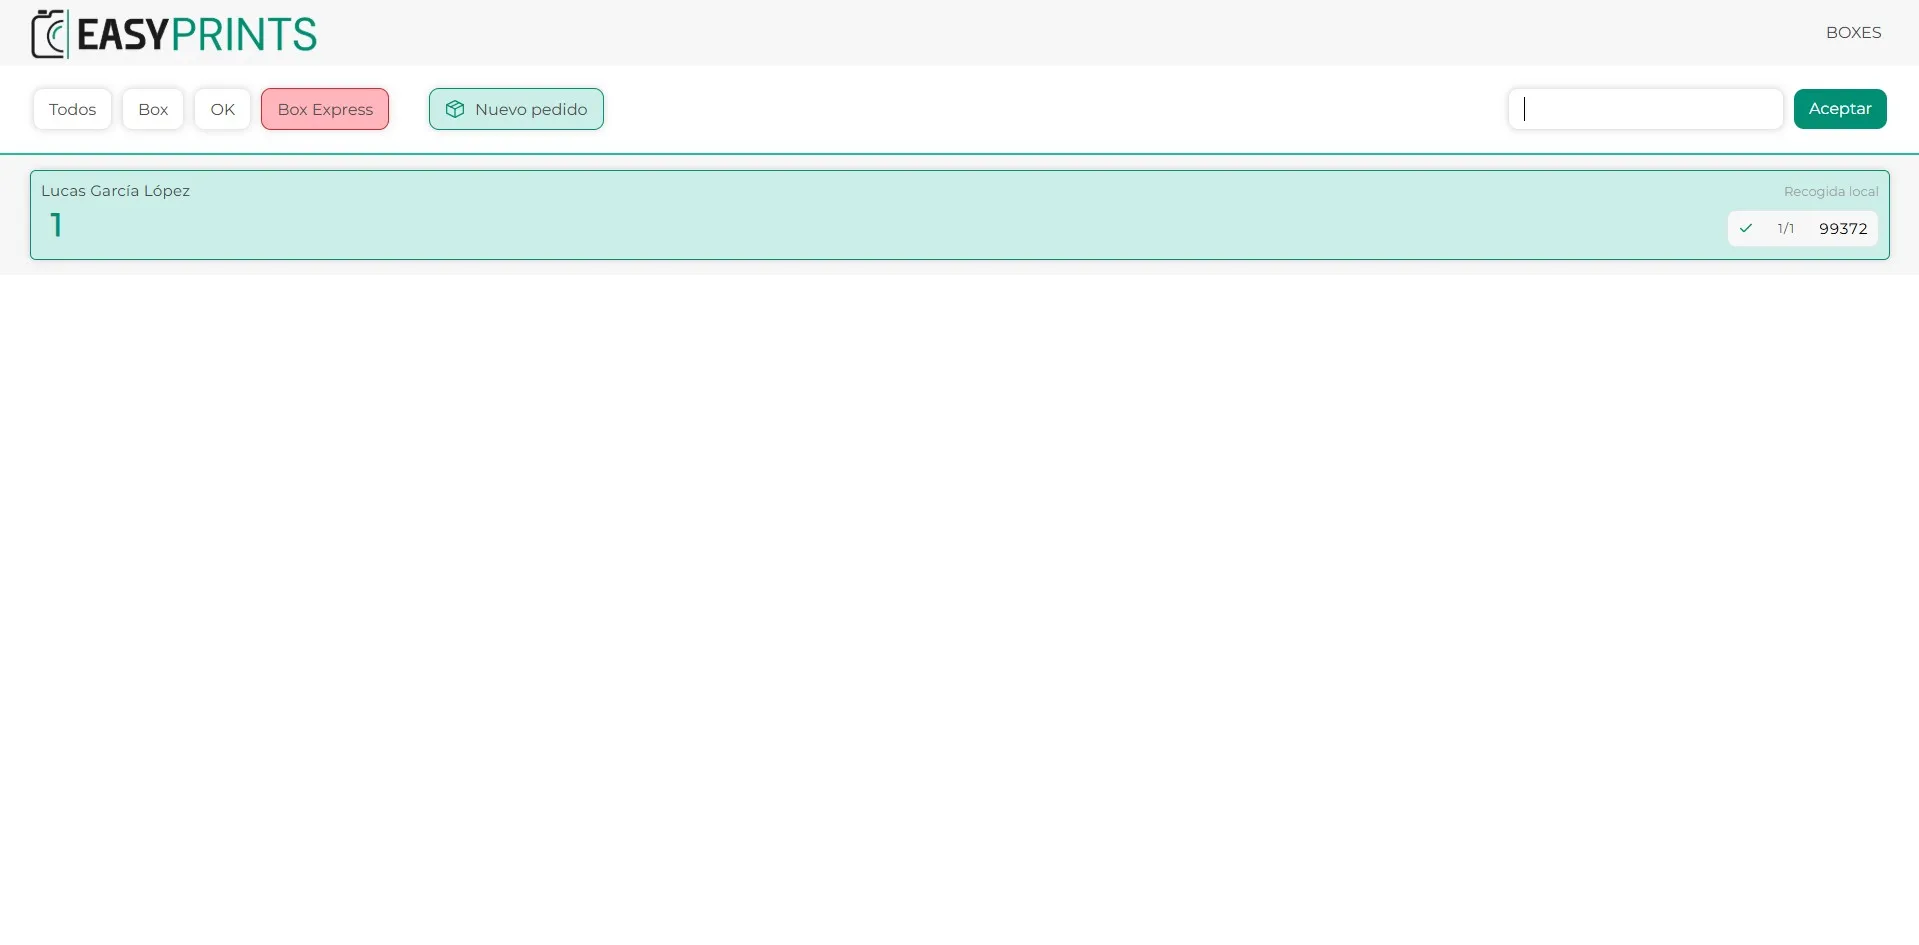
After clicking ‘Accept’, the system will indicate the box where the order must be placed.
Step 10
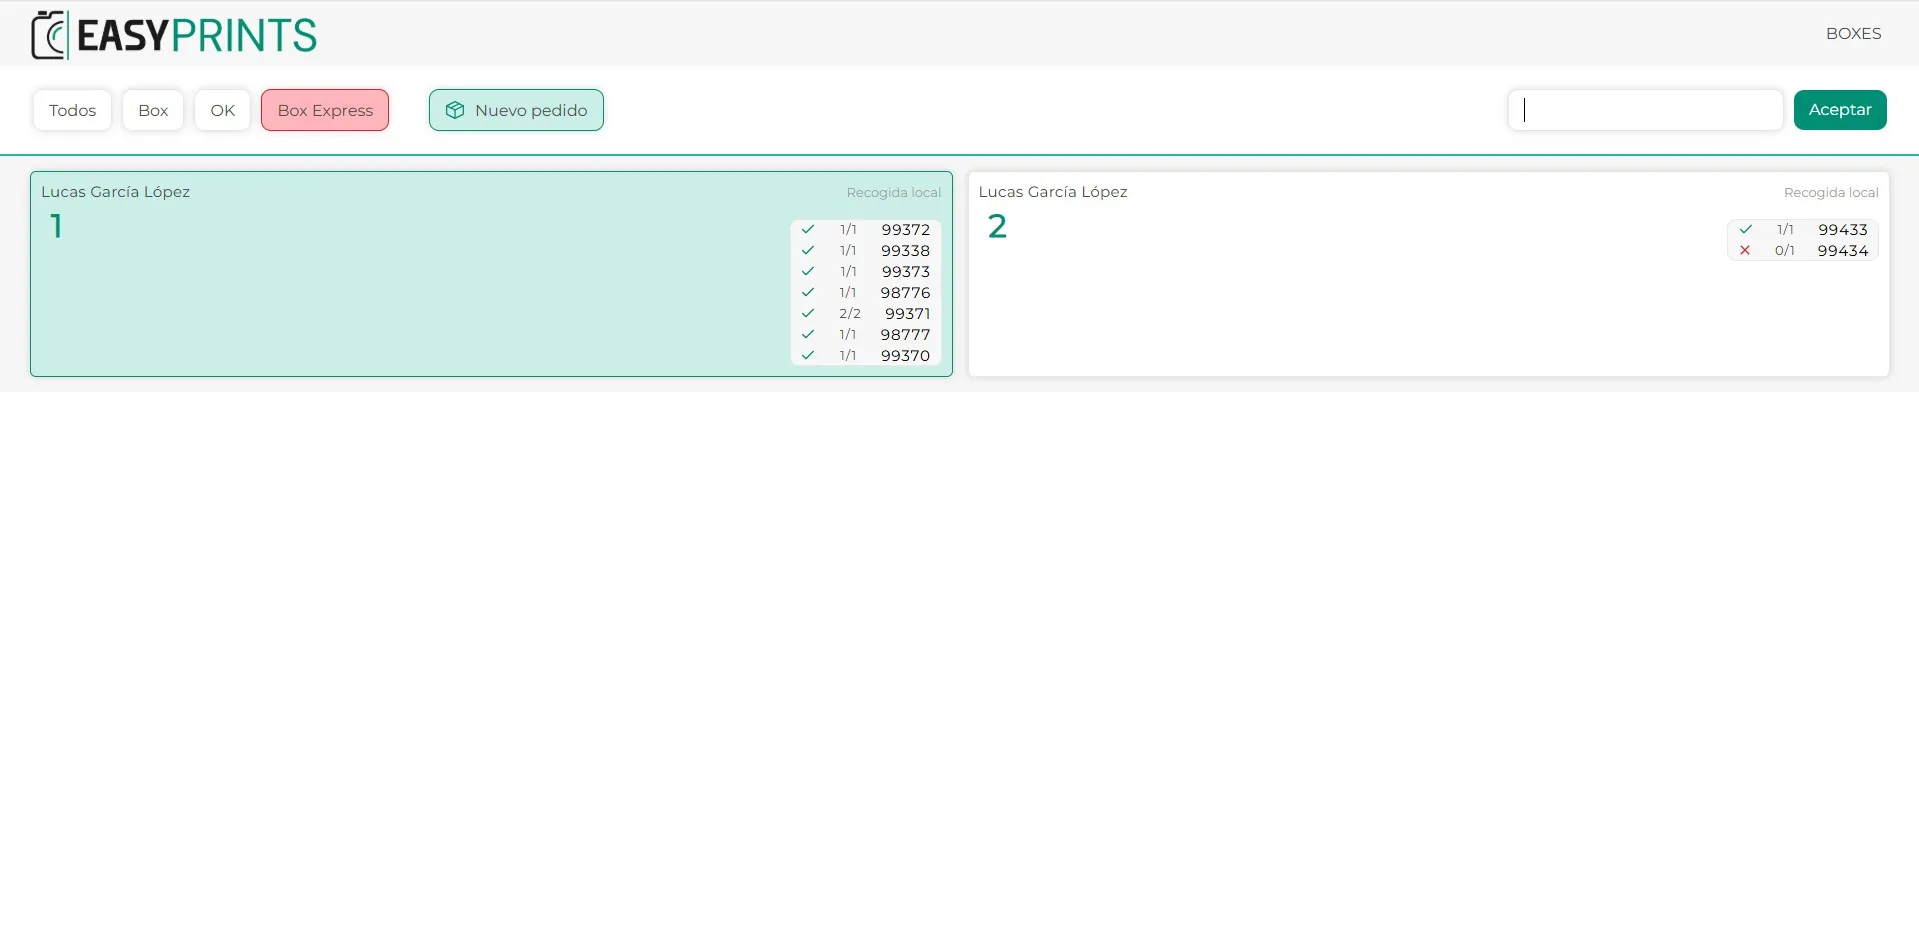
As grouped orders are completed, they will be placed in the same box. Likewise, as other orders are processed, they will be placed in other boxes.
Step 11
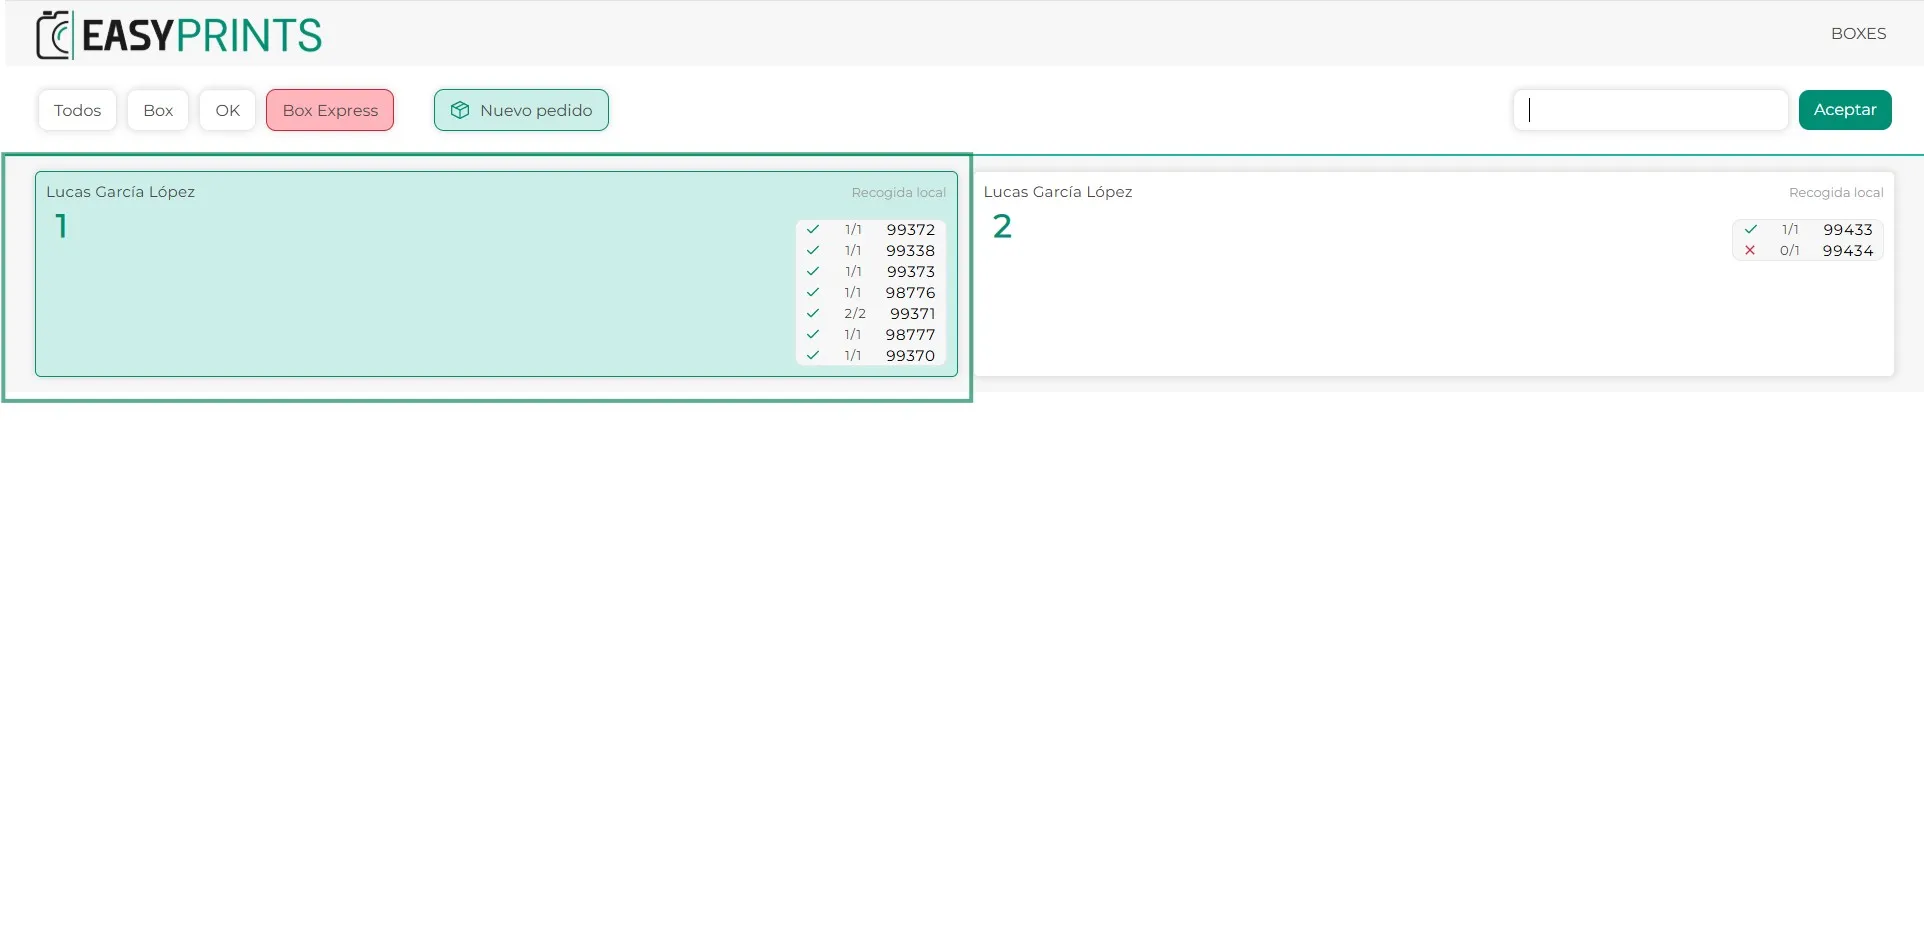
Once all the orders that must go into the box have been produced, all orders will be marked in green. Click on the box to finalize it.
Step 12
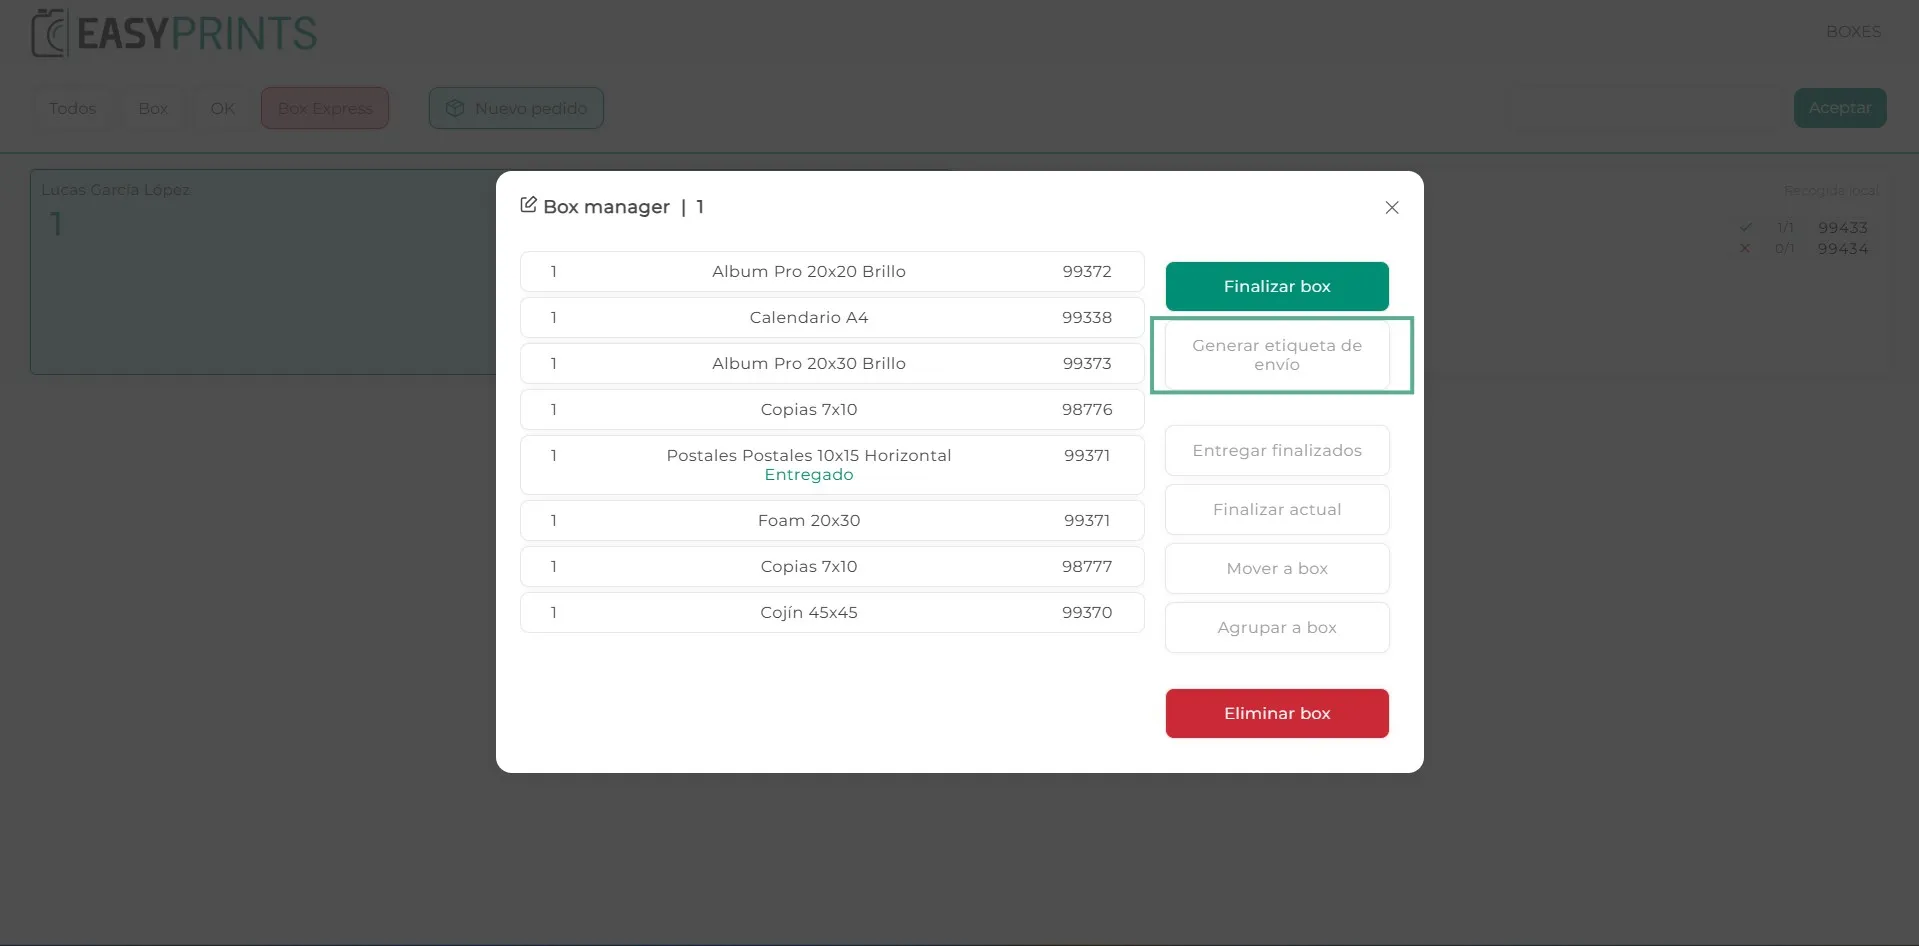
When clicking on the box, a new window will open showing all the orders contained in it. Make sure to generate the shipping label so you can place it on the package.
Step 13
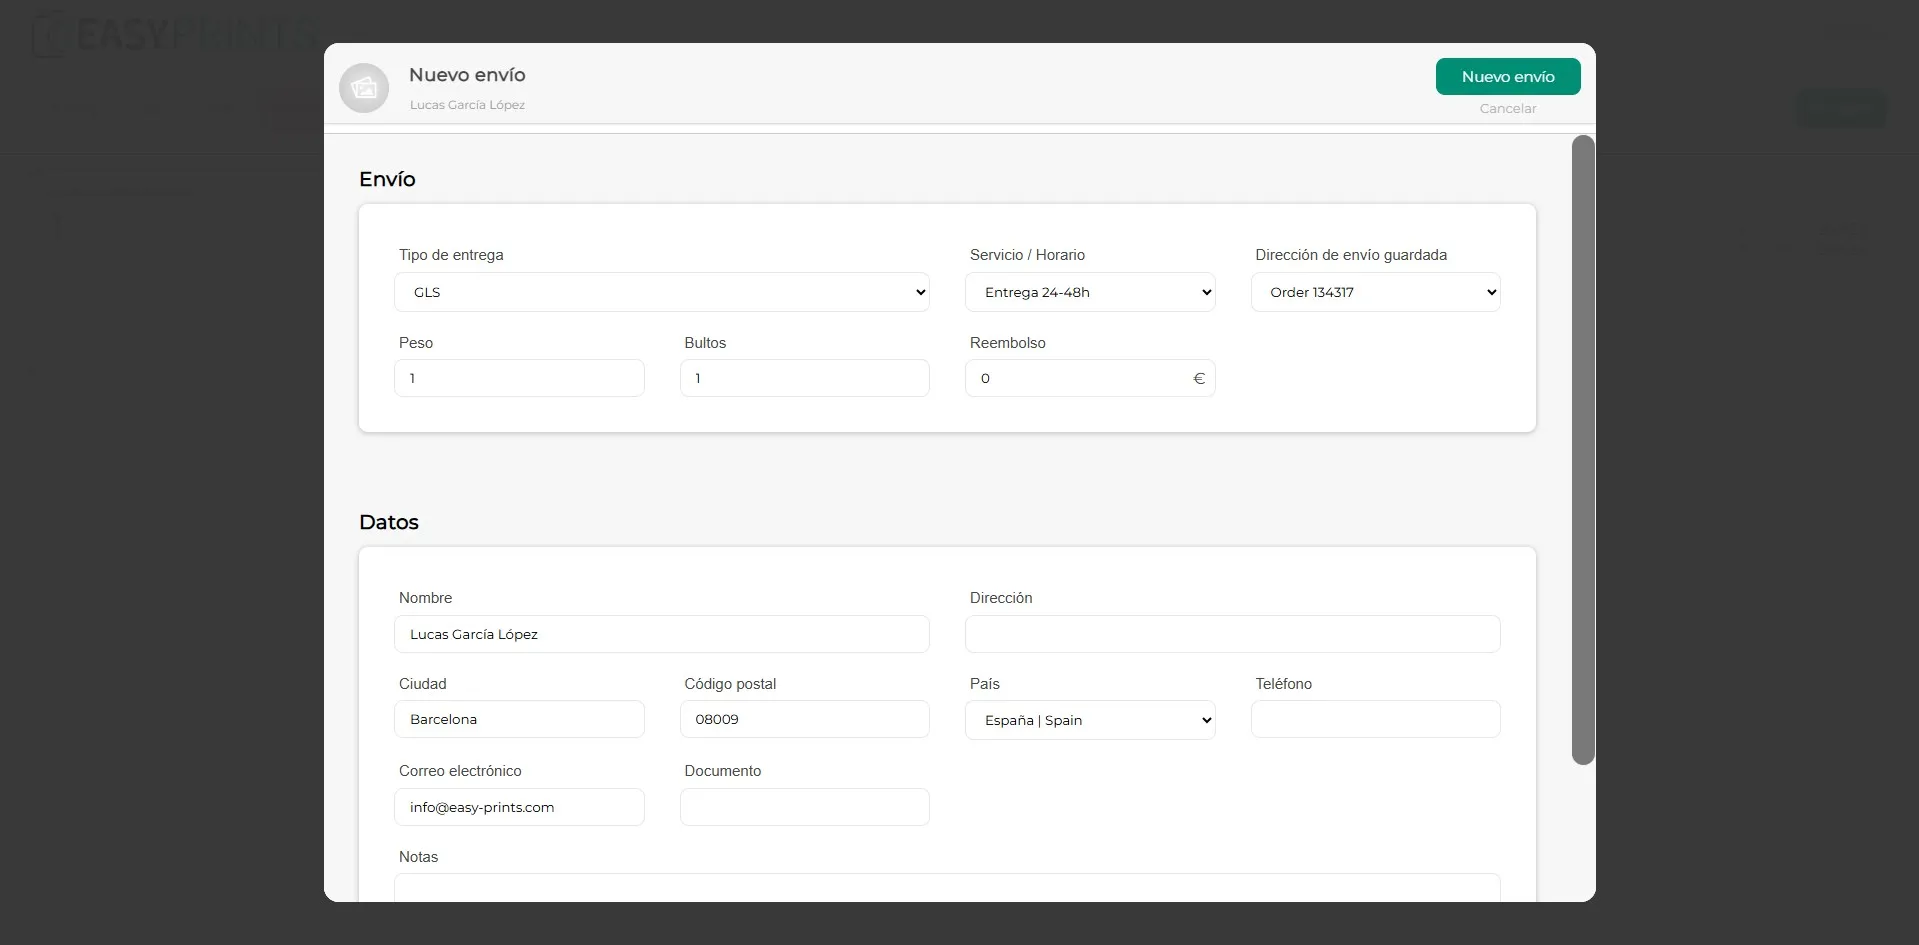
When clicking on ‘Generate shipping label’, a window will open where you must complete the empty fields. Once completed, click the green ‘New shipment’ button located in the top right to print the label.
Step 14
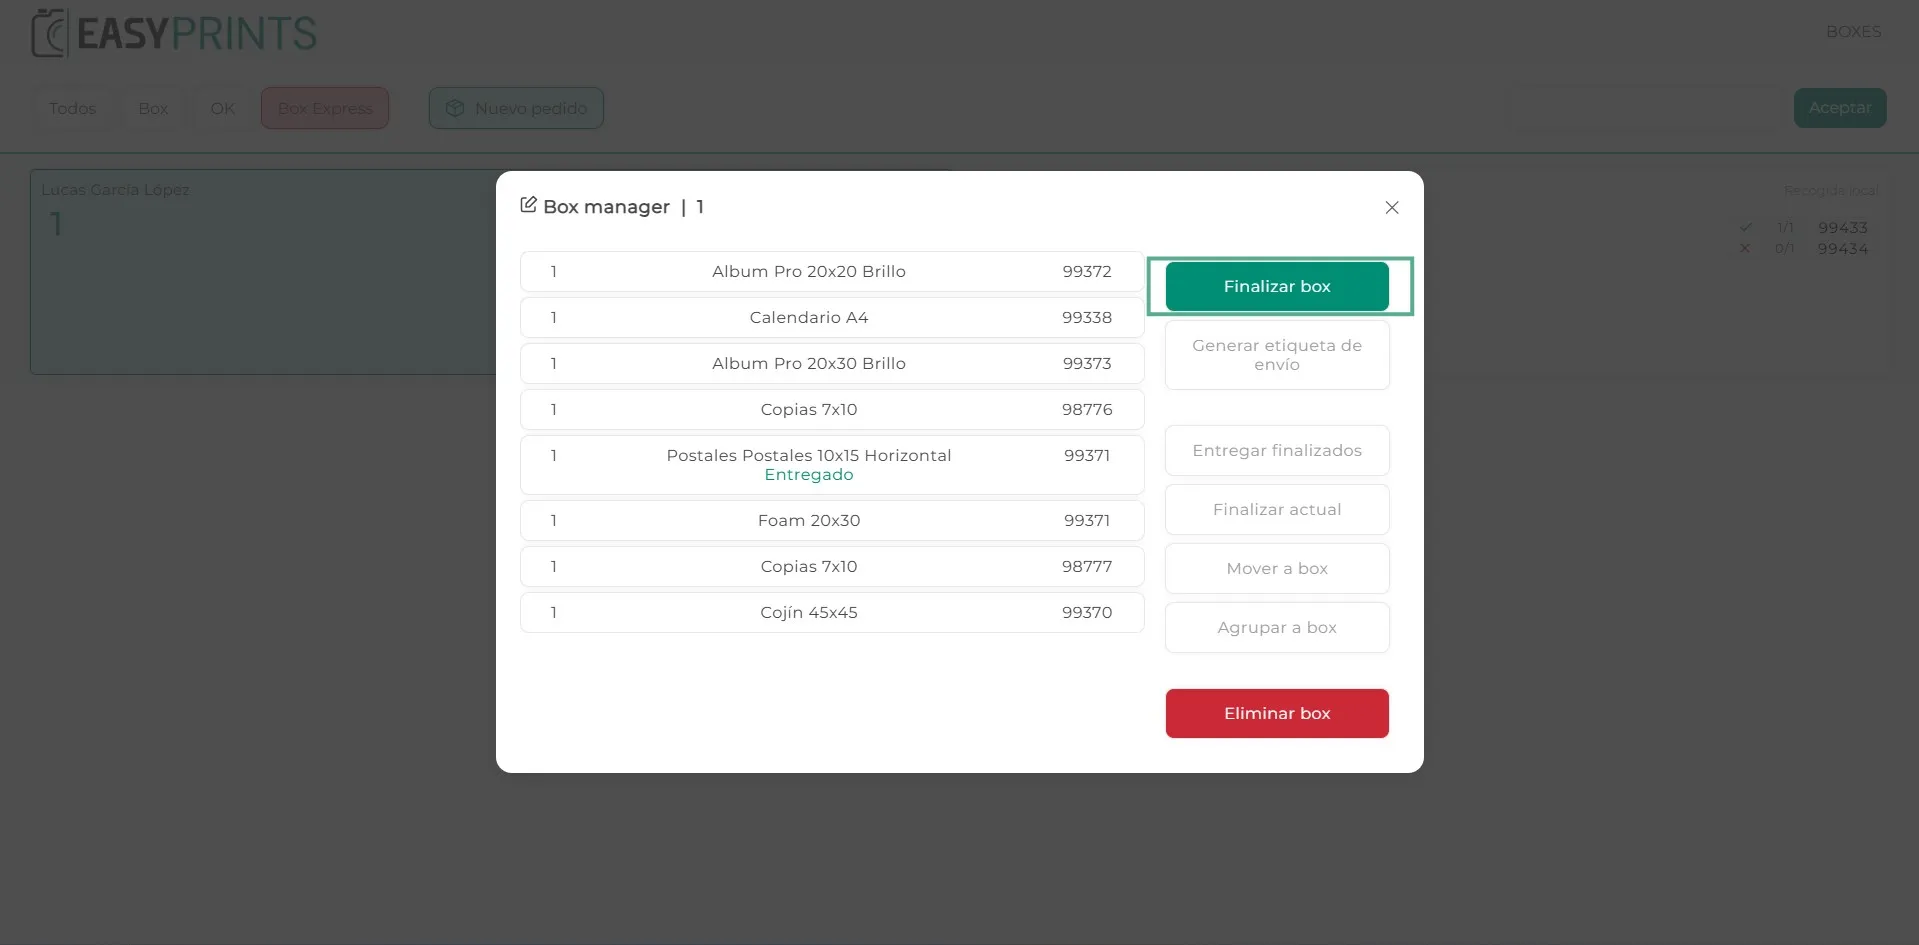
In the box window, click the green ‘Finalize box’ button. Once finalized, delivery notes for all orders contained in this box will be generated automatically.
Go back to the Help Center or contact Easy-Prints.
← Back to Help Center