
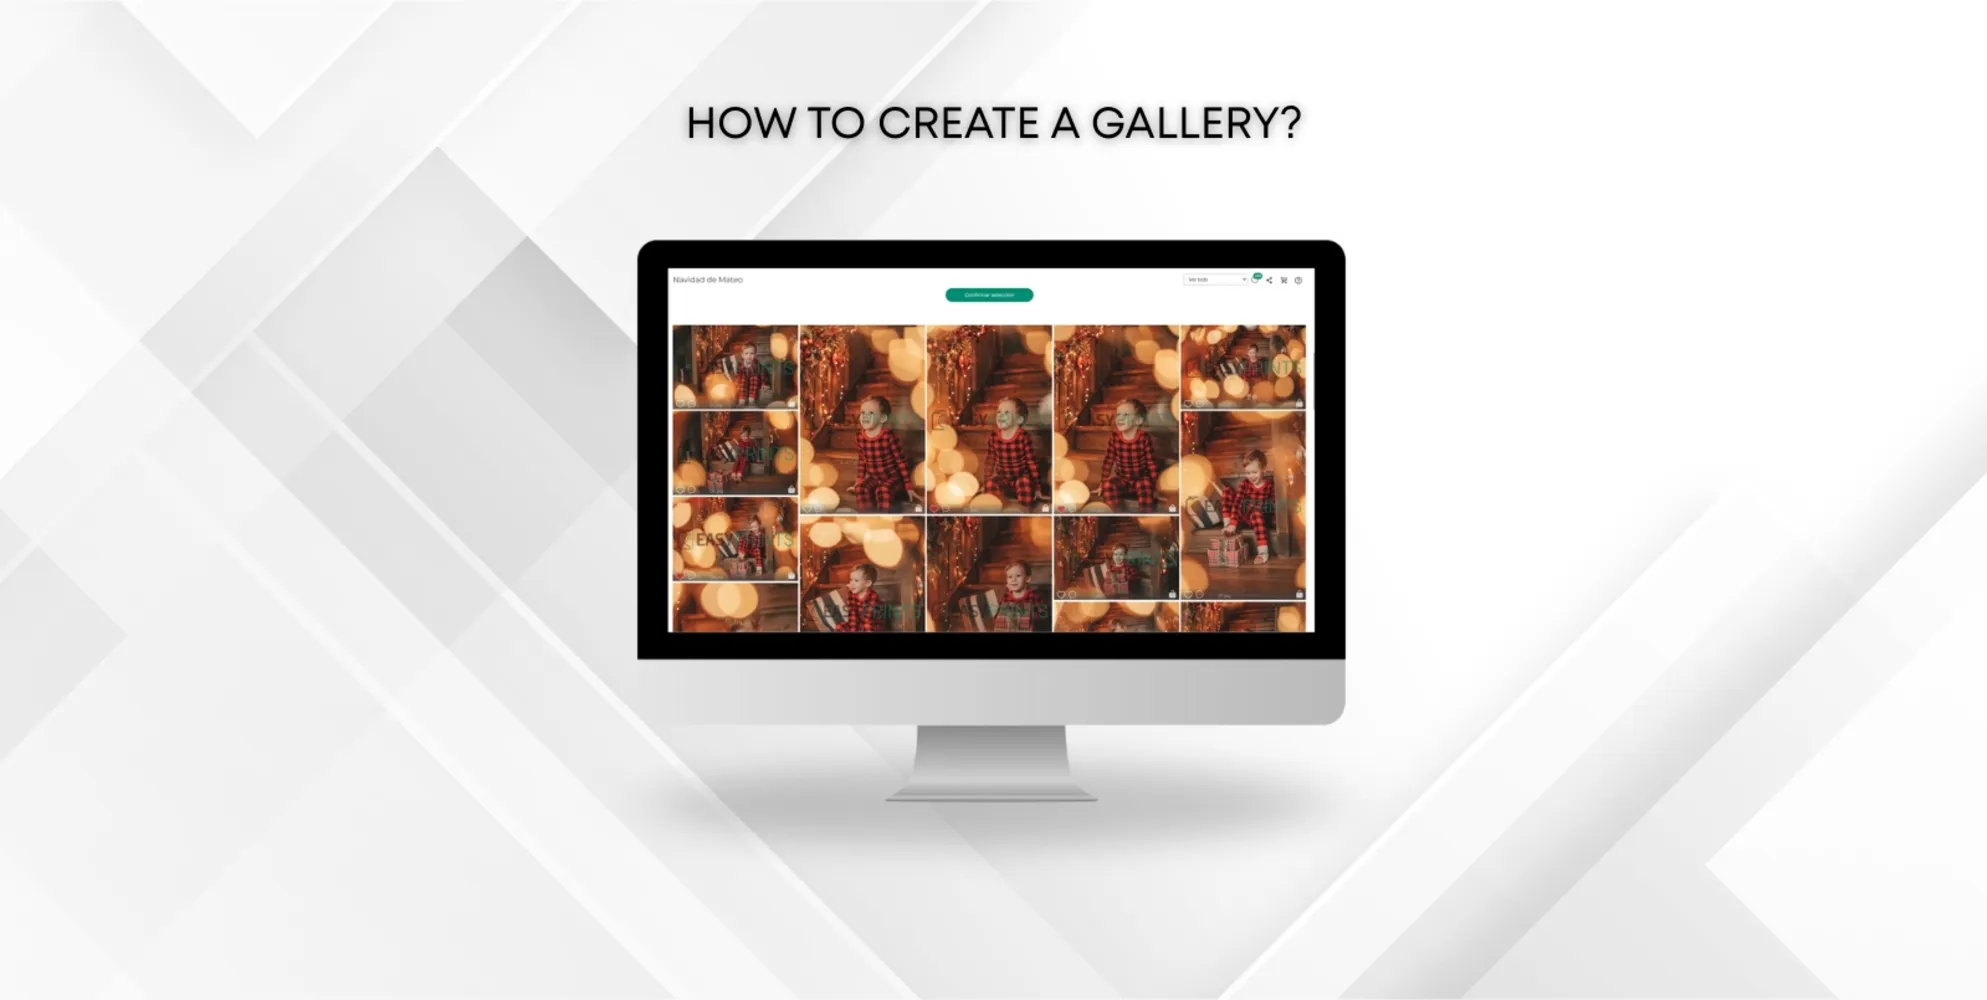
How to create a gallery
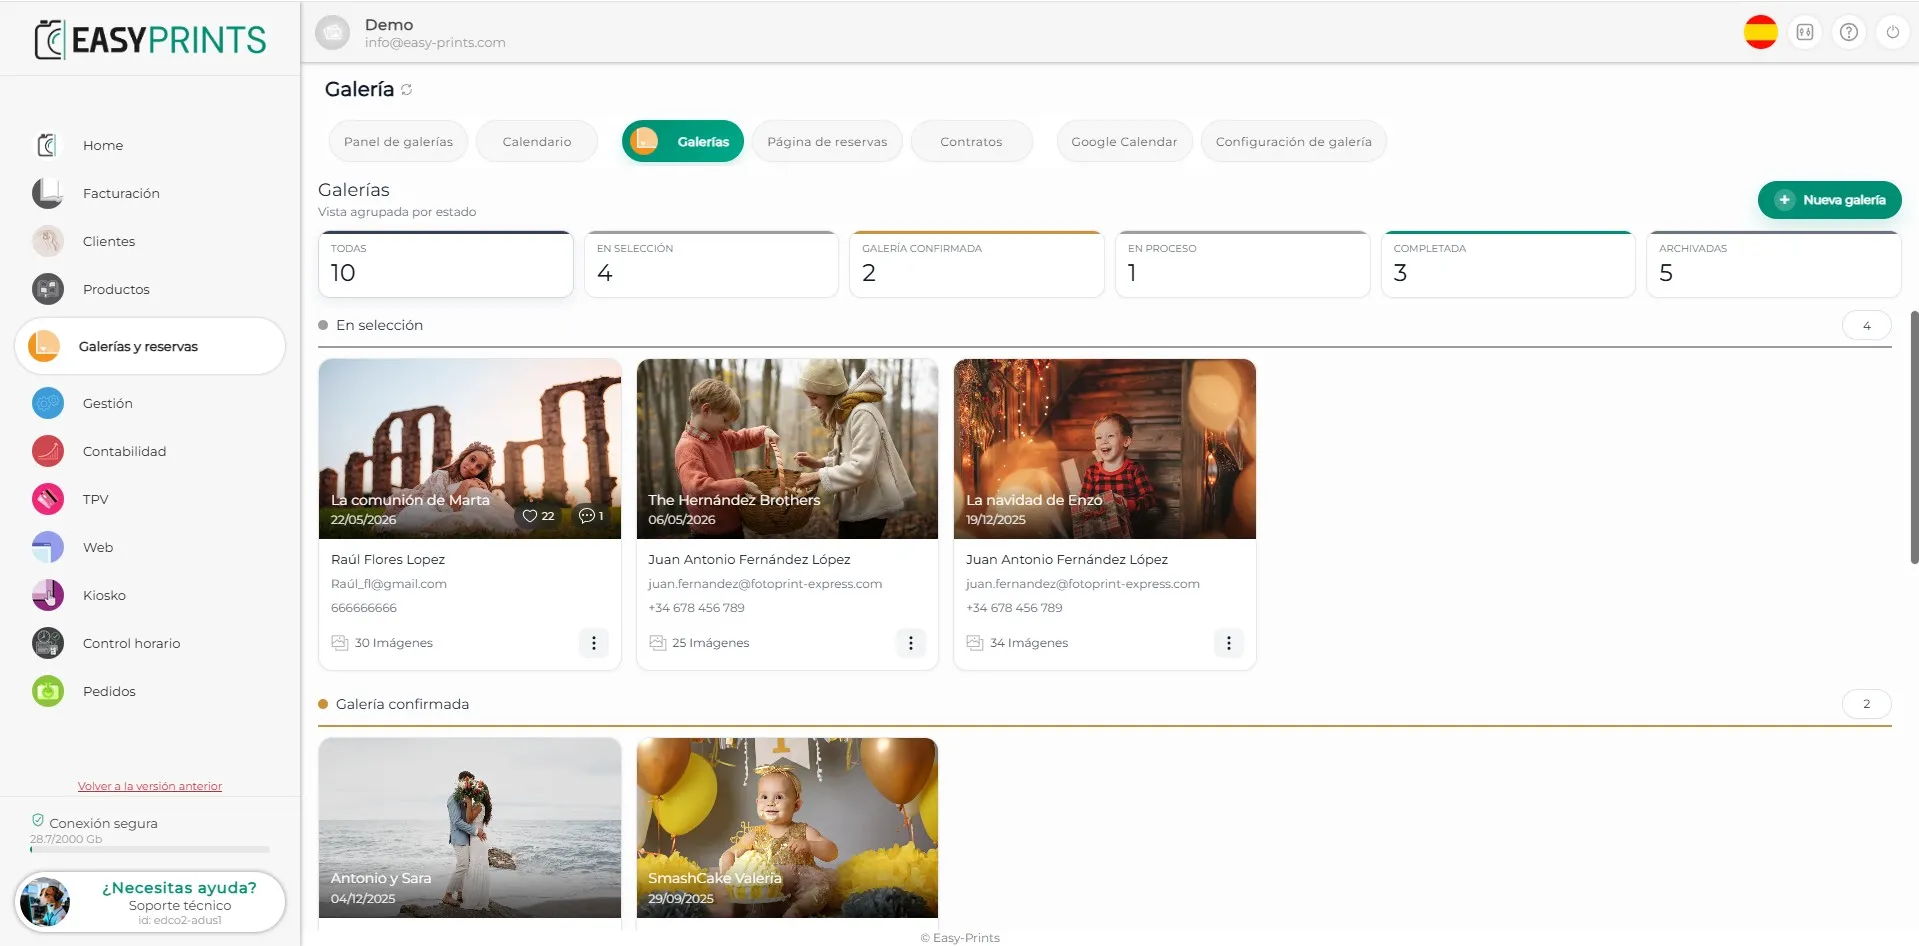
To create a gallery, go to the Galleries and bookings section in the left-hand menu. Once inside, go to the top bar and click Galleries. Then, click the gr…
Step 1
To create a gallery, go to the Galleries and bookings section in the left-hand menu. Once inside, go to the top bar and click Galleries. Then, click the green Create gallery button, located at the top right of the screen.
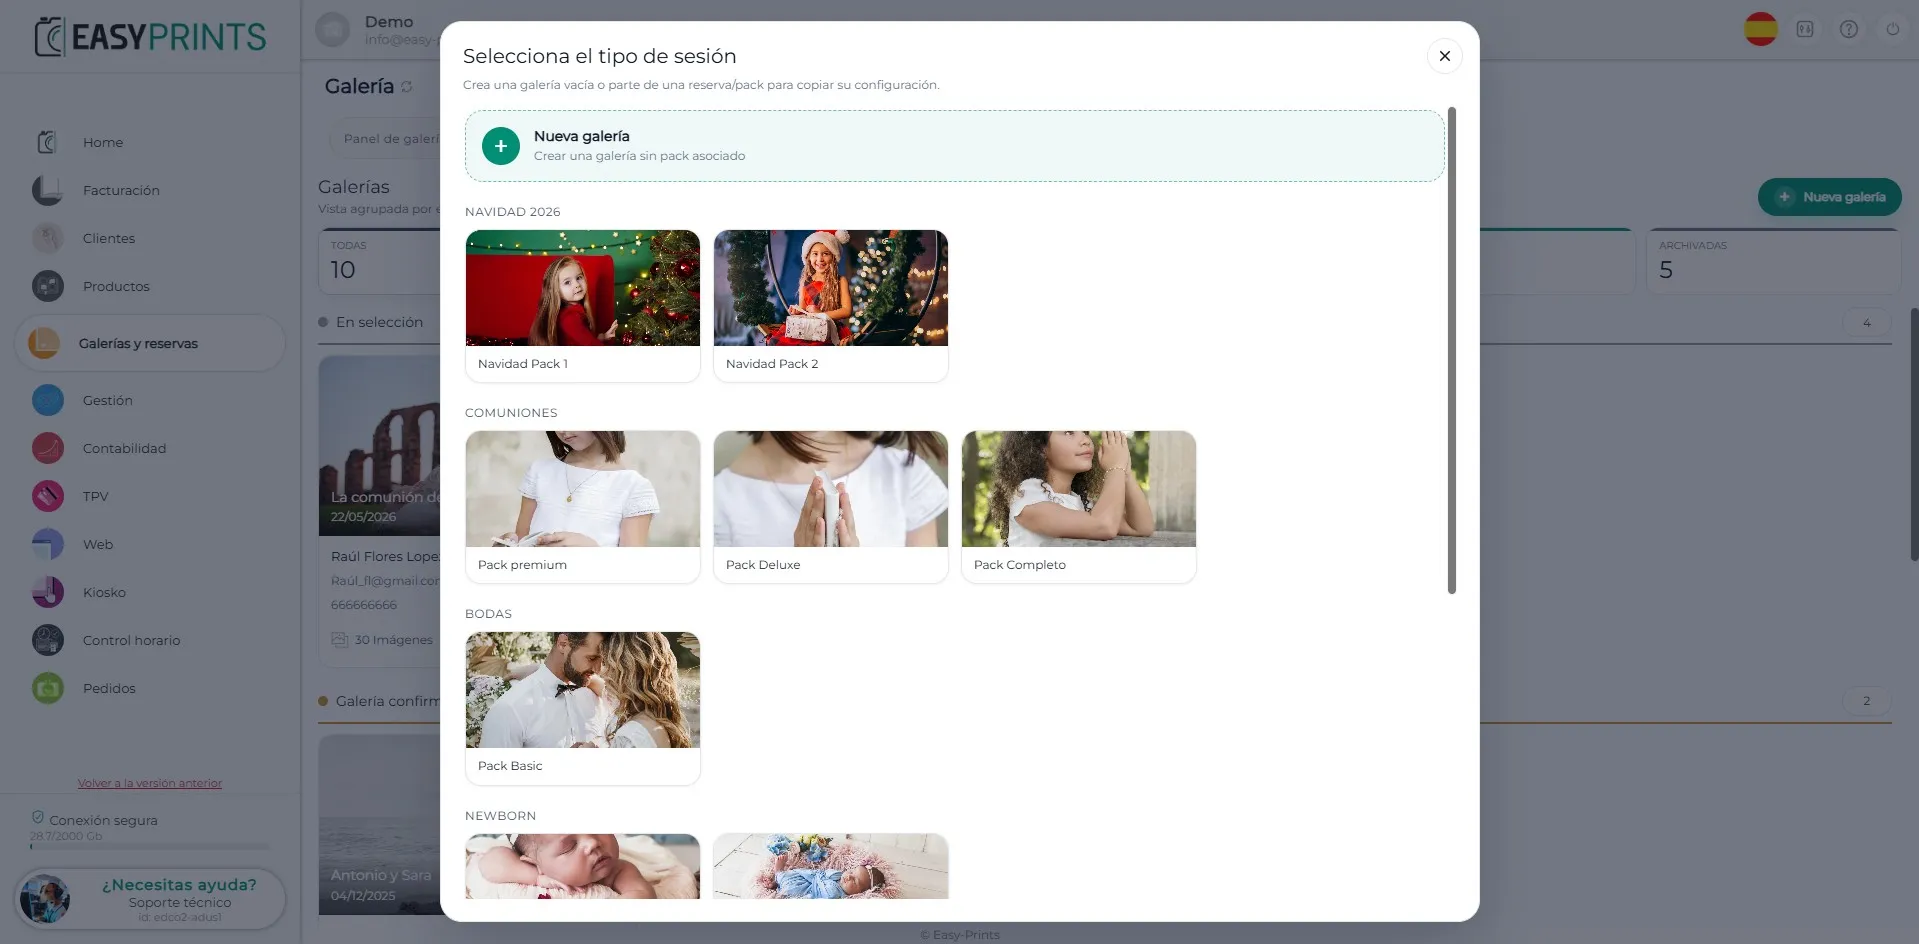
Step 2
In the new window, you will need to select the session type that you have previously created. If it does not match any of the existing sessions, you can create a session without an associated pack by clicking the green box.
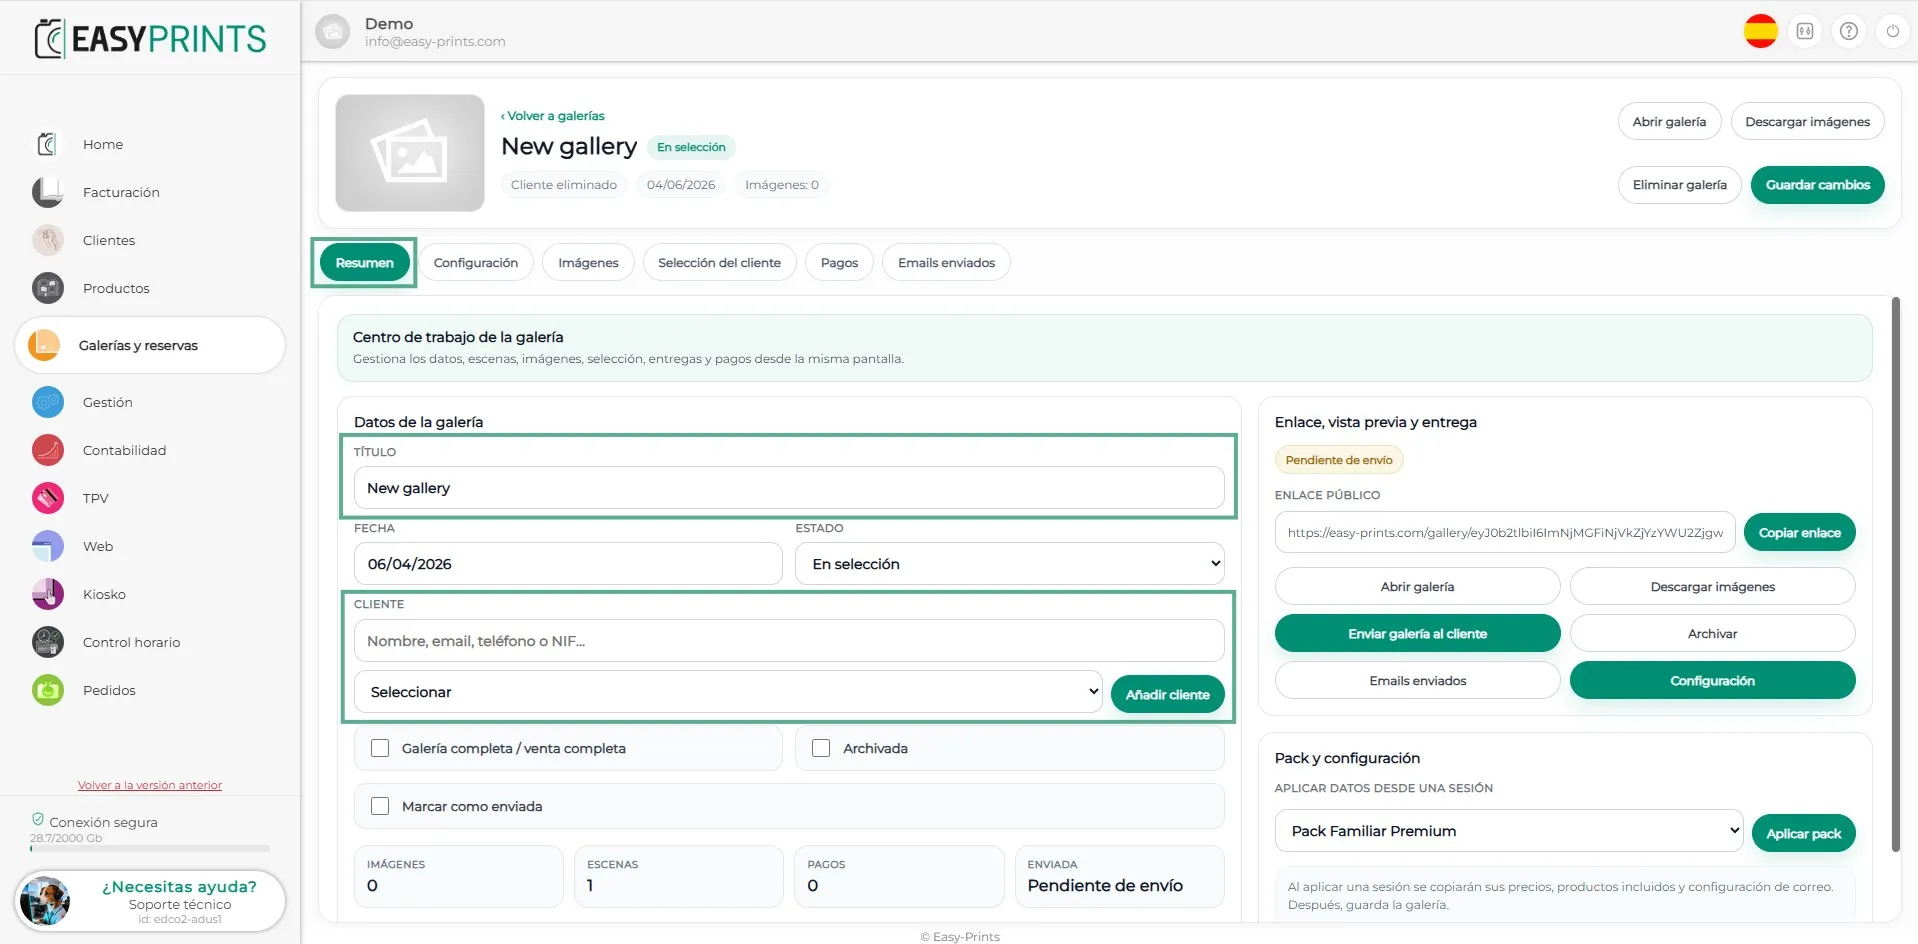
Step 3
Once the pack type has been selected, in the Summary section you will need to enter the gallery name, the corresponding date and the gallery status. By default, it will appear as In selection, although you can choose between: In selection, Gallery confirmed, In progress and Completed. You will also need to enter the client’s name or any information that allows you to identify them. Then, open the dropdown menu and select the corresponding client. If the client has not been created yet, you can add them by clicking the Add client button. The Link, Preview and Delivery sections will be left until the end, as they will be used once the images have been uploaded to the gallery.
Step 4
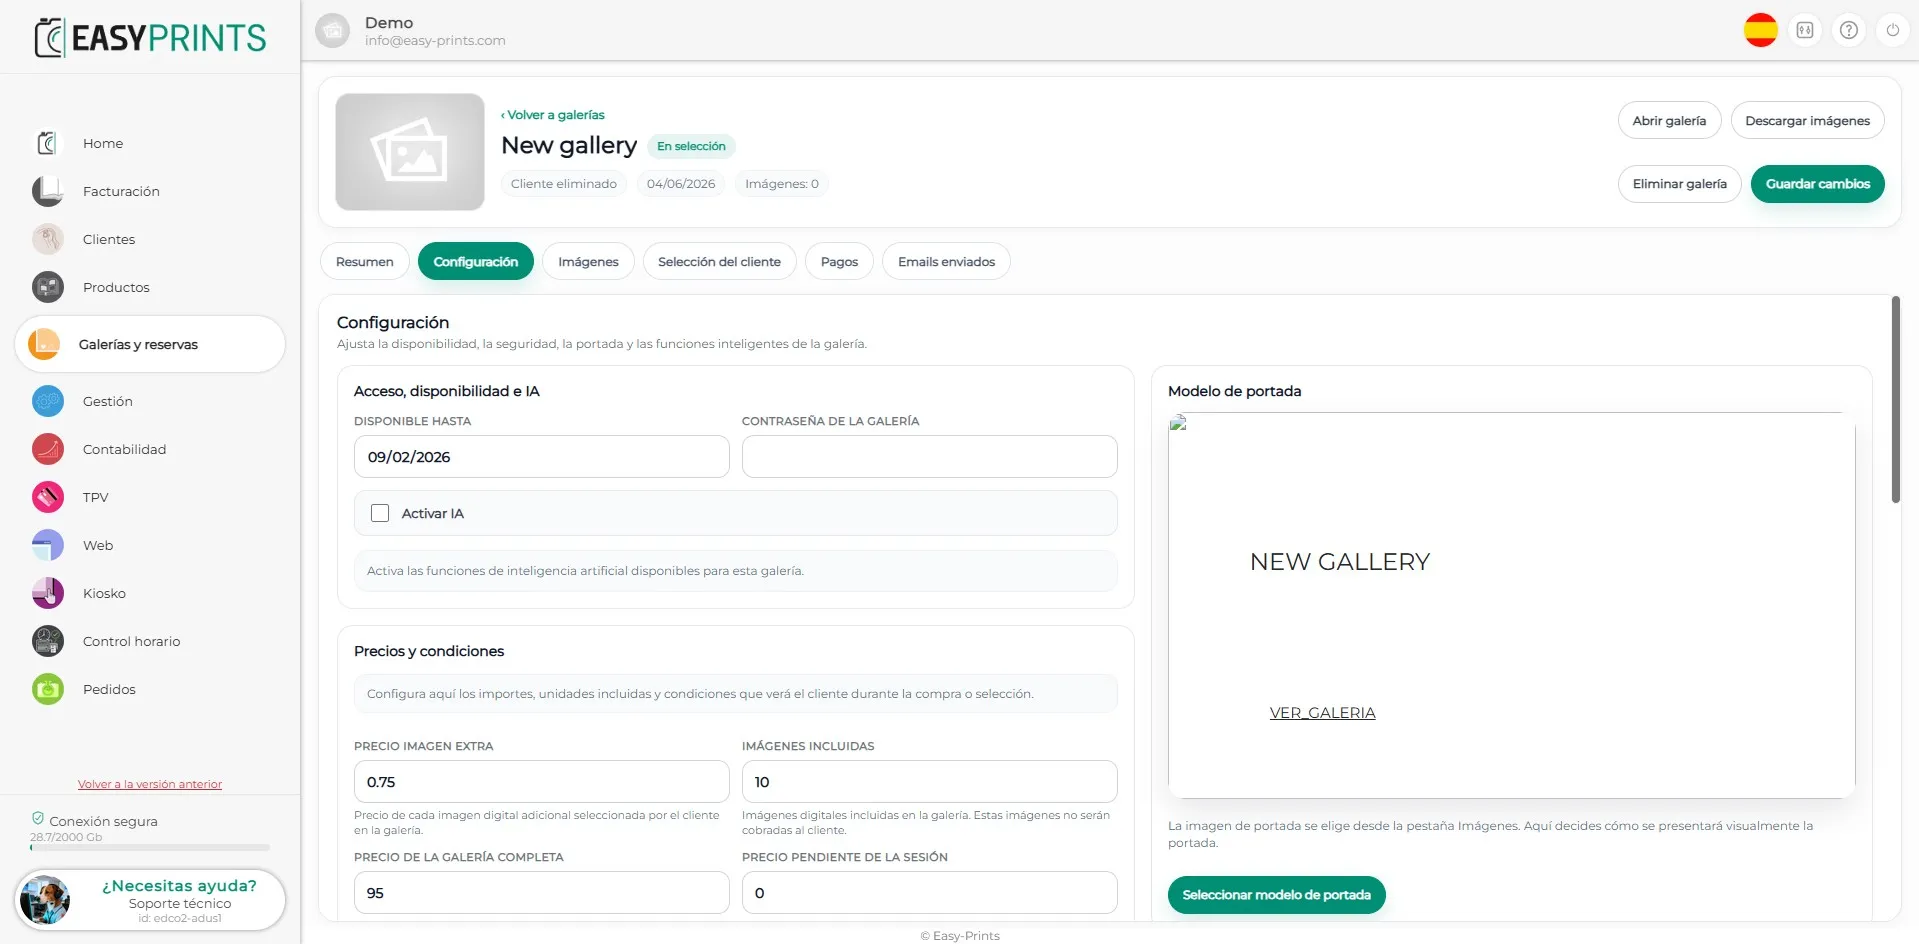
In the Settings section, you will need to indicate until which date you want the gallery to remain active. You can also enter a password to access it, if desired. In addition, you can enable AI, which helps with facial recognition when the photo session involves a group of people.
Step 5
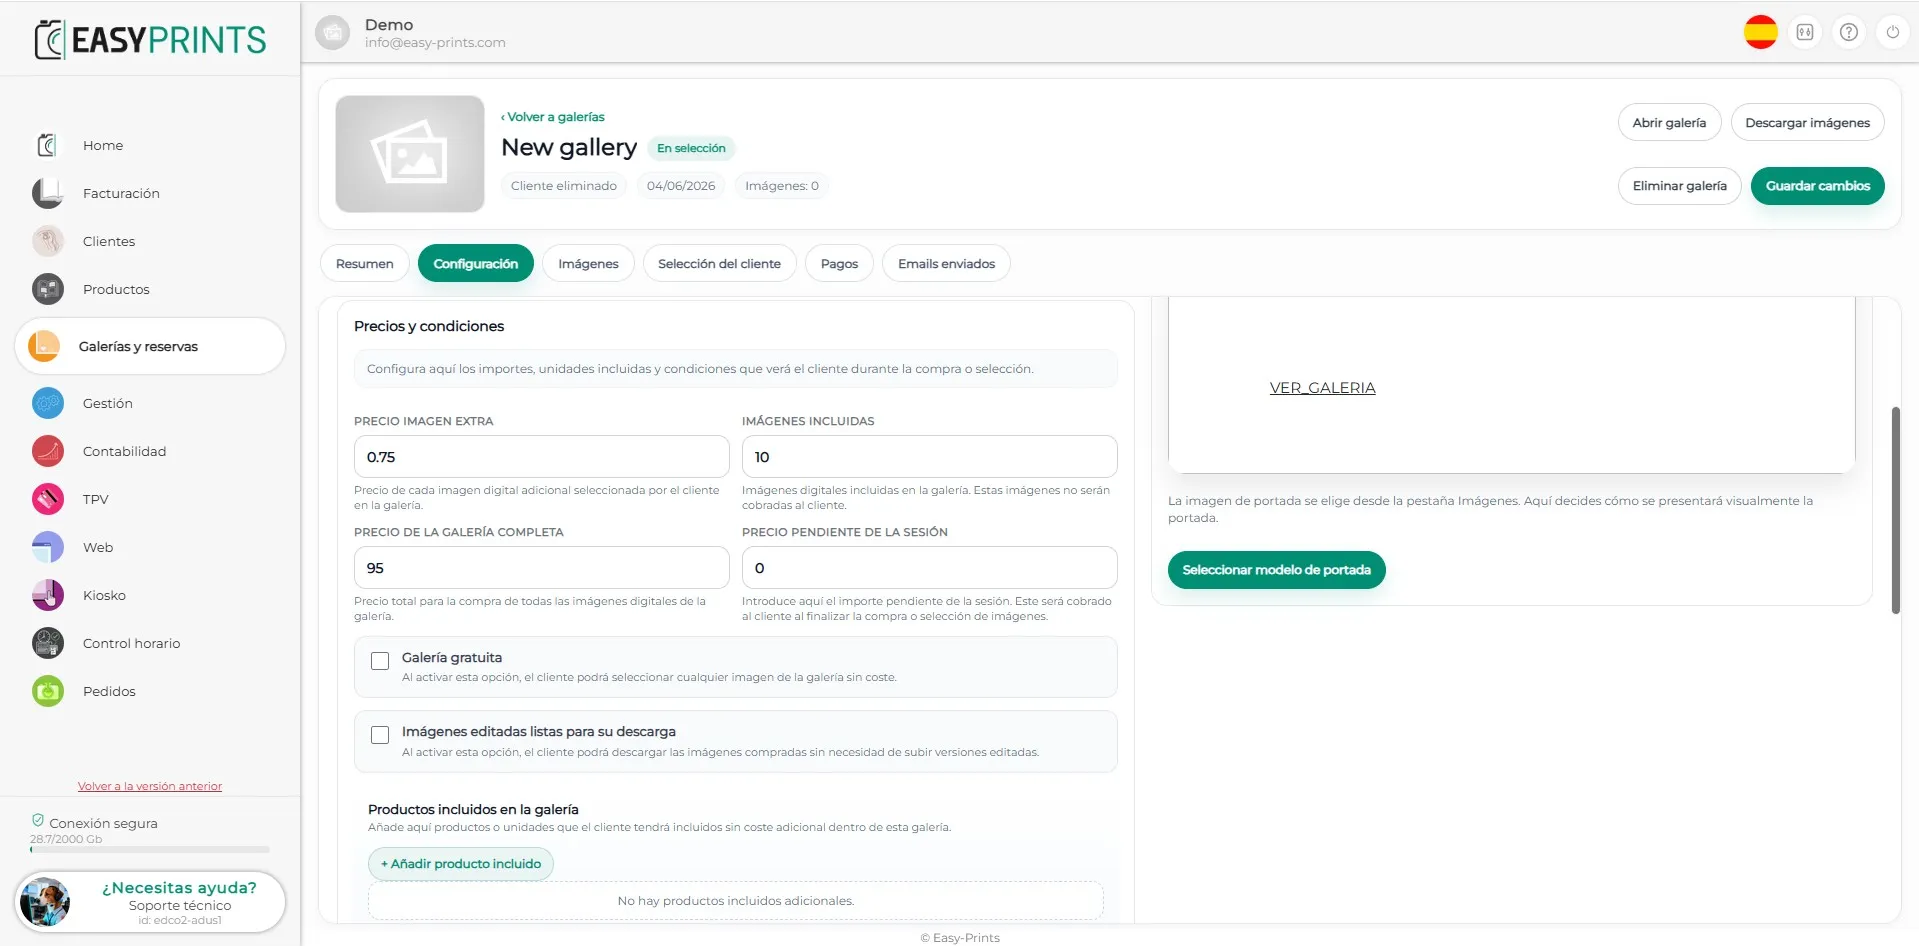
In the Settings section, you will also find the Prices and conditions section. By default, this section will show the images included in the pack and the price of each extra image. However, you can modify both the number of included images and their price. You can also enable the Free gallery option; when enabled, the client will be able to select any image from the gallery at no cost. In addition, you can enable the Edited images ready for download option; by doing so, the client will be able to download the purchased images without needing to upload edited versions. In addition to the products included in the photo session pack, you can add extra products by clicking the green + Add included product button.
Step 6
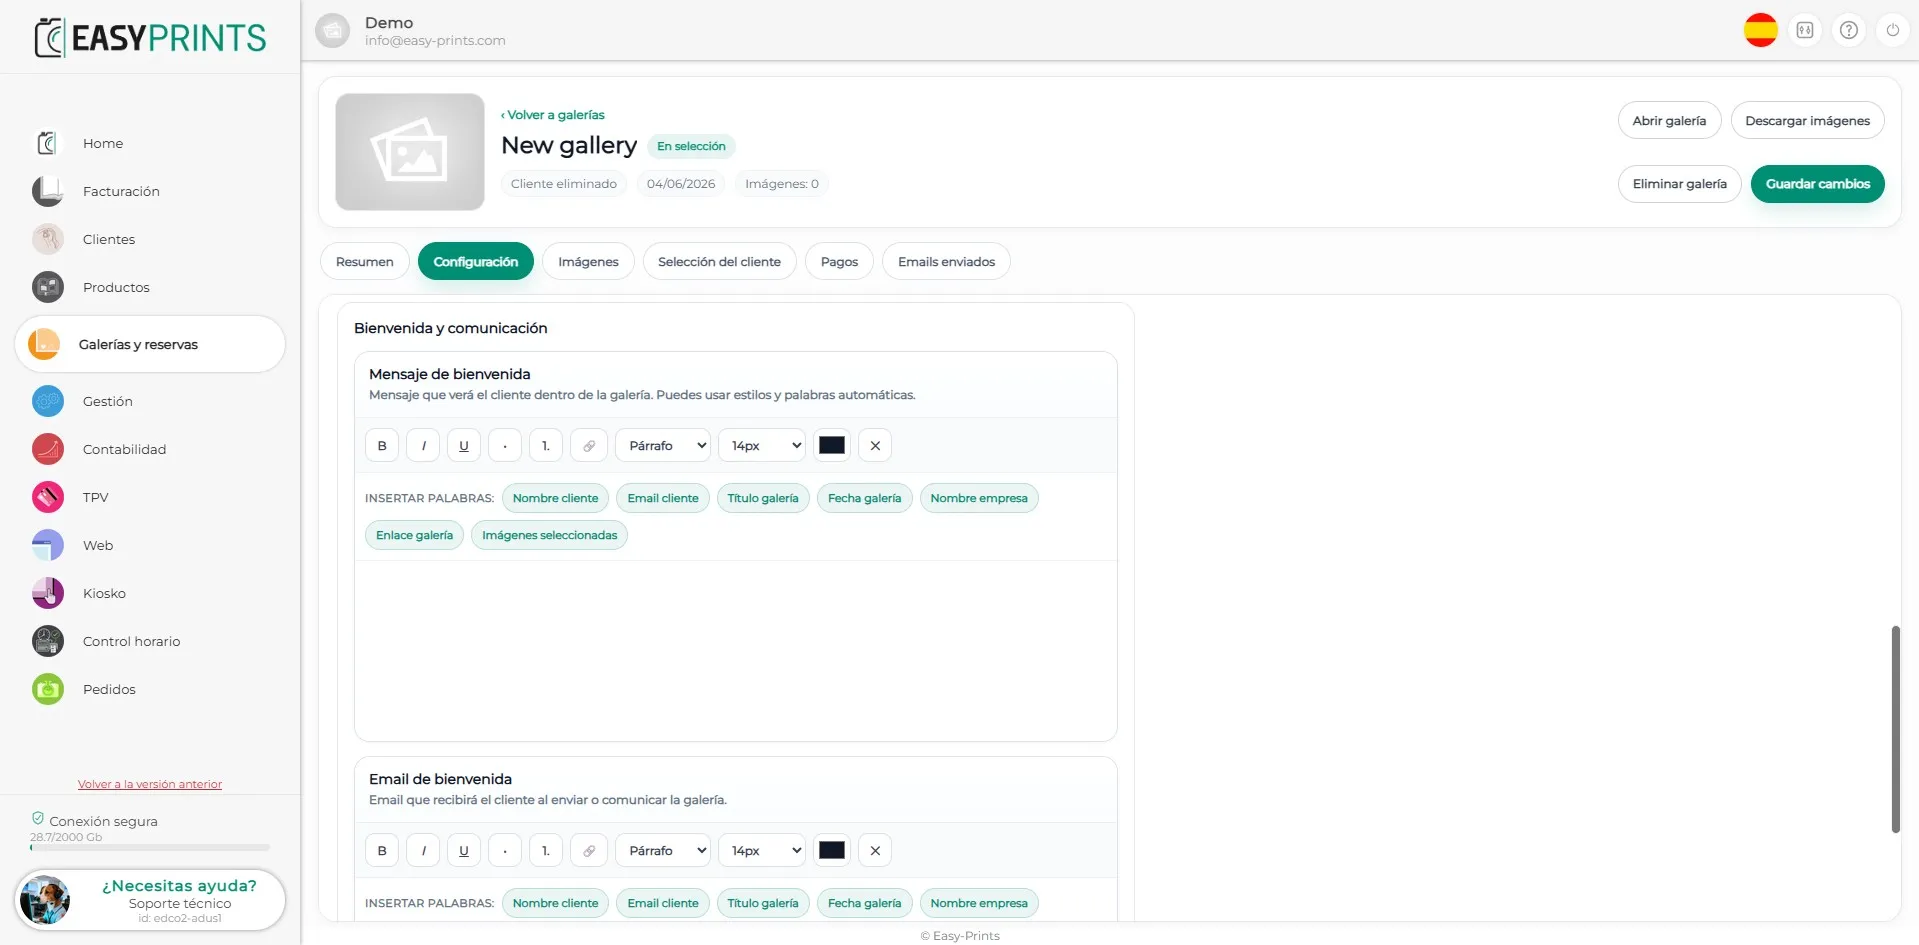
In the Settings section, you will also find the welcome email that the client will receive when you send the gallery email.
Step 7
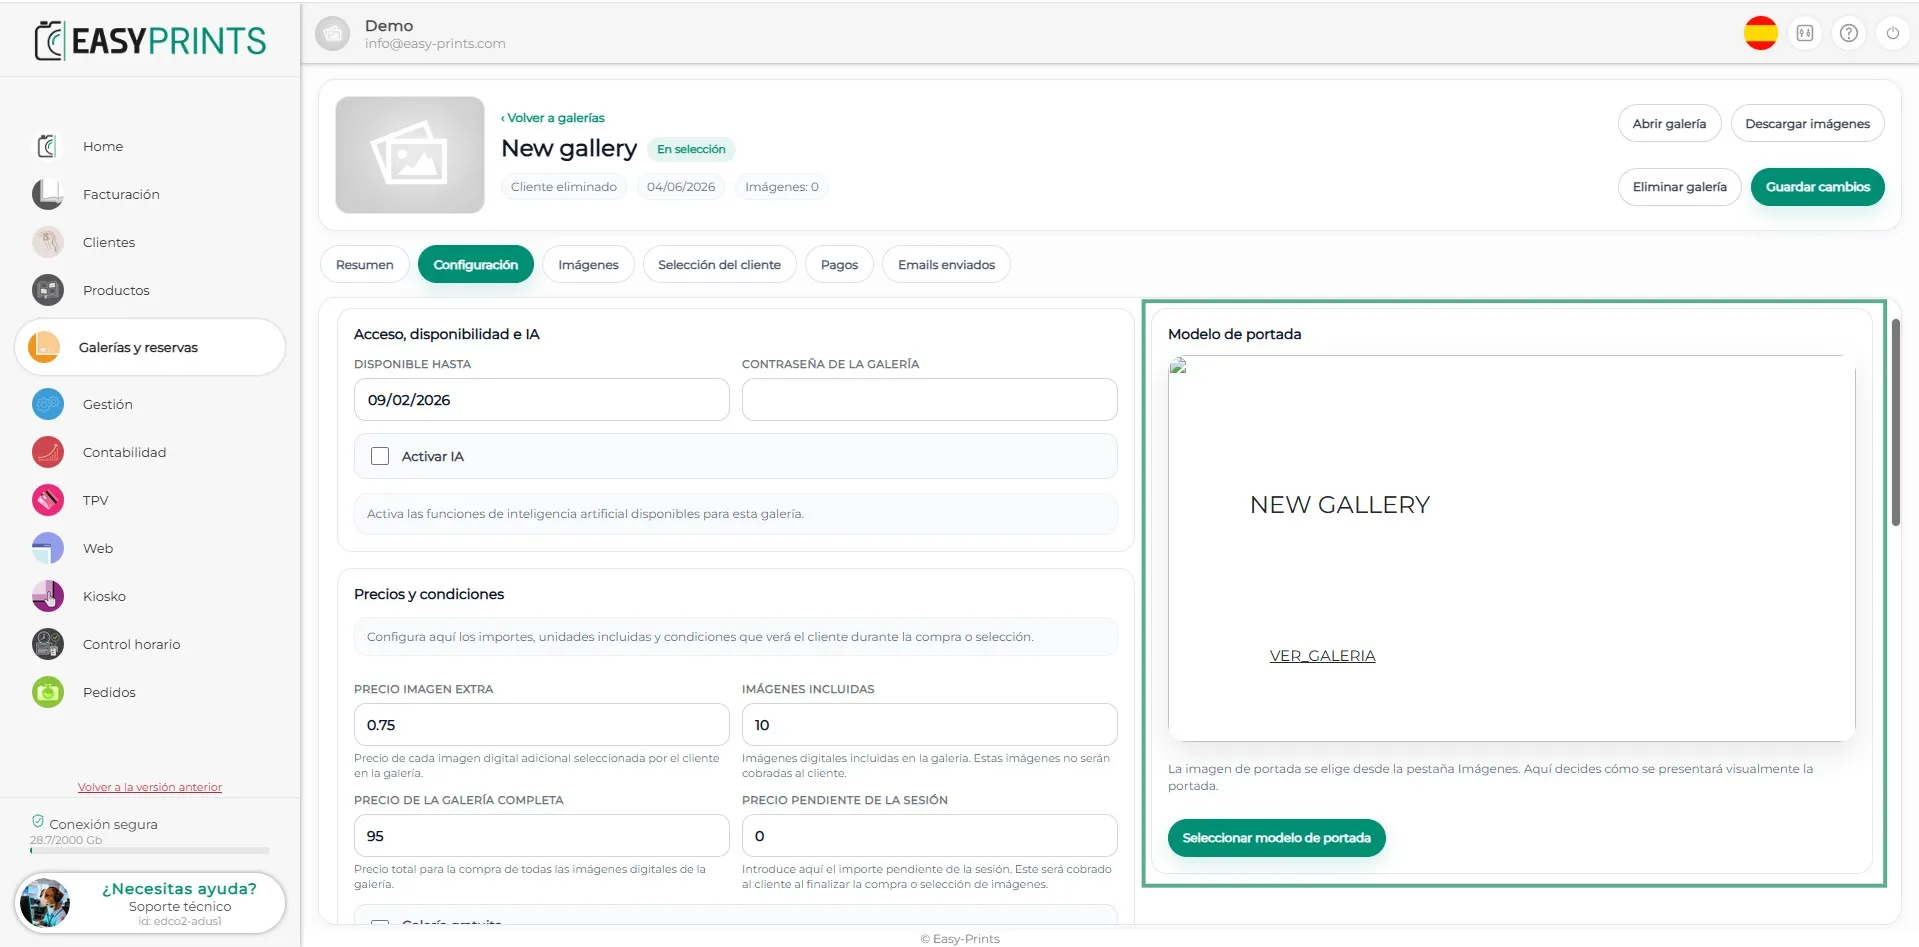
To finish the setup, you will need to indicate which gallery model you want to display.
Step 8
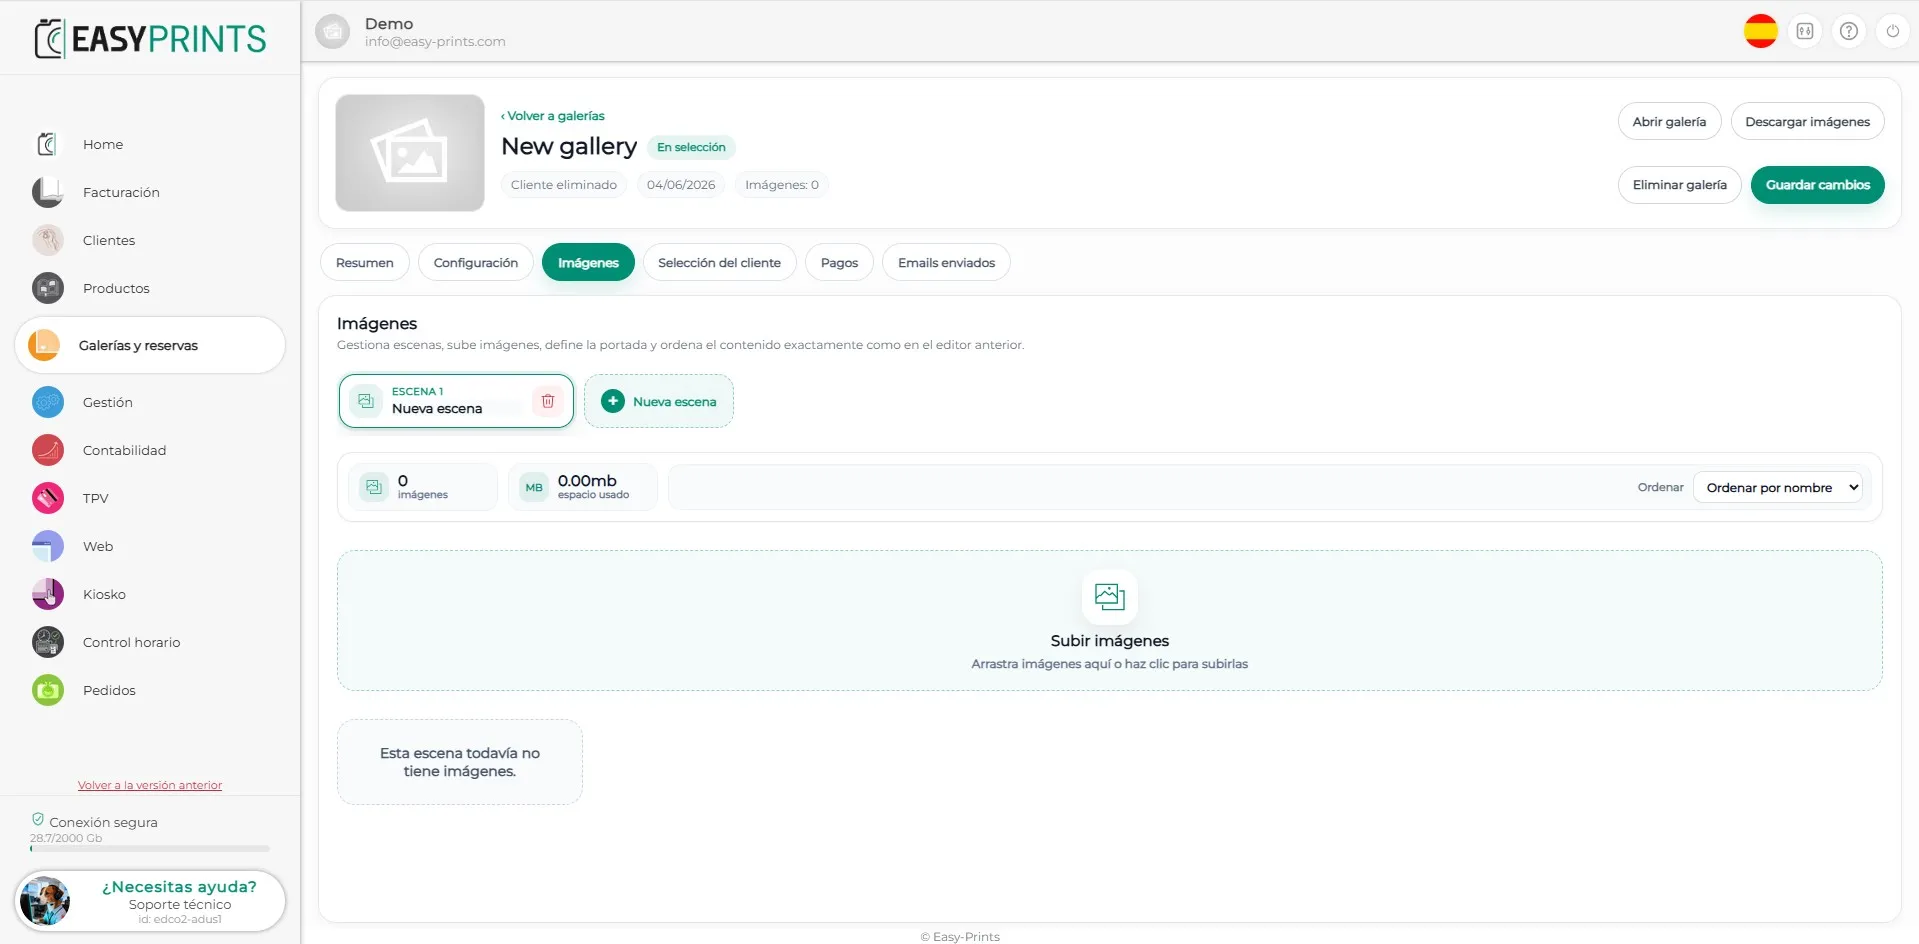
In the Images section, you can upload the photos by clicking the green Upload images box. You can also create different scenes and assign a different name to each one. By default, only one scene will be created. To add more scenes, click New scene.
Step 9
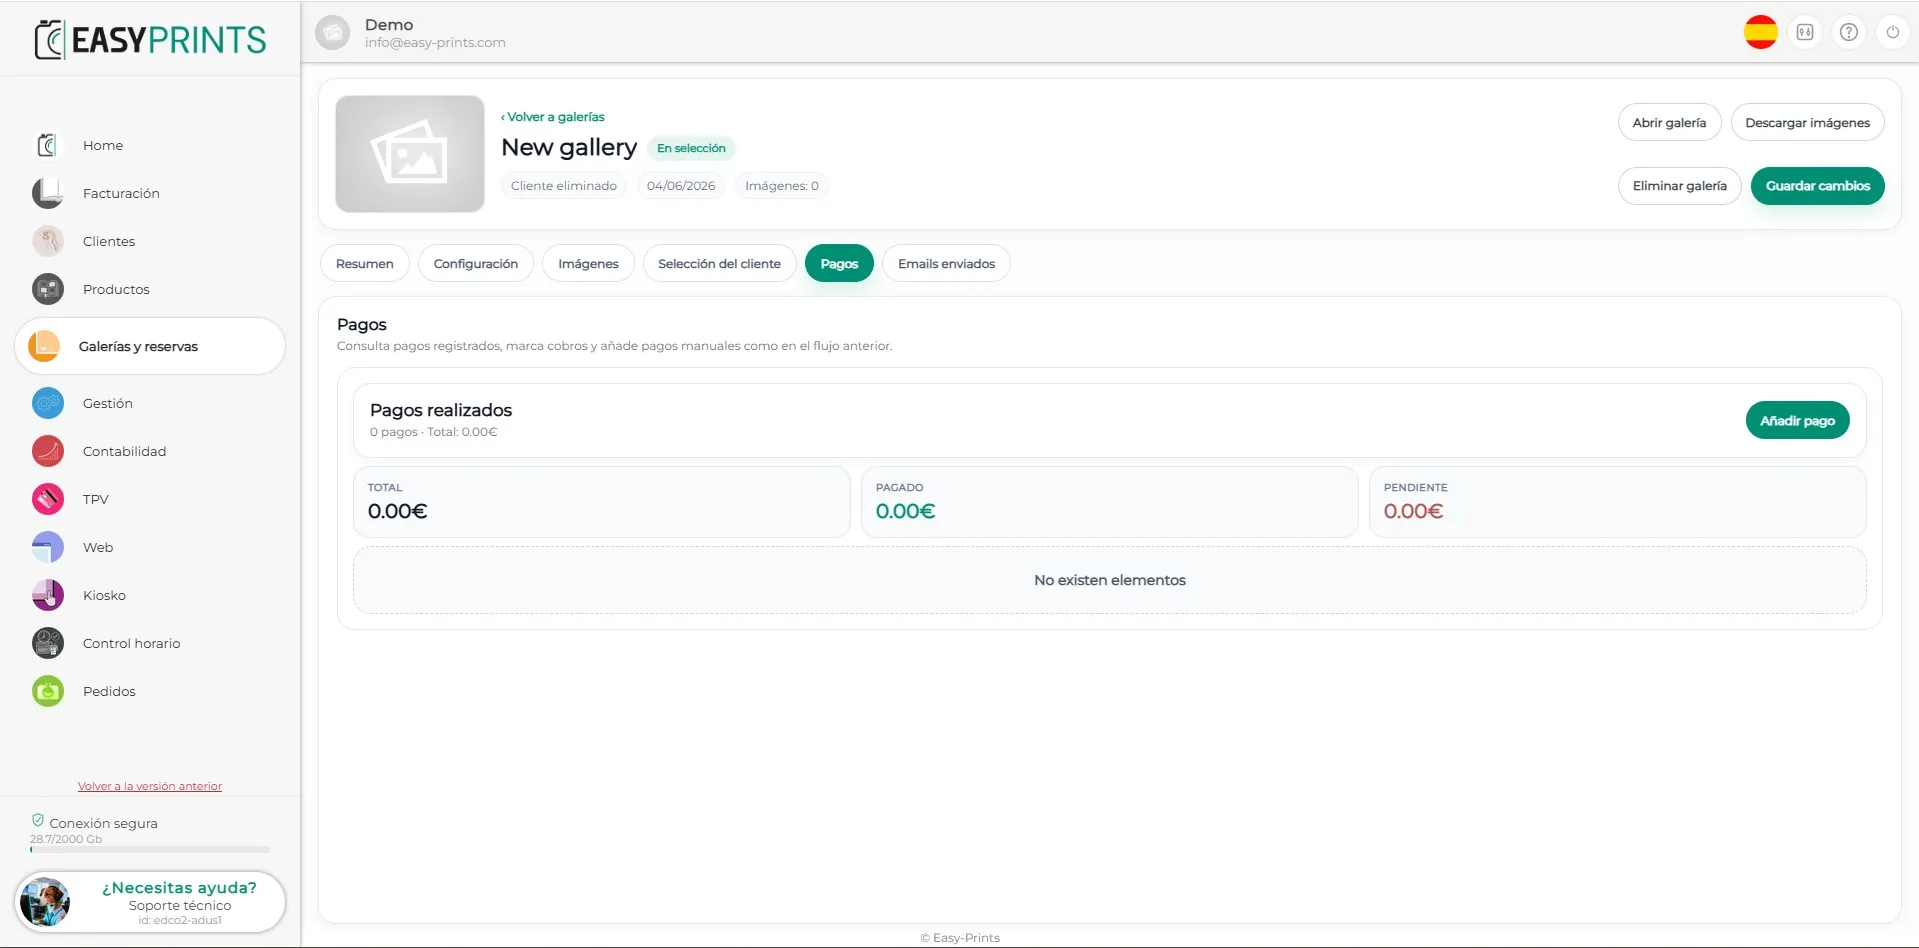
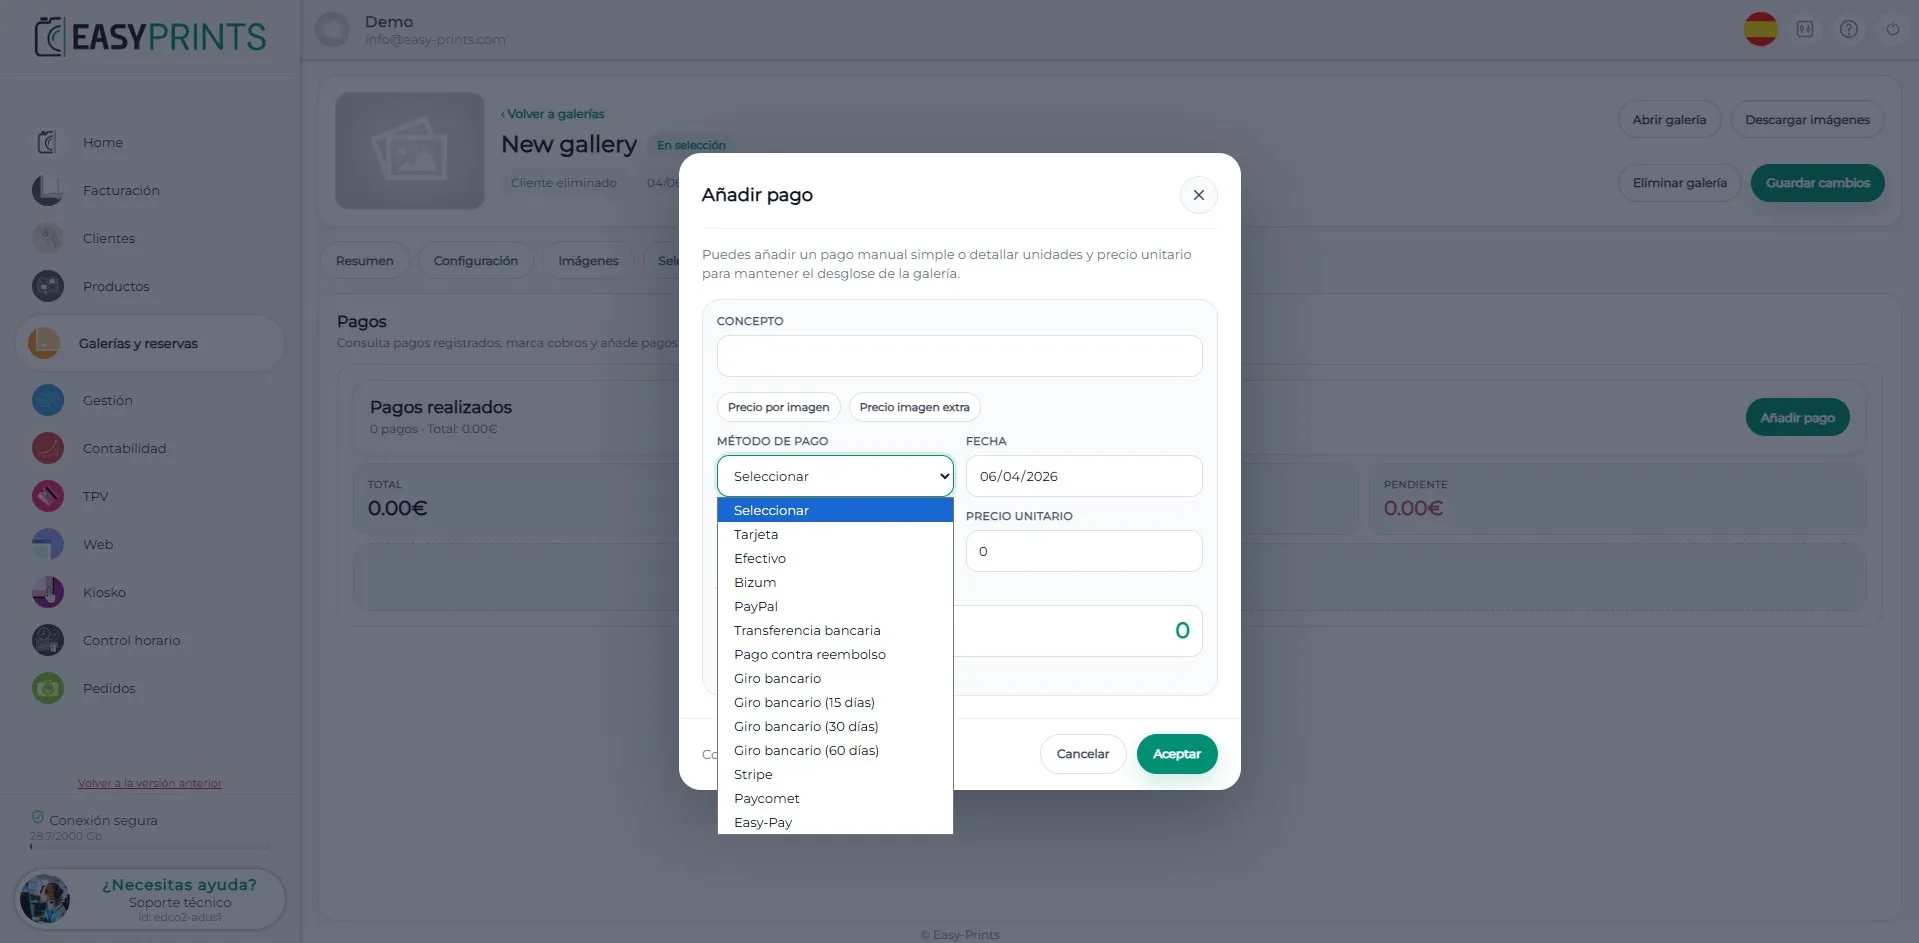
In the Payments section, to add a payment, you will need to click the green Add payment button.
Step 10
Step 11
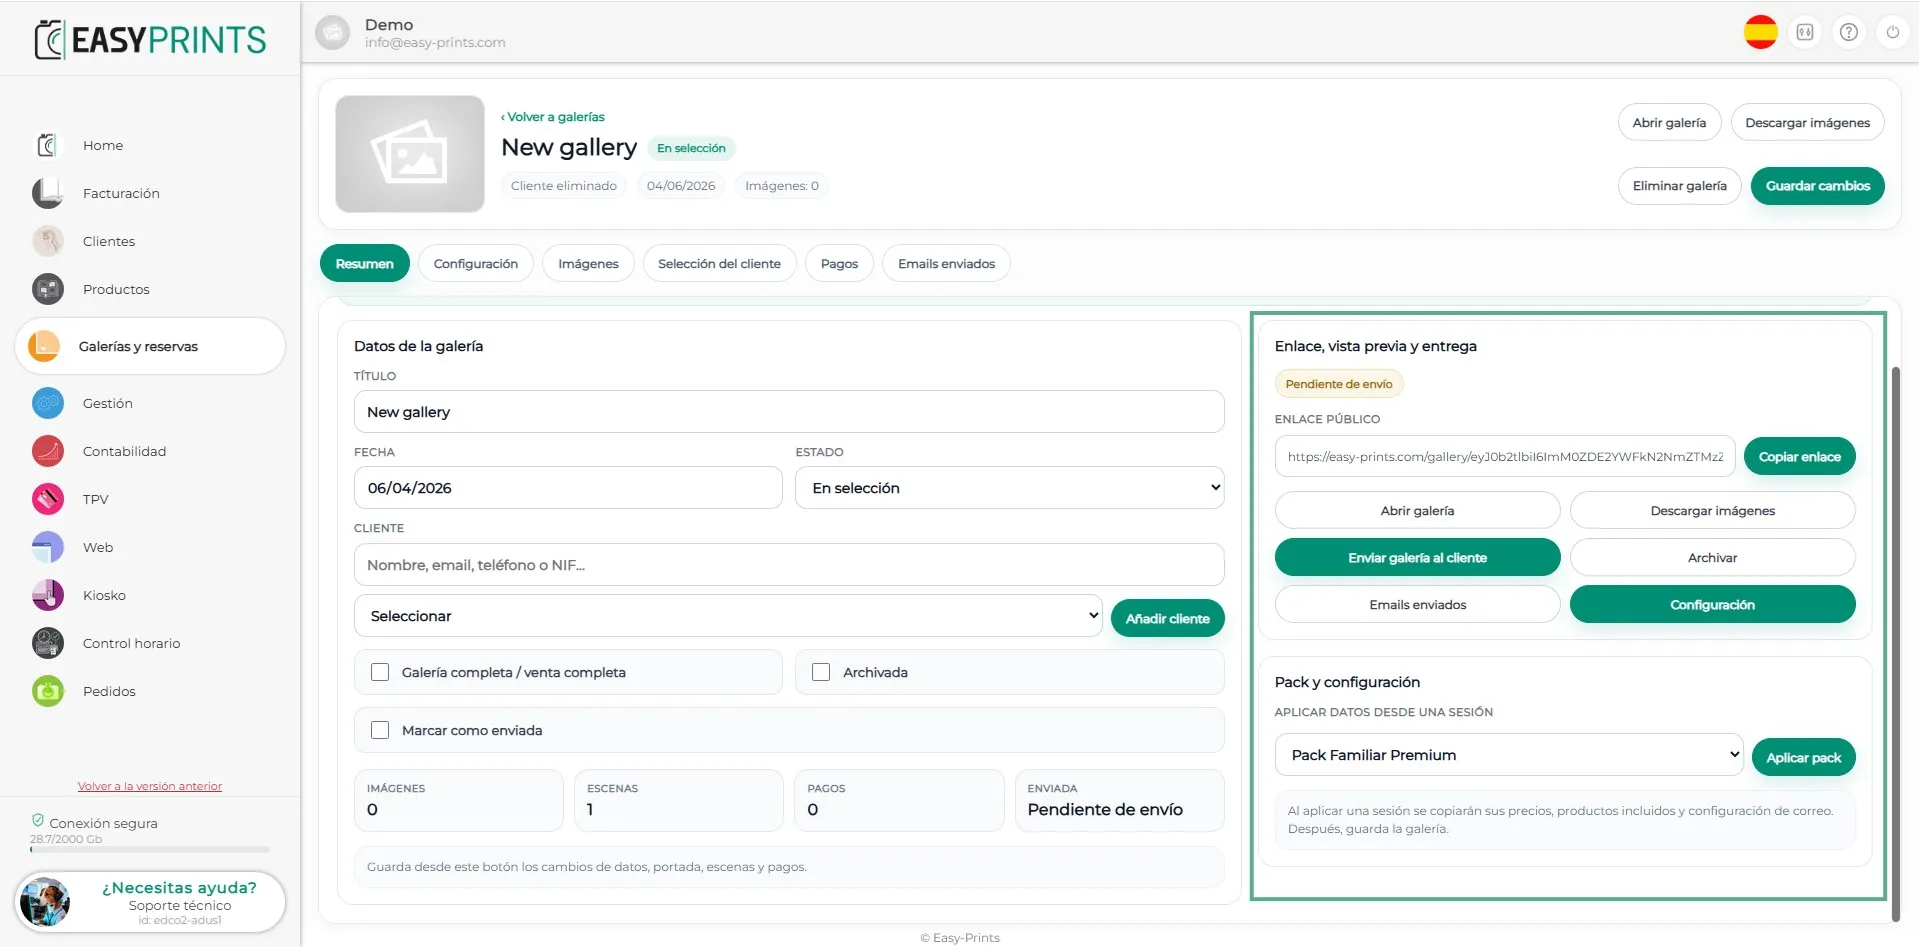
Finally, returning to the Summary section, you will find the Link, Preview and Delivery options. From here, you can send the email to the client by clicking the corresponding button, or copy the link and send it via WhatsApp or another method. Make sure to save the gallery by clicking the Save changes button, located at the top right.
Go back to the Help Center or contact Easy-Prints.
← Back to Help Center