
Product price scaling
To configure price scaling, access the Products section from the left-hand side menu. Once inside, select the Products option in the top bar. Next, you ca…
Step 1
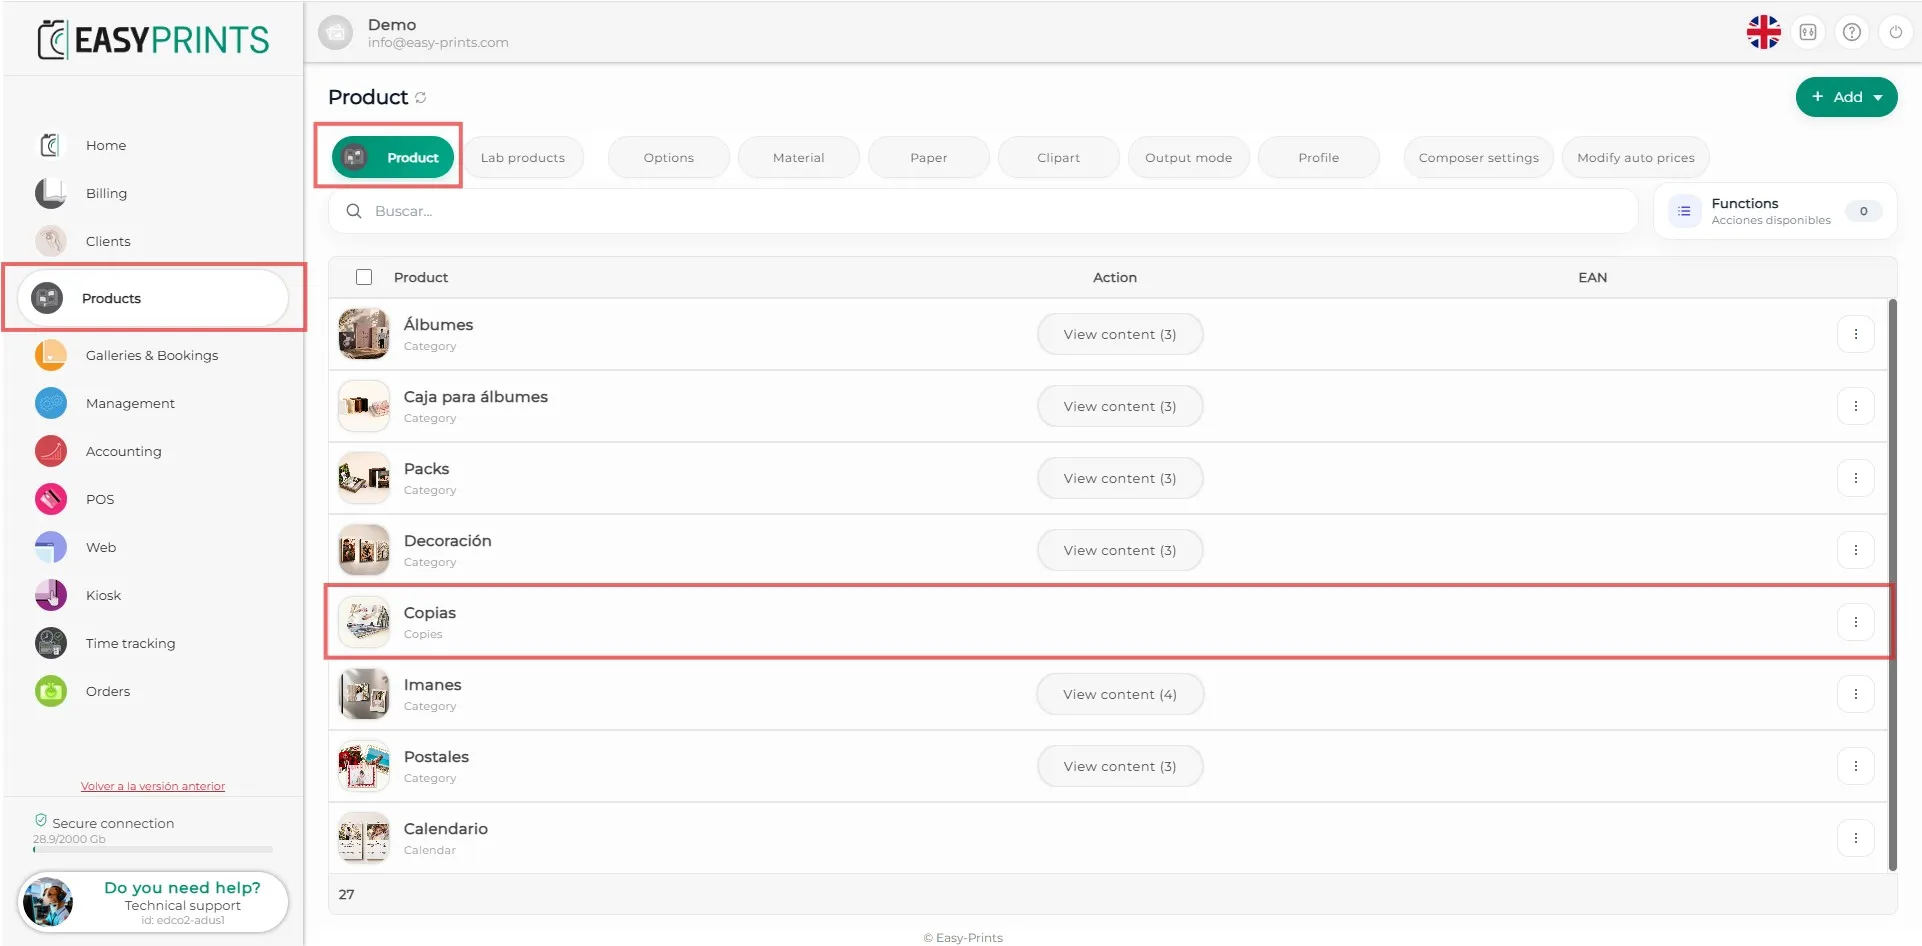
To configure price scaling, access the Products section from the left-hand side menu. Once inside, select the Products option in the top bar. Next, you can create a new product or choose an existing one to which you want to apply price scaling. In this example, we will use the Photo Prints product.
Step 2
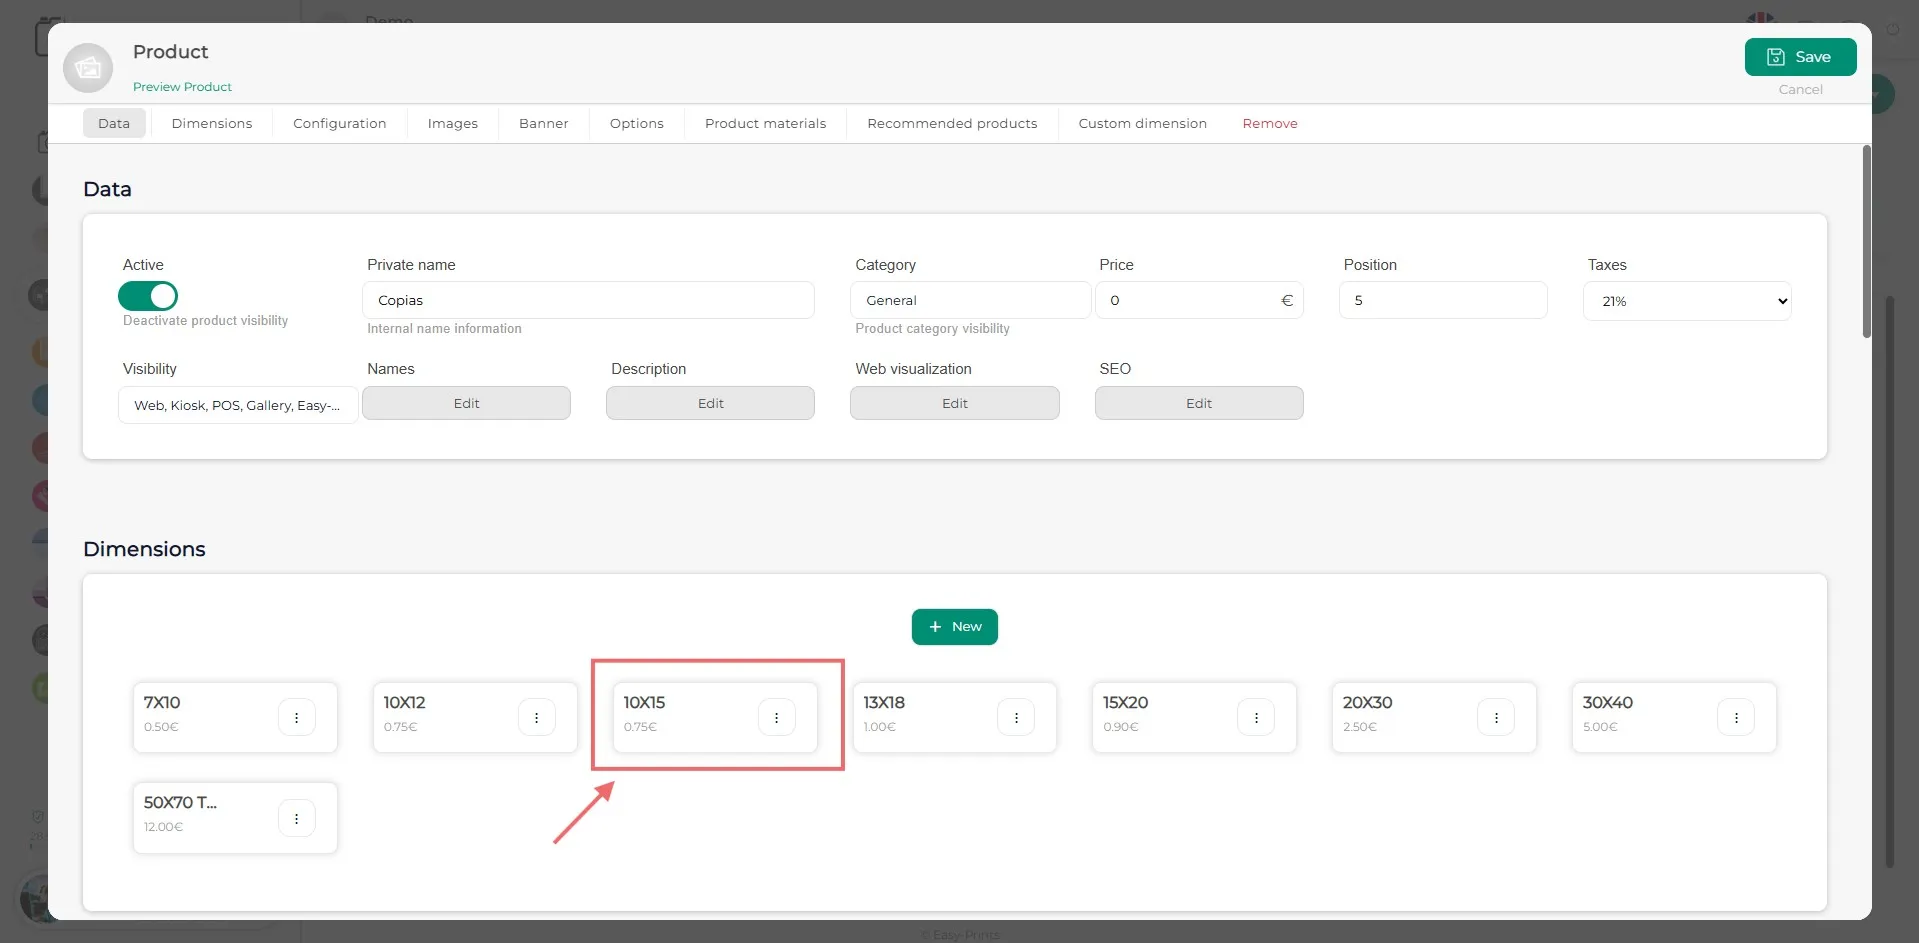
Within the product, in the General section, a main price can be set. However, if a dimension is created and price scaling is configured within it, that scaling will override the product’s main price. To add it, click on one of the existing dimensions. If you are creating a new product, you will first need to create a new dimension. In this example, we will use the 10 × 15 cm size.
Step 3
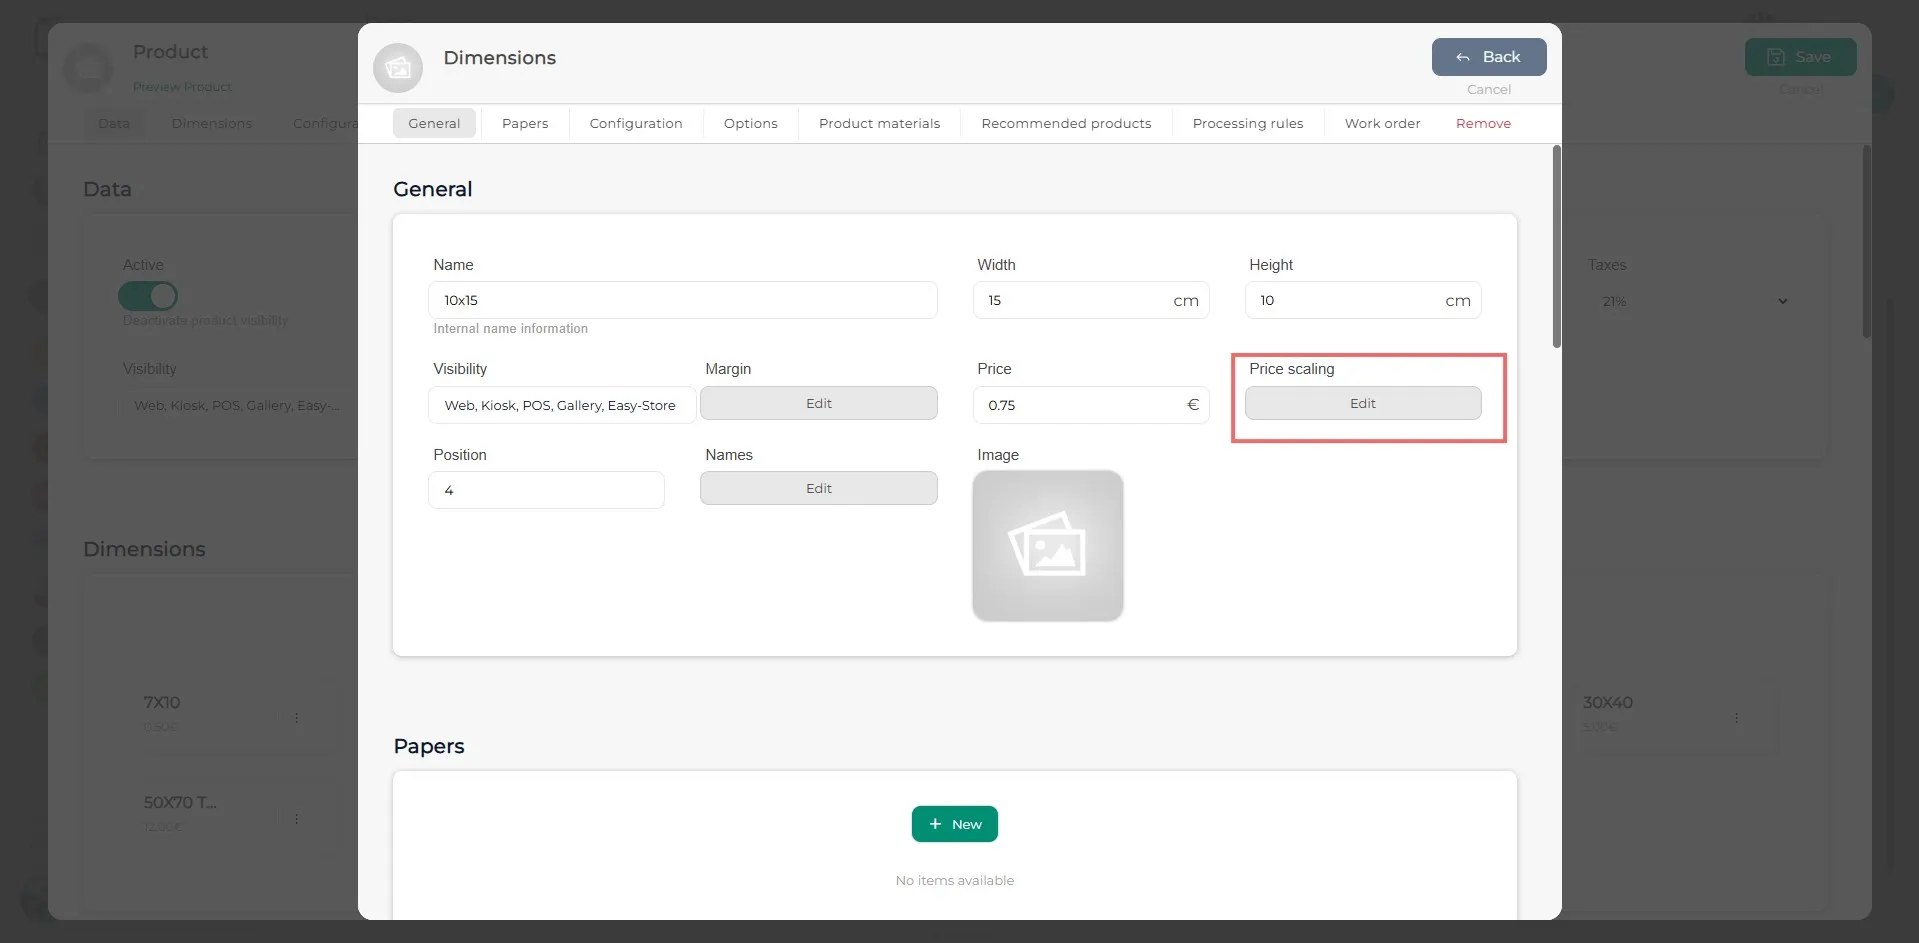
Within the dimension, in the General section, you will find the Price scaling button.
Step 4
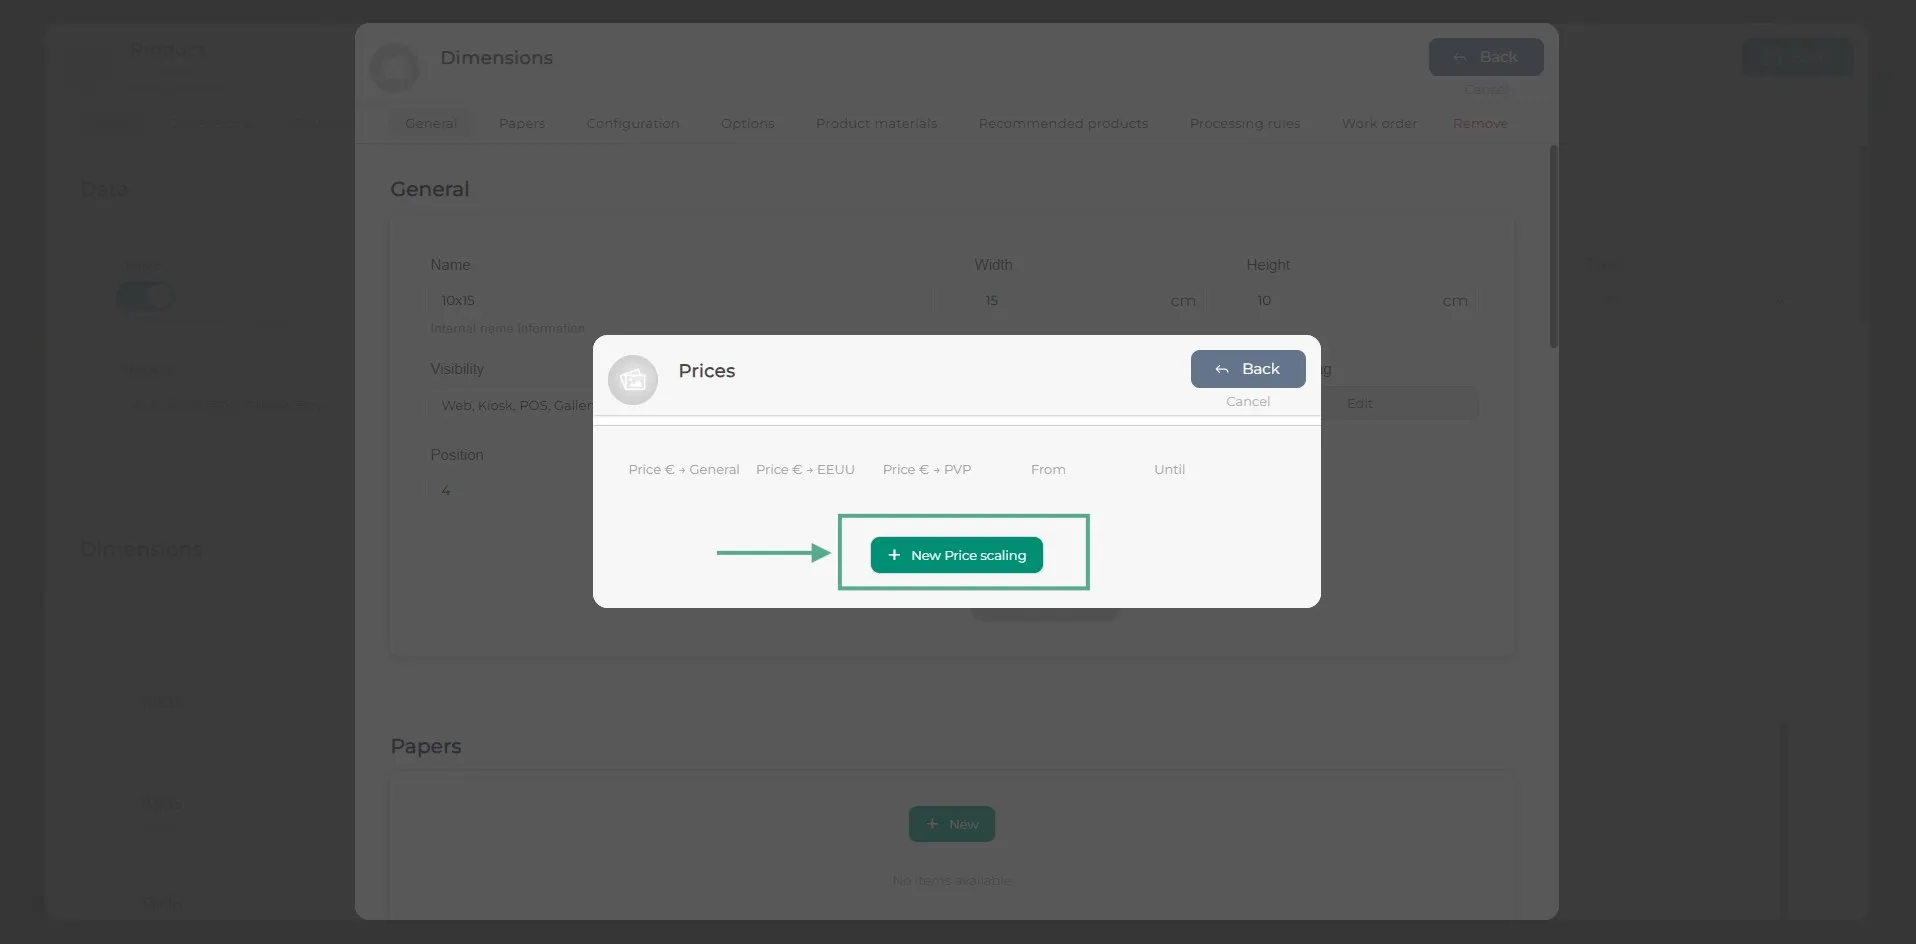
In the new window, click the green + New price scale button to add a new line.
Step 5
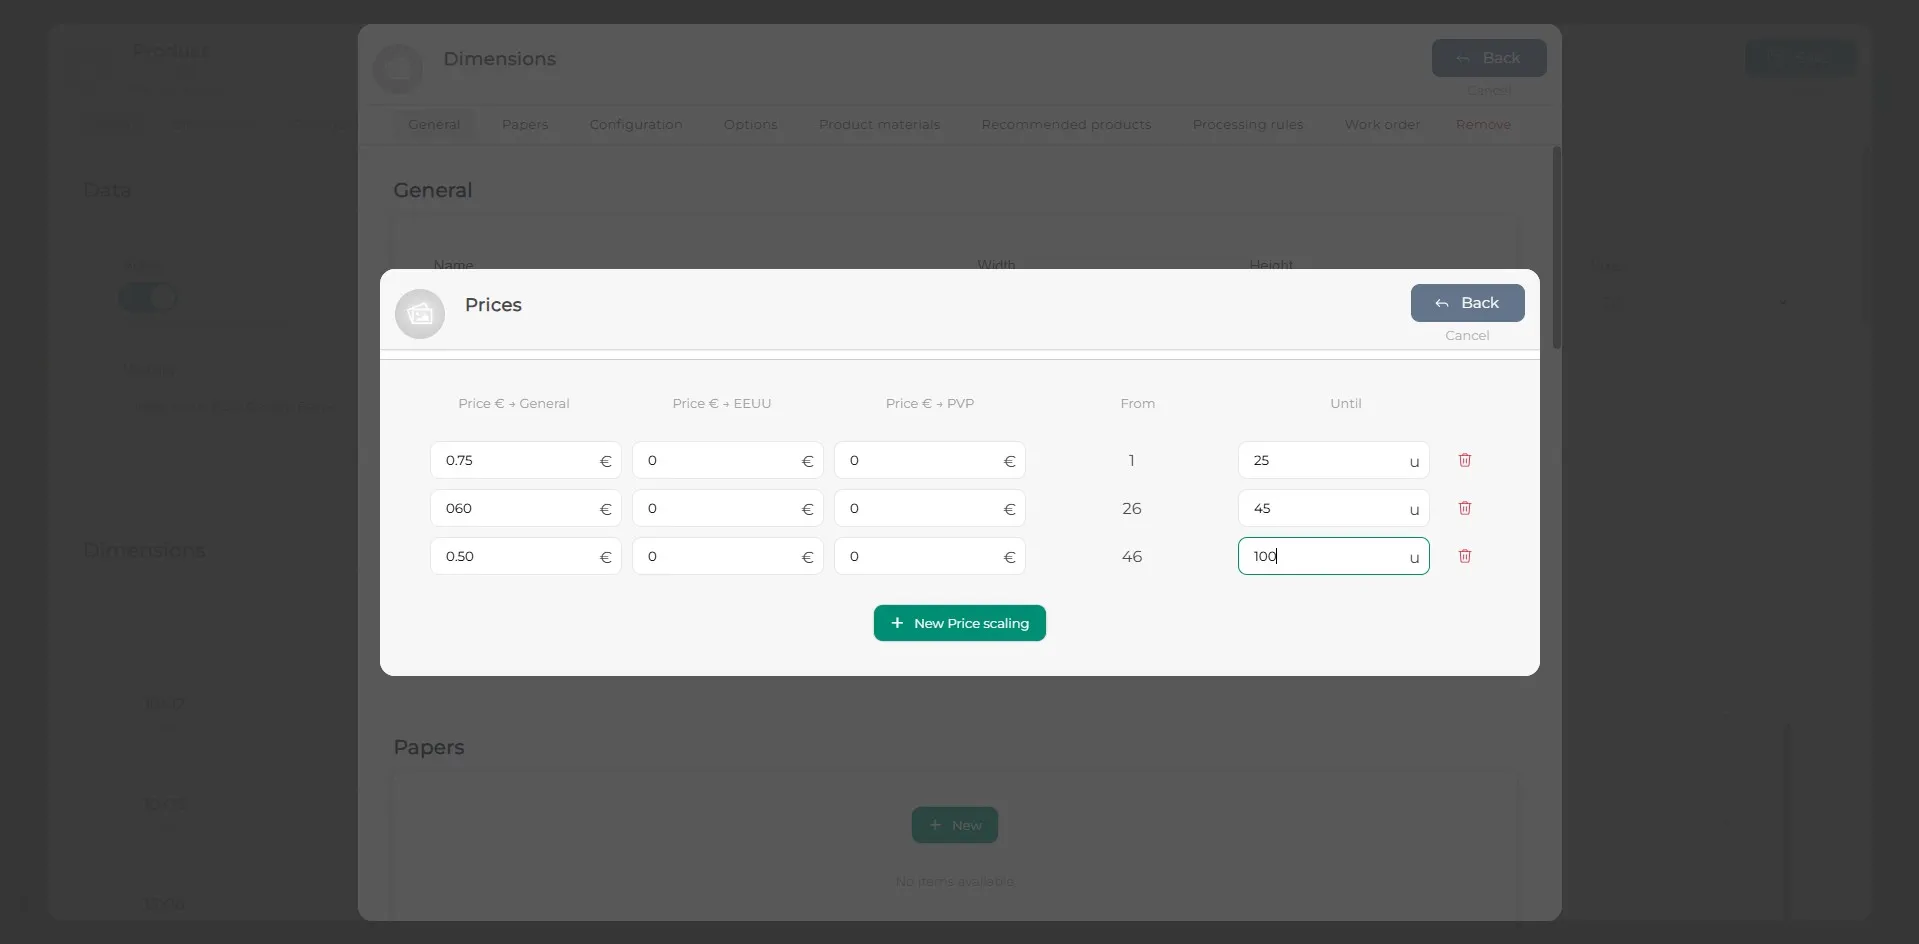
Complete the blank fields in the added line. Add as many price scale lines as necessary.
Step 6
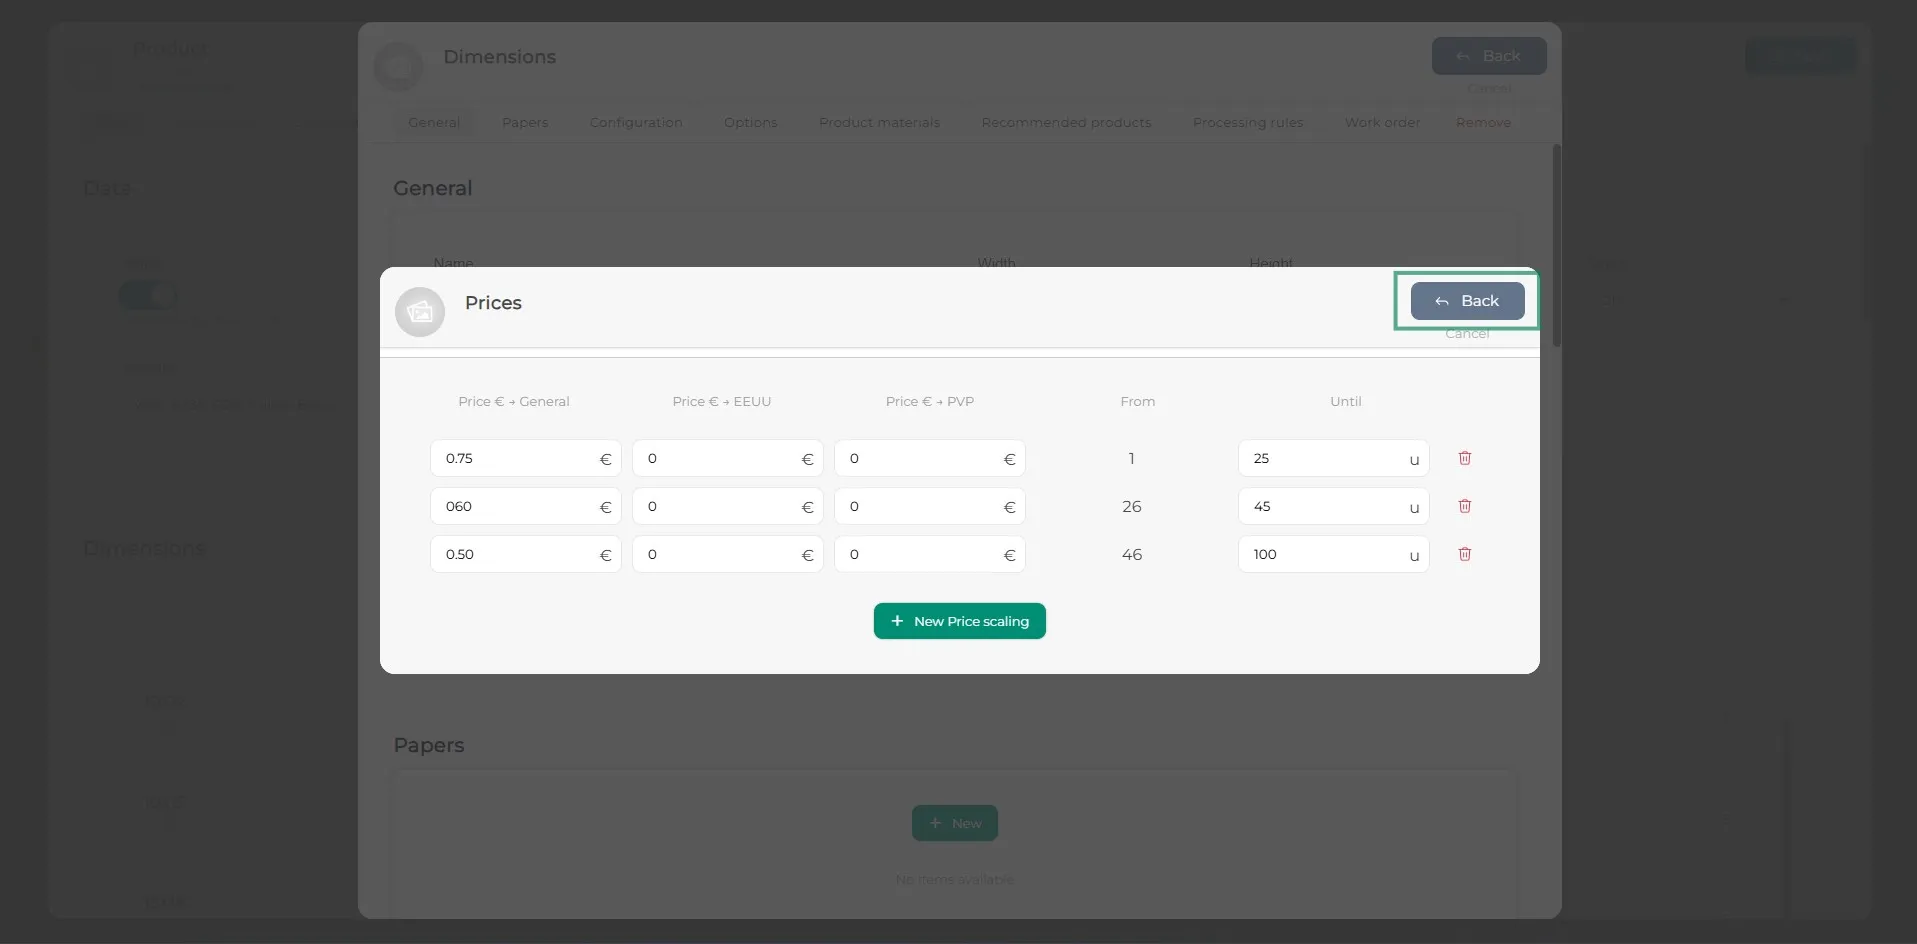
Once the price scales have been entered, click the Back button. Repeat this process for all dimensions that require price scaling. Please note that price scaling takes priority over the general price. If a dimension has a configured price scale, the corresponding scaled price will be applied.
Step 7
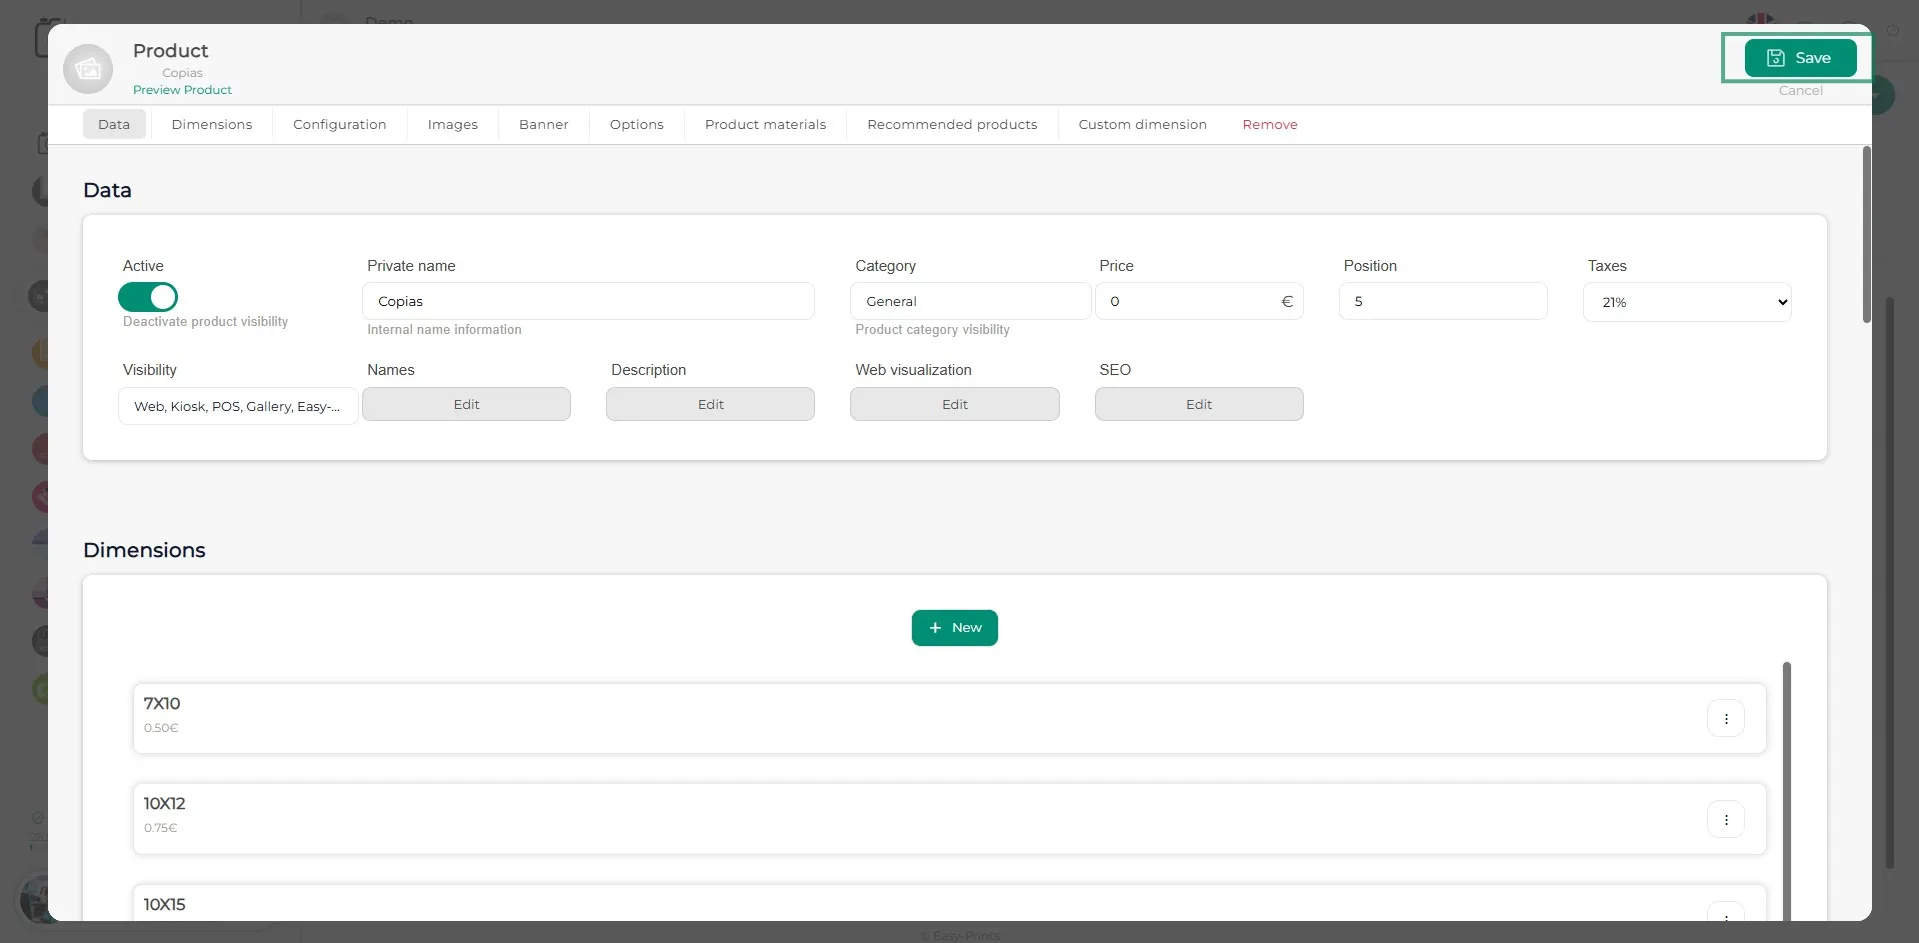
Make sure to click the green Save button to keep the changes made.
Go back to the Help Center or contact Easy-Prints.
← Back to Help Center