
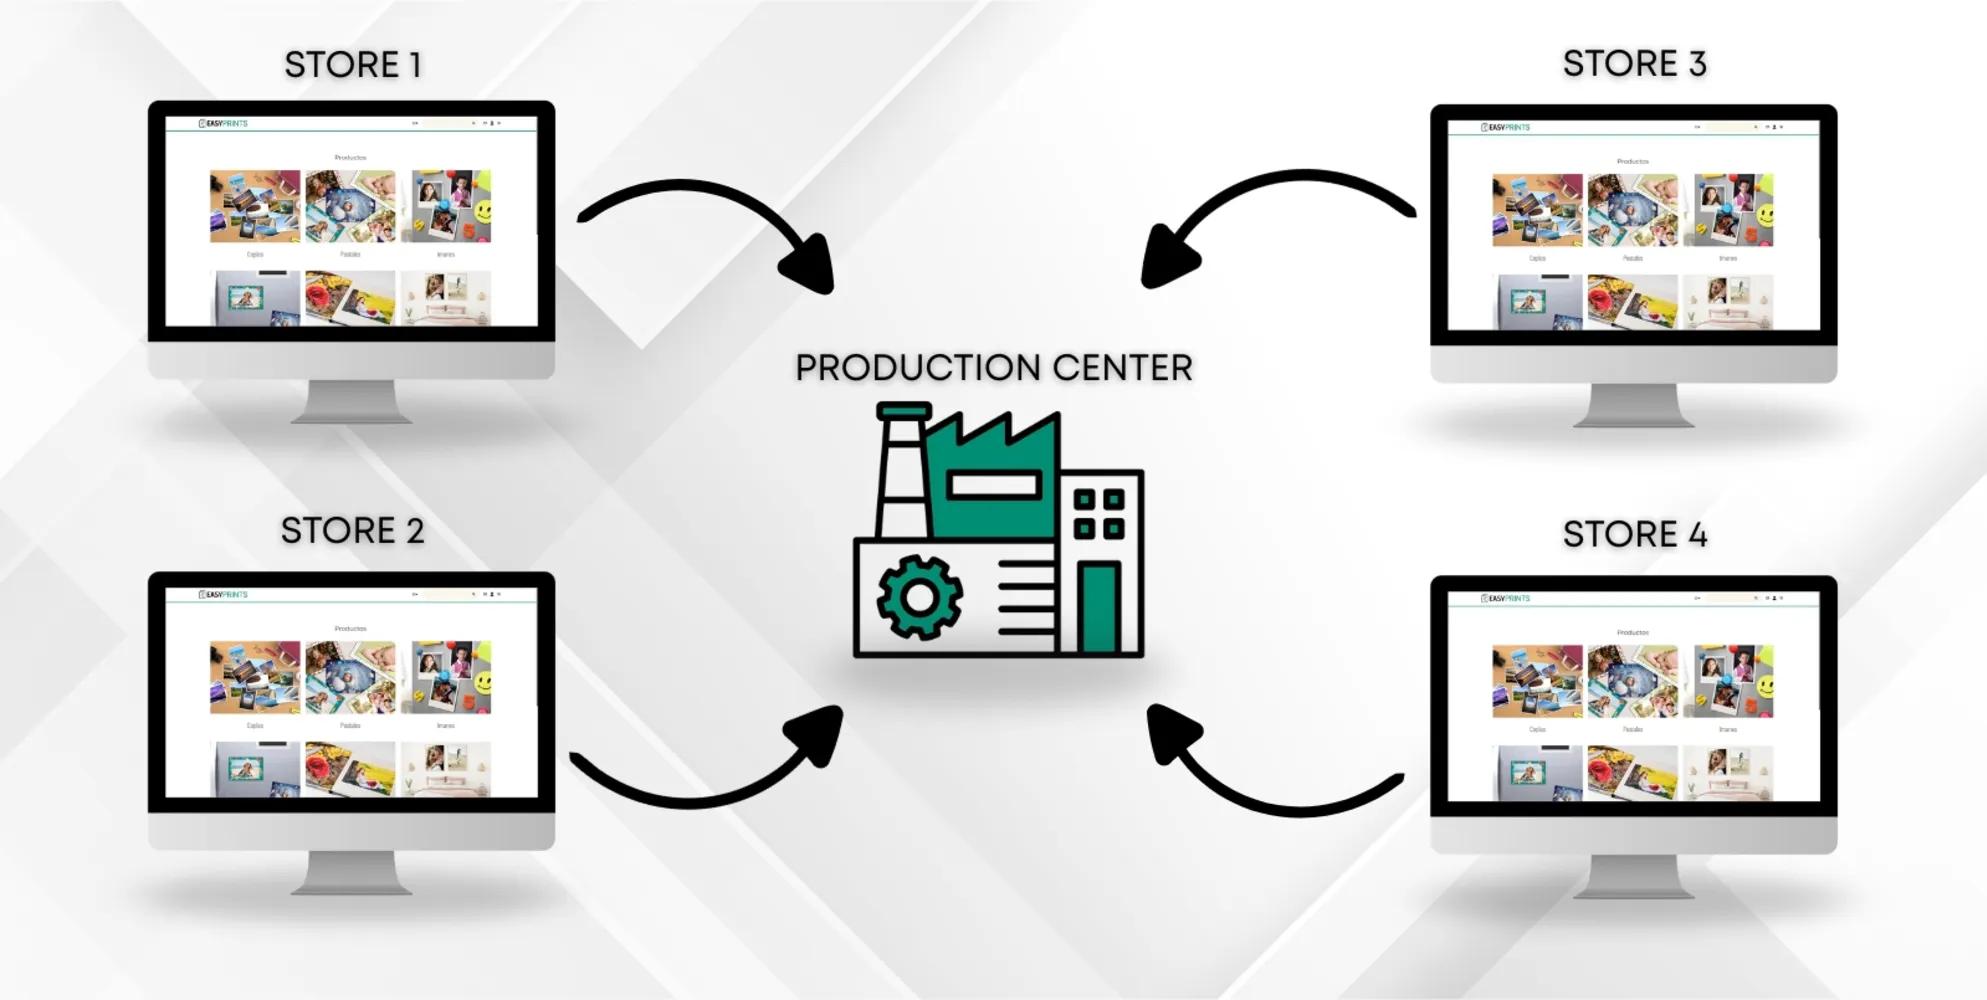
How to send the workflow to the production center?
In the Management section, located in the left-hand menu, open Stores from the top bar. Once inside, create as many stores as necessary. Each store will ha…
Step 1
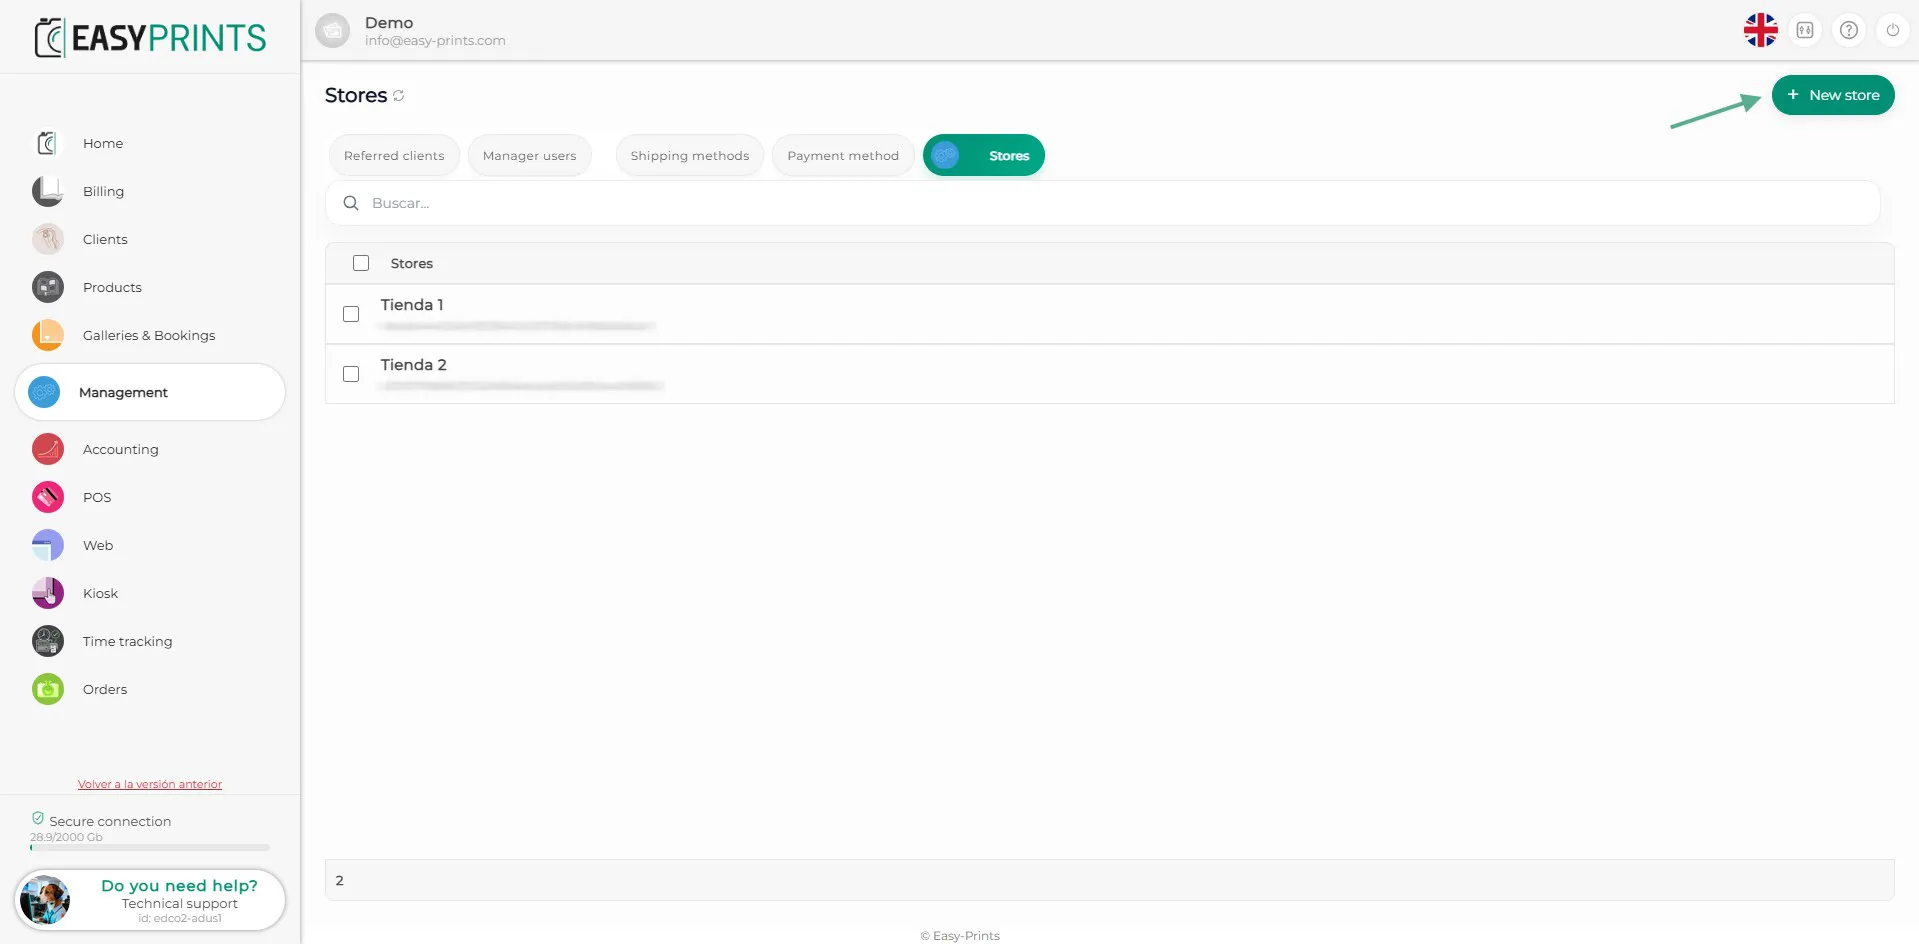
In the Management section, located in the left-hand menu, open Stores from the top bar. Once inside, create as many stores as necessary. Each store will have a different token.
Step 2
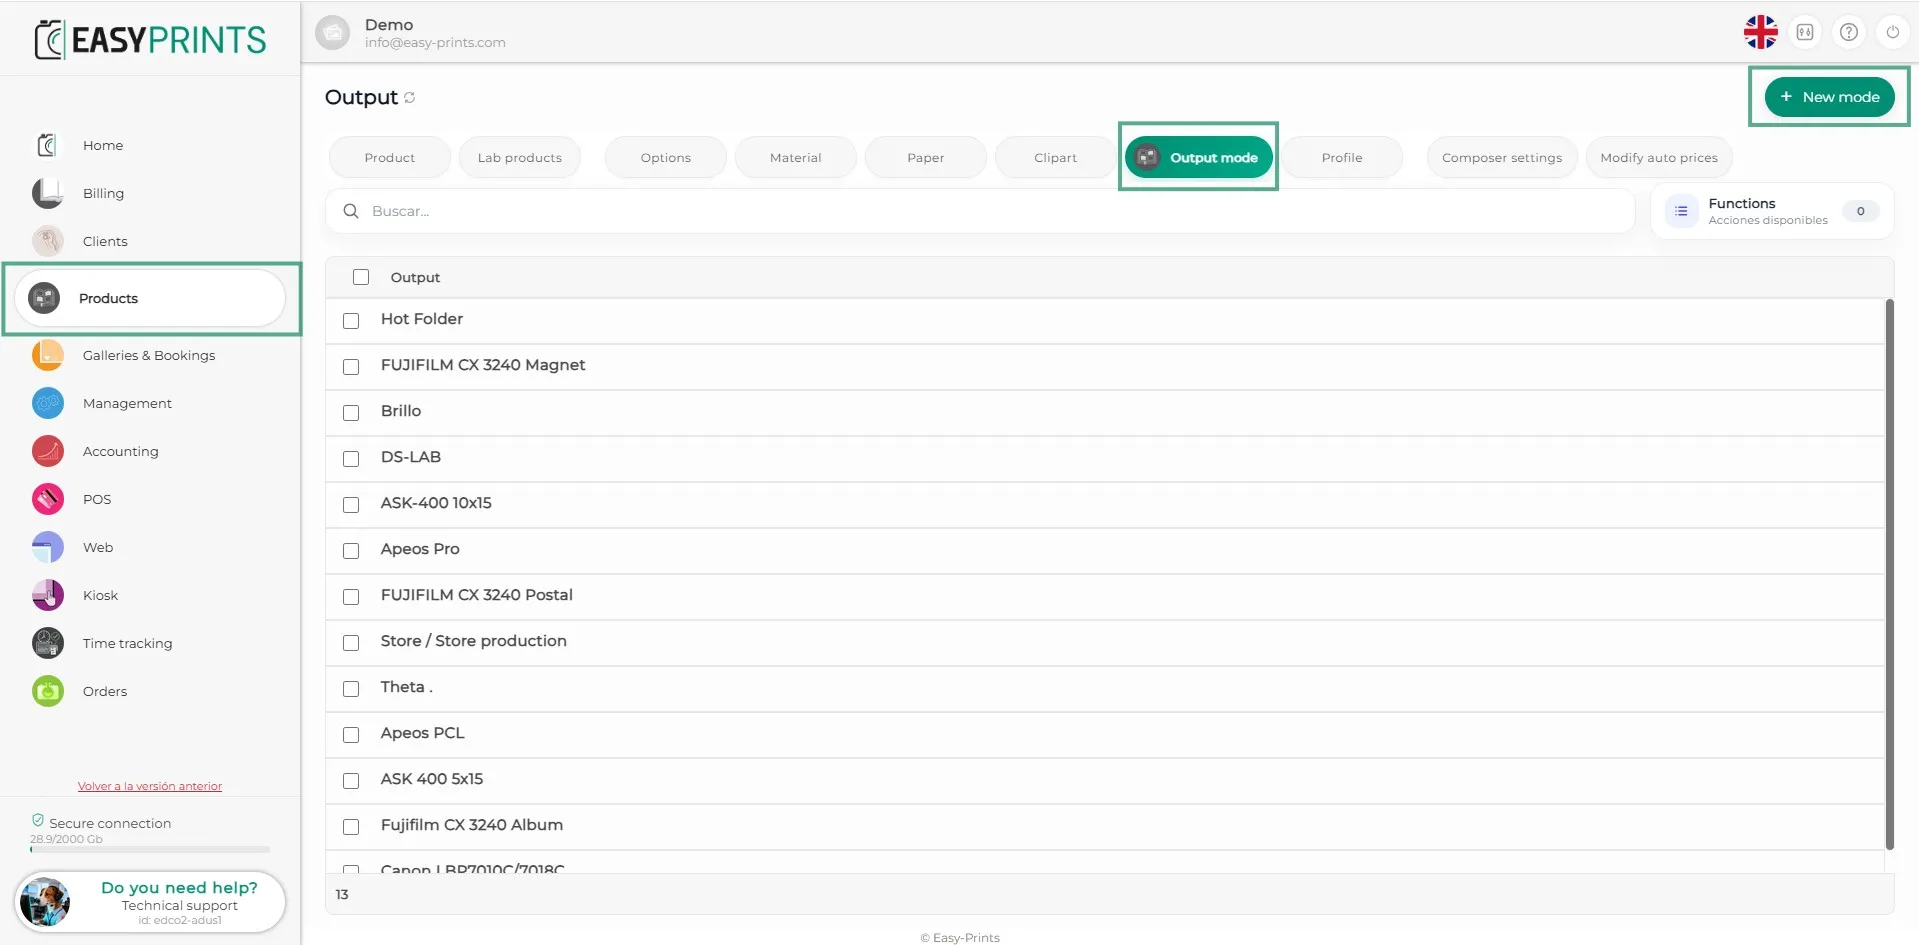
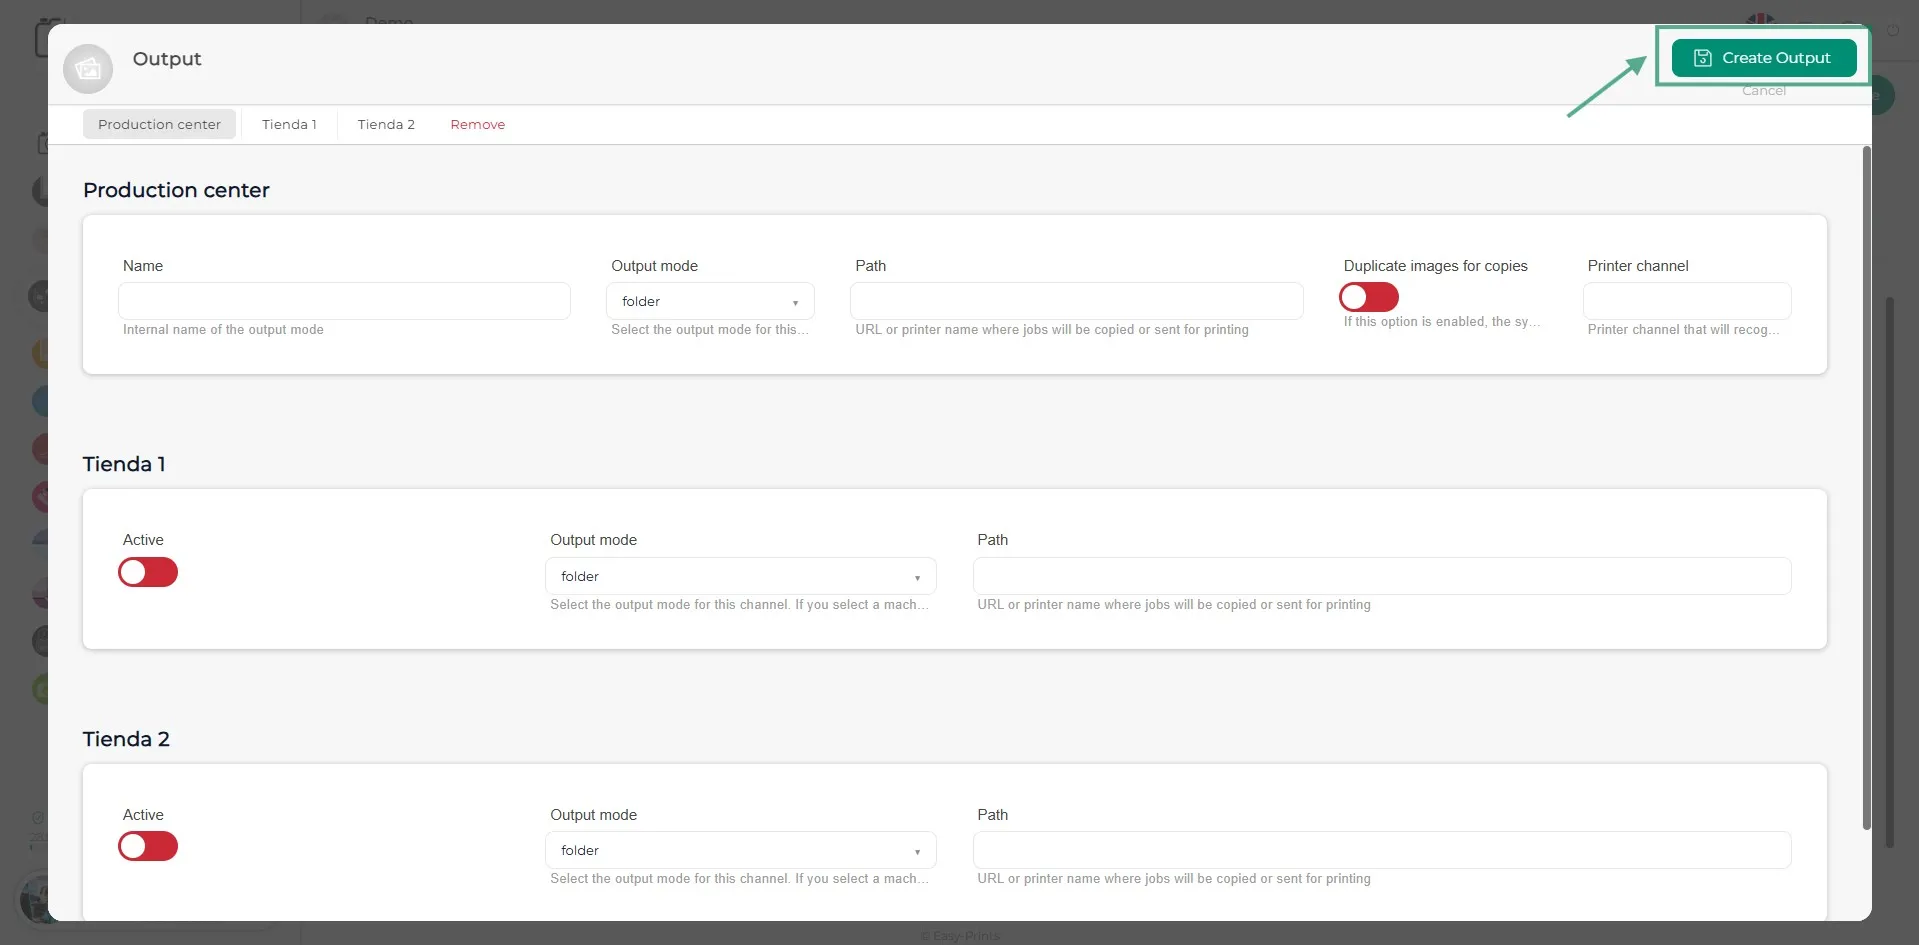
The next step is to return to the administration panel and access the Products section. Within this section, go to the Output Mode category. There, you must add a new output mode by clicking the green button located in the upper right corner.
Step 3
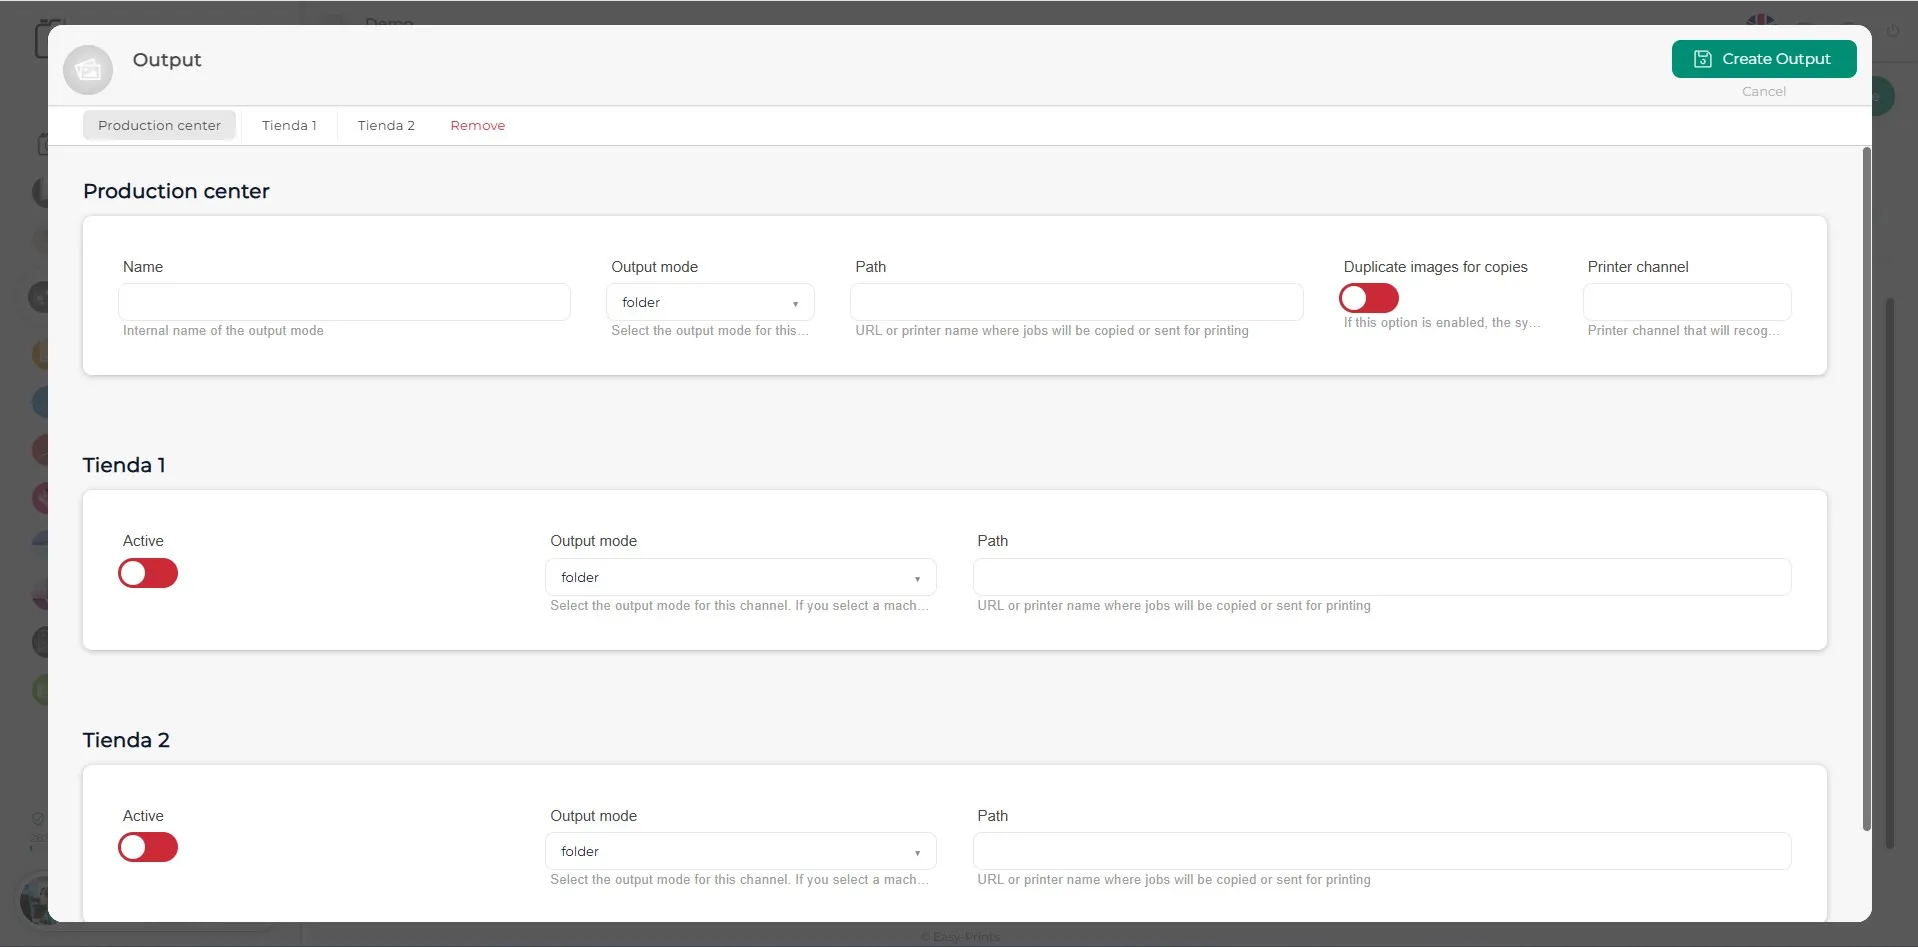
In the new window that appears, fill in the blank fields, select the desired output mode, and specify the folder path where the files will be saved.
Step 4
Once all fields have been filled in as desired, remember to click the green Save button located at the top right.
Step 5
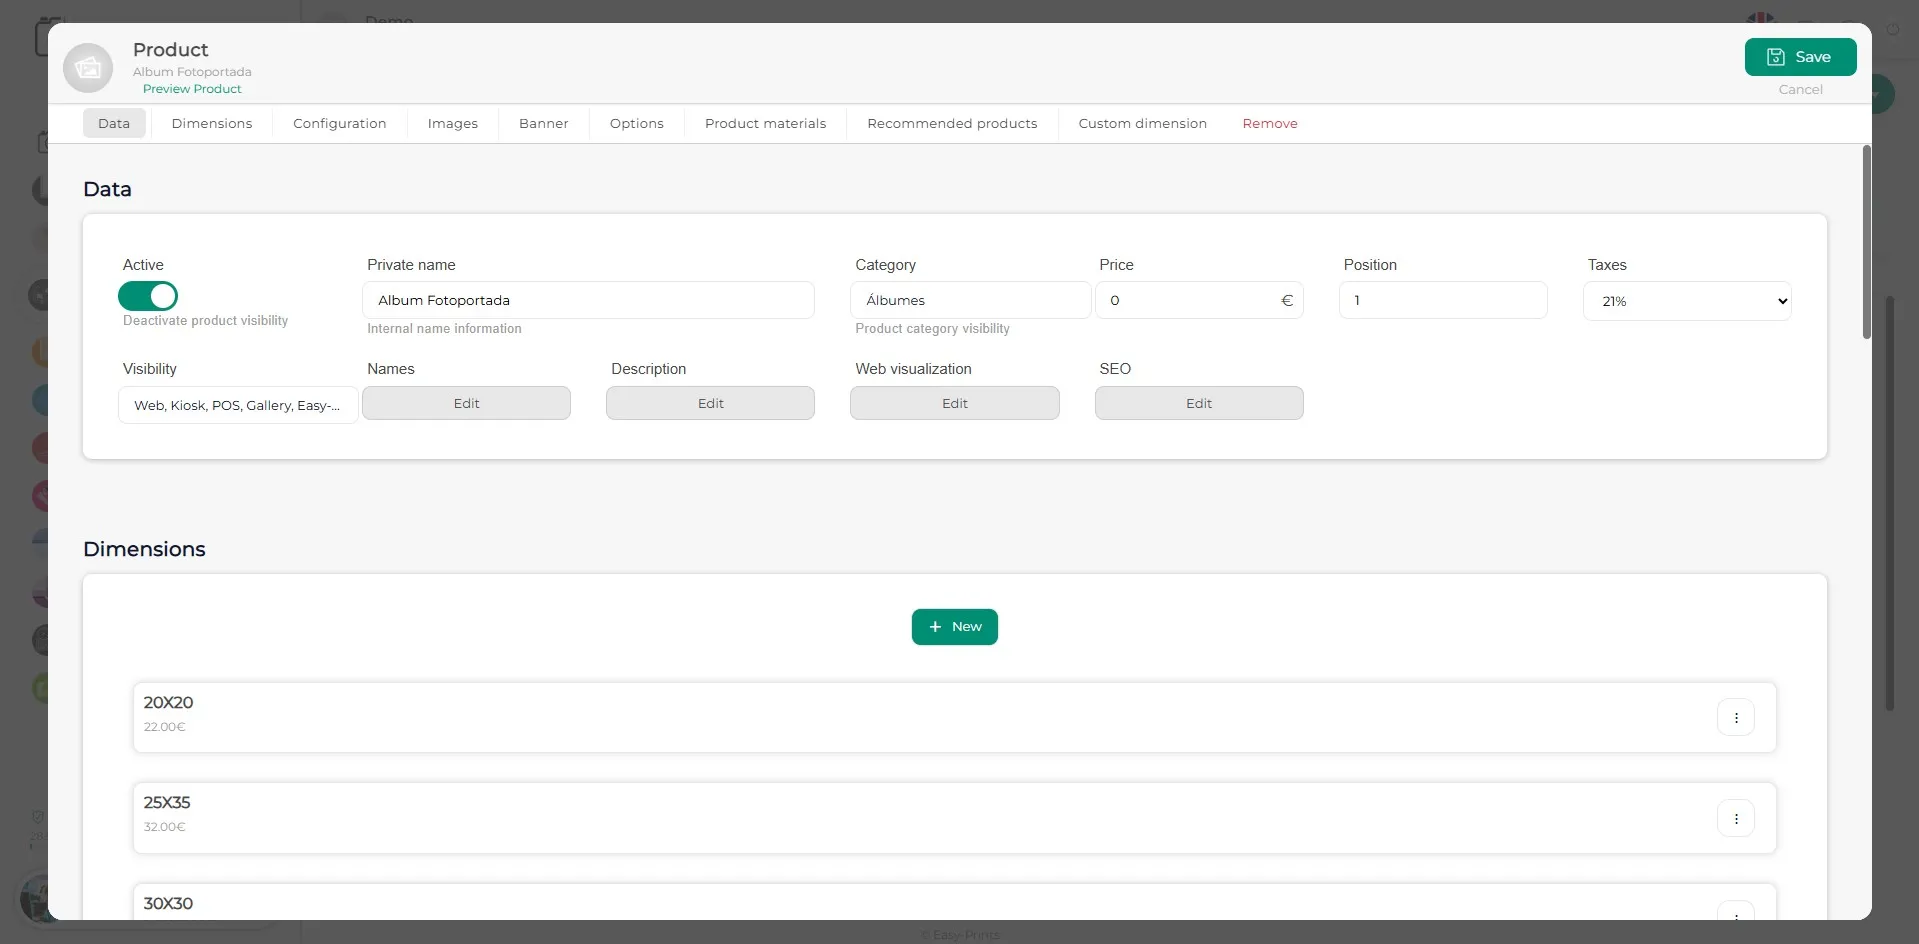
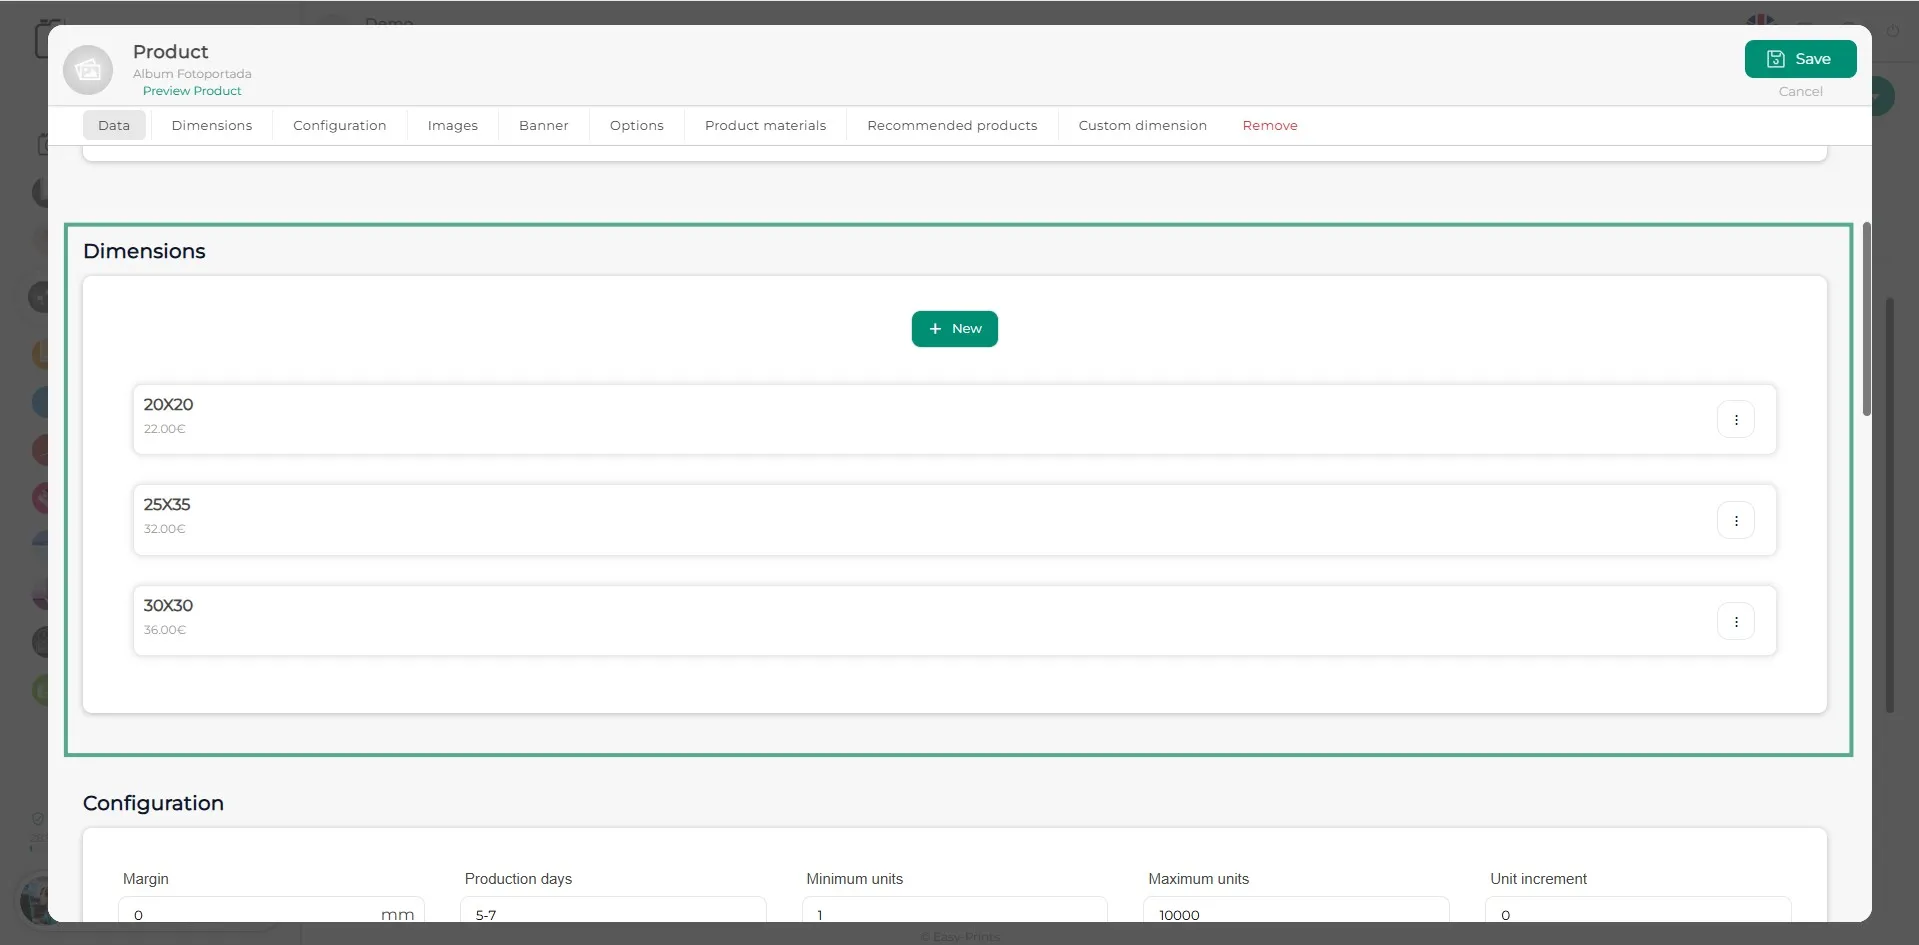
Once the output mode has been created, go to the product it has been assigned to and open the corresponding dimension.
Step 6
If there are different sizes of the product, you must follow the next steps for each one.
Step 7
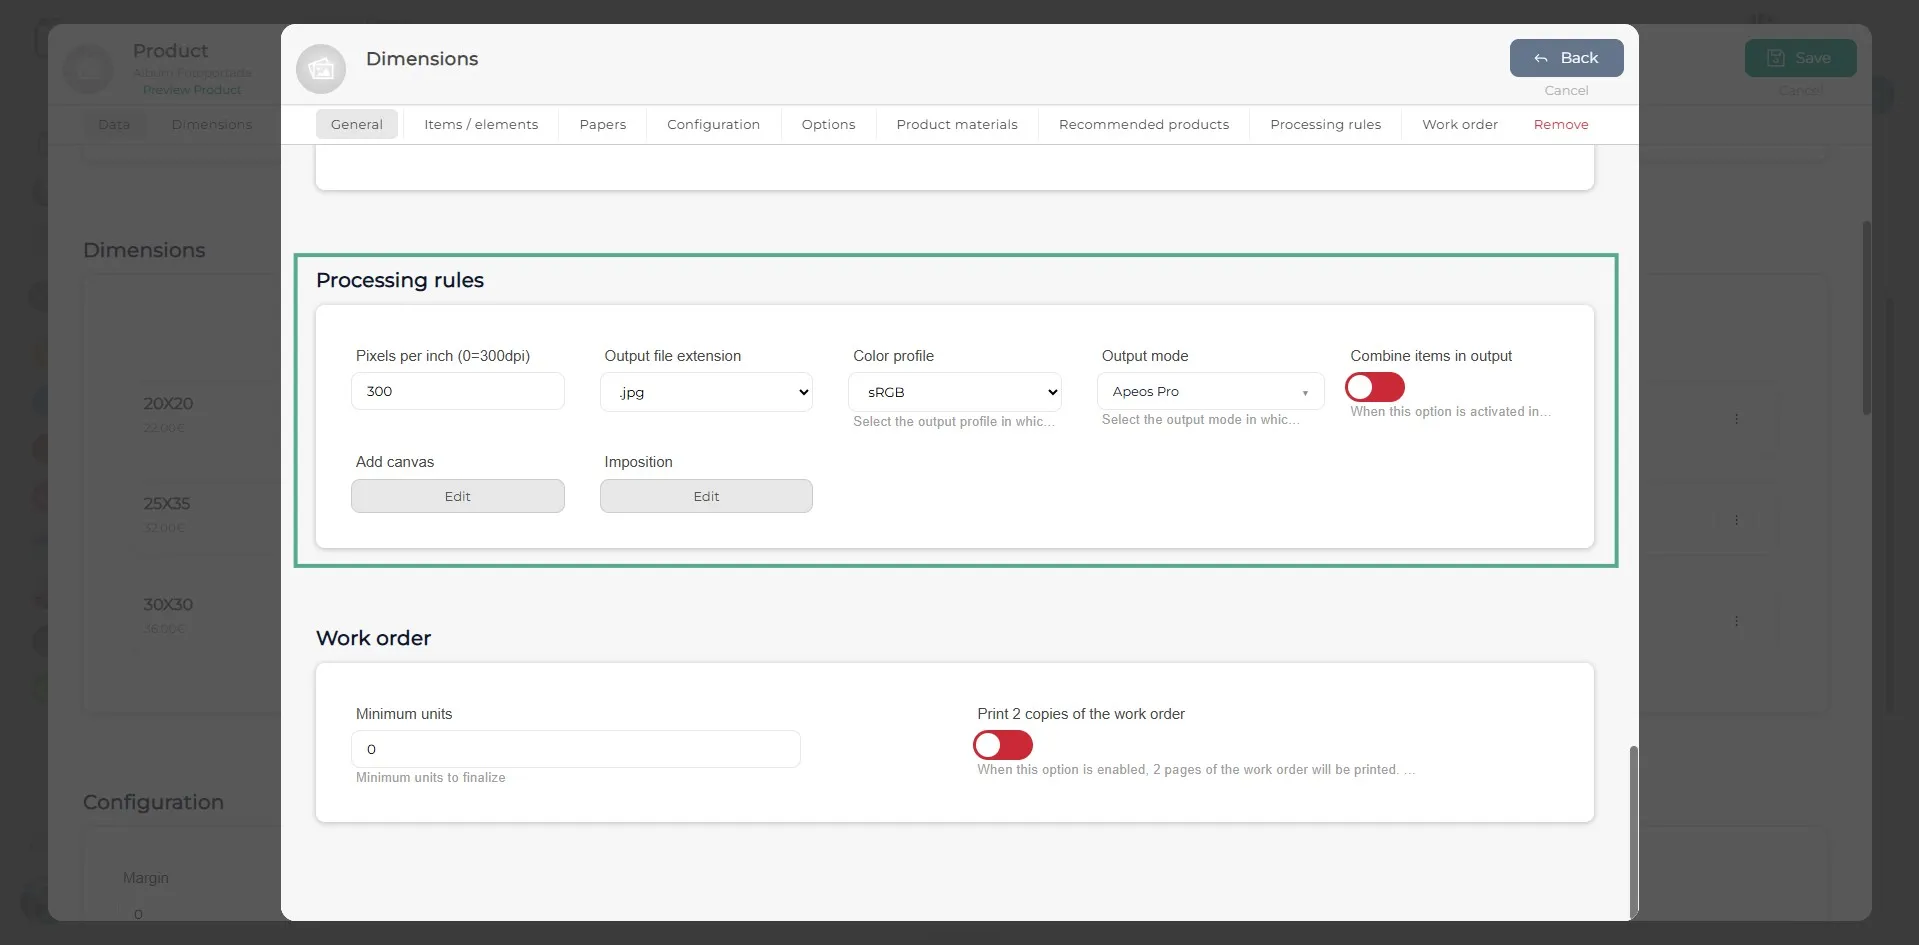
Now go to the product’s Processing rules section. In this area, complete the required fields. It is very important to select the Output mode you created earlier. Once all the information has been entered, make sure to save the changes.
Go back to the Help Center or contact Easy-Prints.
← Back to Help Center