
How to create products from the Copies category
Go to the Products section in the menu located on the left. Inside the Products section, at the top there is a tab bar. Go to the Products tab. Once there,…
Step 1
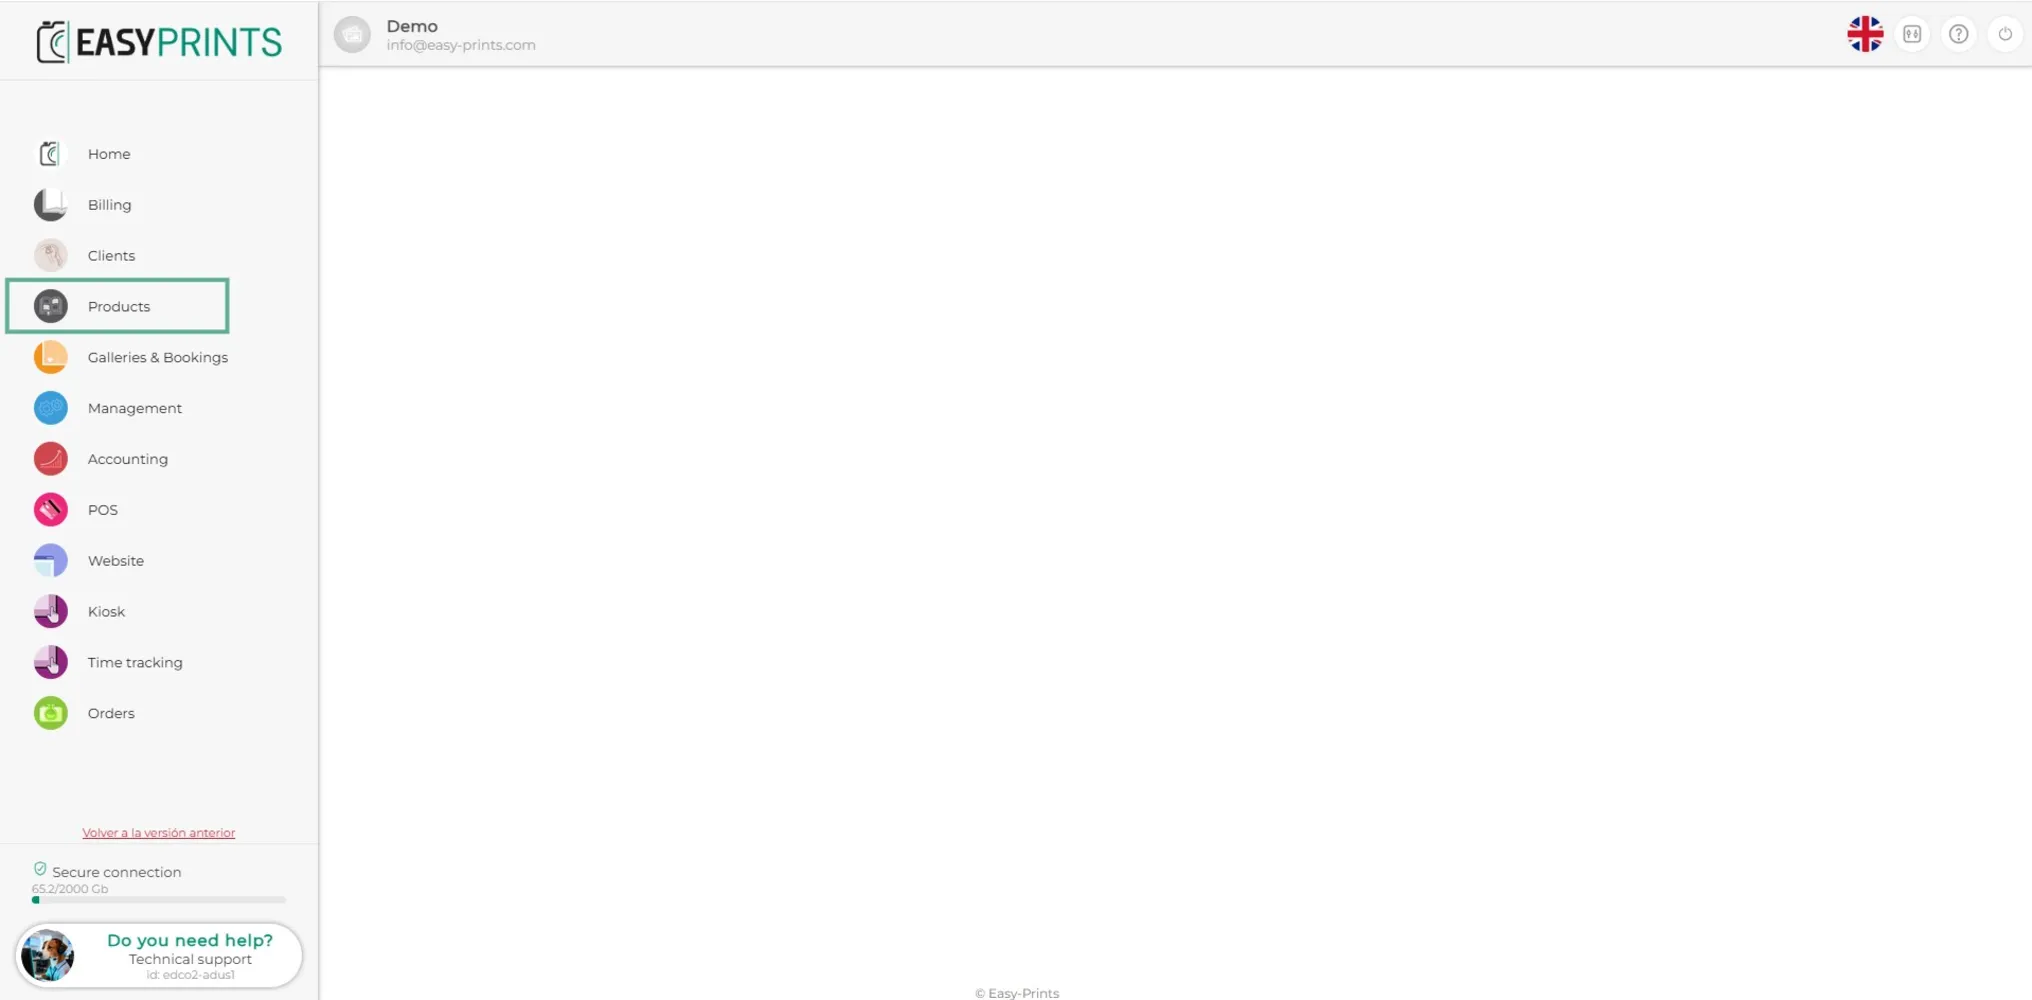
Go to the Products section in the menu located on the left.
Step 2
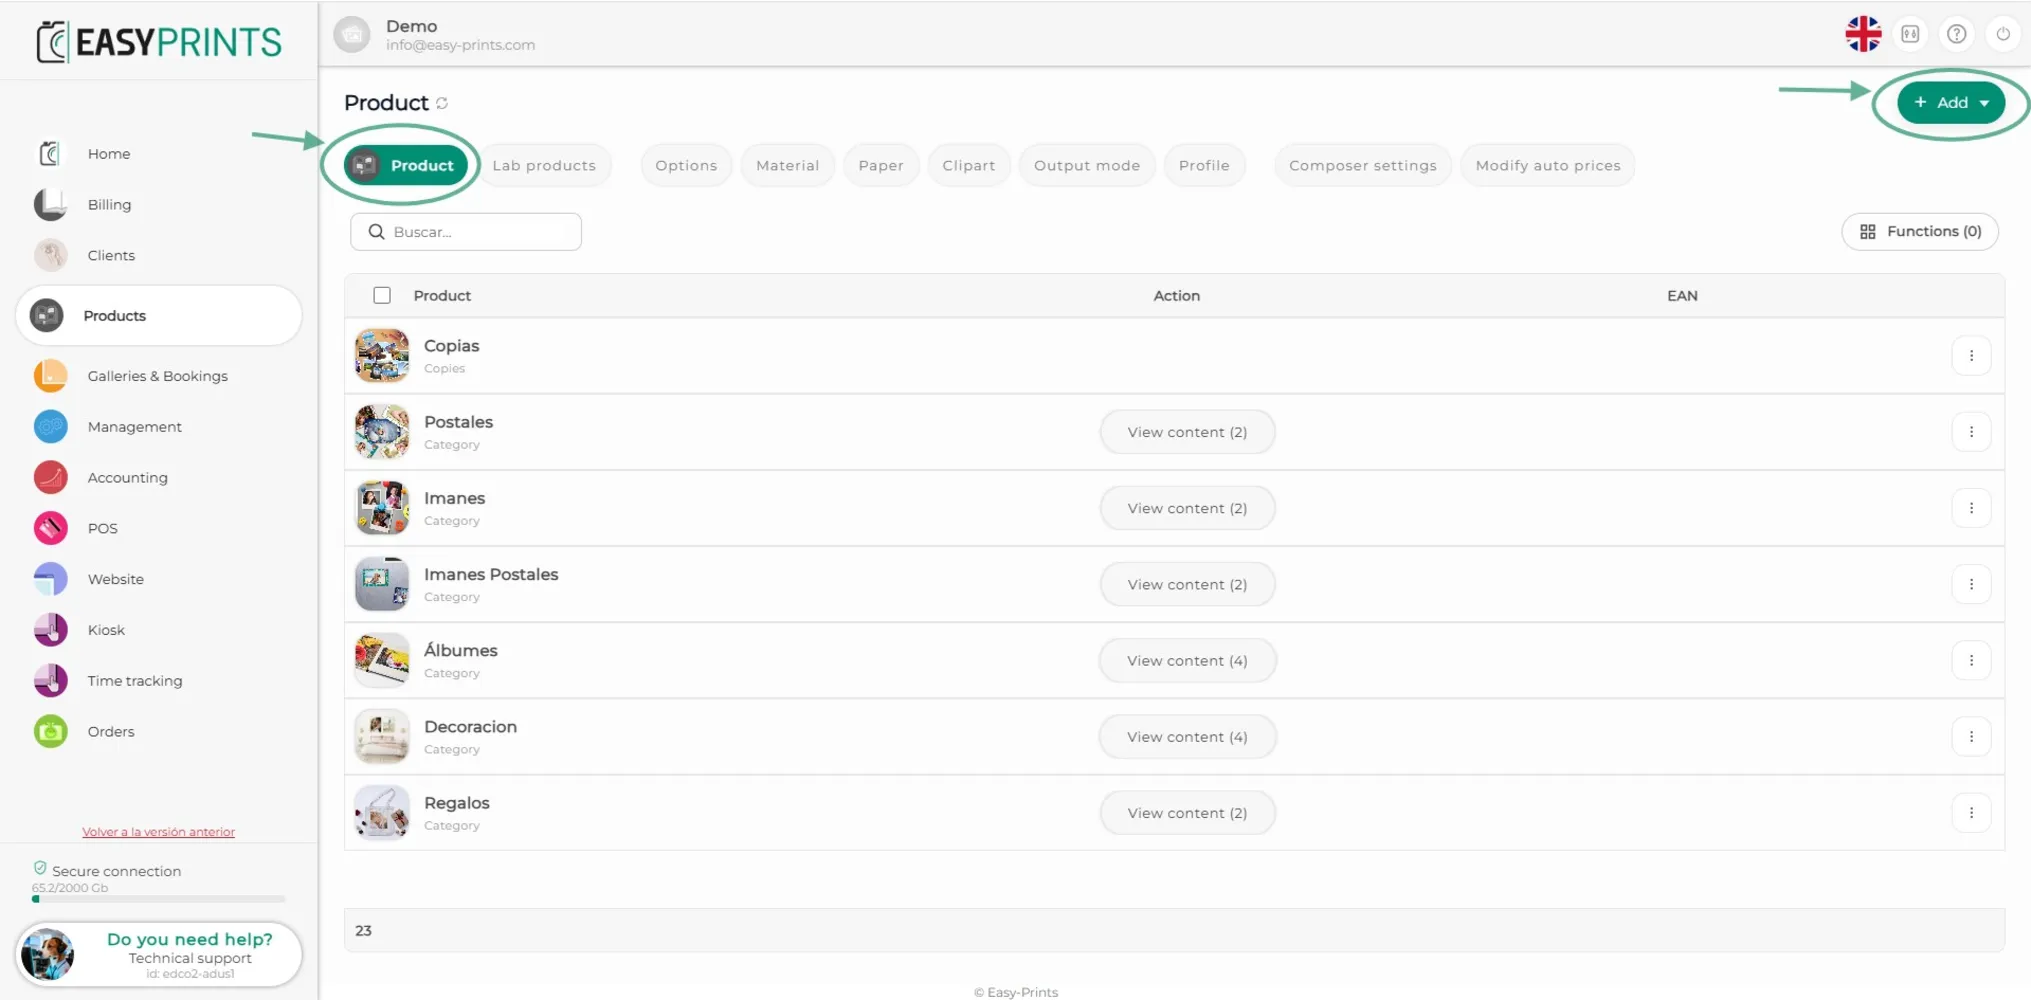
Inside the Products section, at the top there is a tab bar. Go to the Products tab. Once there, click the green +Add button located in the upper right corner.
Step 3
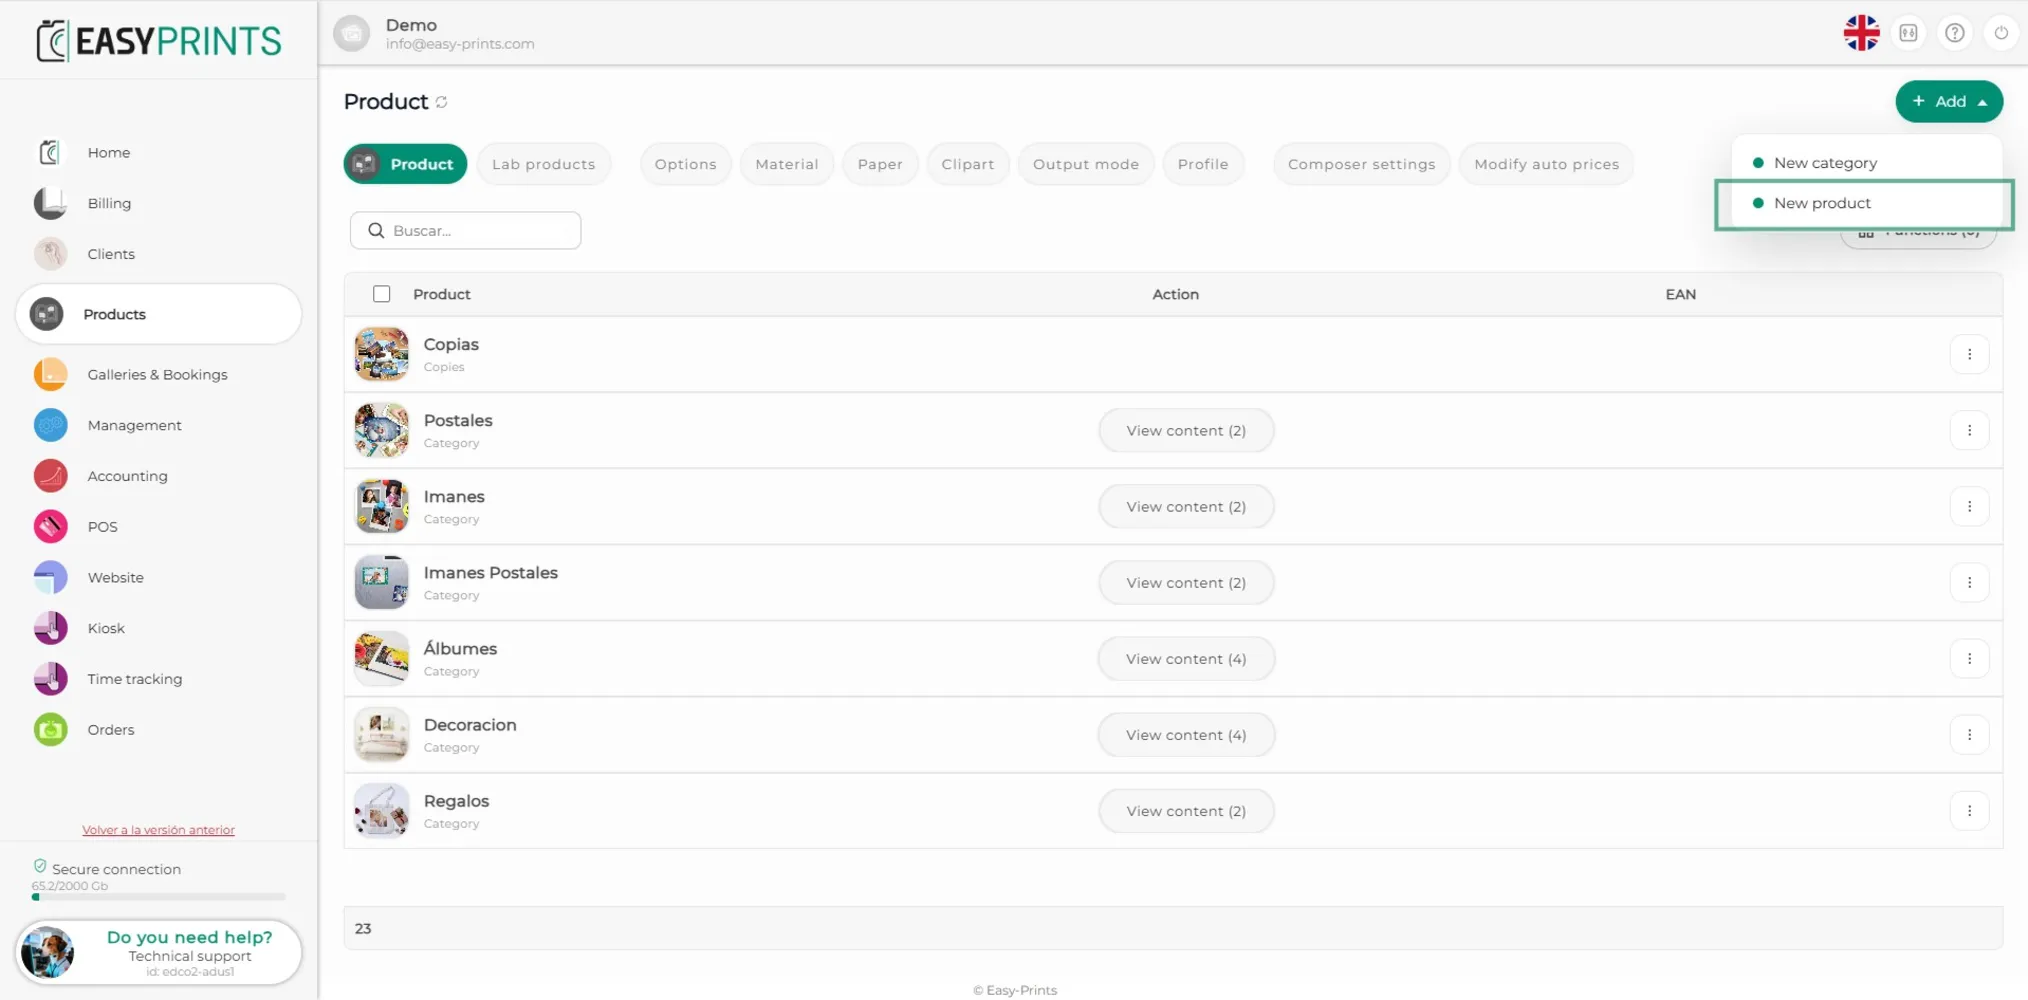
In the dropdown menu, select New product.
Step 4
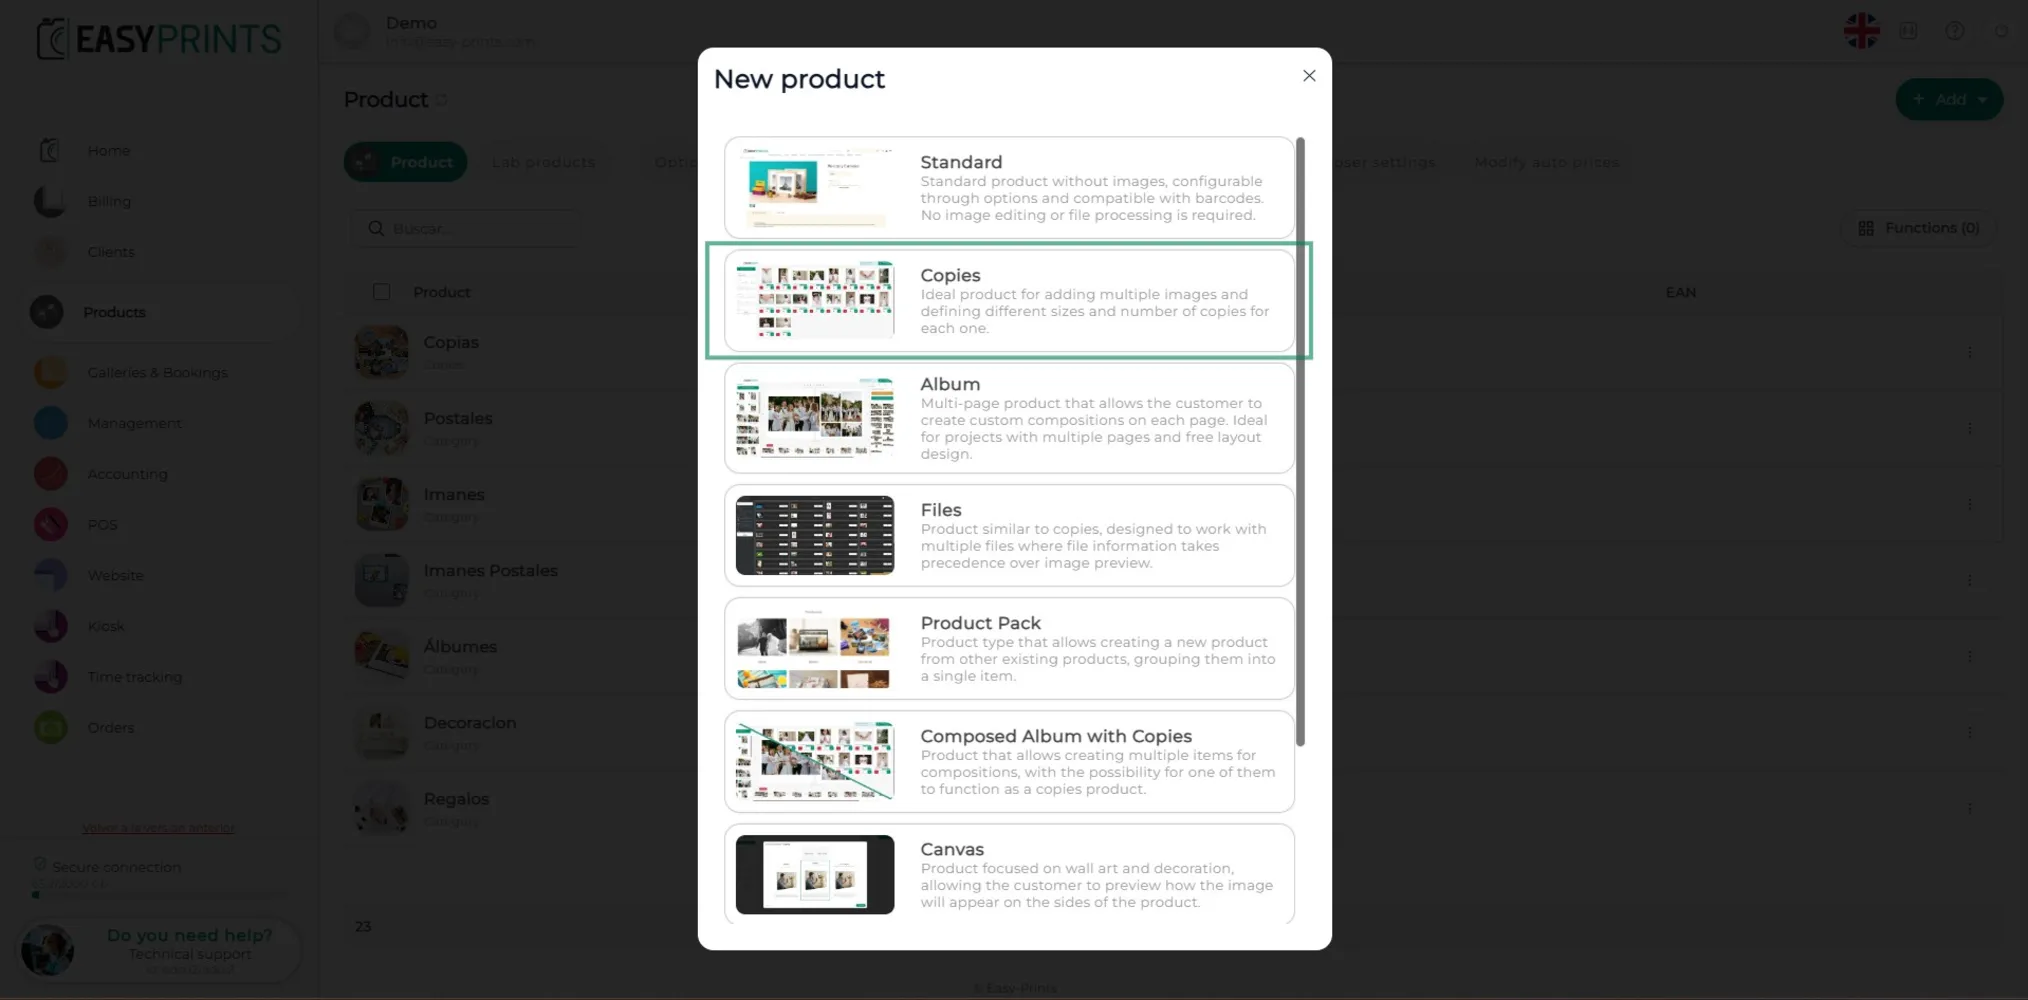
A new window will open asking which type of product you want to create. In this case, select Copies.
Step 5
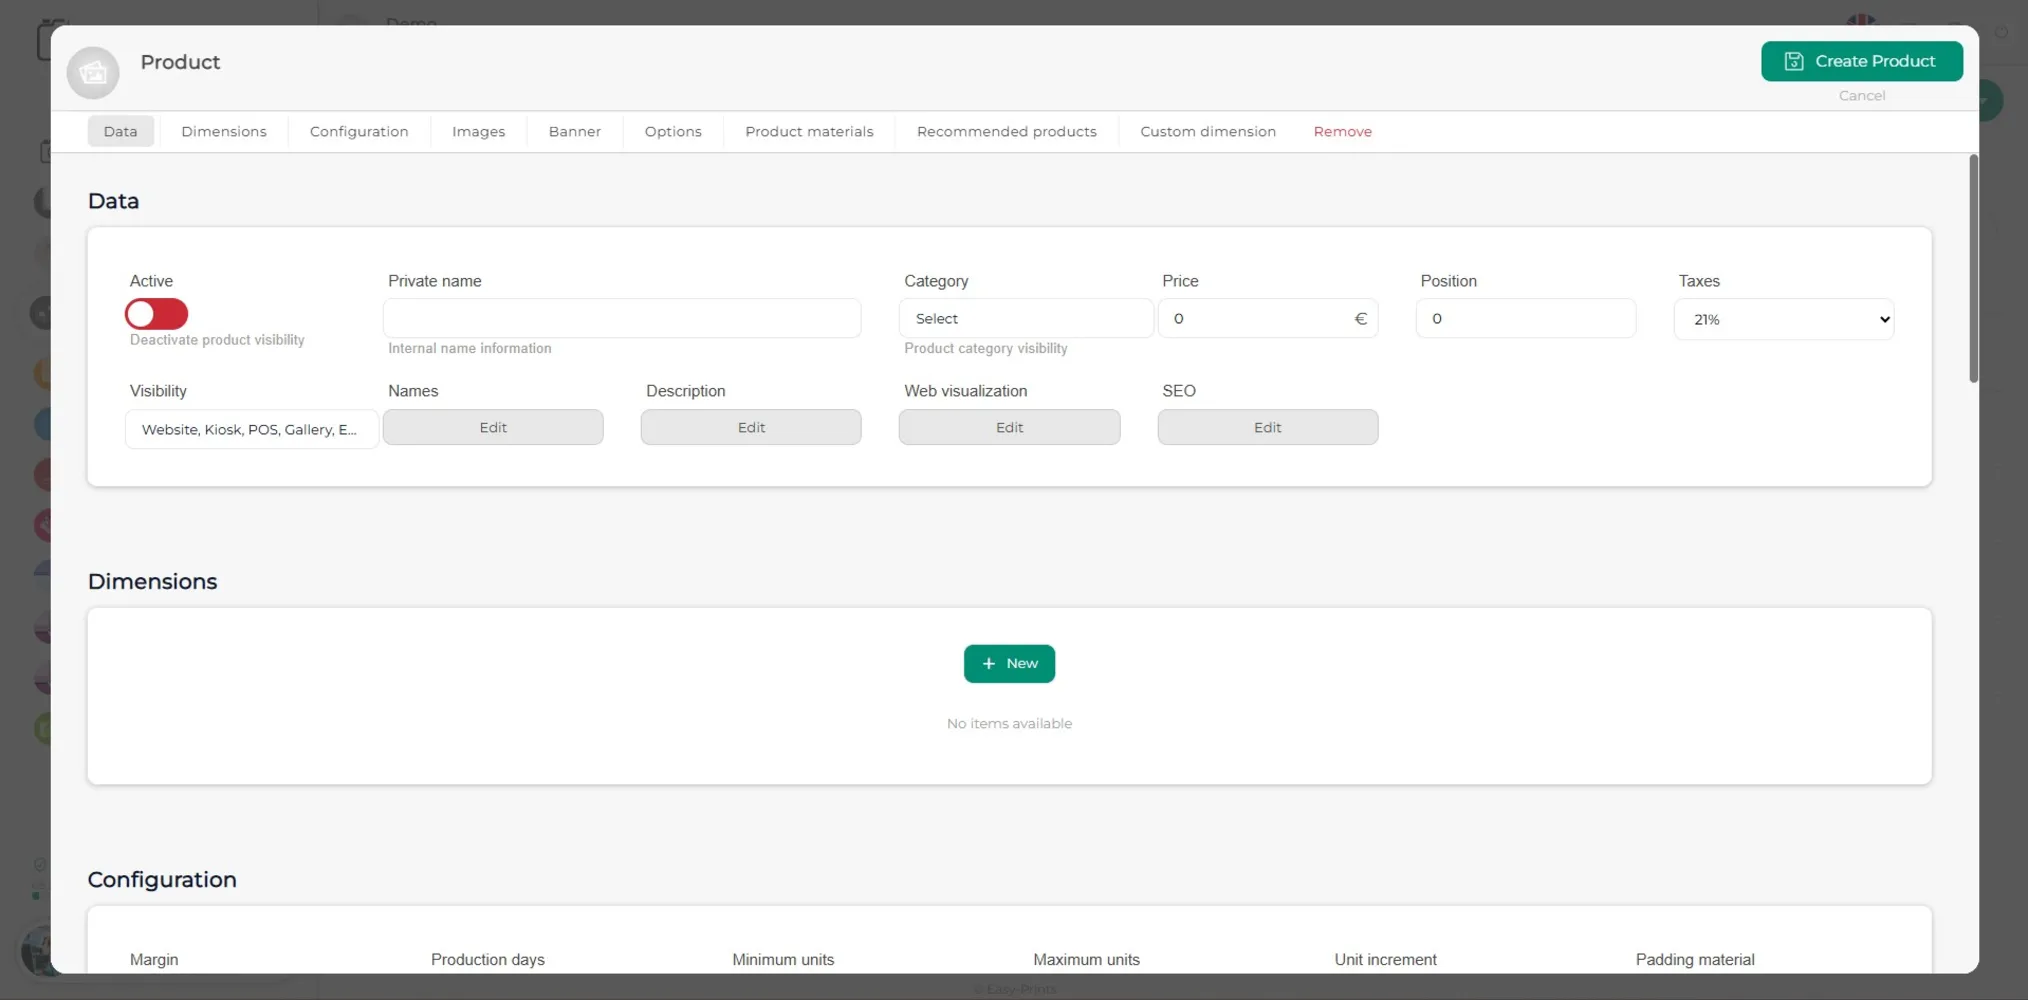
In the new tab, the blank fields must be completed. In the Internal name section, enter the name by which the product is known within the production center. In Category, you must indicate in which category the product will be placed; if it does not belong to any category, it should be left as General. In the Position box, you must indicate the position in which it will be displayed on the website.
Step 6
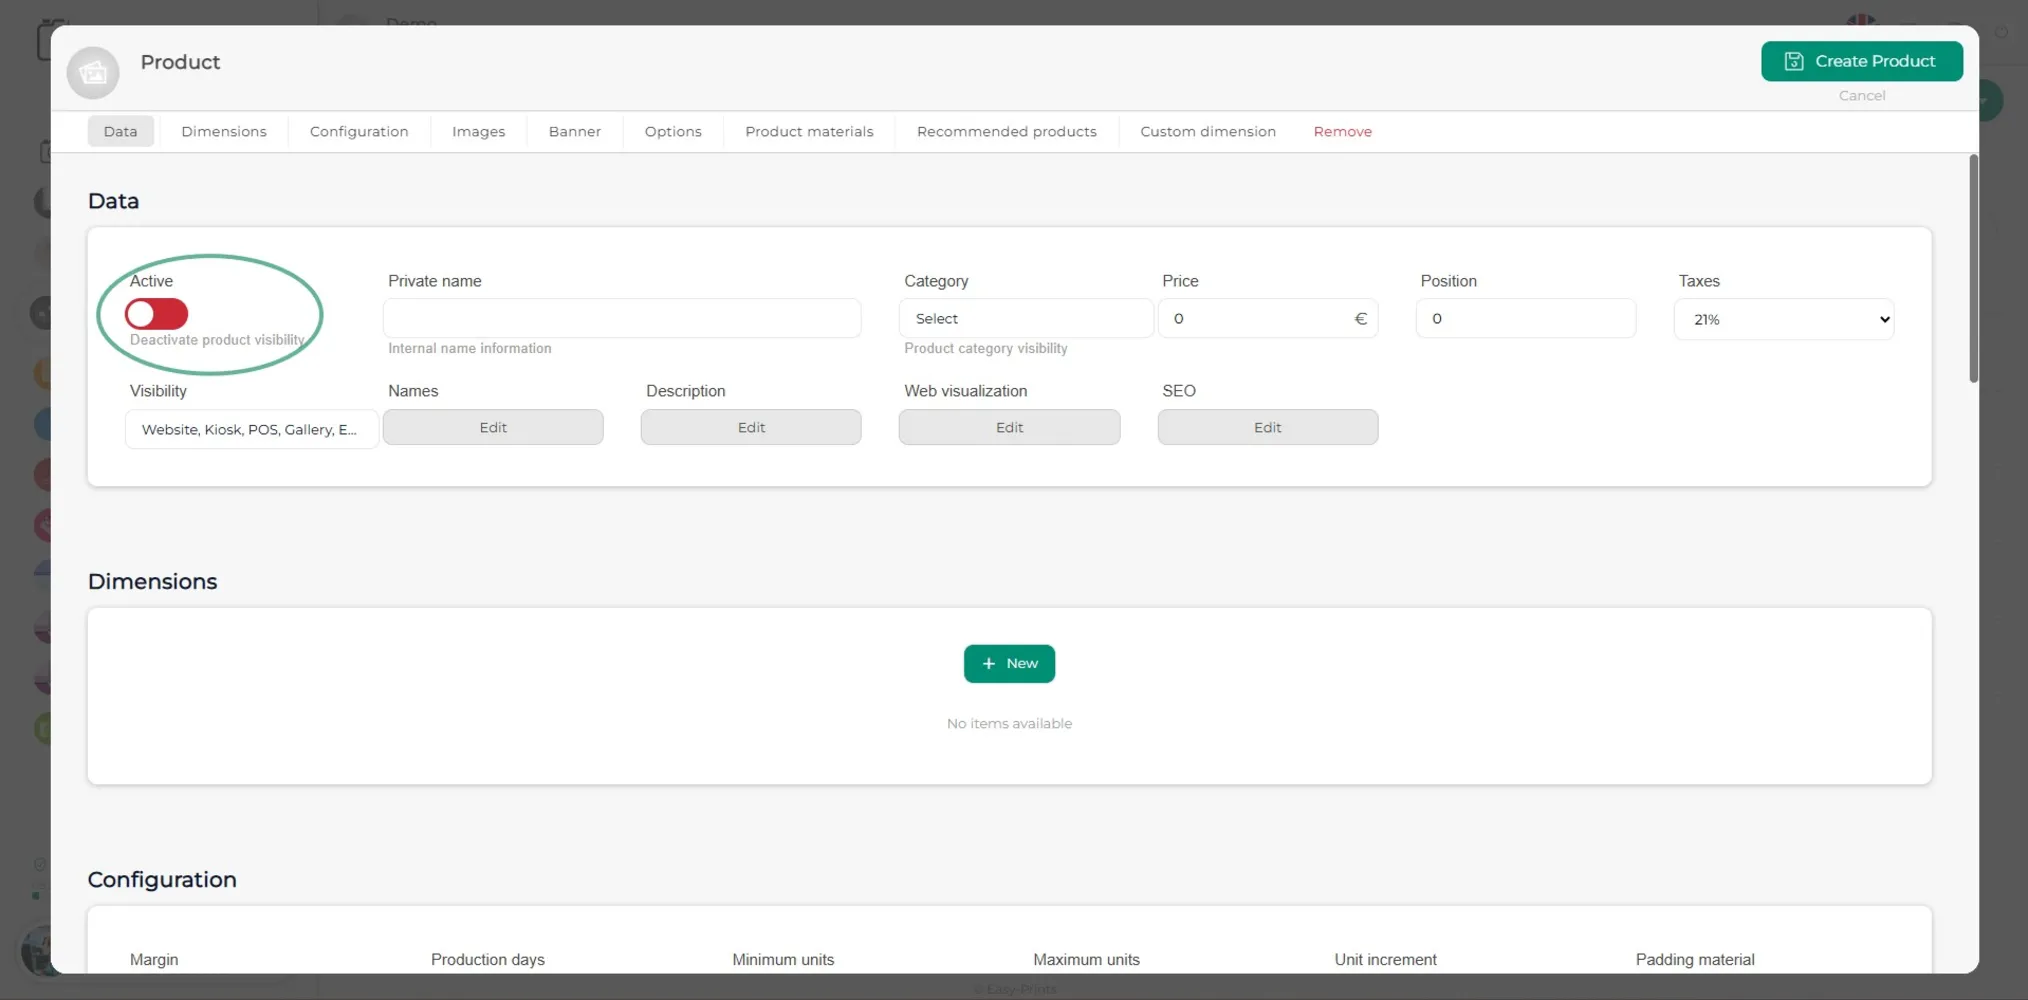
For the product to be visible on the website, kiosk, POS, etc., the button shown in the image must be activated.
Step 7
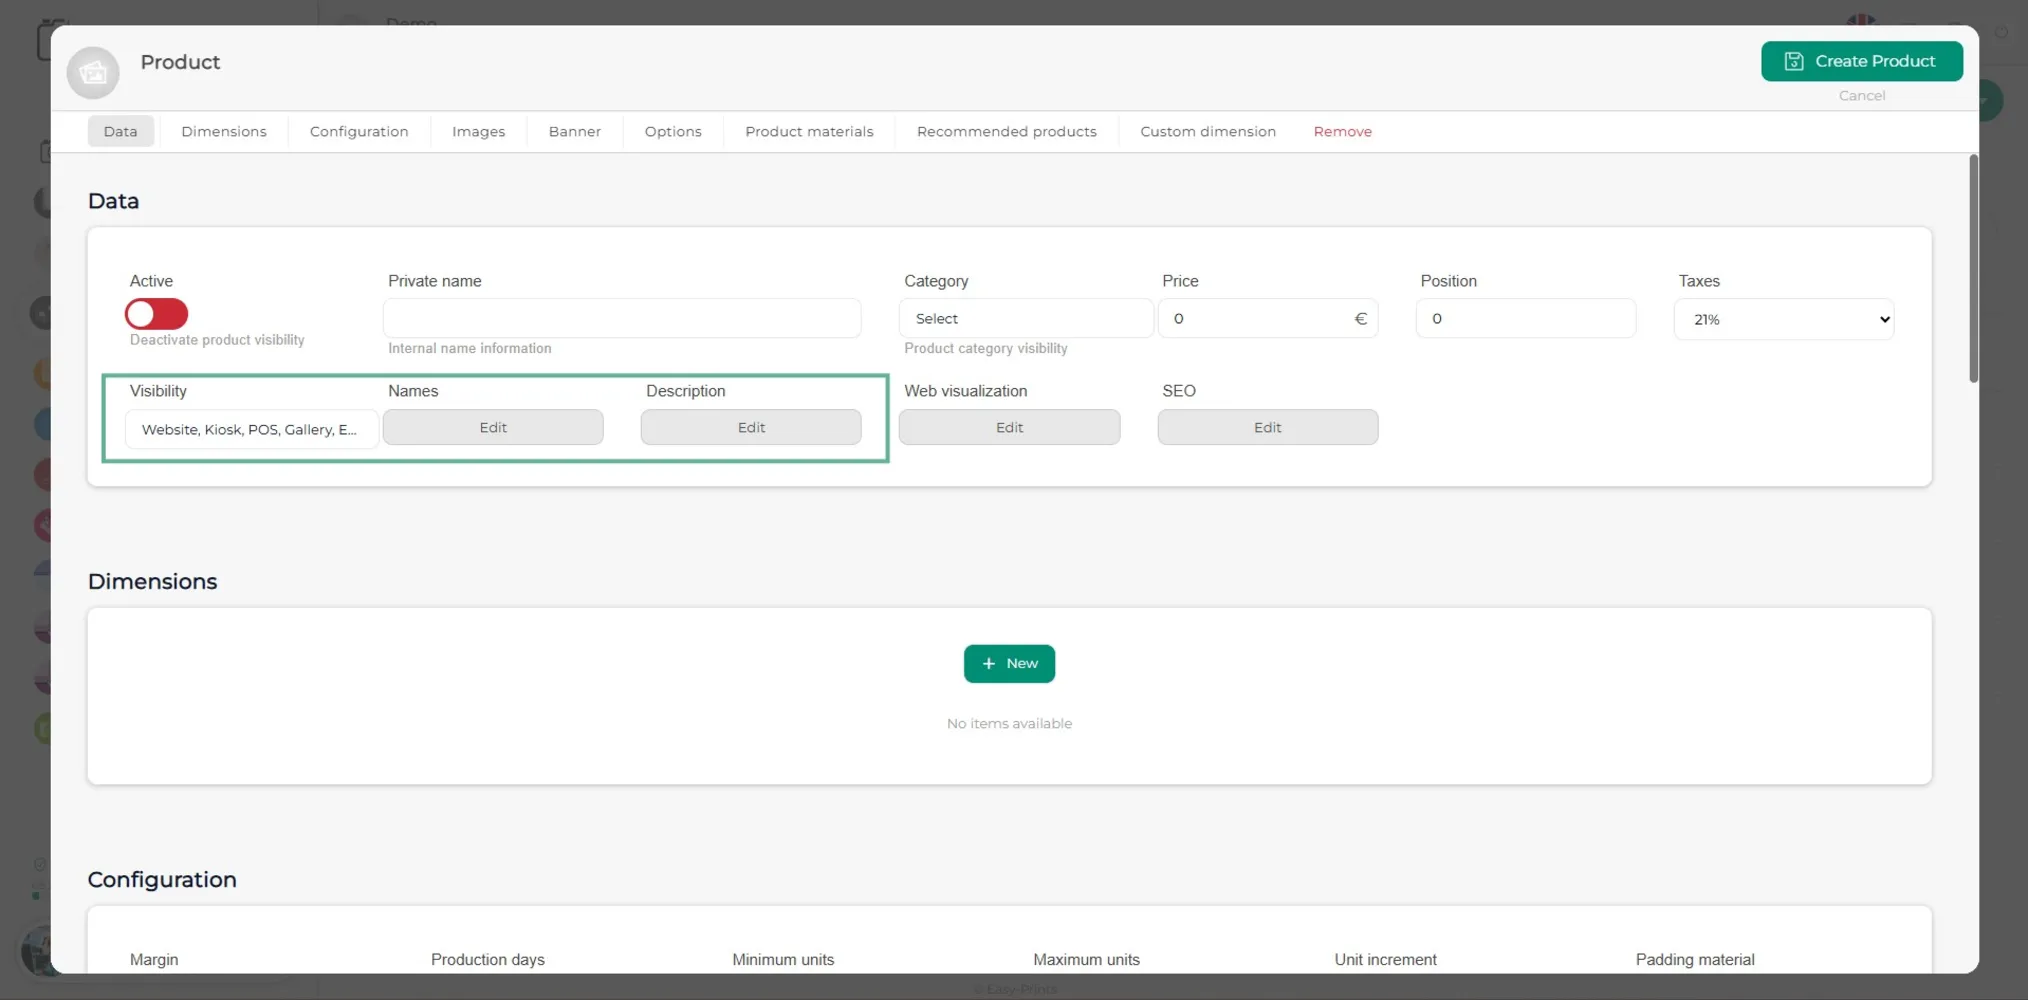
In Visibility, you must indicate in which parts of the program the product will be visible. In the Name section, enter the name that the client will see on the website. In Description, you can add product information if desired.
Step 8
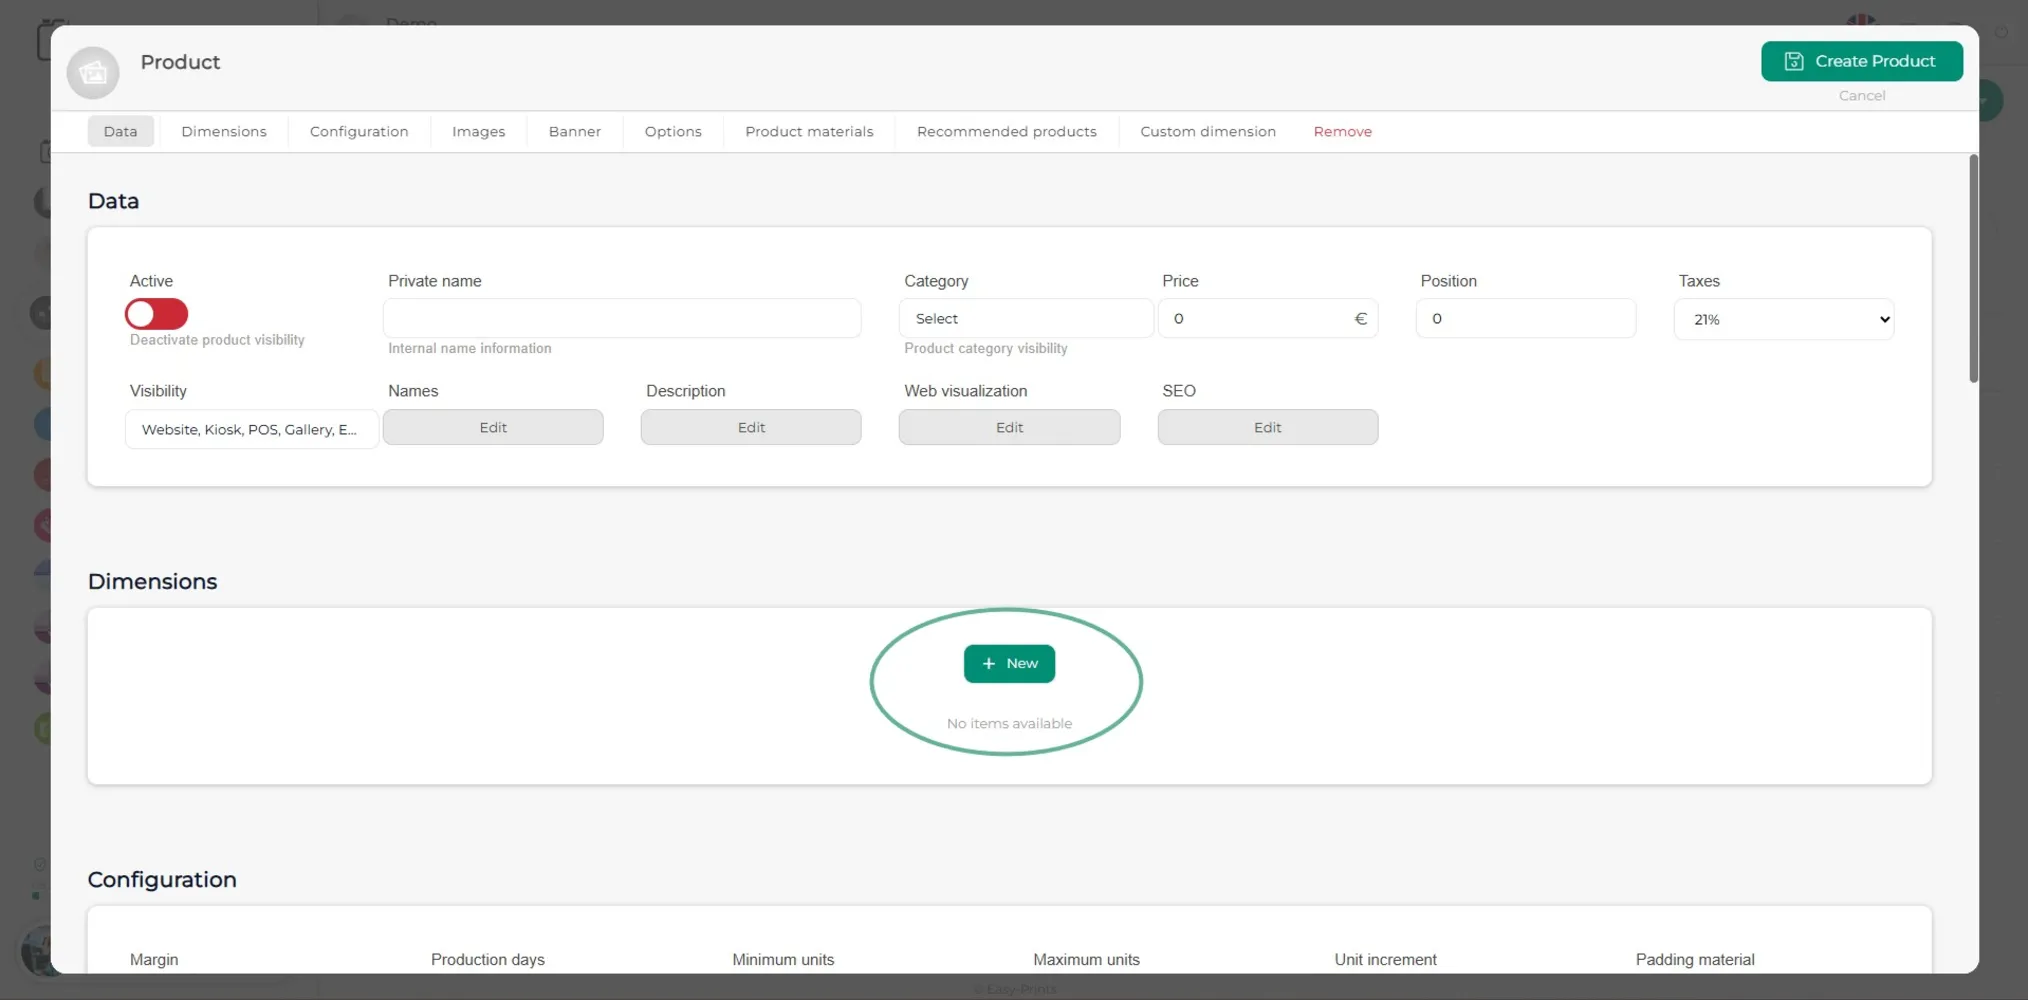
To add the product, you must add a dimension (or as many dimensions as needed) by clicking the green +New button.
Step 9
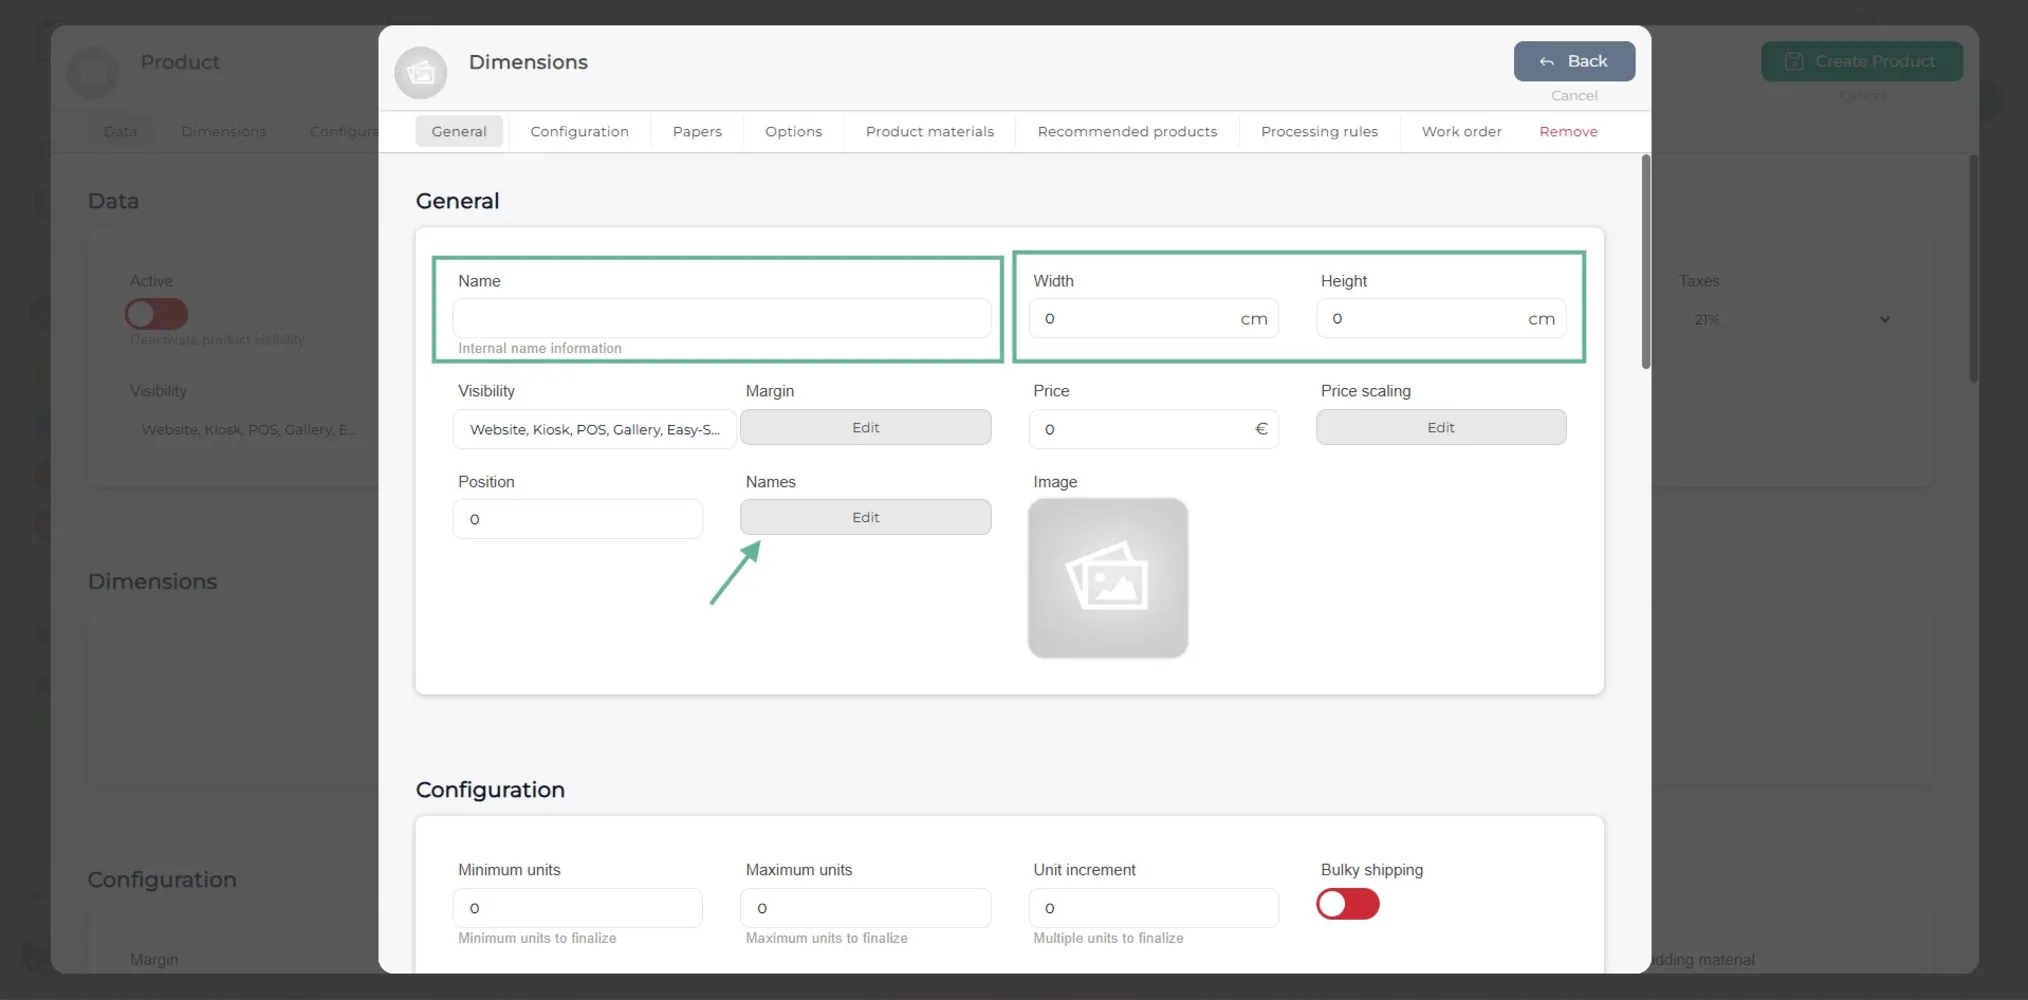
In the new window, you must indicate the product name (internally) and its dimensions (width and height). In the Names section, you must indicate the name that will be displayed on the website, kiosk, POS, etc. If there is price scaling, it must also be configured in the Price scaling button.
Step 10
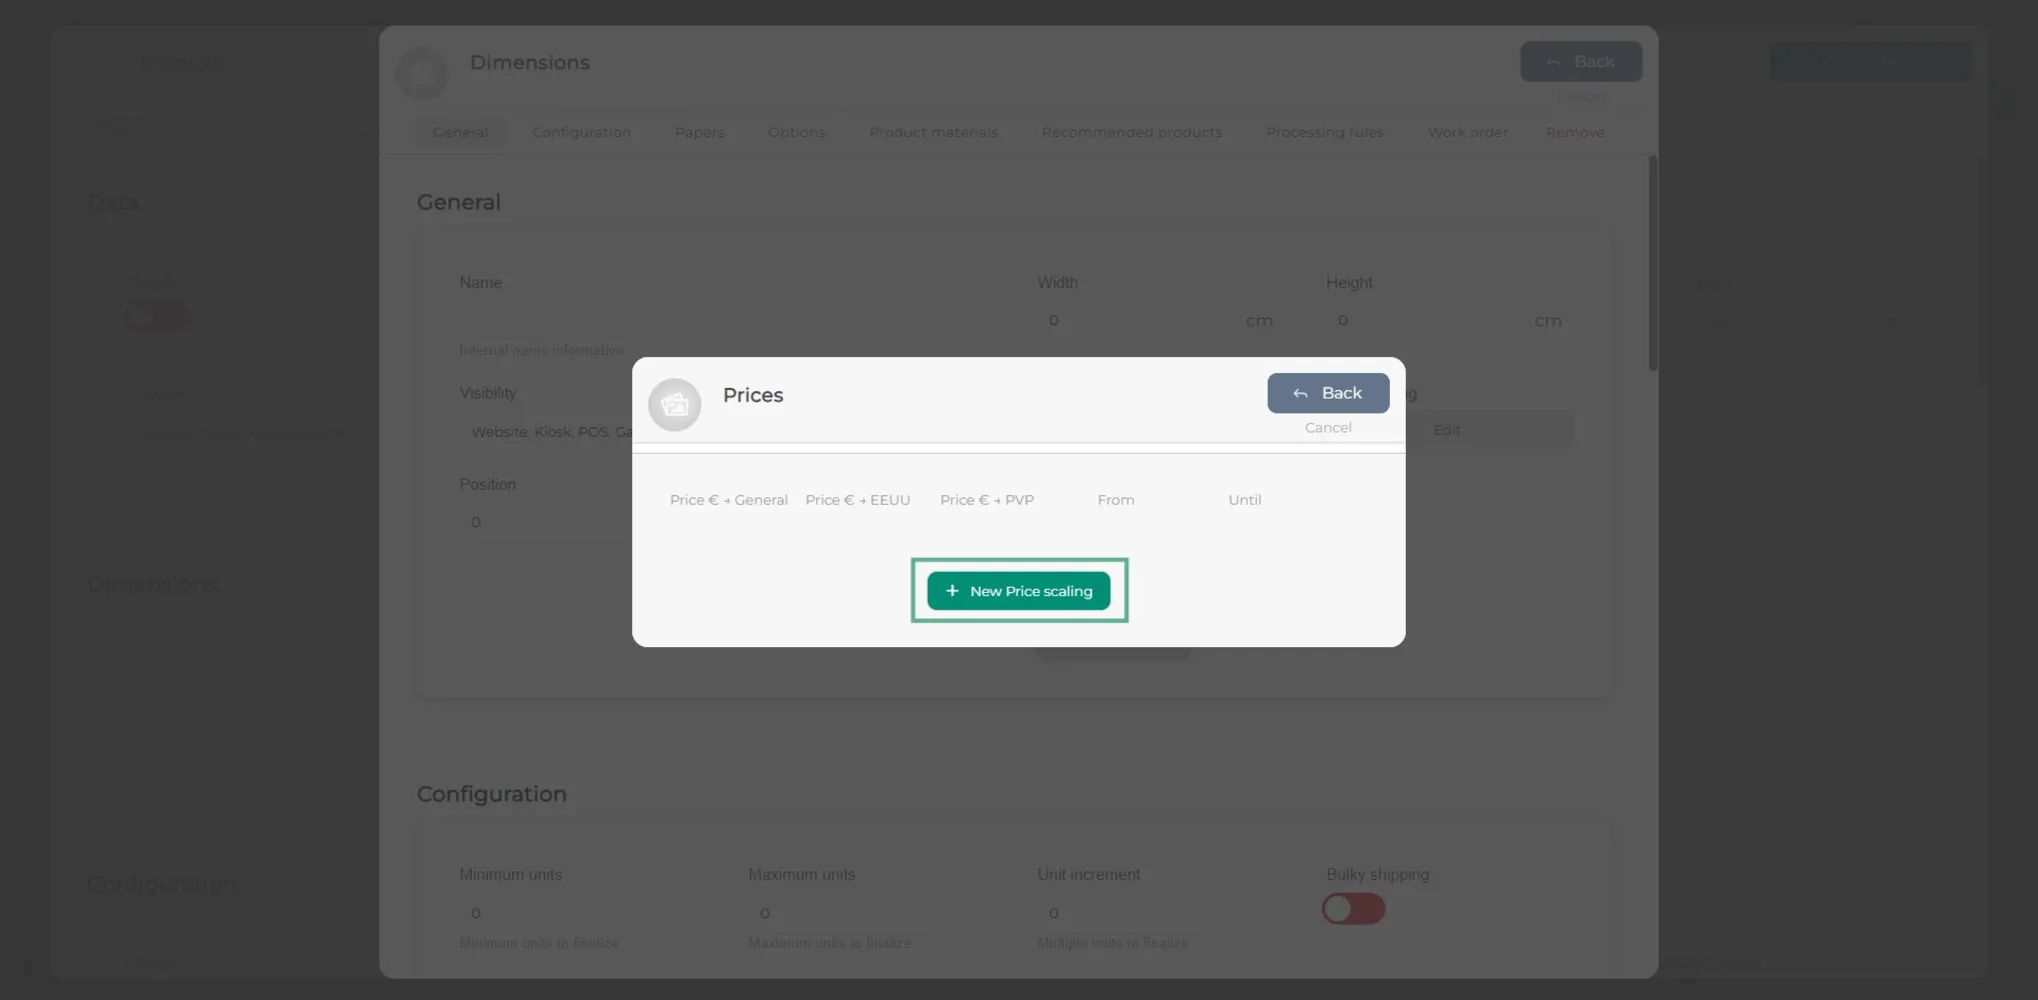
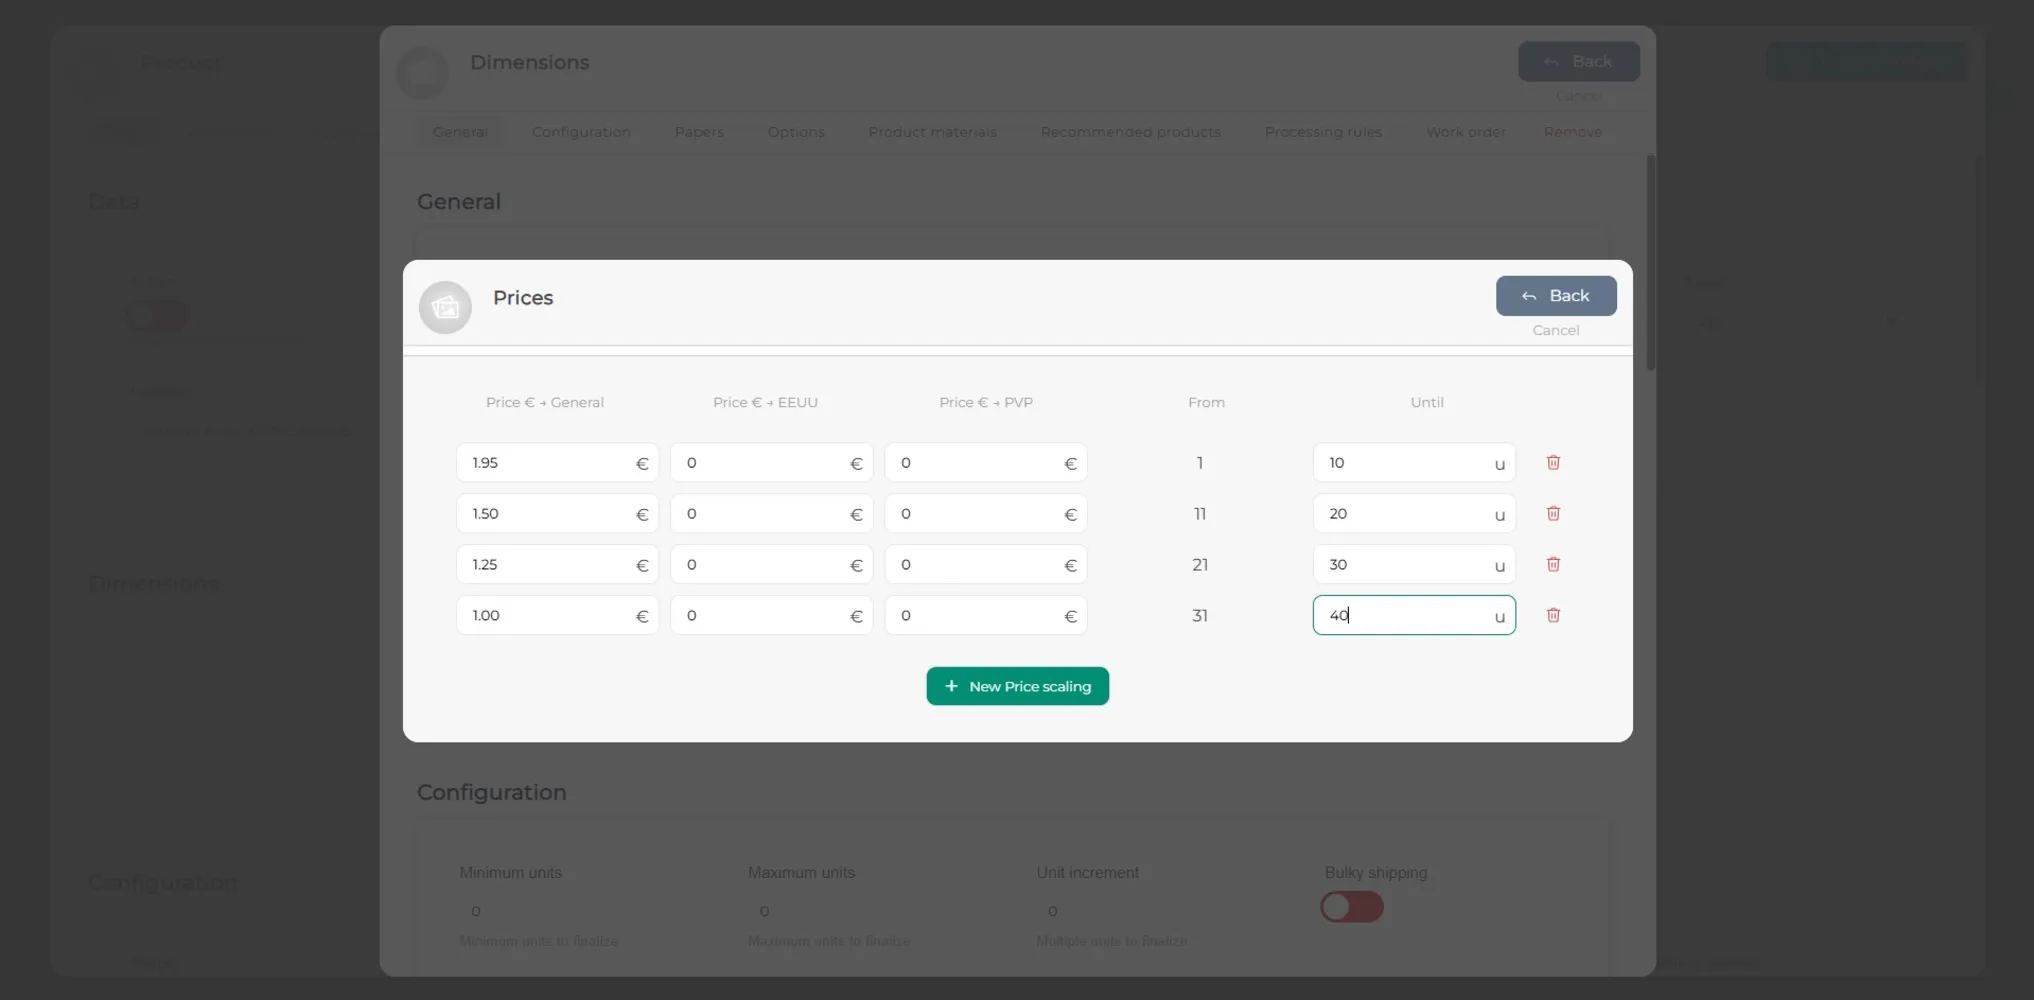
To create the price scaling, click on the Price scaling button. A new window will open. In it, click on the green +New price scaling button.
Step 11
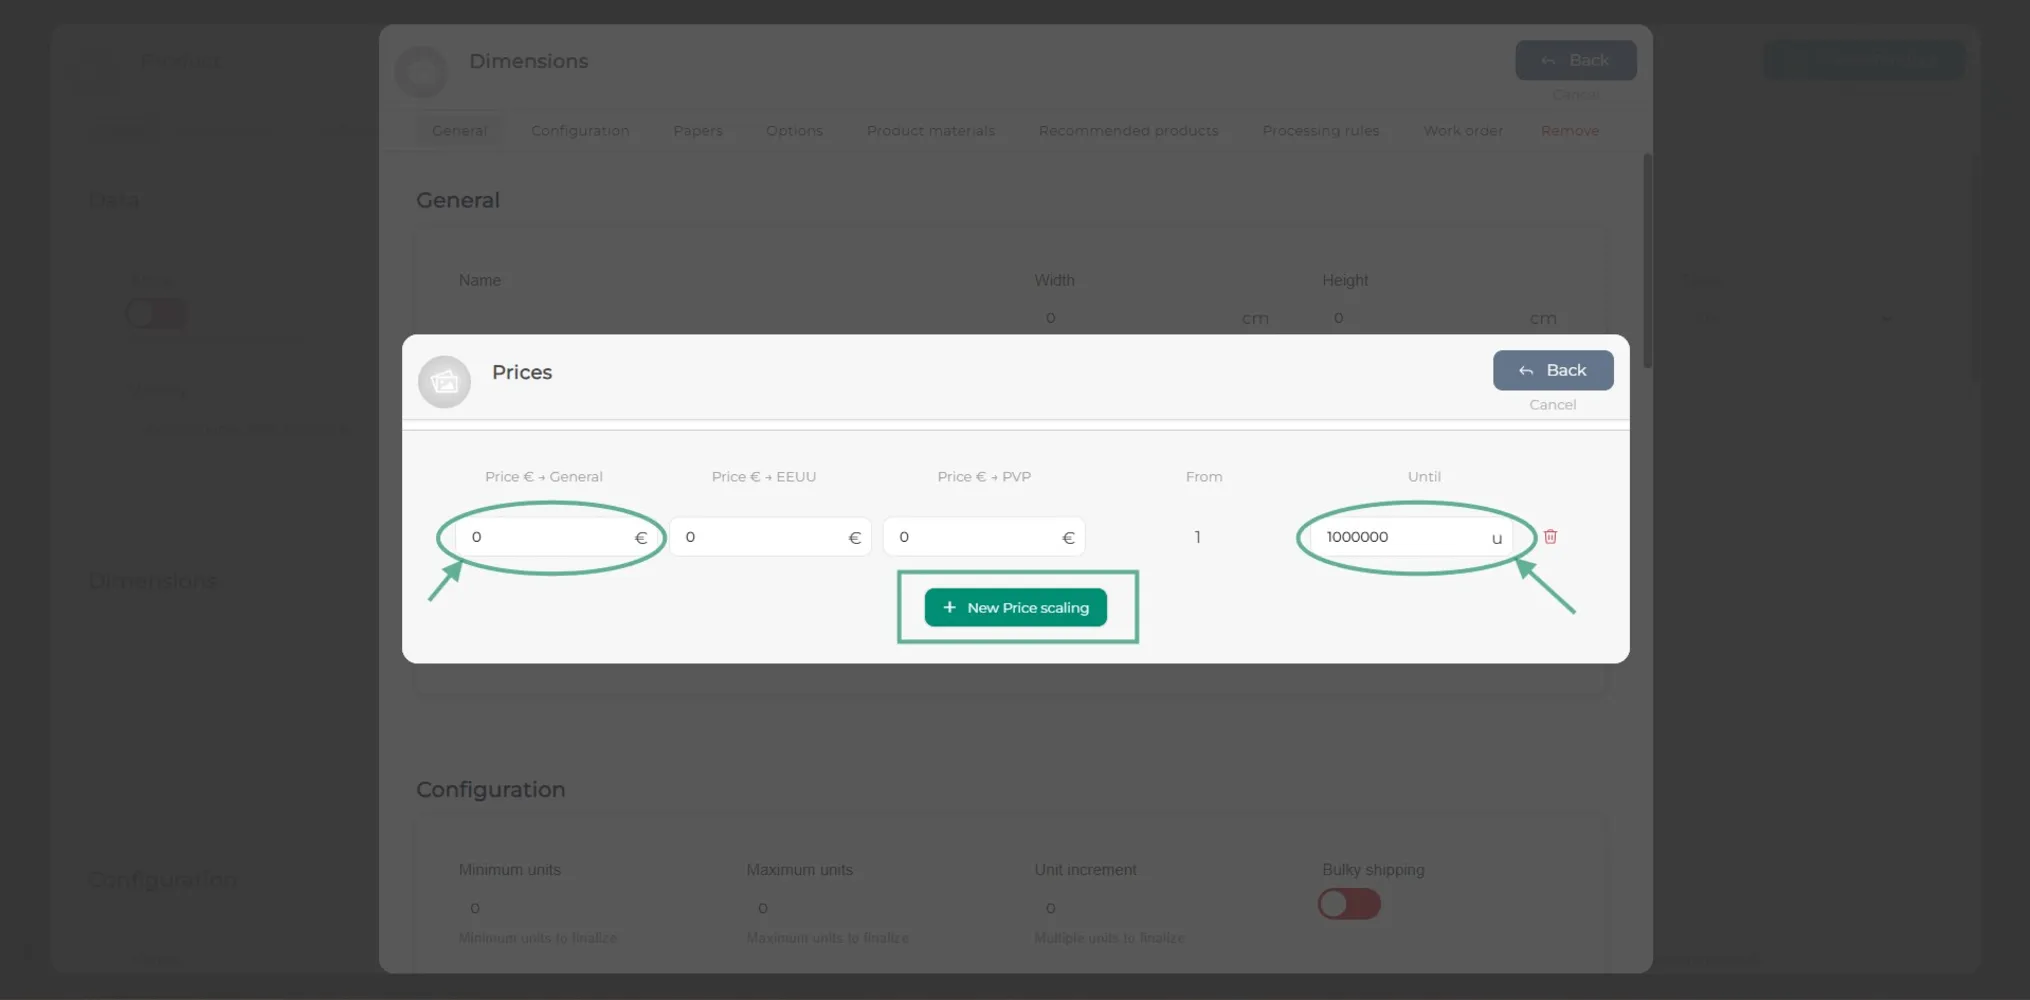
In the line that has been created, you must indicate the price. The software automatically detects that it goes from unit 1 to the unit you specify. To add a new line, click on +New price scaling.
Step 12
Add as many price scales as necessary.
Step 13
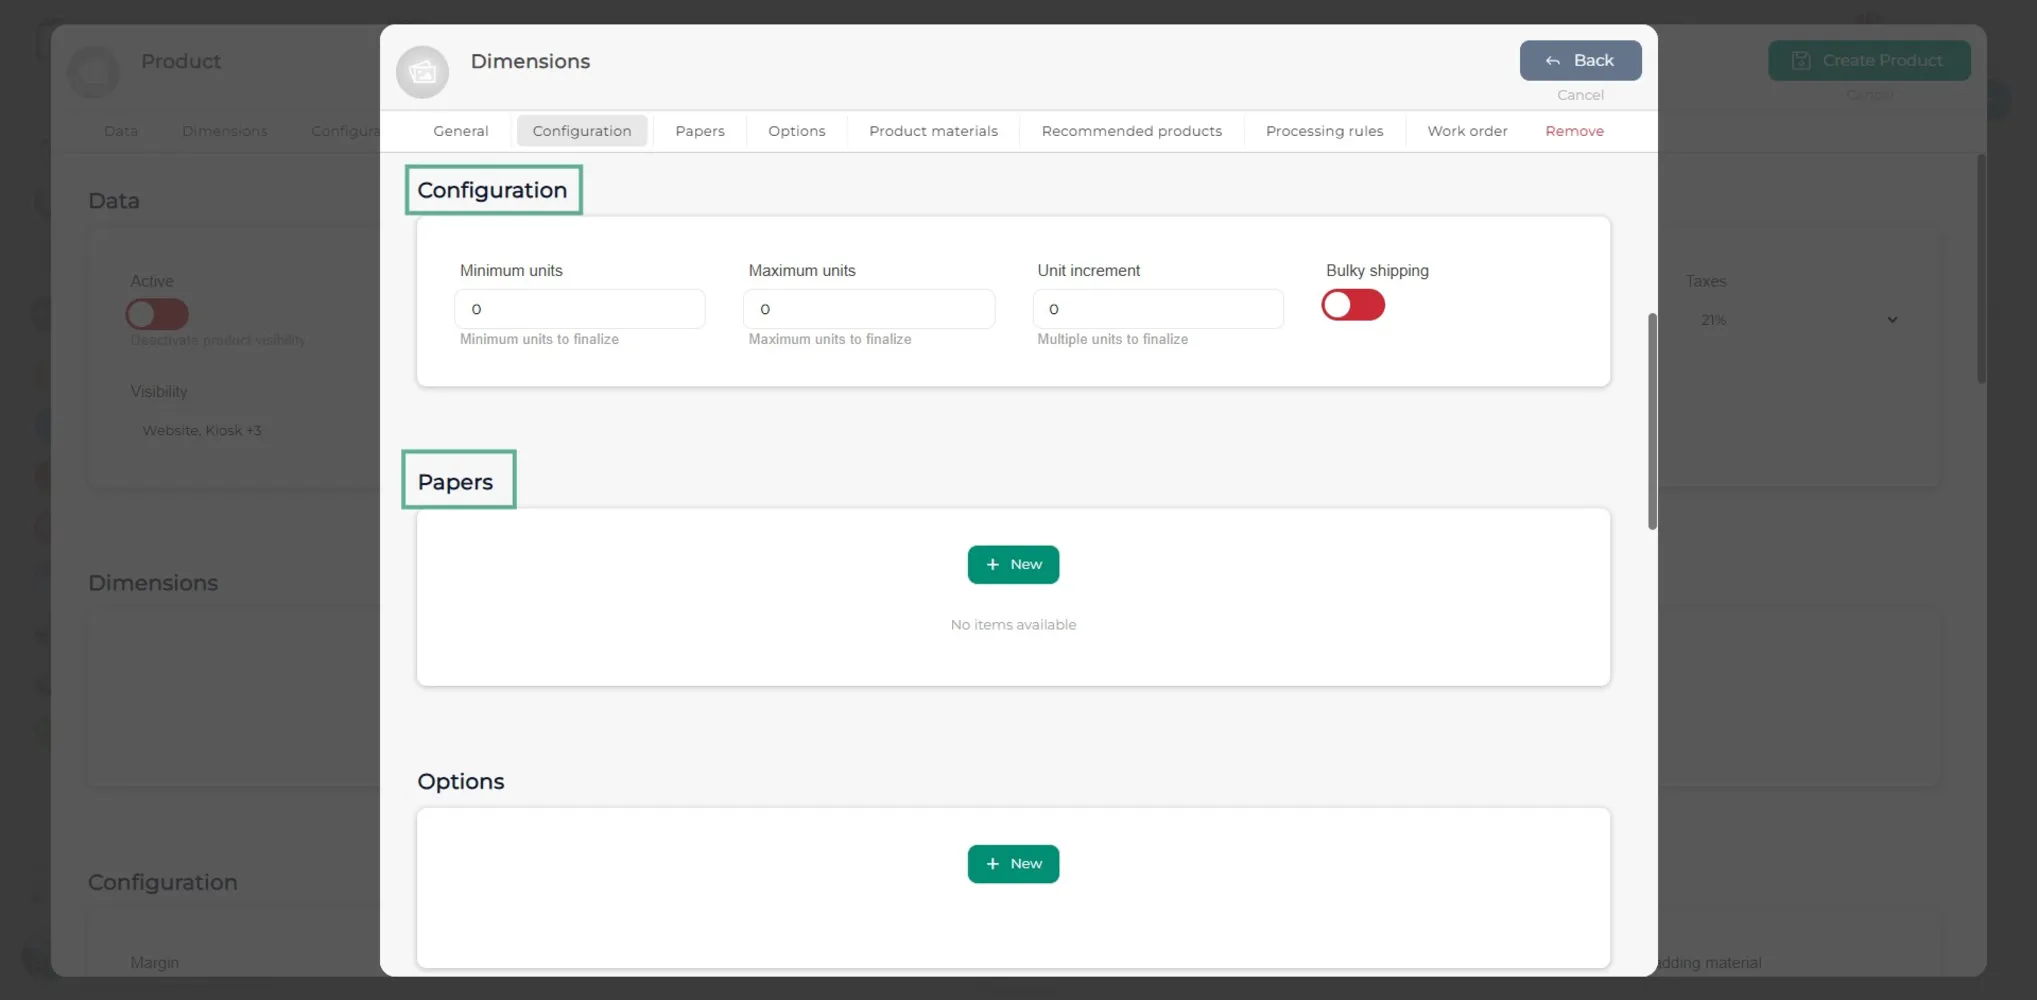
In Configuration, the minimum and maximum units must be indicated. In the Paper section, you can indicate the type of paper and whether it has an extra cost.
Step 14
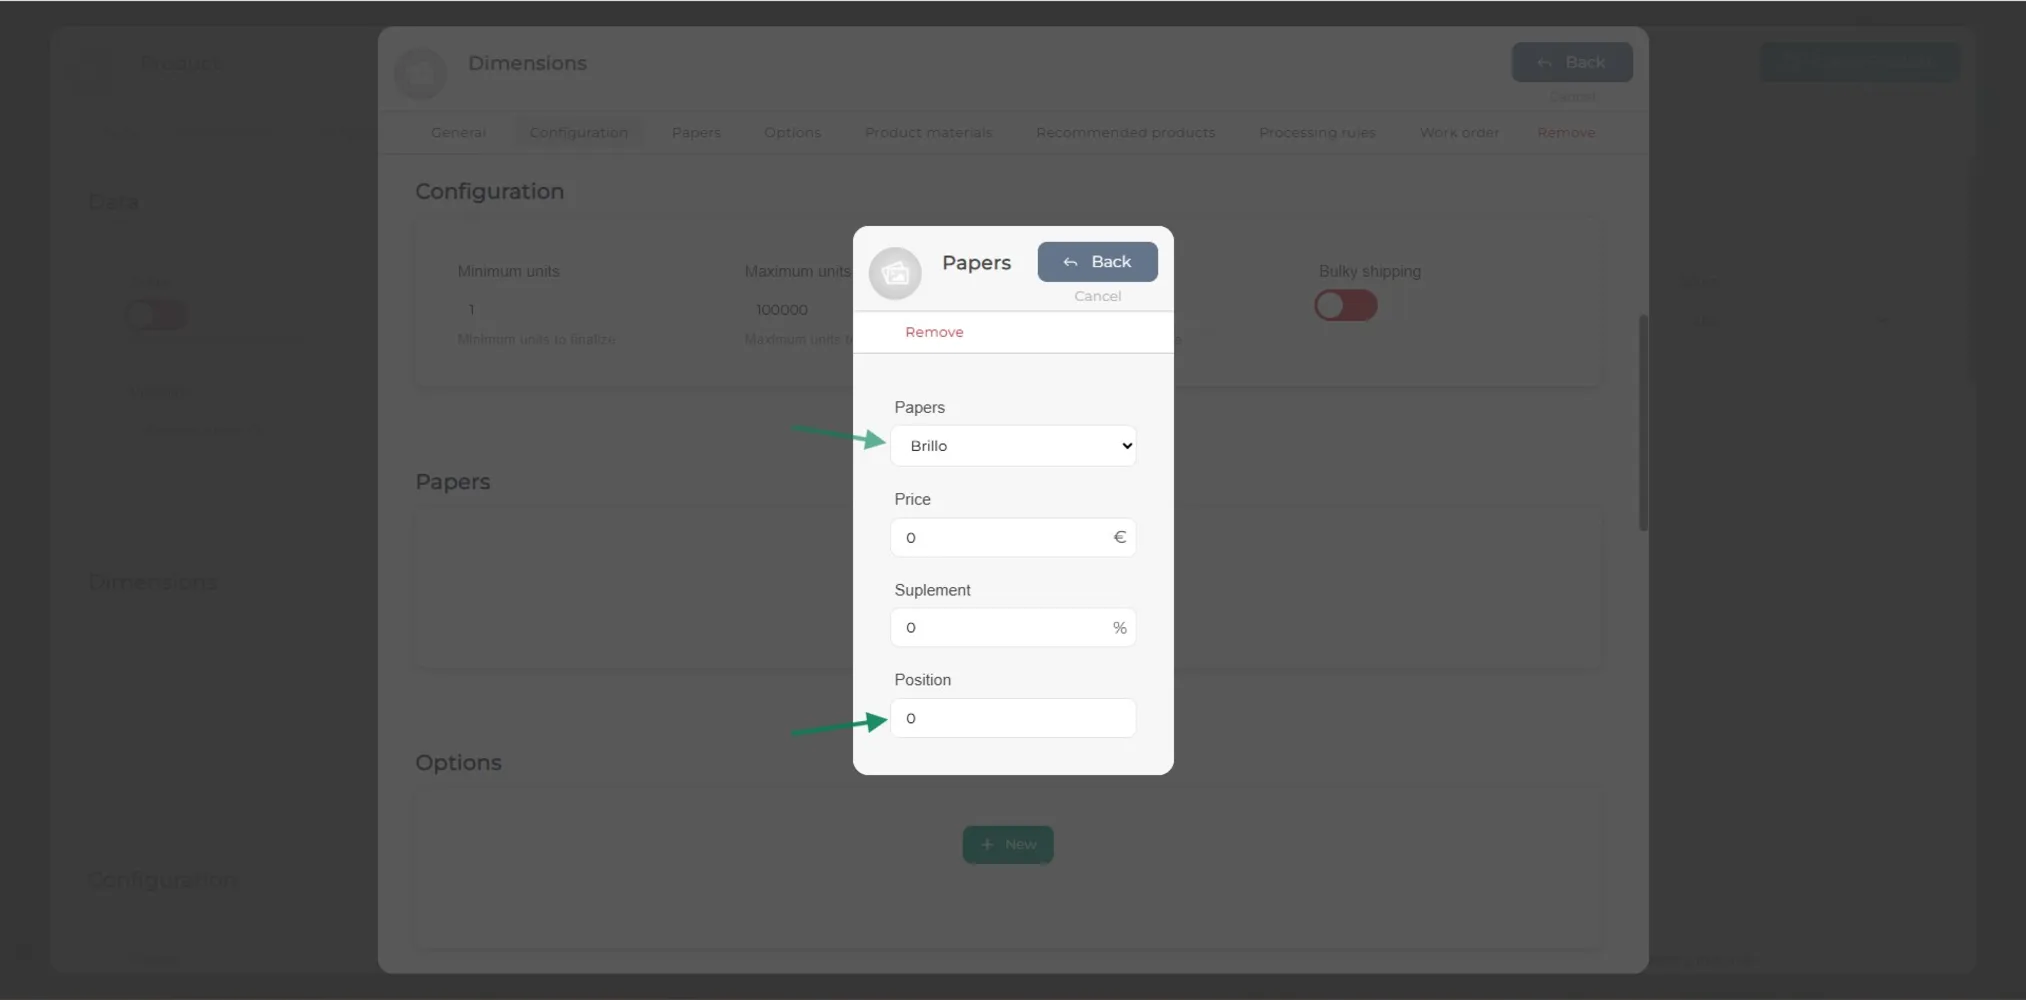
In the Paper section, you must indicate the type of paper and the surcharge. This must be done according to the type of paper used for the print. If the paper has no surcharge, it should be left at 0.
Step 15
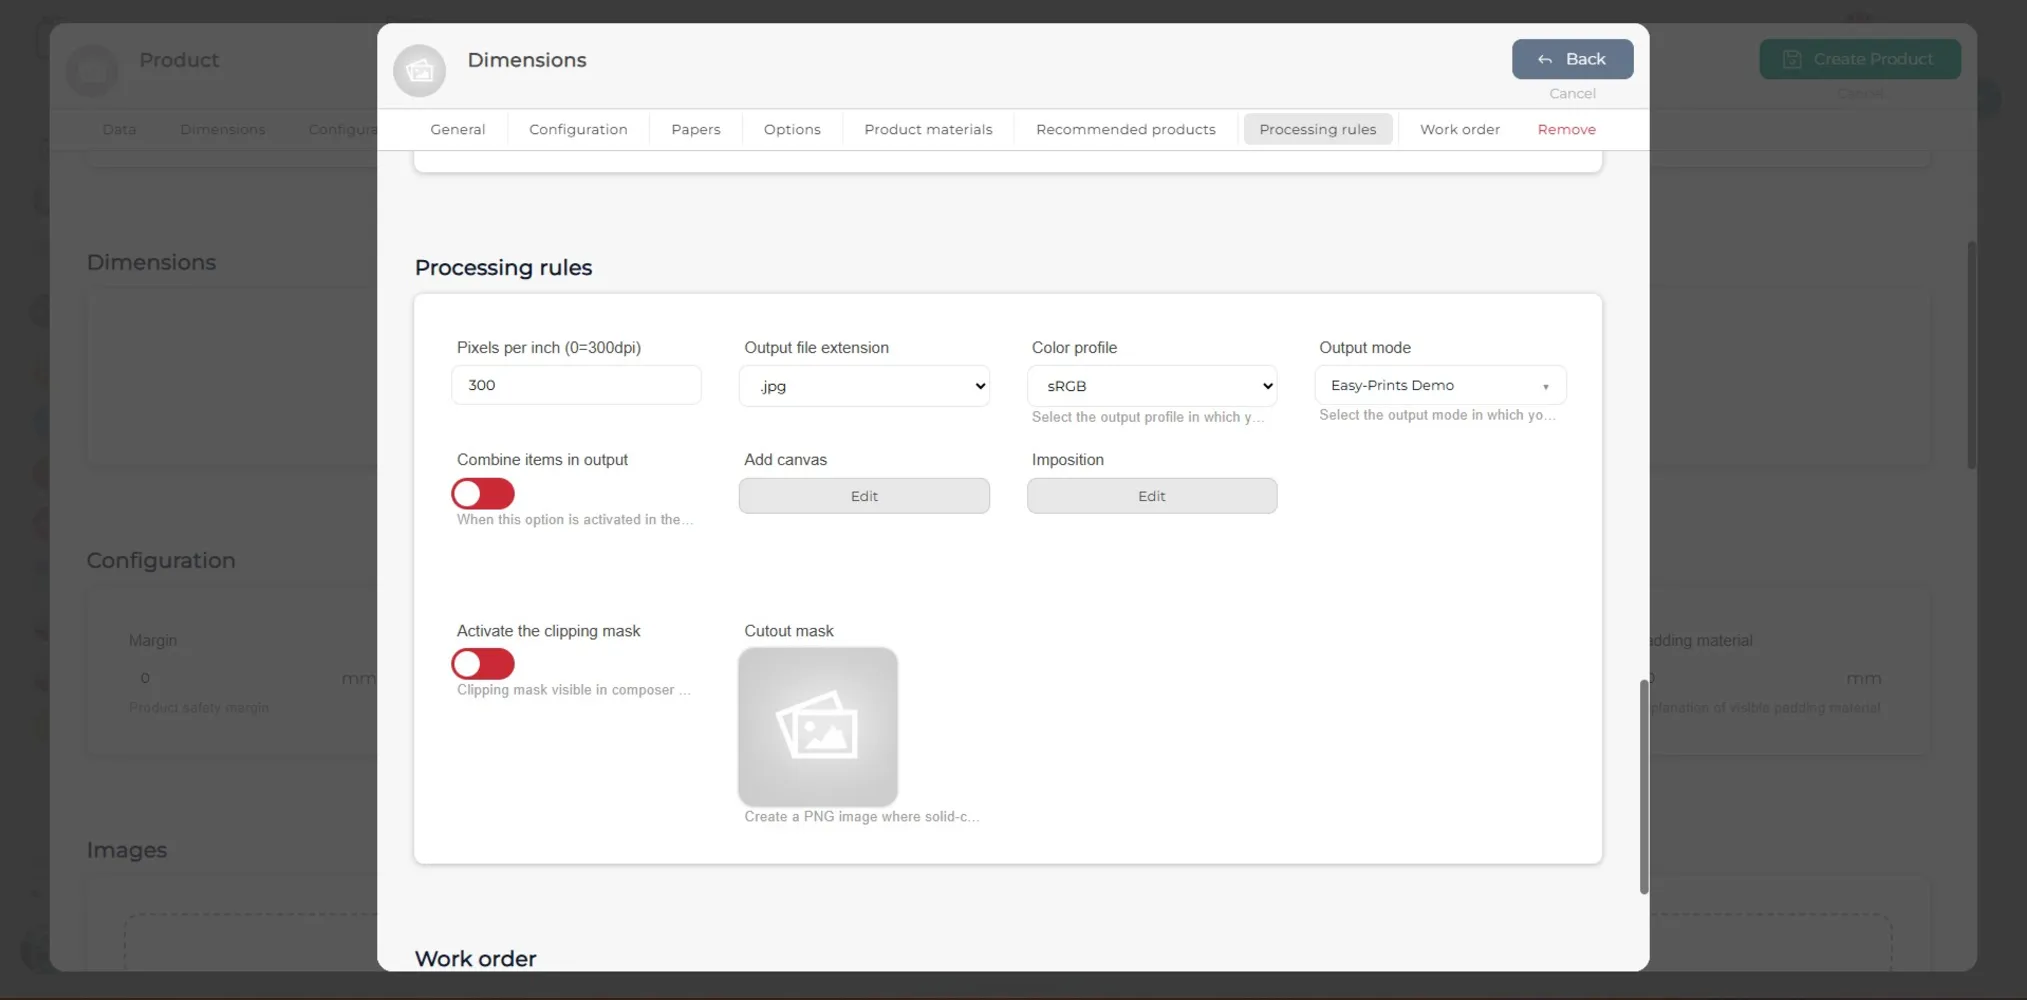
In the processing rules, you must indicate the pixels per inch, the output file extension, the color profile and the output mode. If you want to apply a crop mask to the print, you must upload the image in PNG format and activate it.
Step 16
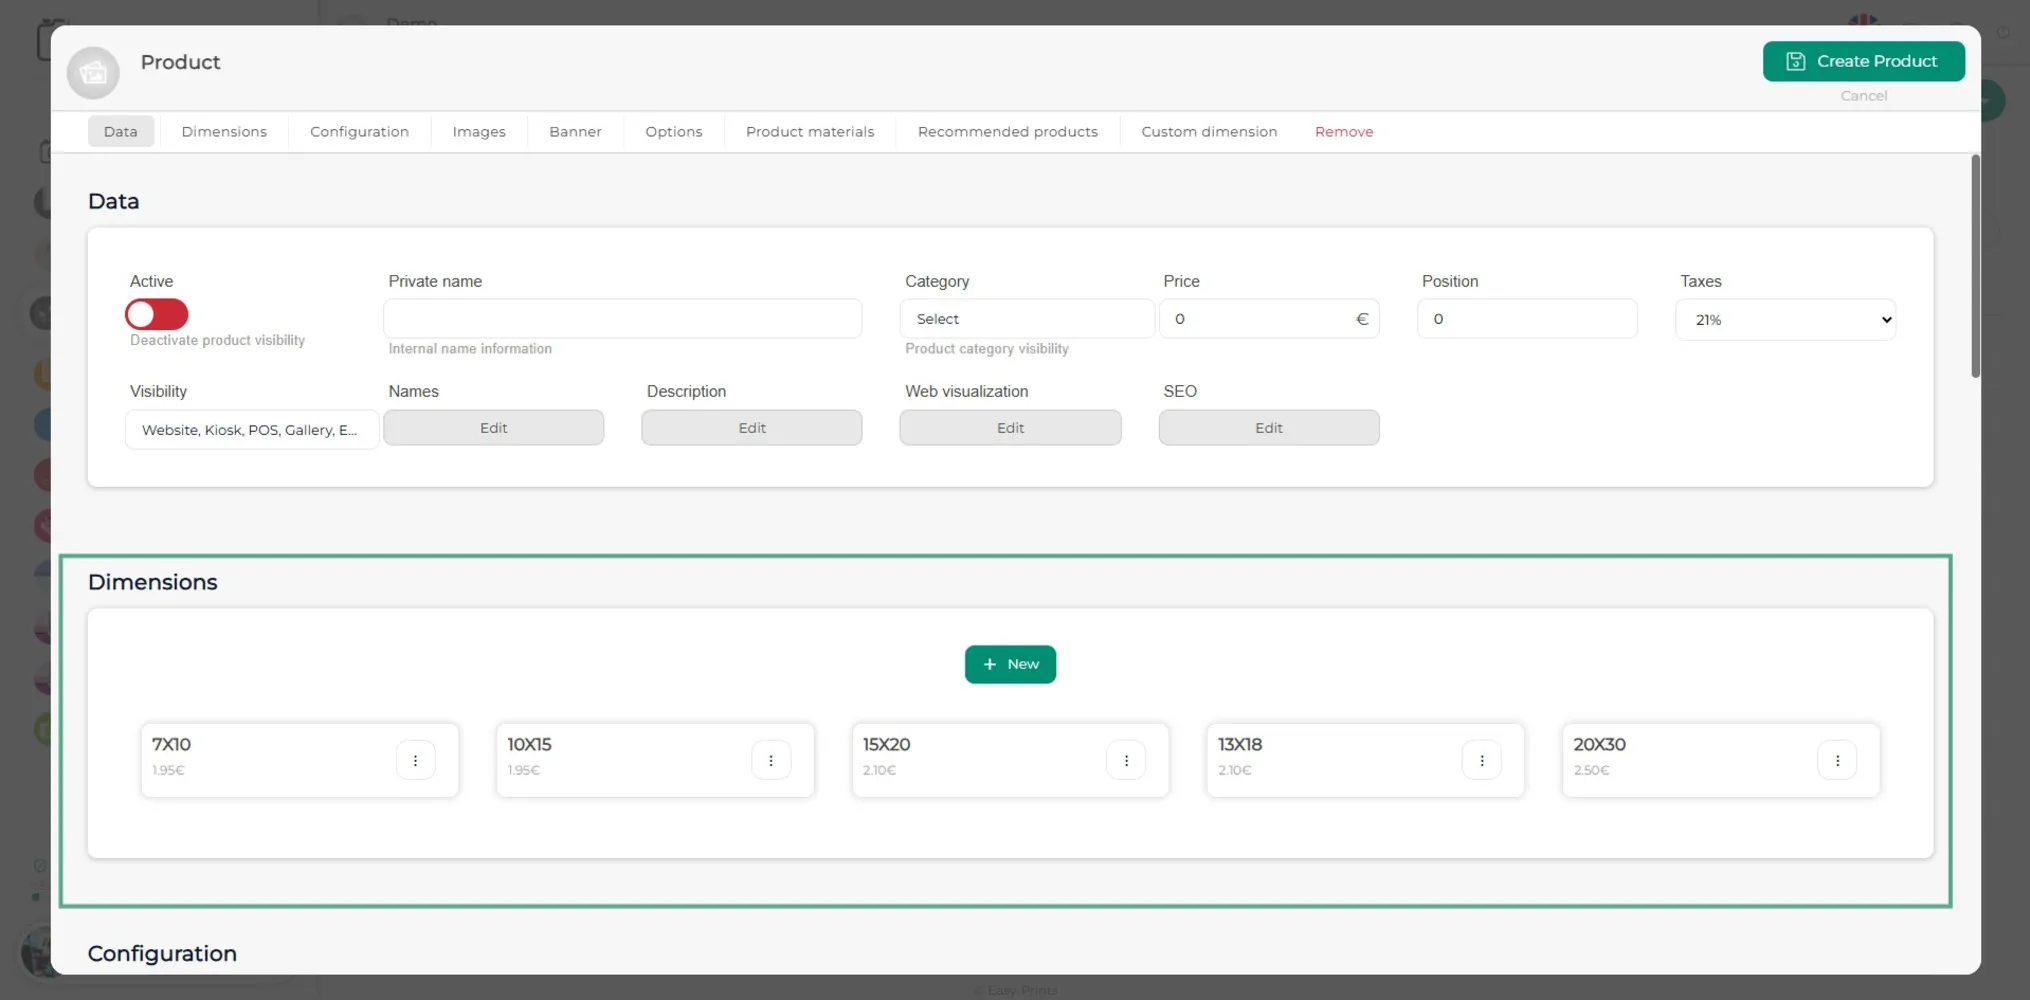
Repeat the process with the sizes you want to add.
Step 17
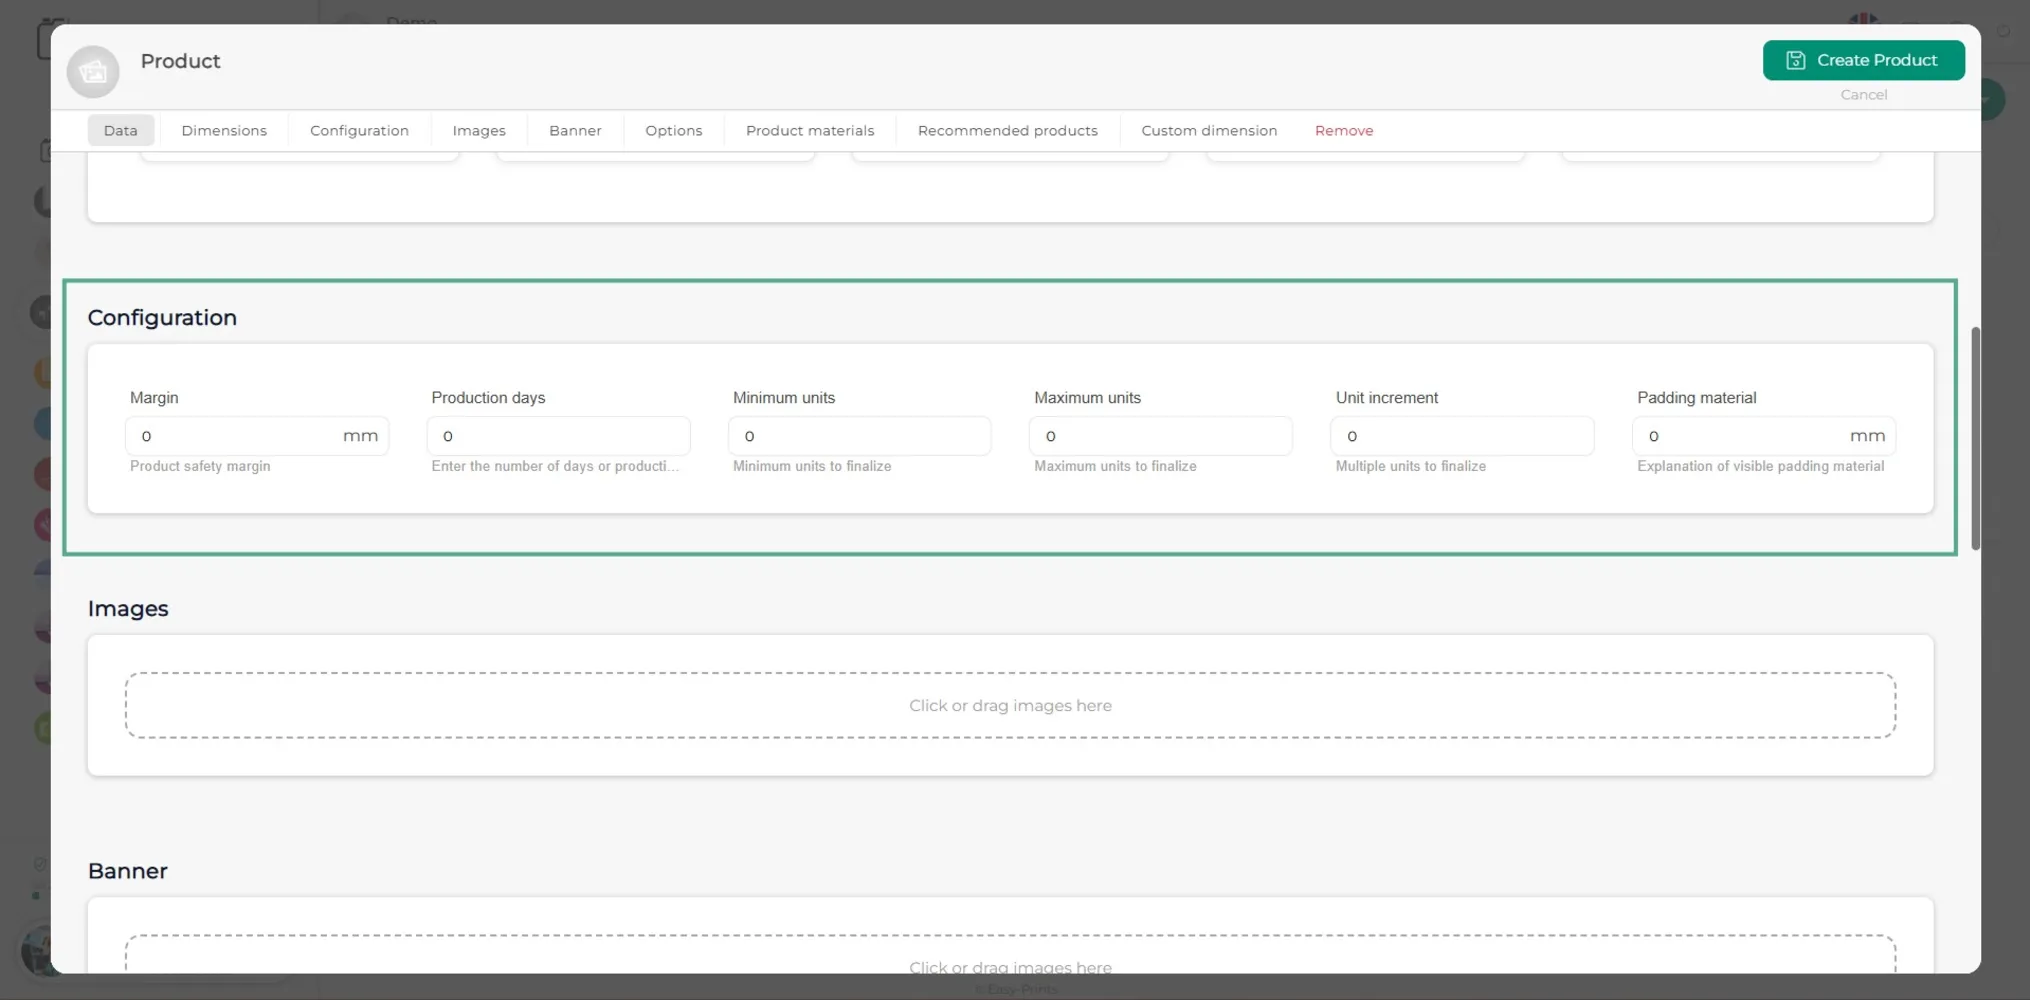
In the Product configuration section, if the margin (product safety margin) or the maximum/minimum units for each size have not been indicated, they can be set here. You can also indicate the number of days required to produce the product. These are working days. If you want to set a range of days, it must be entered separated by a hyphen, for example: (4-6). If the value is 0, the estimated production time will not be displayed.
Step 18
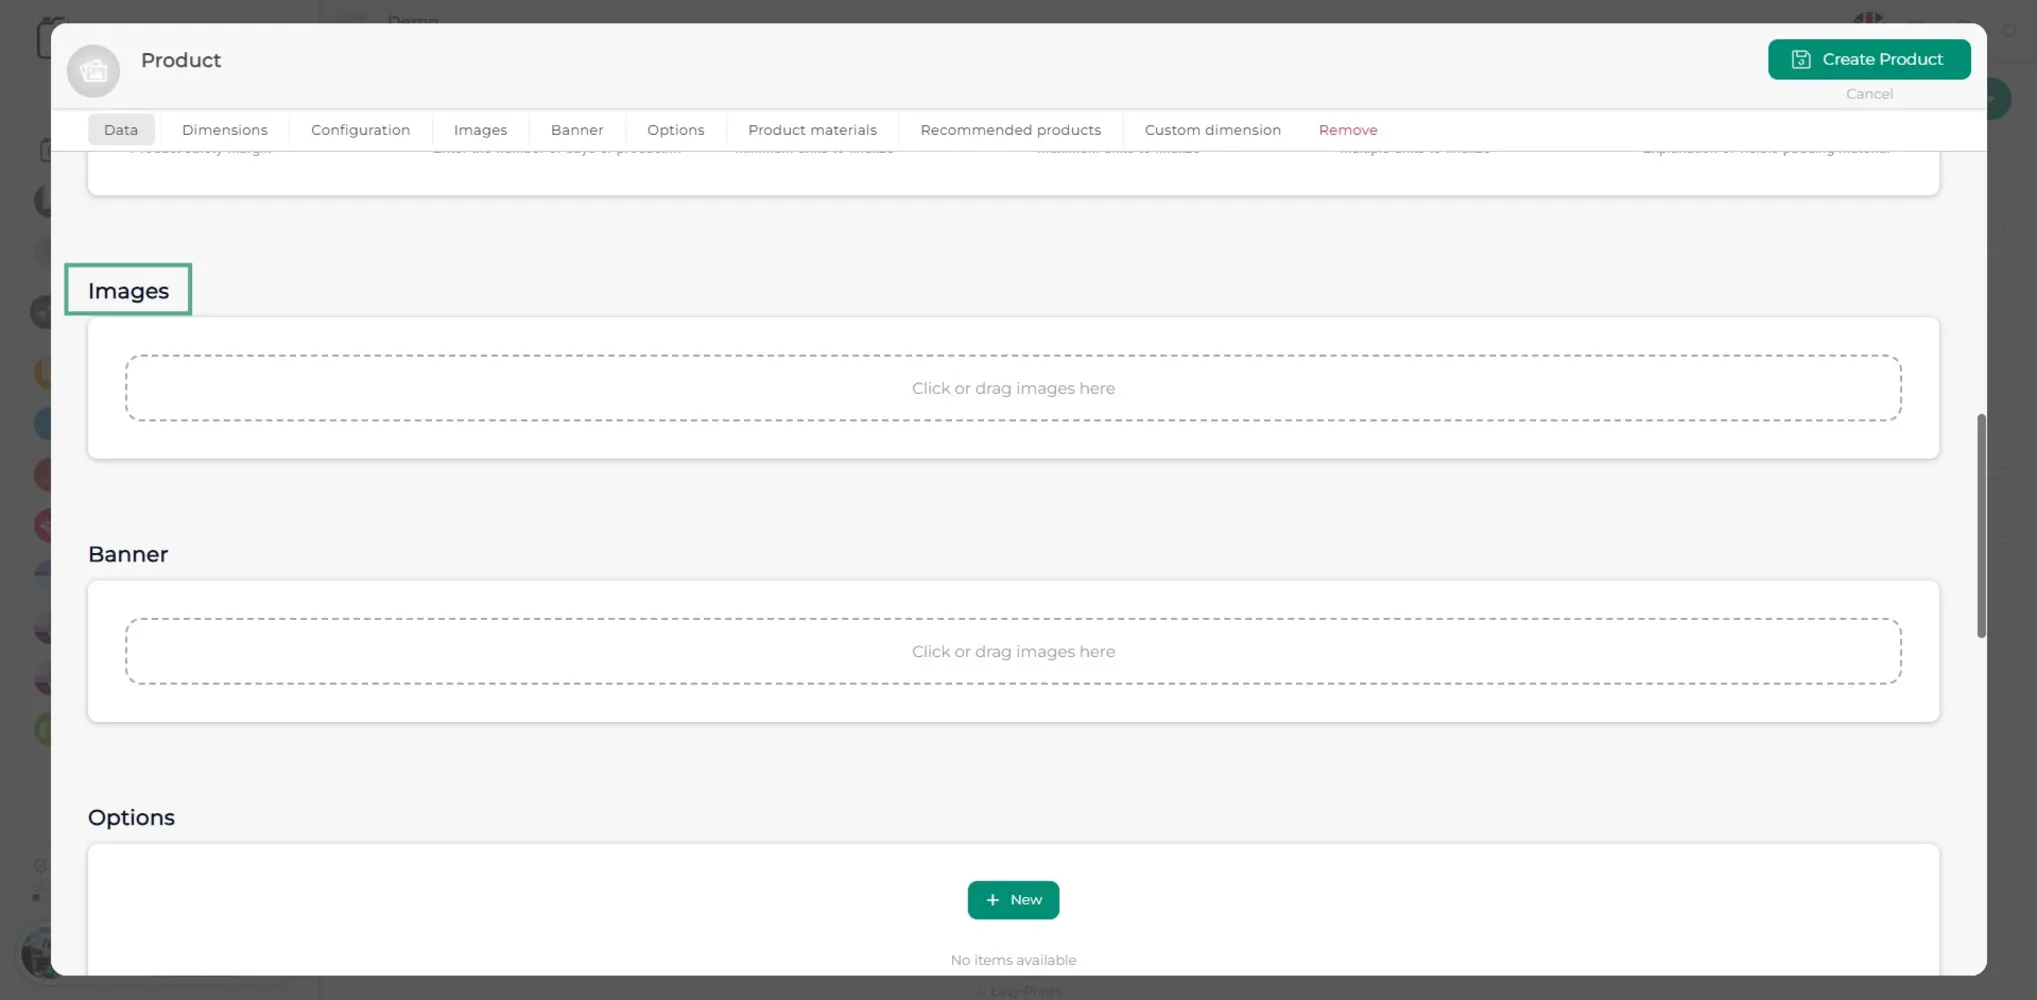
To add an image, click on the box where it is indicated. Here you can add the product image or images. There is also the option to add a banner, which can be added in the same way as the images. A size of 500x1920 is recommended for the banner.
Step 19
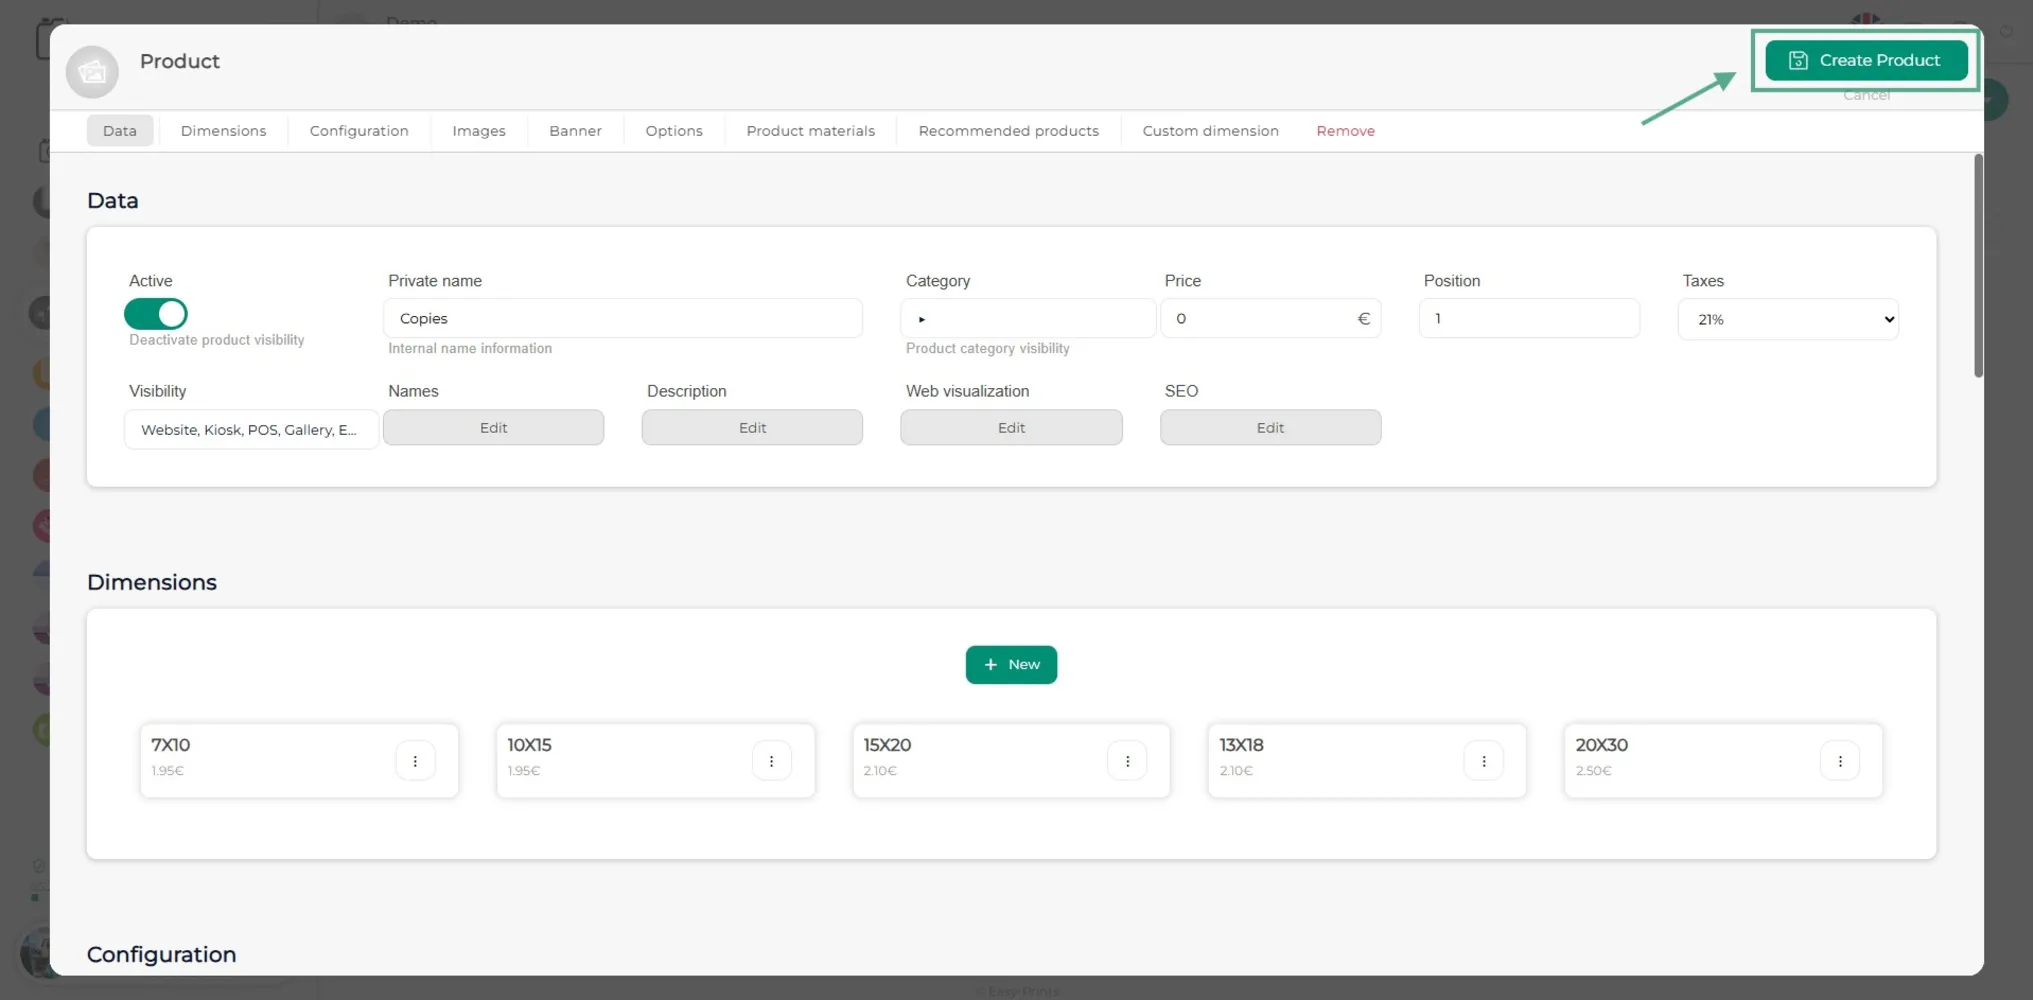
Finally, click on the green Create Product button located in the upper right corner of the window.
Go back to the Help Center or contact Easy-Prints.
← Back to Help Center