
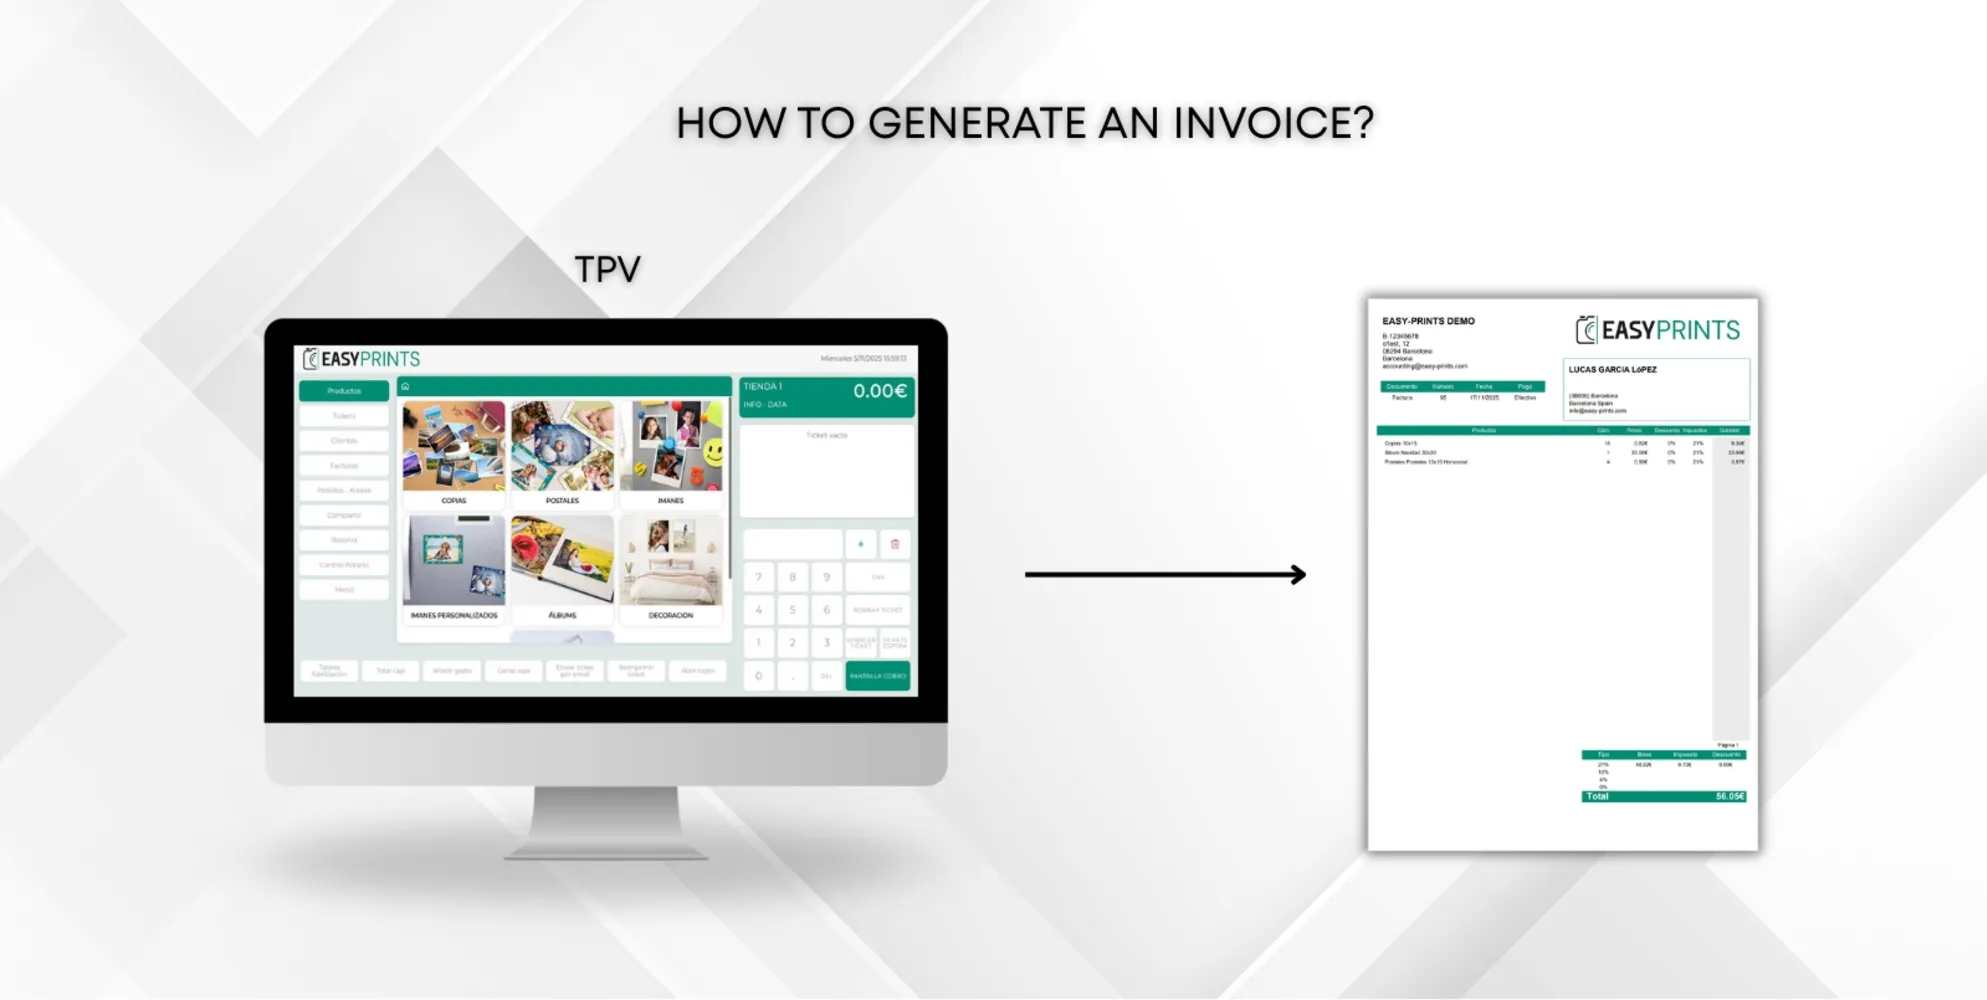
How to generate the invoice for a sale
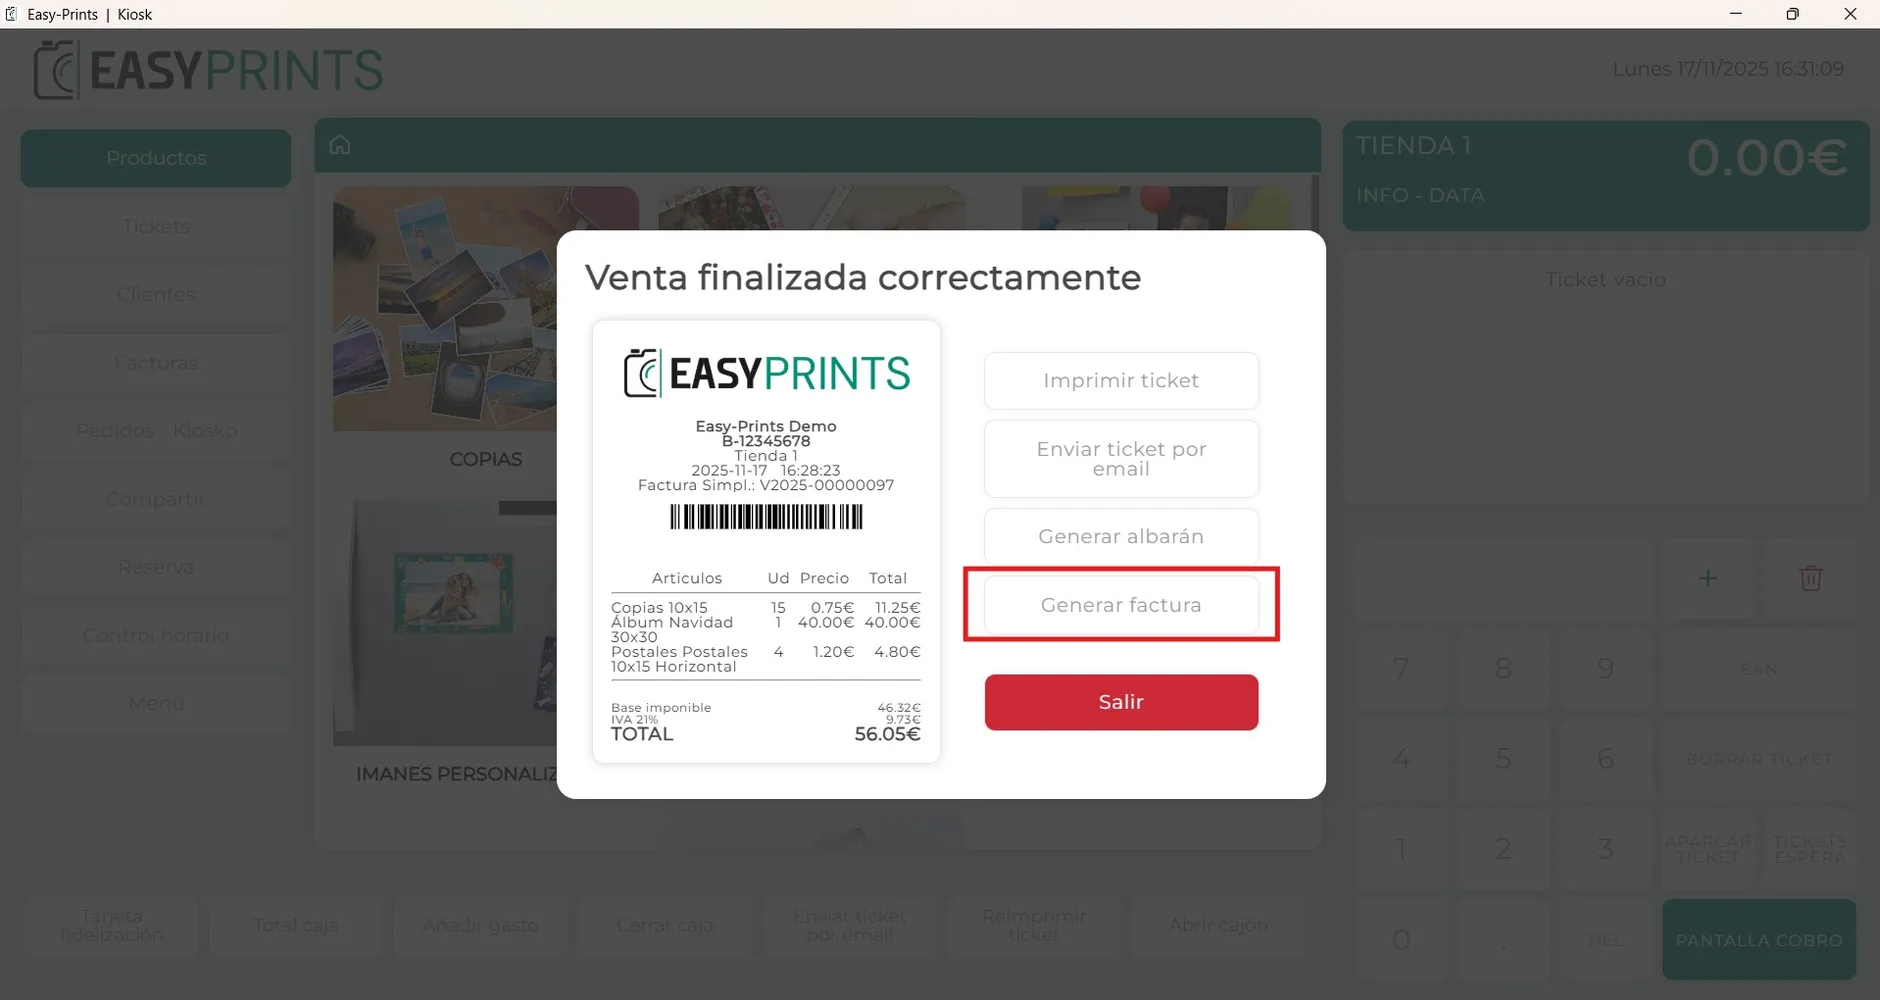
To create an invoice, when you finish a sale you will see the following options: print receipt, send receipt by email, generate delivery note, and generate…
Step 1
To create an invoice, when you finish a sale you will see the following options: print receipt, send receipt by email, generate delivery note, and generate invoice. You must click on “Generate invoice”.
Step 2
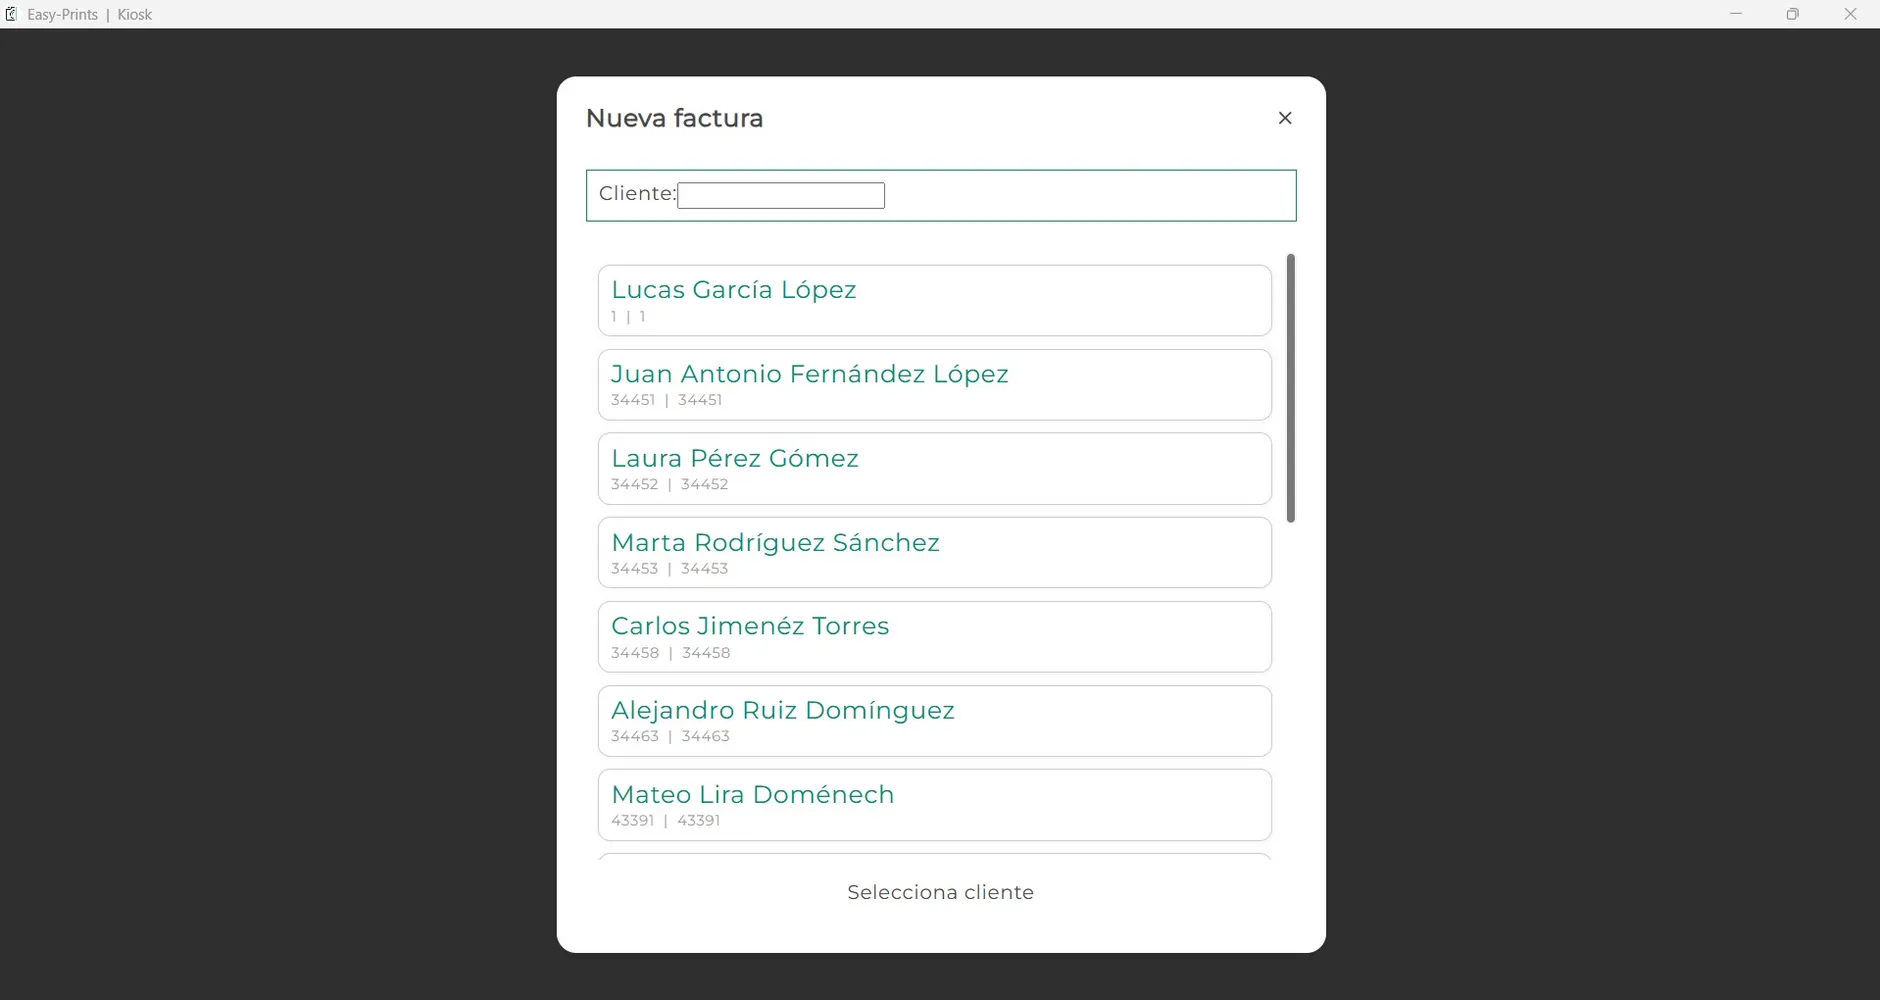
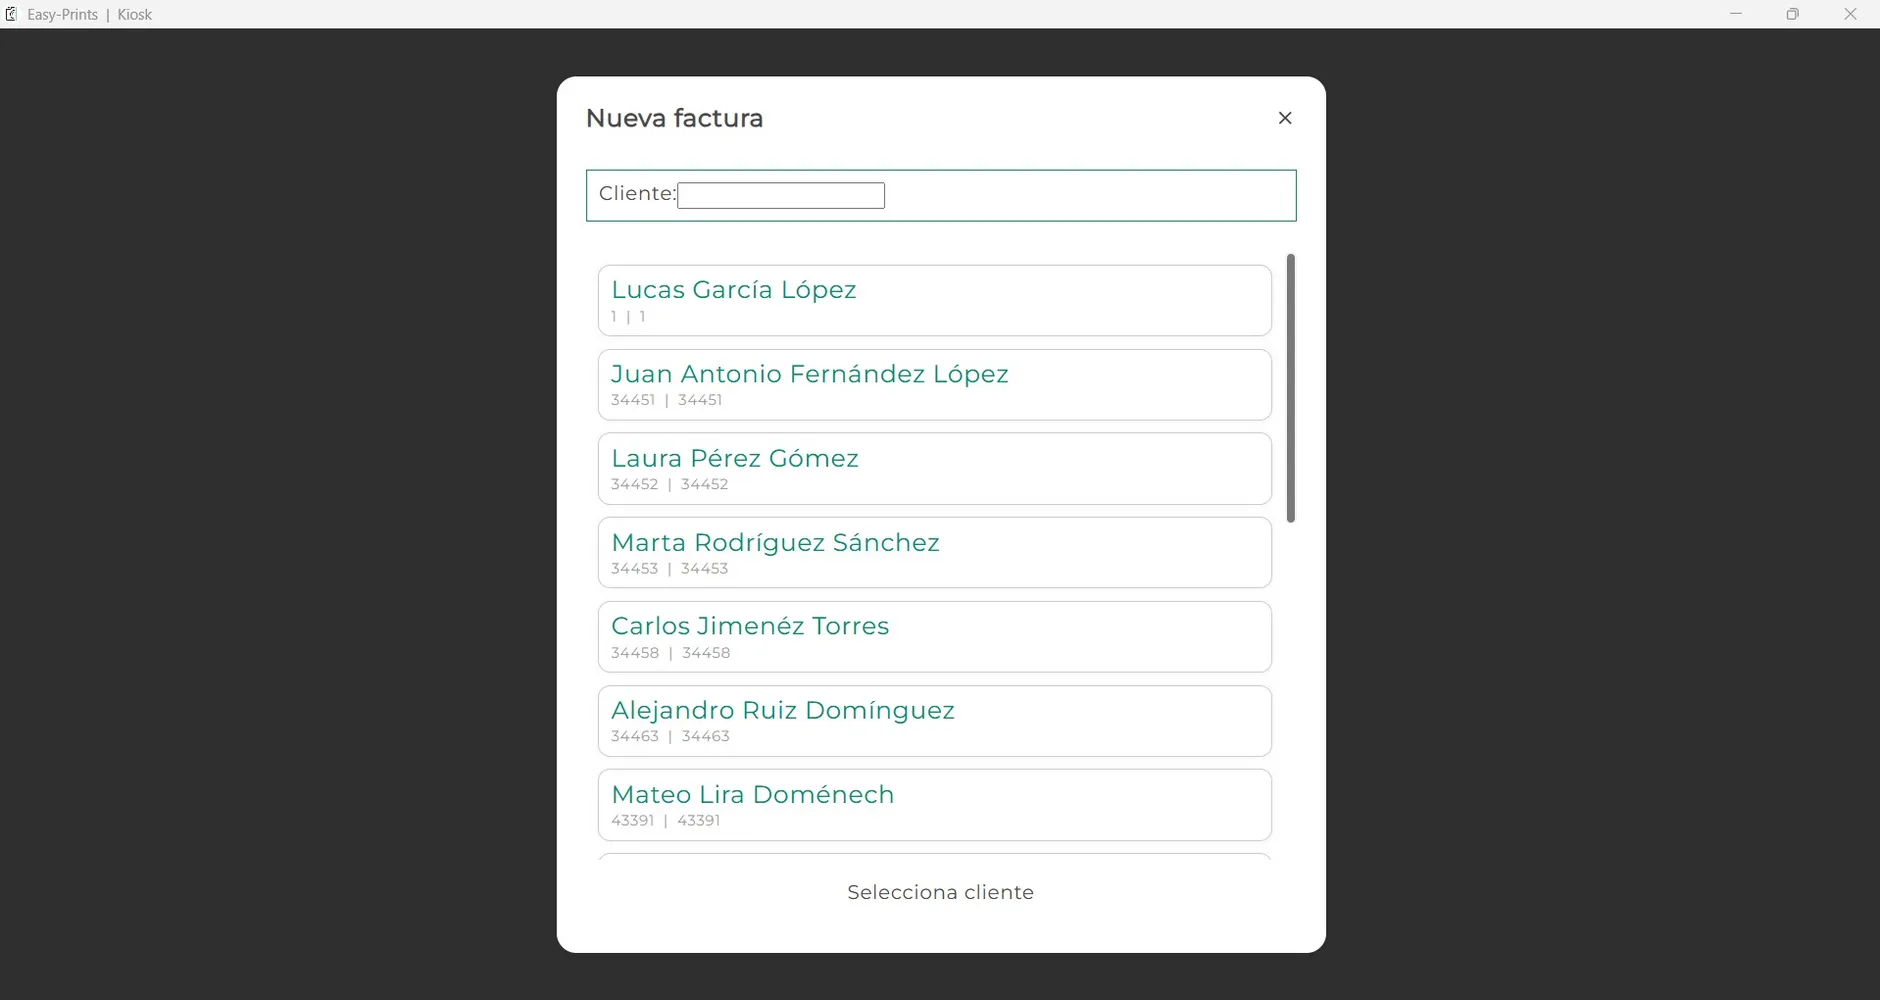
A new window will open where you must choose from your saved customers. Click on the desired customer. If you don’t have a customer profile created, go to point 4.
Step 3
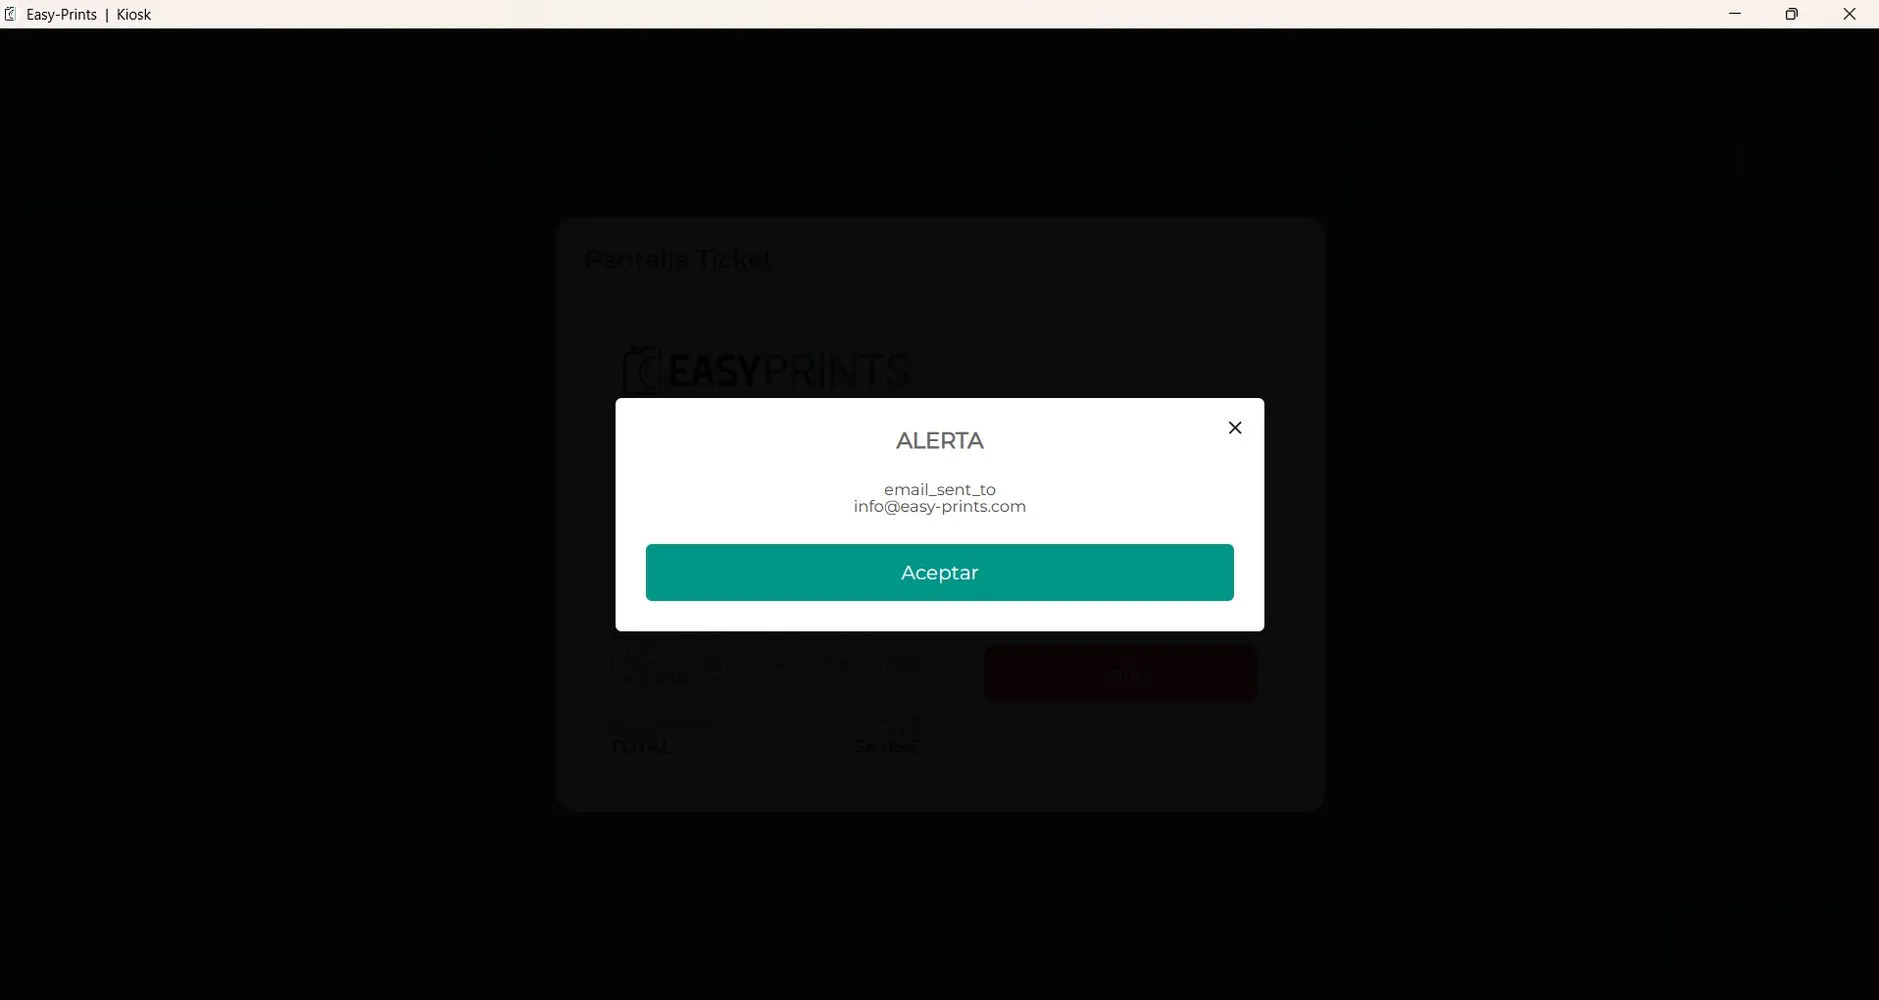
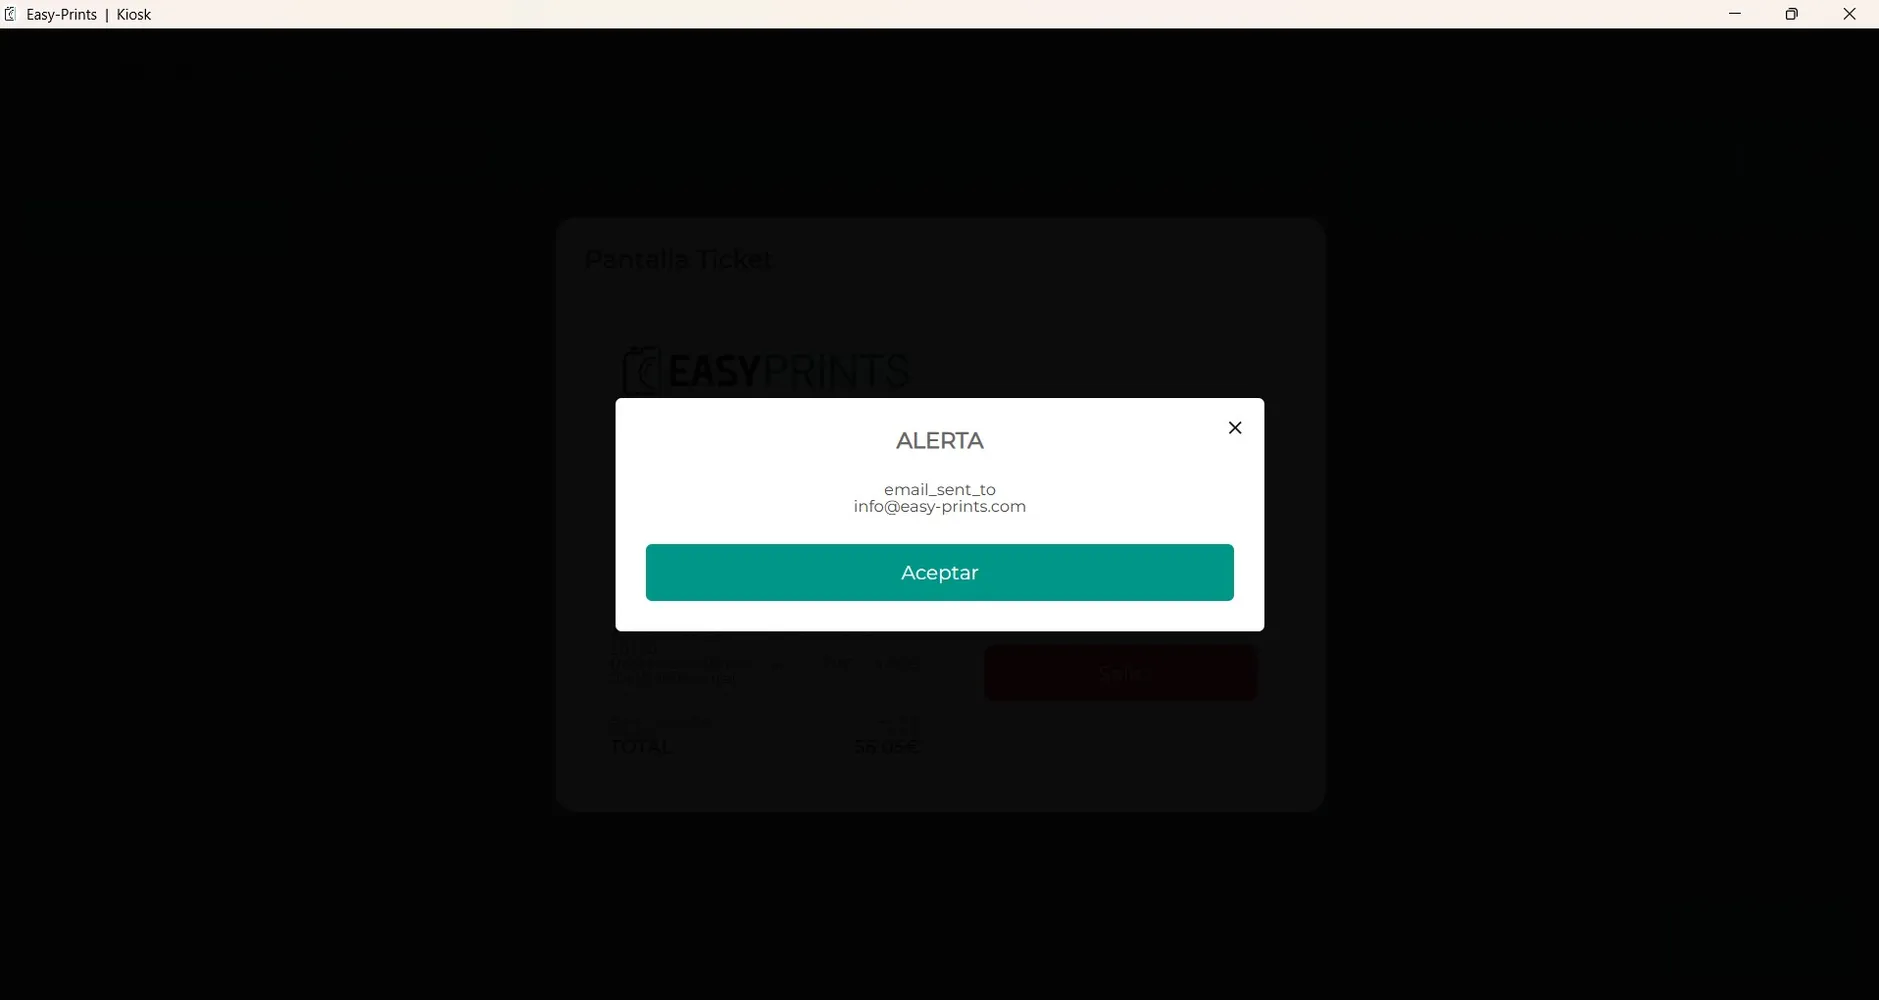
An email with the invoice will be sent automatically to the customer's email address.
Step 4
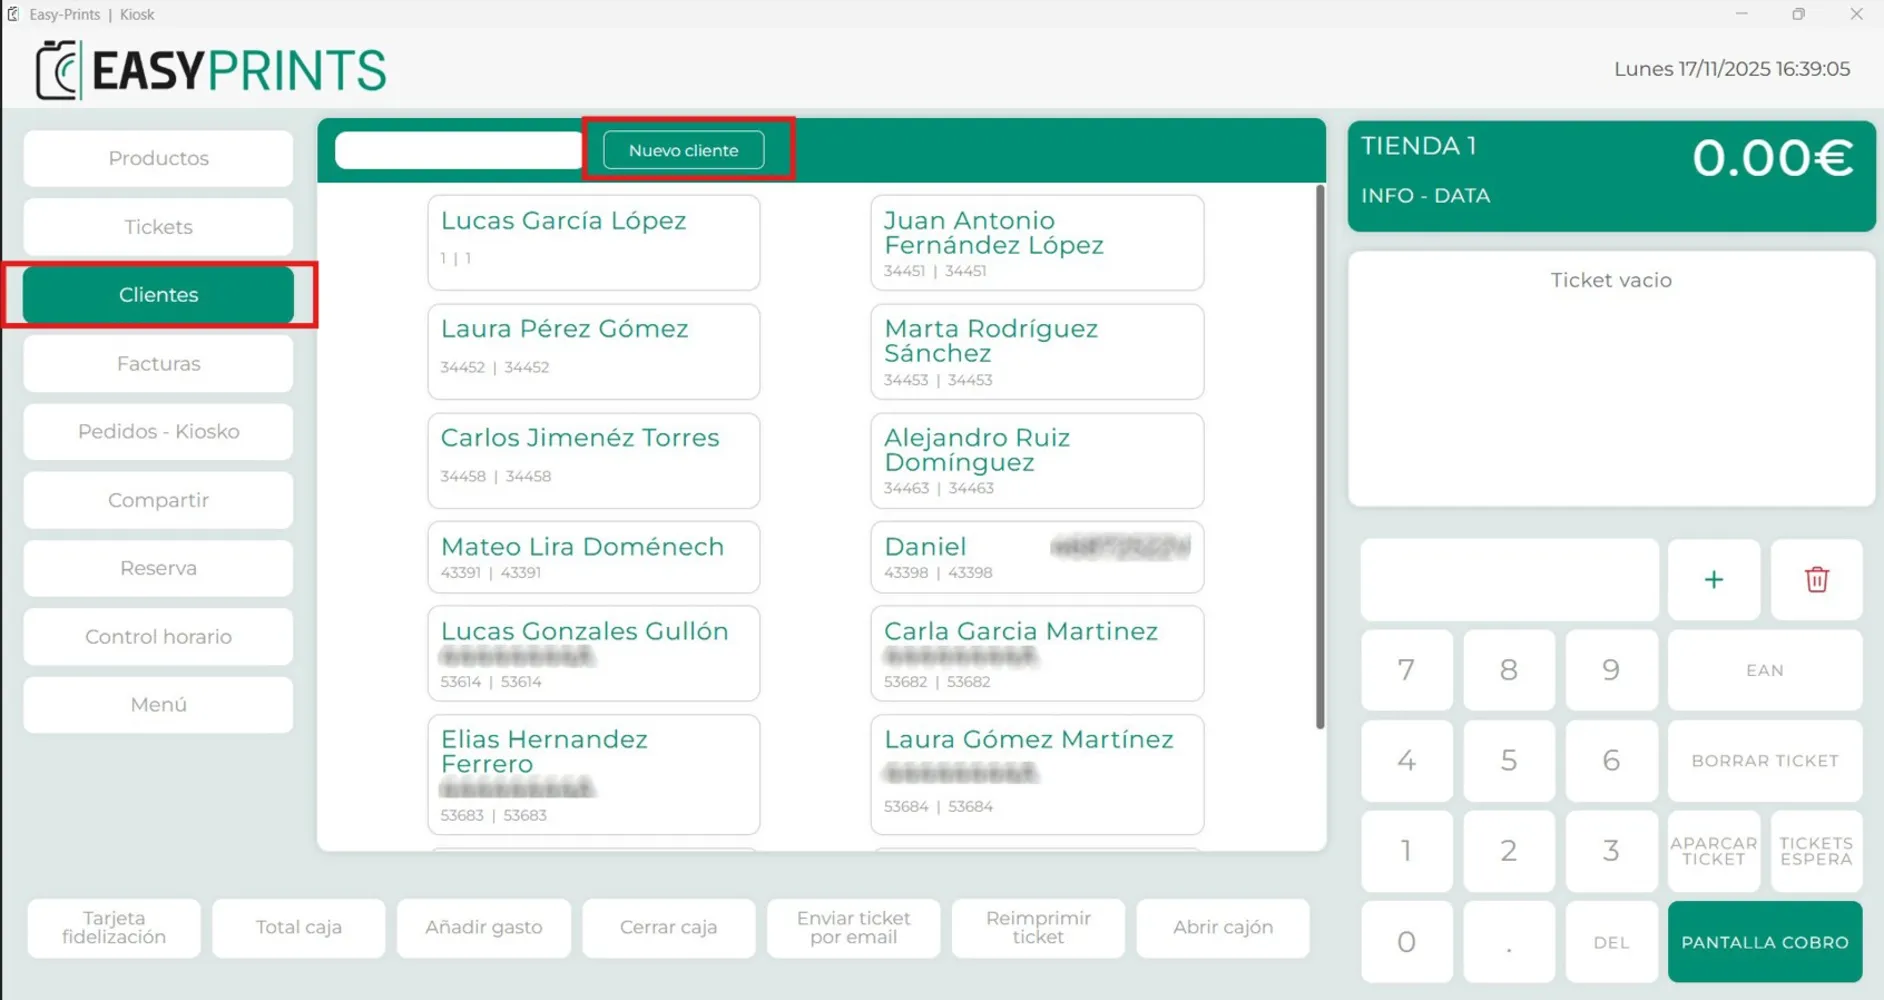
If the invoice is for a new customer, go to the Customers section located in the left panel. At the top, you will find a box labeled “New customer” (as shown in the image).
Step 5
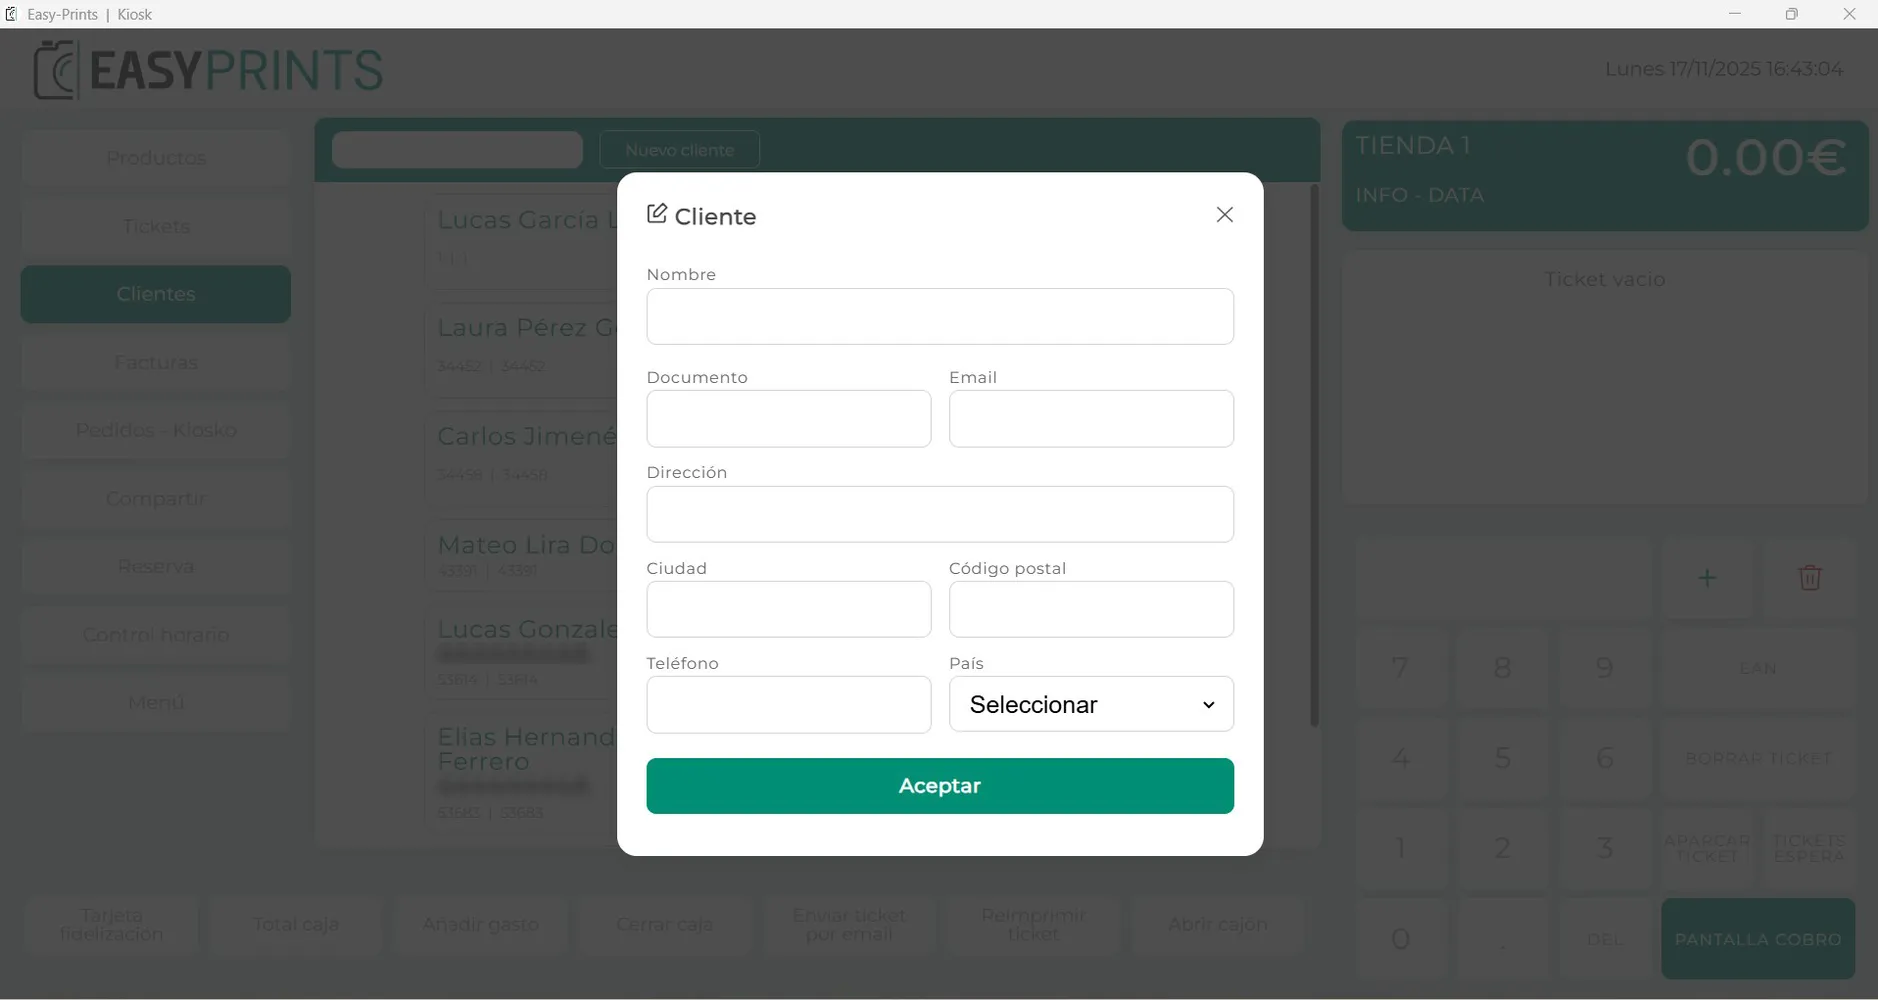
A new window will open where you will need to enter the new customer's details. Once all fields are completed, make sure to click the green save button.
Step 6
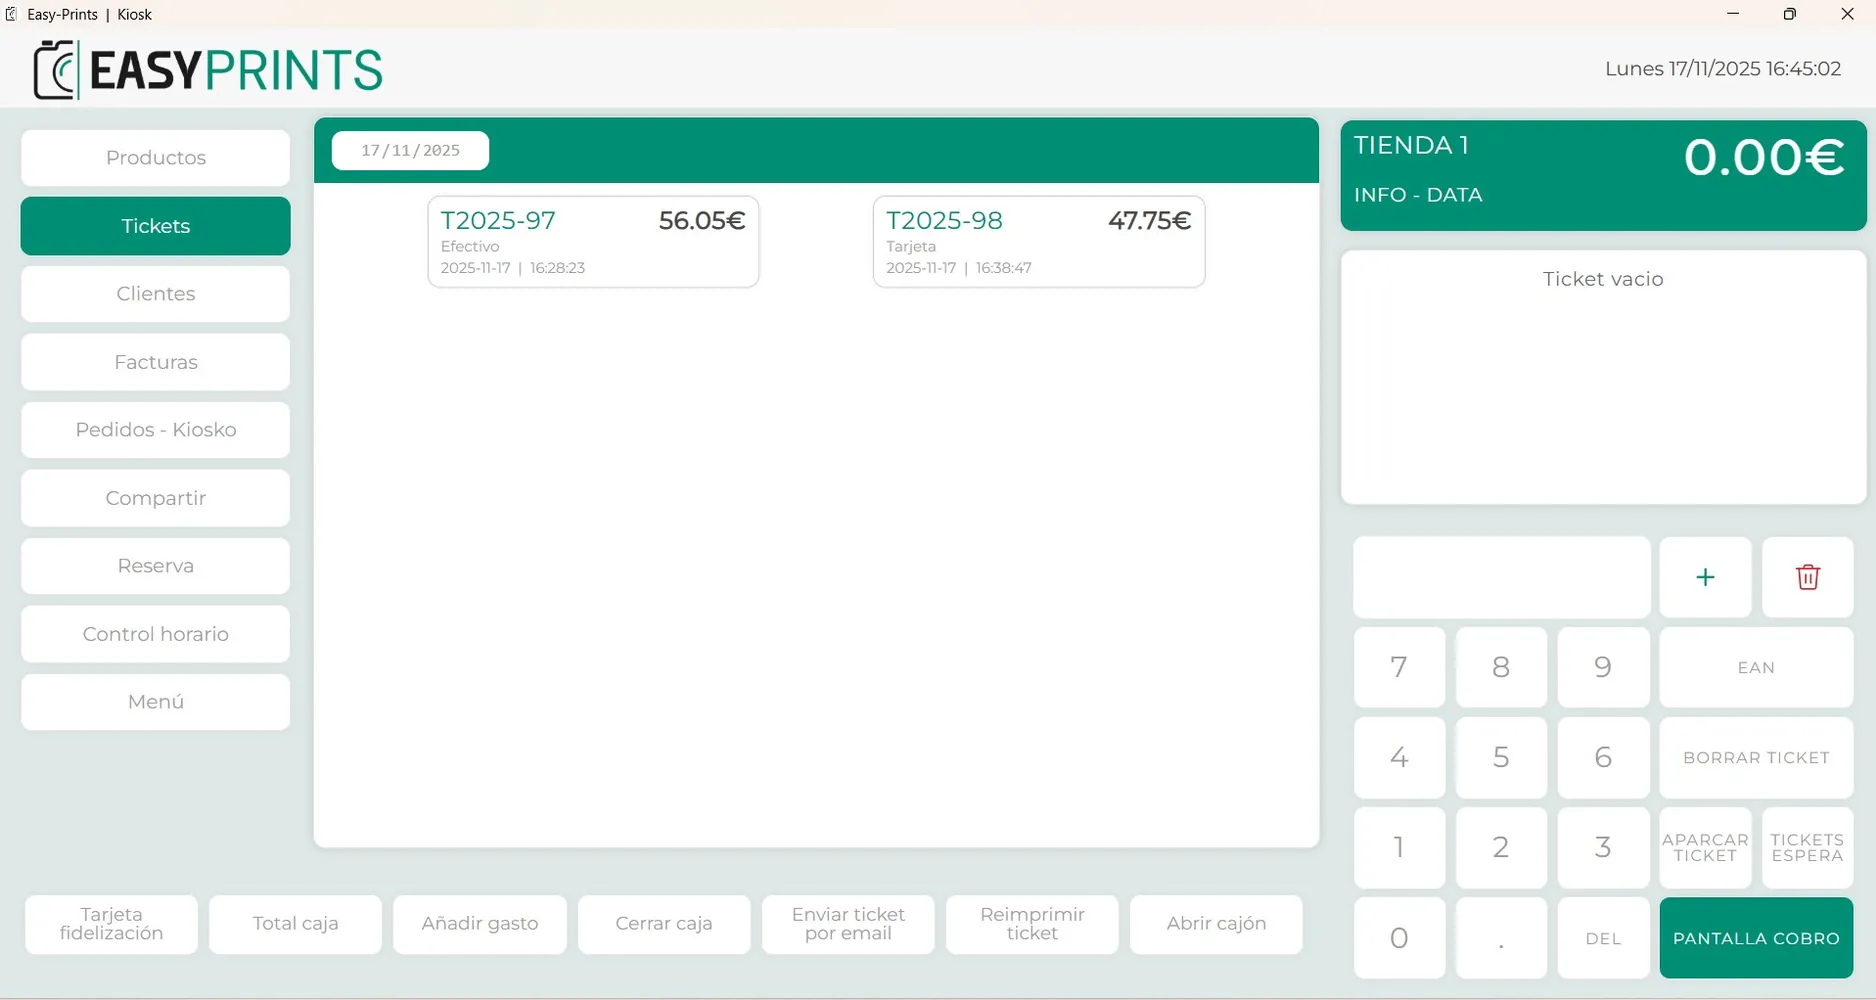
Once the new customer has been created, you must go to the Tickets section located in the left panel. In the central panel, all the tickets generated during the day will appear. You will need to select the ticket for which you want to generate the invoice.
Step 7
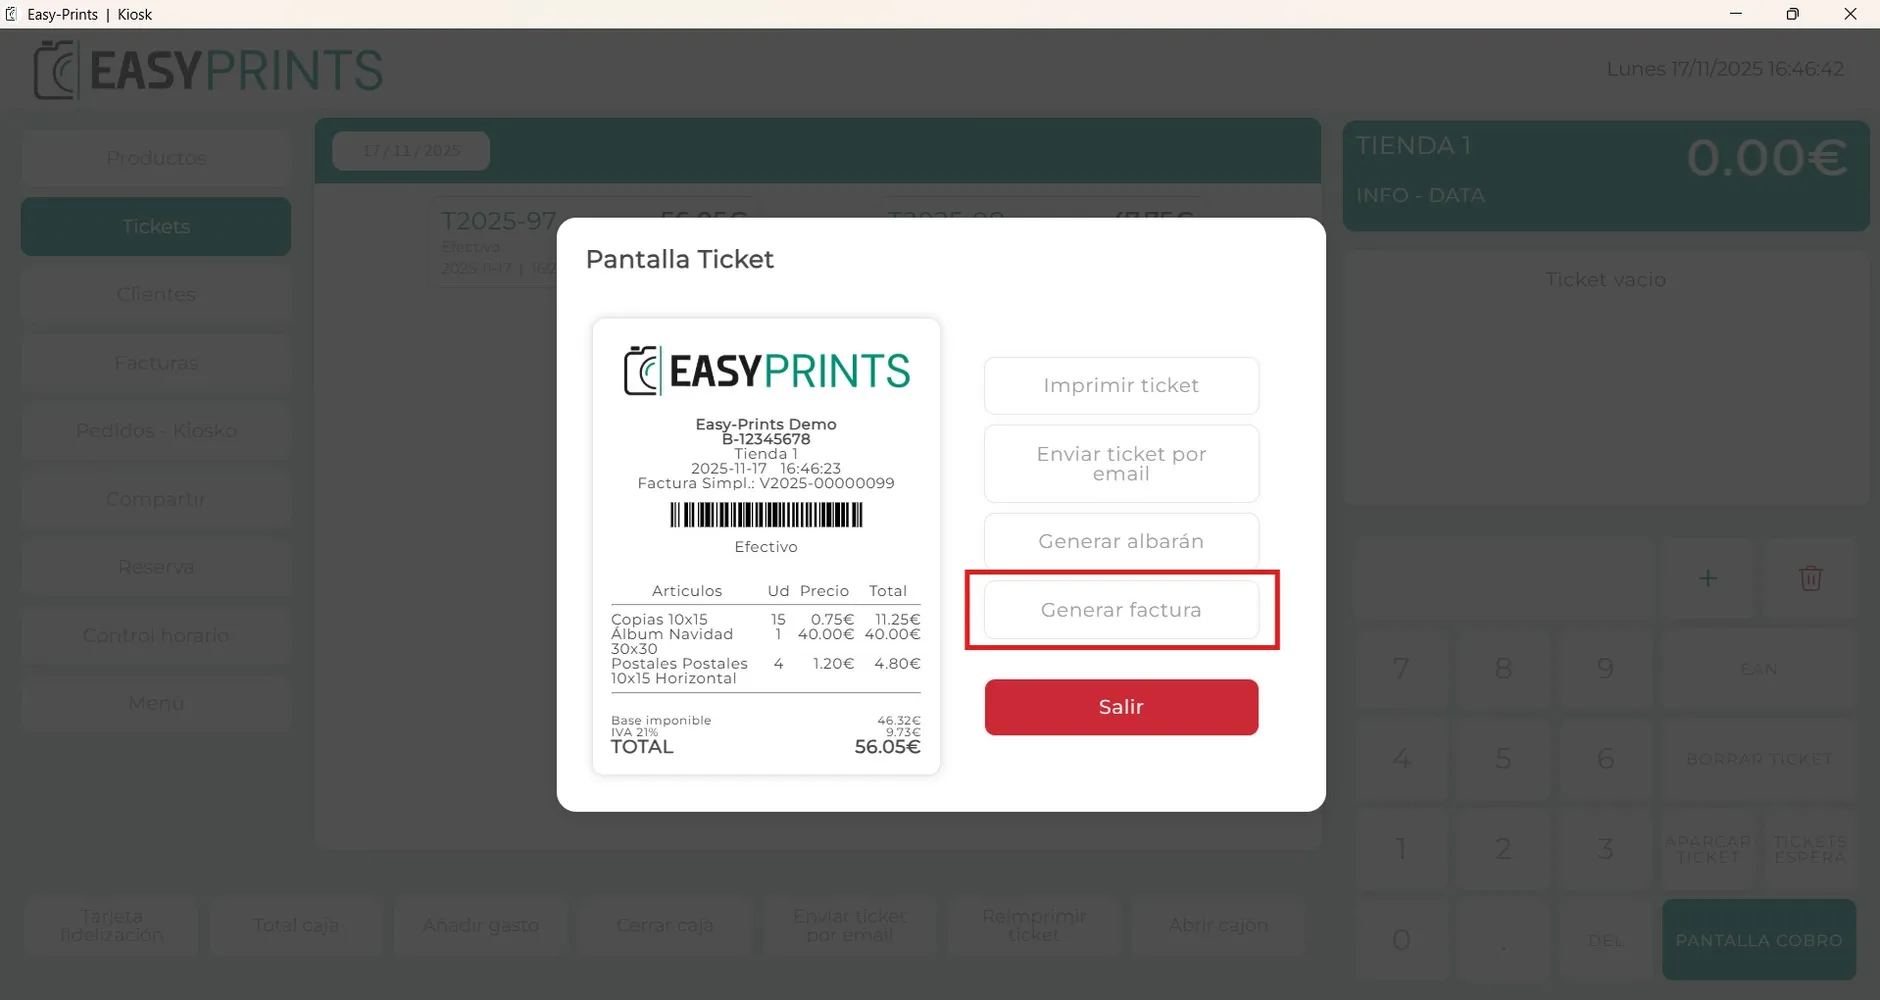
A new window will open where the four previously mentioned options will appear again. You will need to click on “Print invoice”.
Step 8
A new window will open where you will need to select the customer you have created.
Step 9
An email with the invoice will be sent automatically to the customer's email address.
Step 10
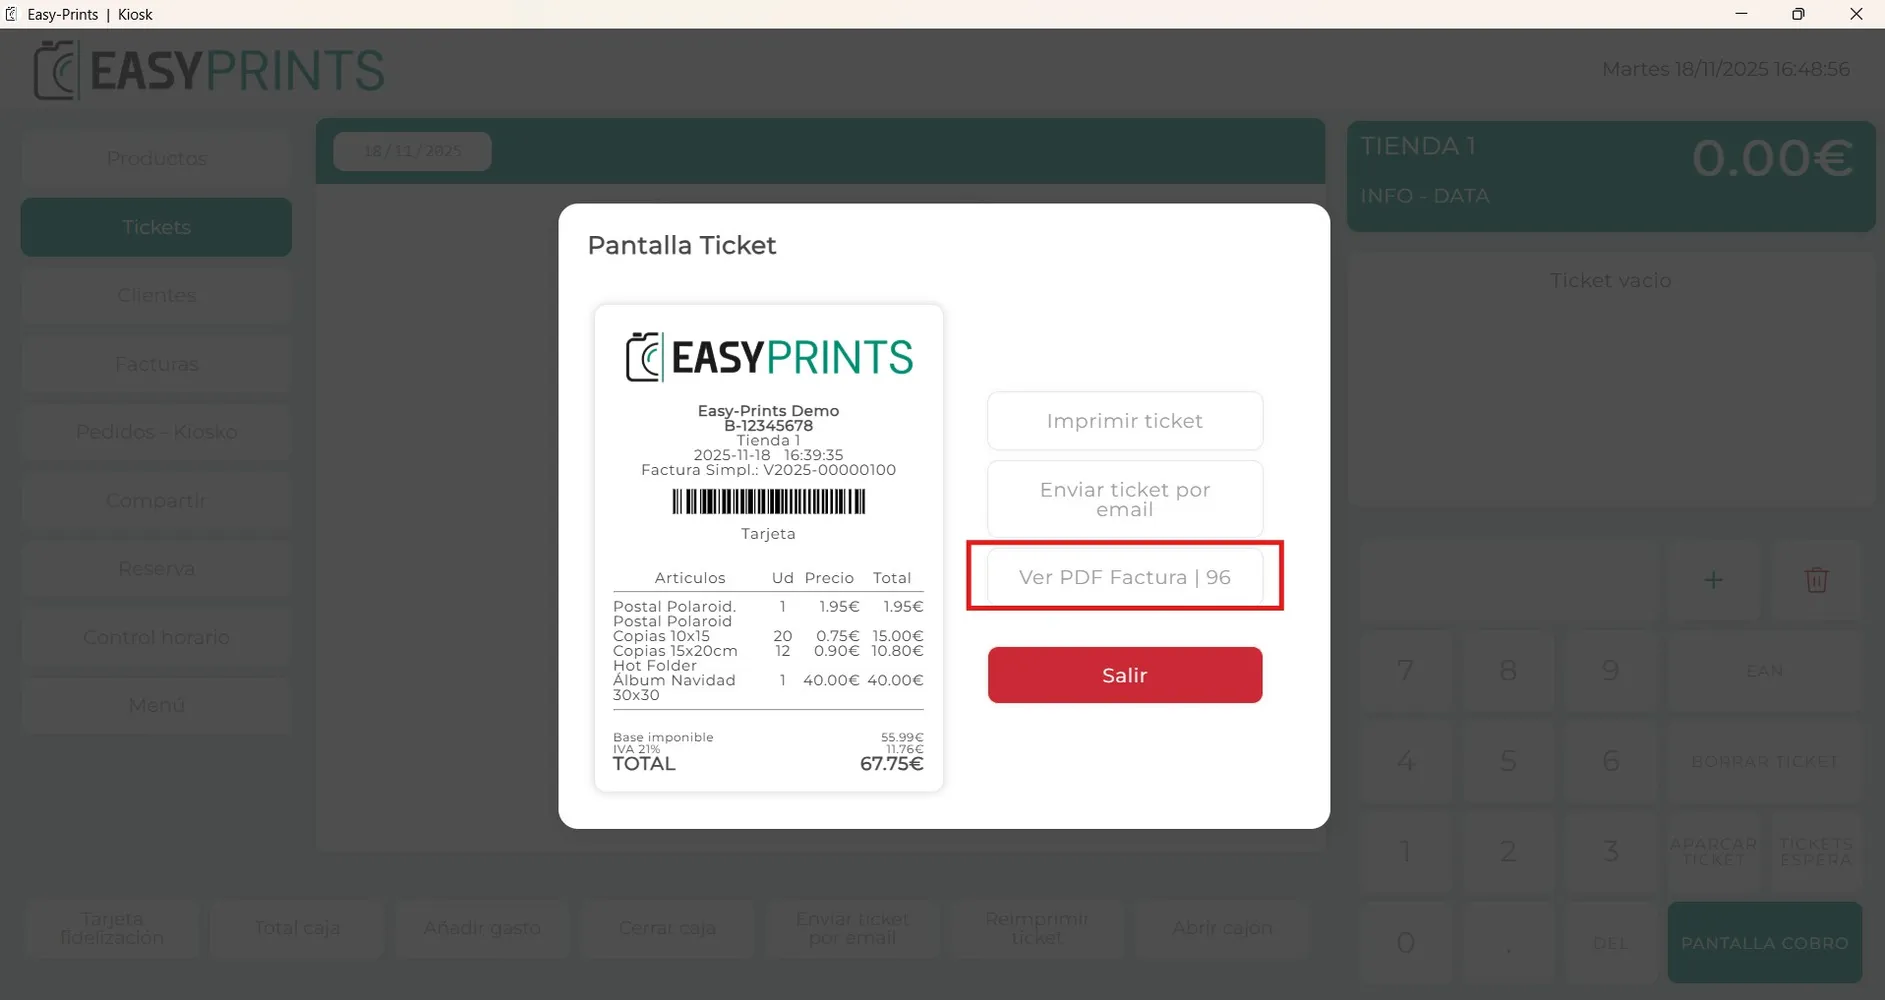
If the customer wants to have the invoice on paper, you must go to the Tickets section on the left side and select the ticket for which you generated the invoice. A screen will open where you will have the option to view the invoice PDF, which you can open and print.
Go back to the Help Center or contact Easy-Prints.
← Back to Help Center