
How to add products to the receipt
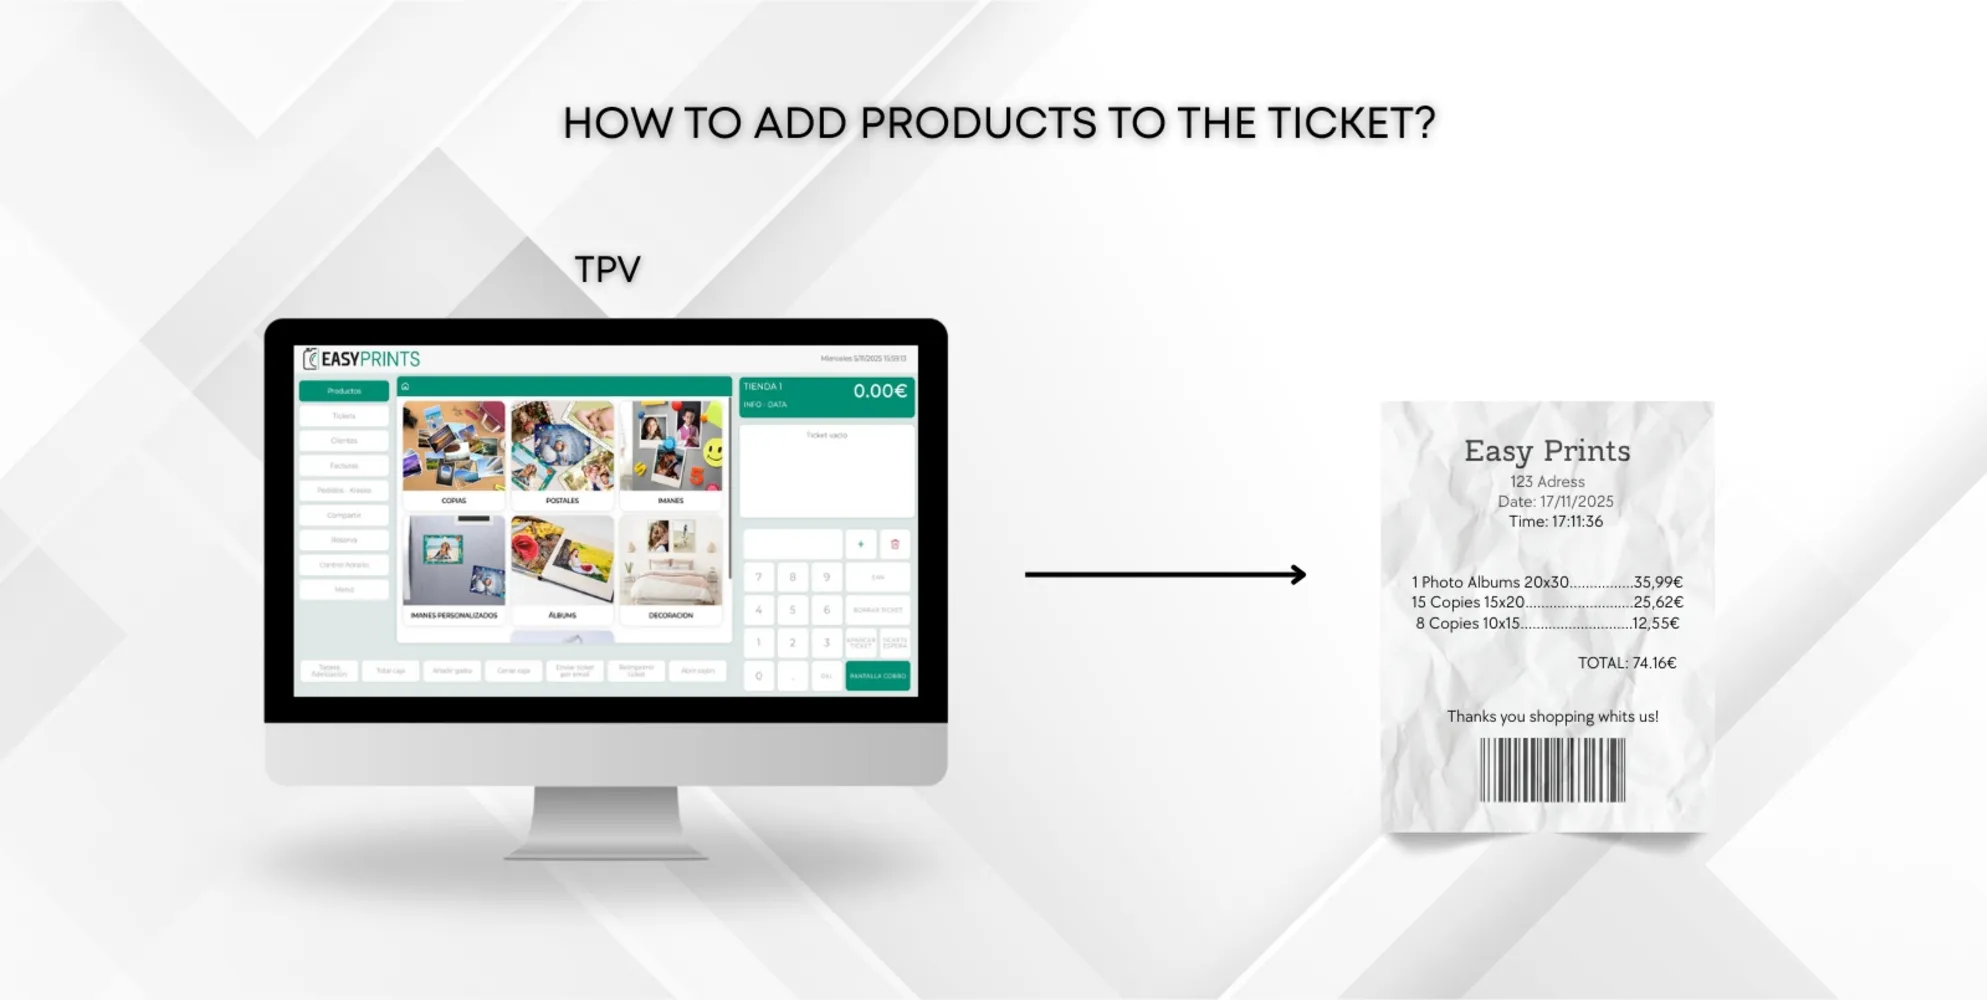
To add a product to the receipt (and later charge it), we need to select the category requested by the customer. In this example, we will use the photo pri…
Step 1
To add a product to the receipt (and later charge it), we need to select the category requested by the customer. In this example, we will use the photo prints category.
Step 2
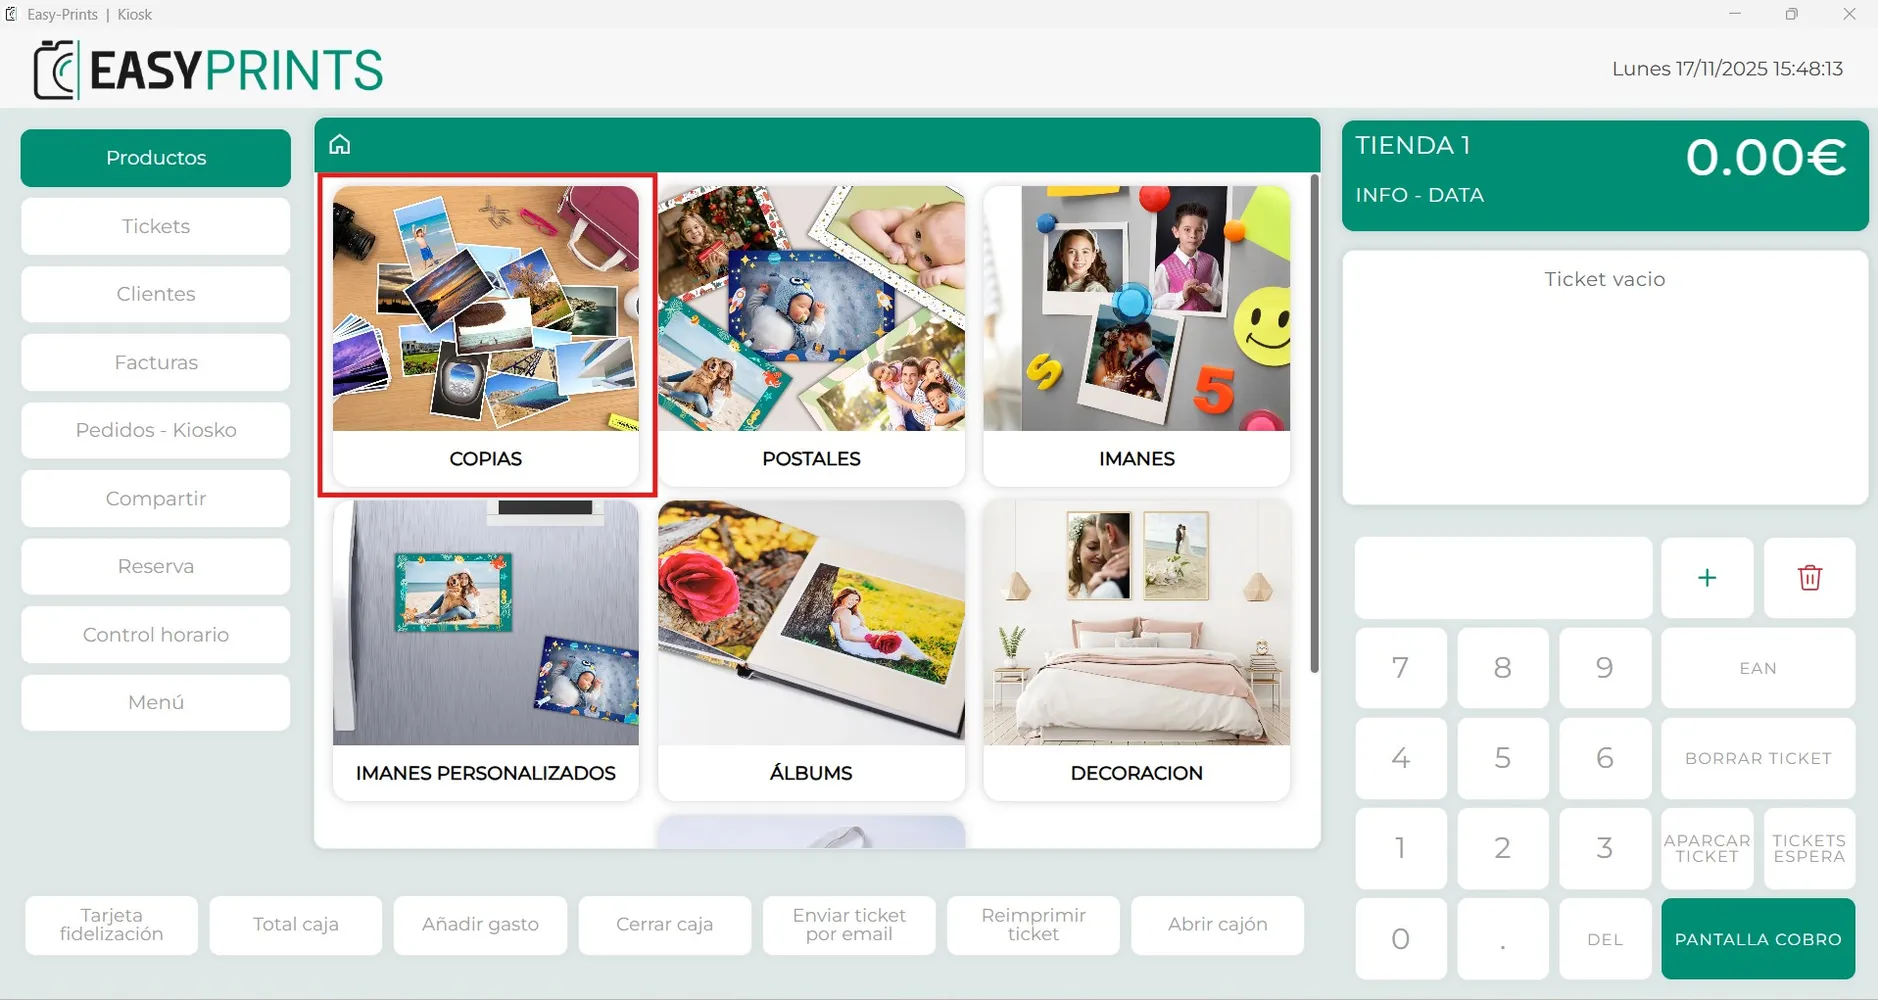
When you click on the photo prints category, the different available sizes will appear. Let’s assume the customer requested the 10x15 cm size. On the right side, the selected product will appear, as indicated by the arrow.
Step 3
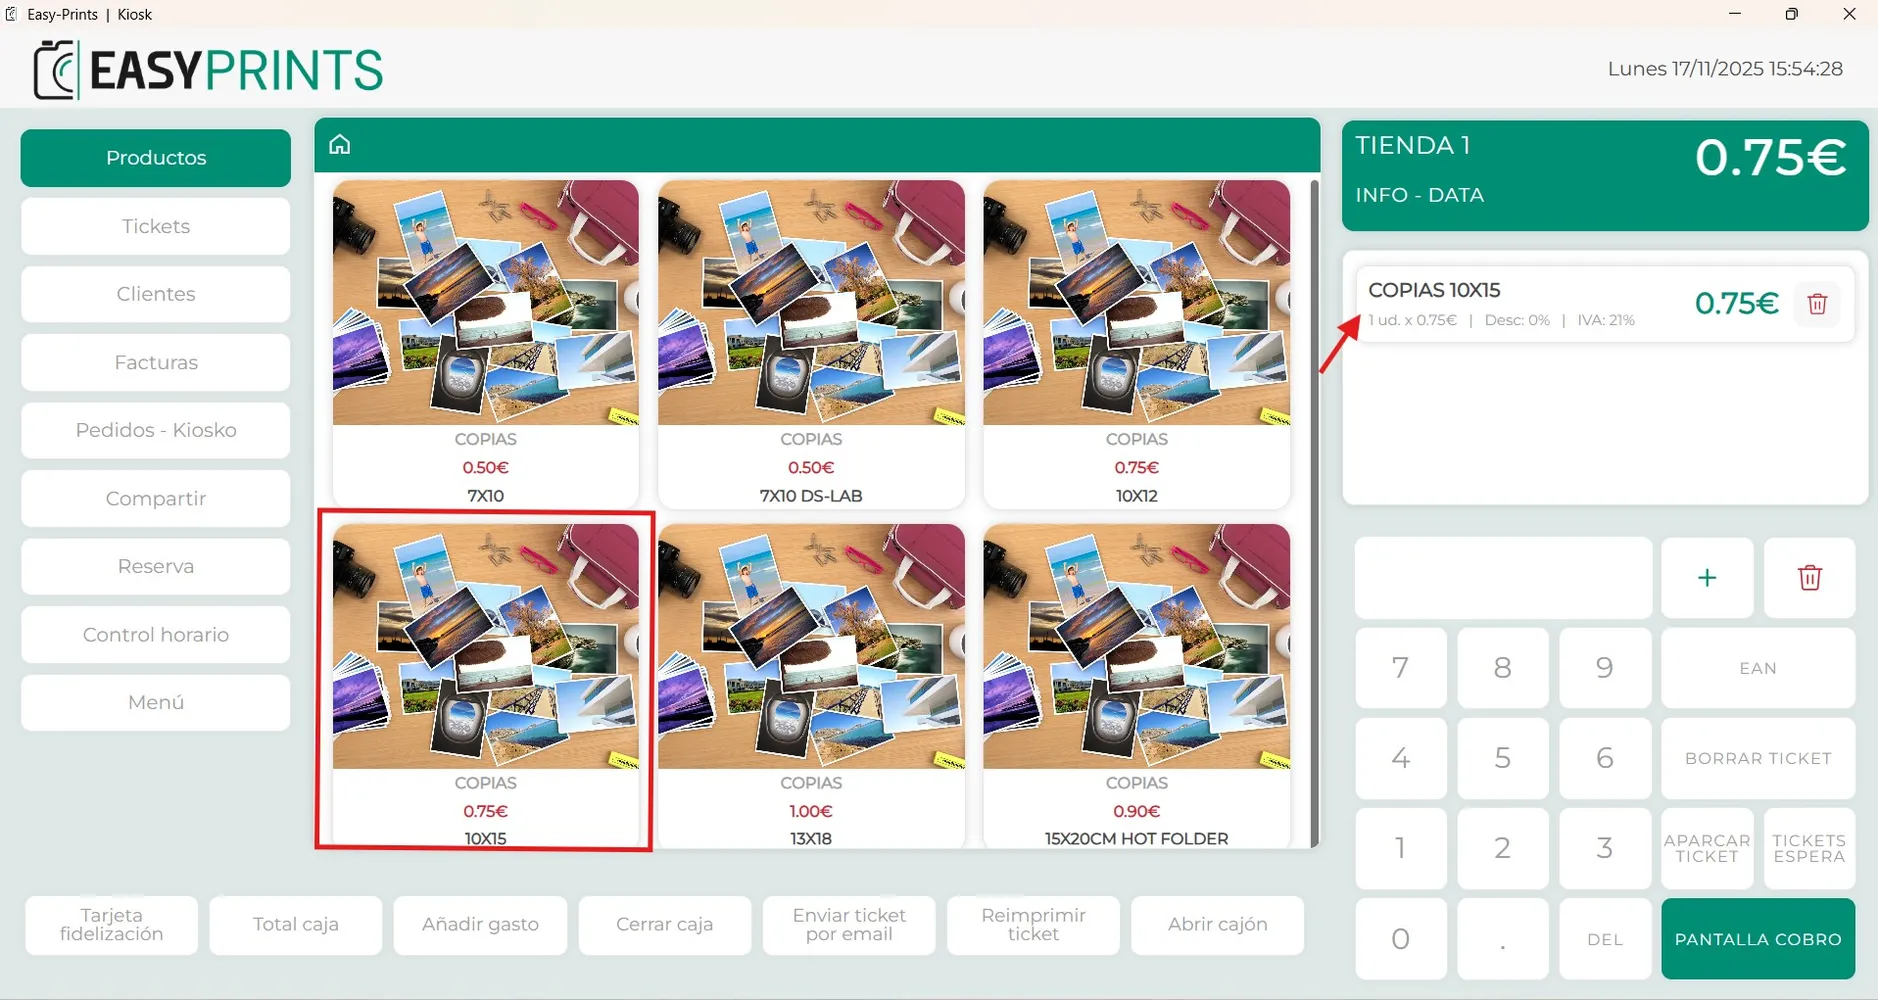
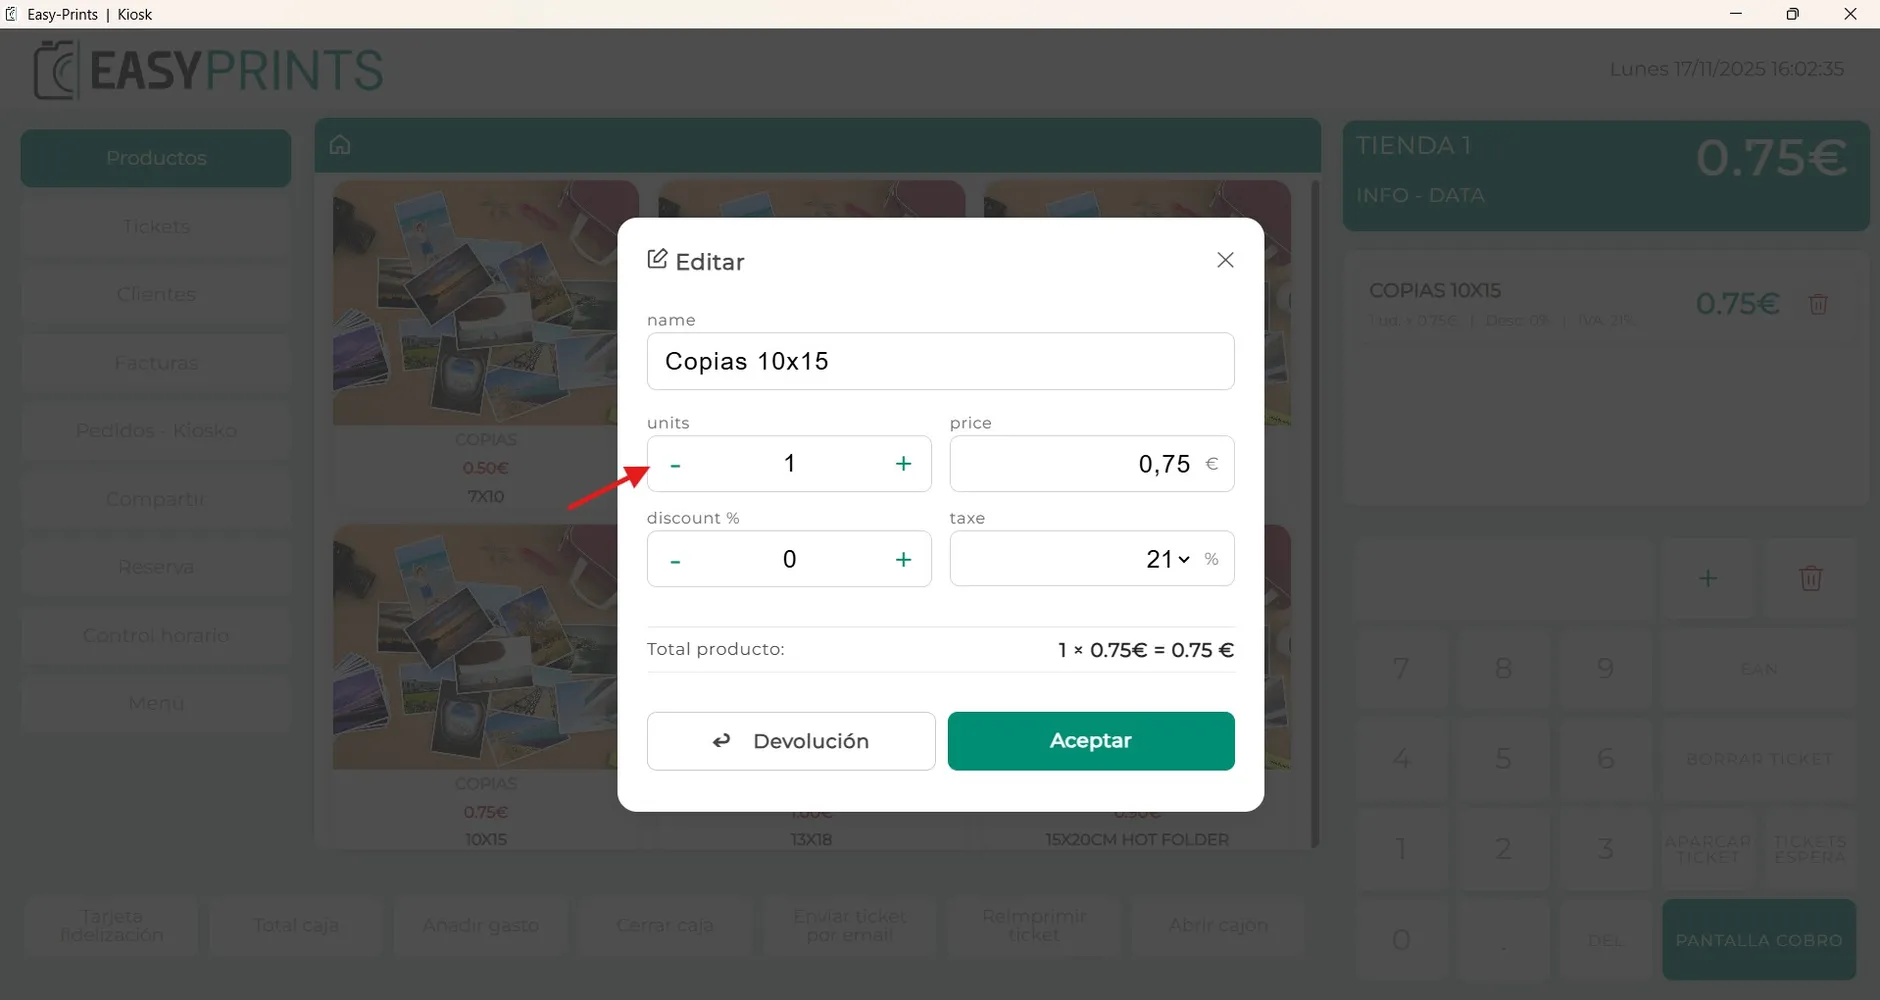
As you can see, it only shows that one unit has been added. If you need to change the quantity of the product, you must click on the product, as shown in the image.
Step 4
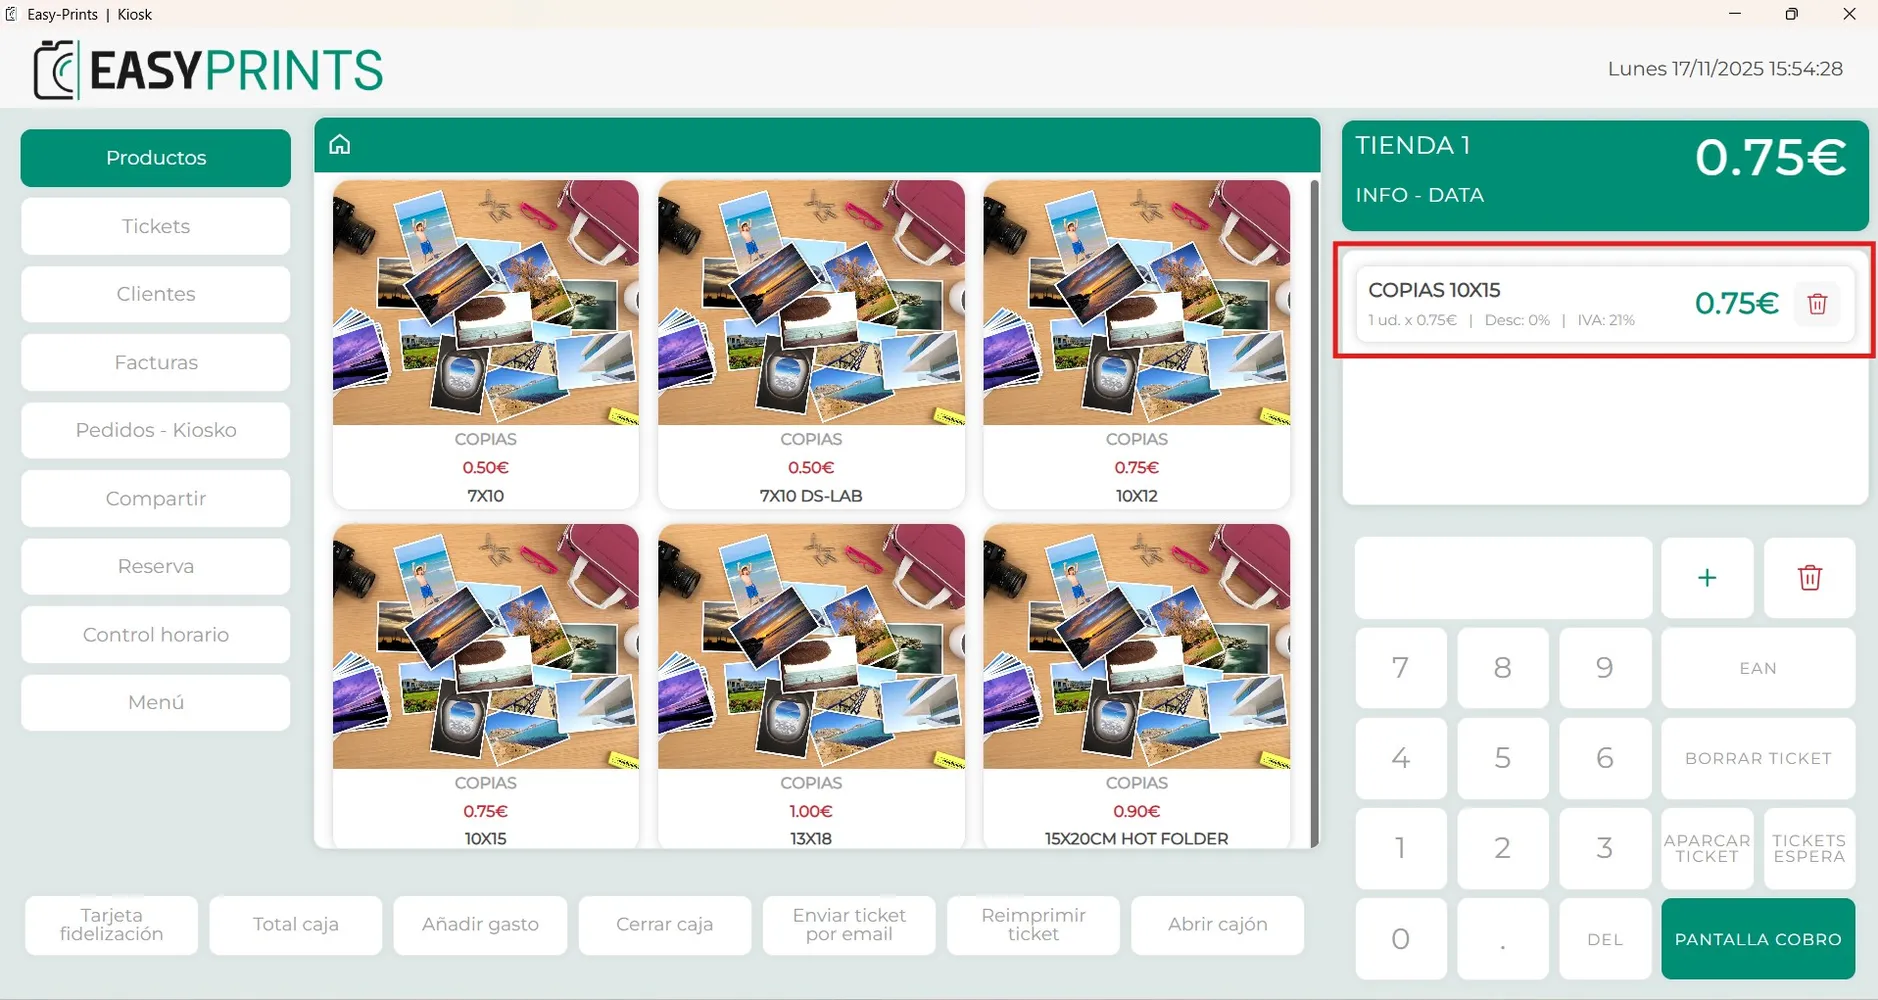
In the new window, you can specify the quantity. You will also find additional buttons such as discount, price, and/or tax, which can be modified if needed. Remember that after changing any of these values, you must click the green Accept button to save the changes.
Step 5
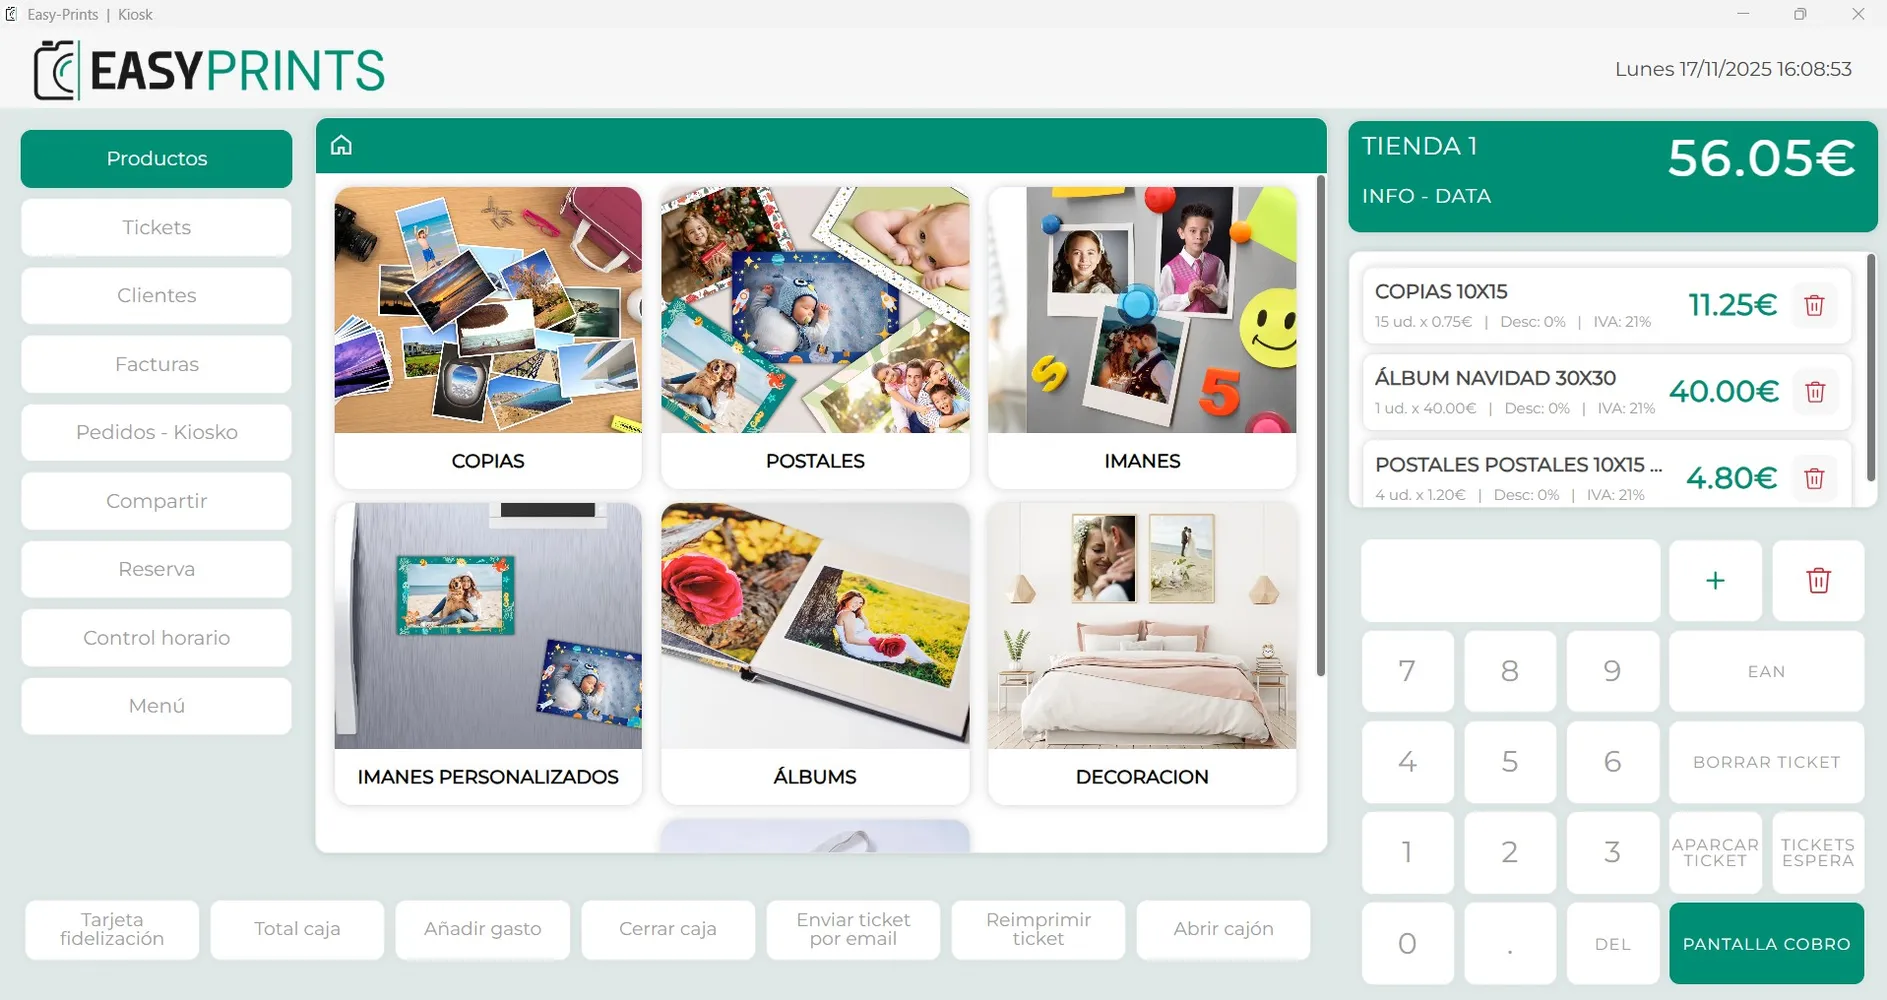
You can add as many products as you need and modify each of them.
Go back to the Help Center or contact Easy-Prints.
← Back to Help Center