
How to create product categories
To create a product category, go to the Products section in the left menu of the software. In this section, at the top of the screen, you will find the tab…
Step 1
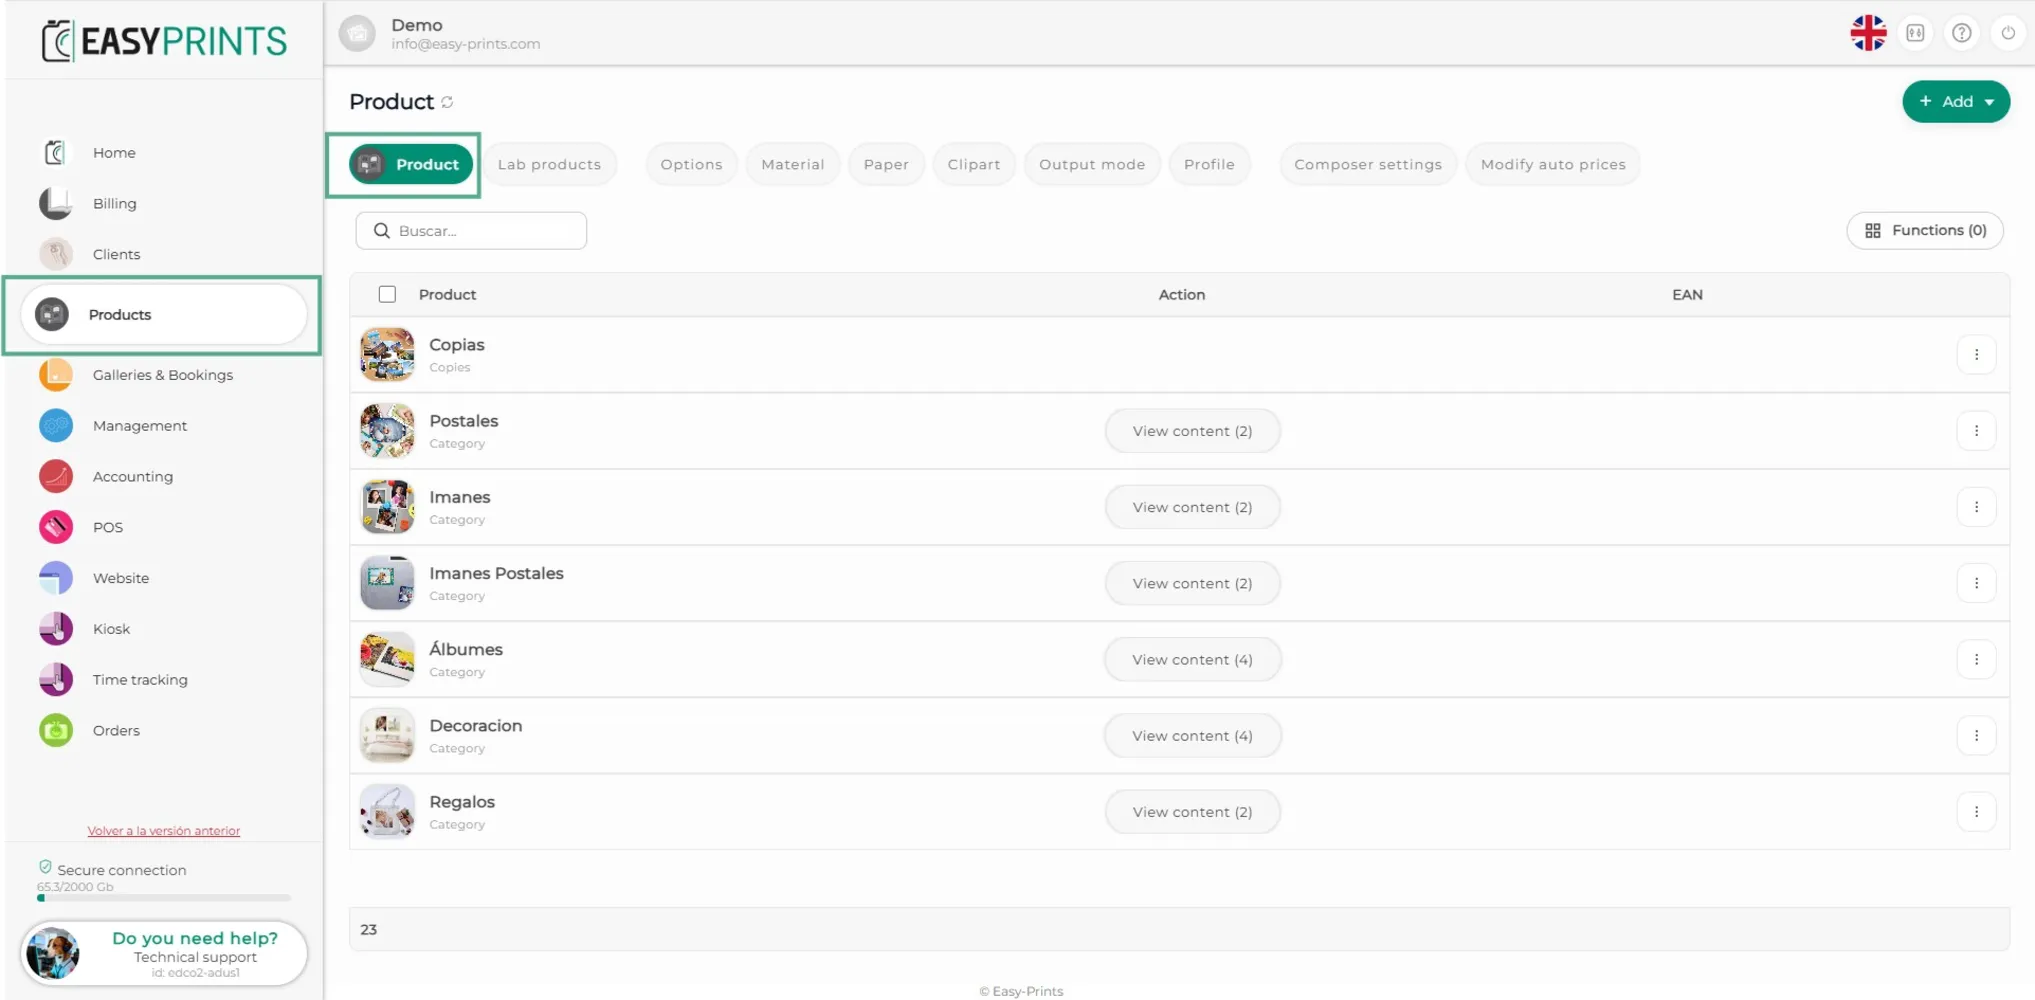
To create a product category, go to the Products section in the left menu of the software. In this section, at the top of the screen, you will find the tabs of the products module. Click on Products, as shown in the image.
Step 2
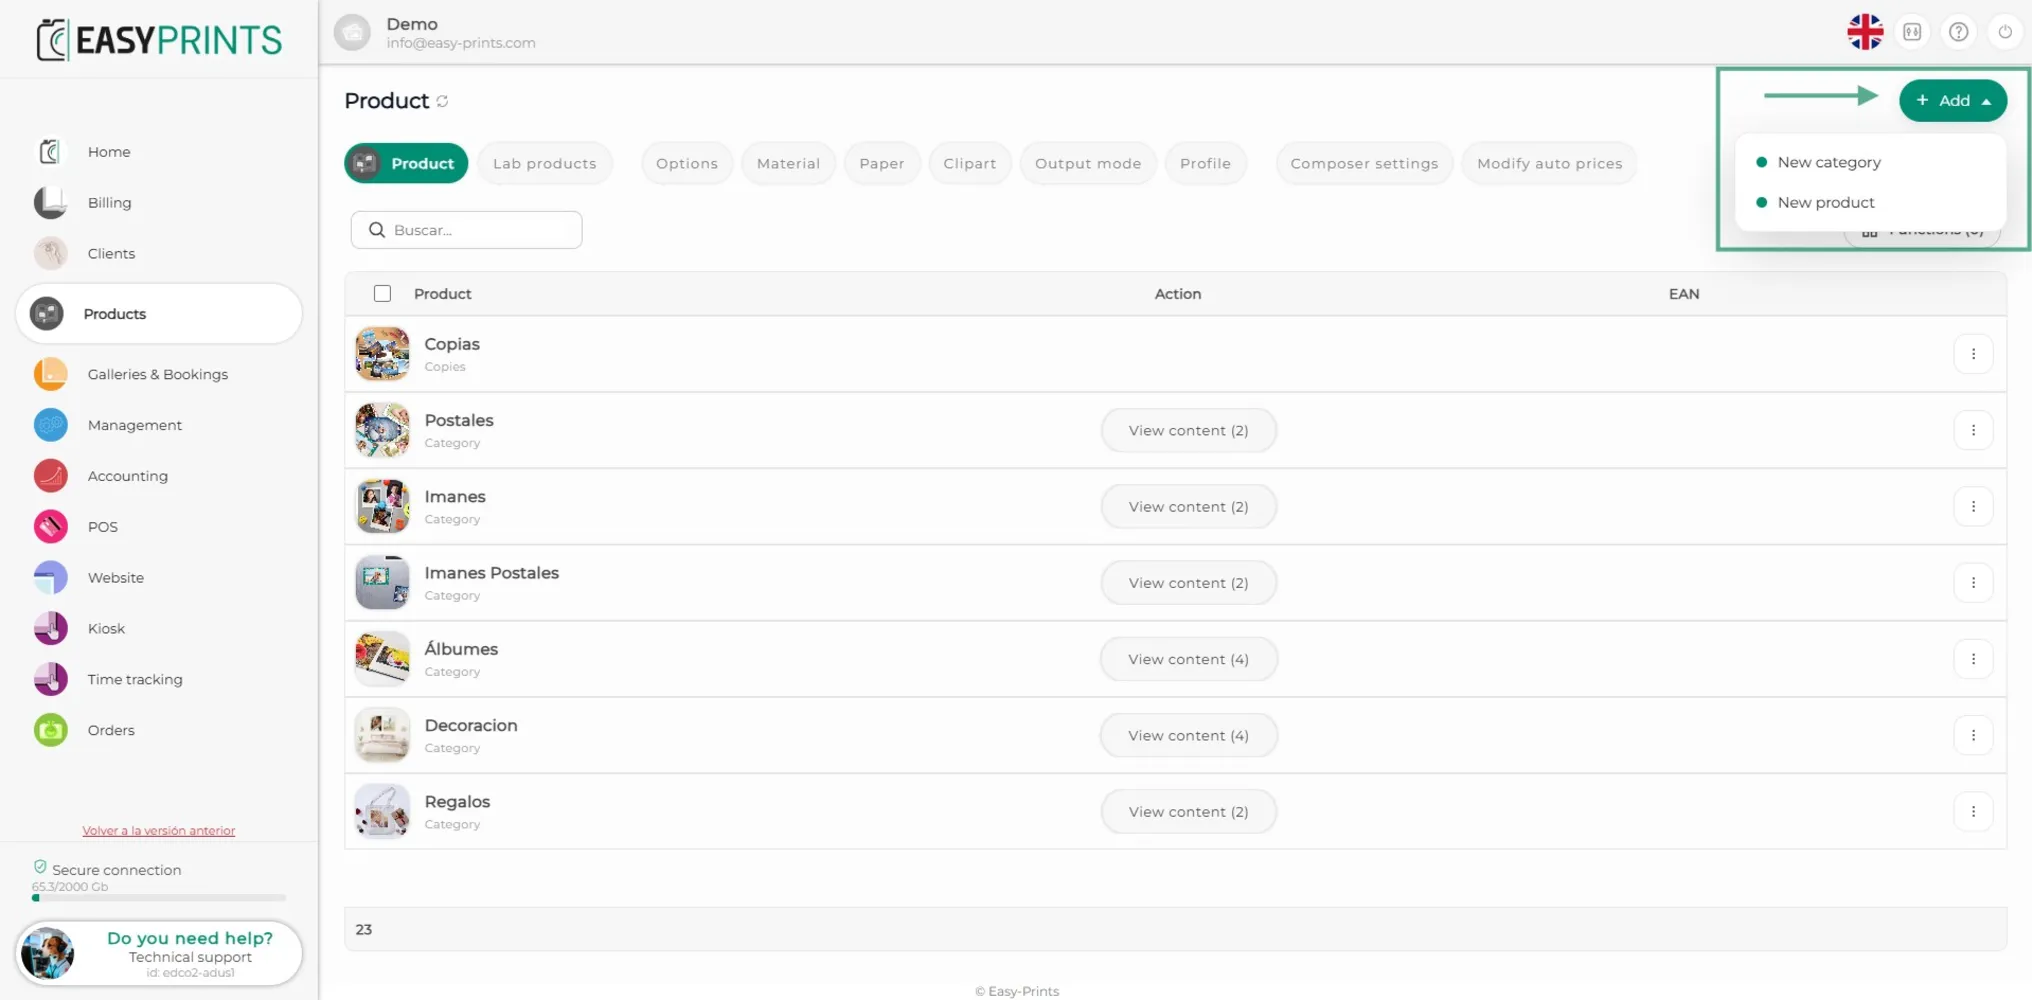
In the top right corner, you will find the + Add button. When you click on it, a dropdown menu will open where you can choose Create category or Create product. Click on Create category.
Step 3
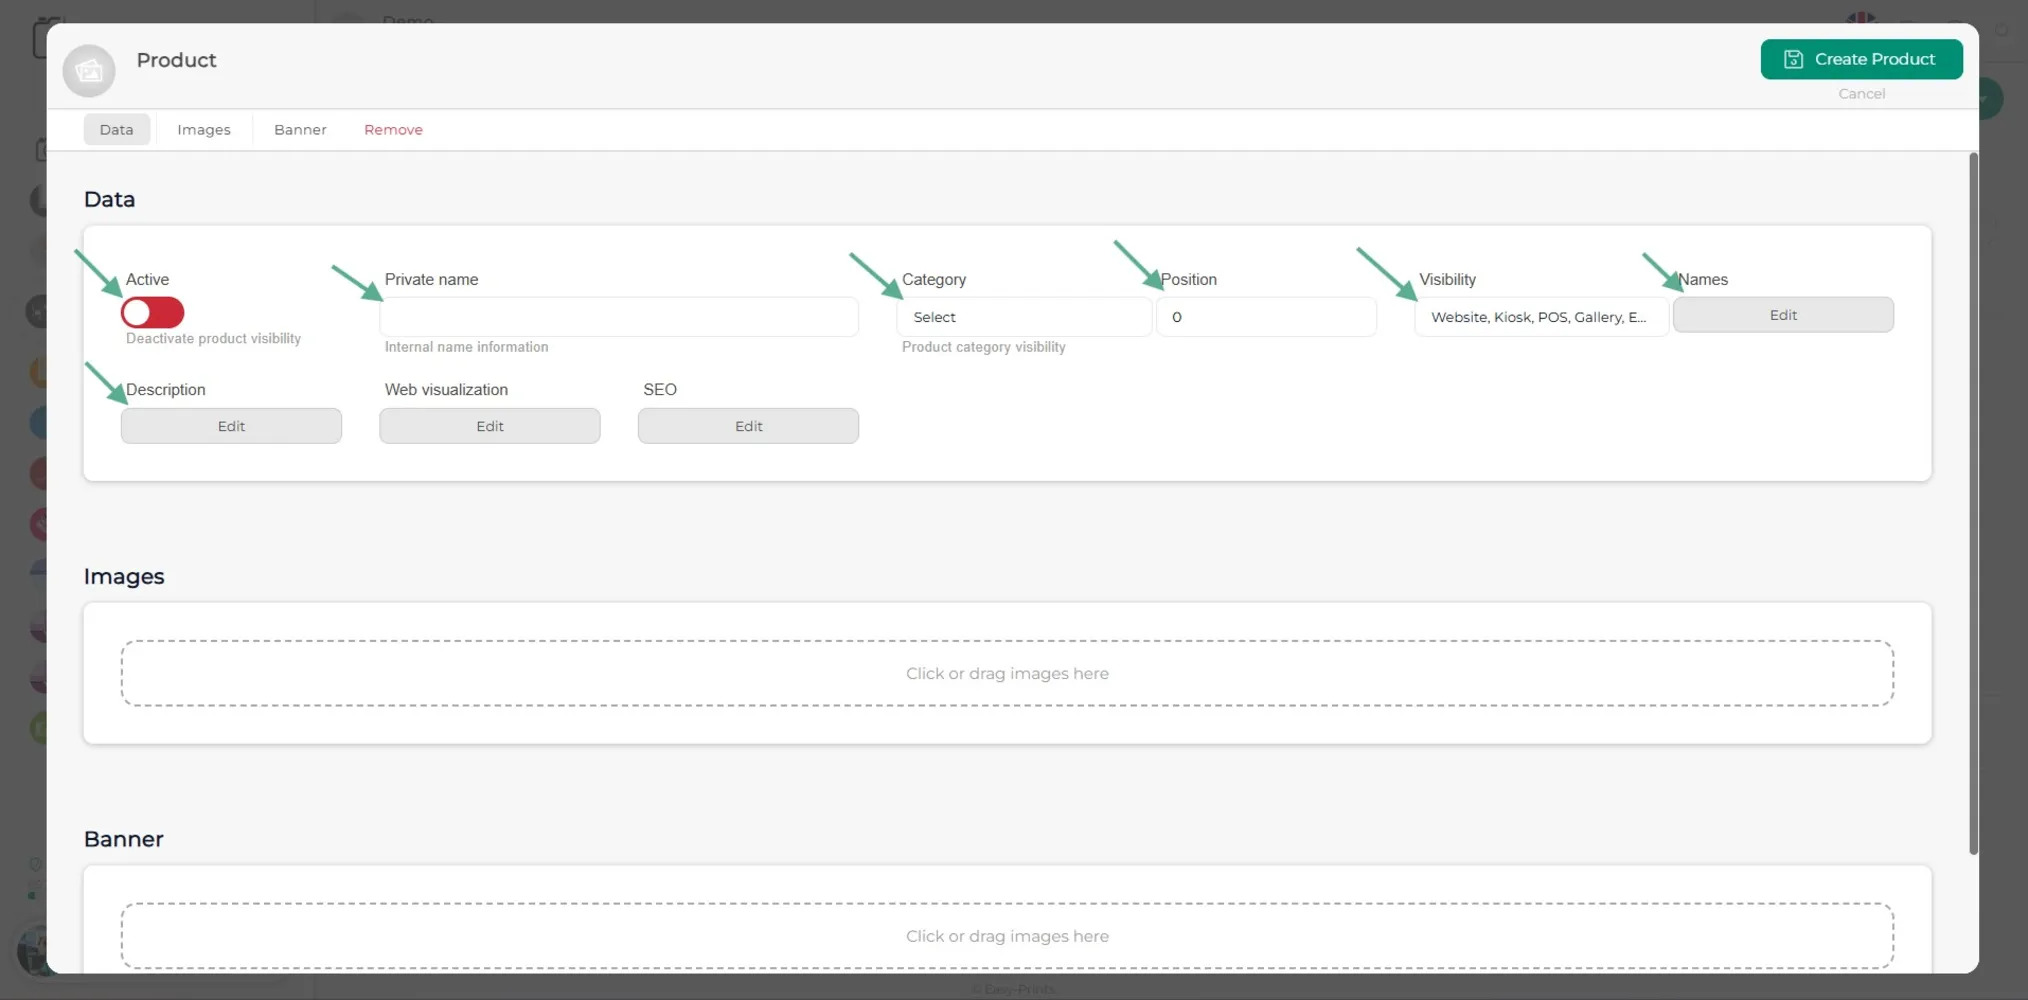
In the new window, in the Data section, the category must be activated and the following fields must be completed: Internal product name, category, position, product name (the name that will be displayed on the website) and description.
Step 4
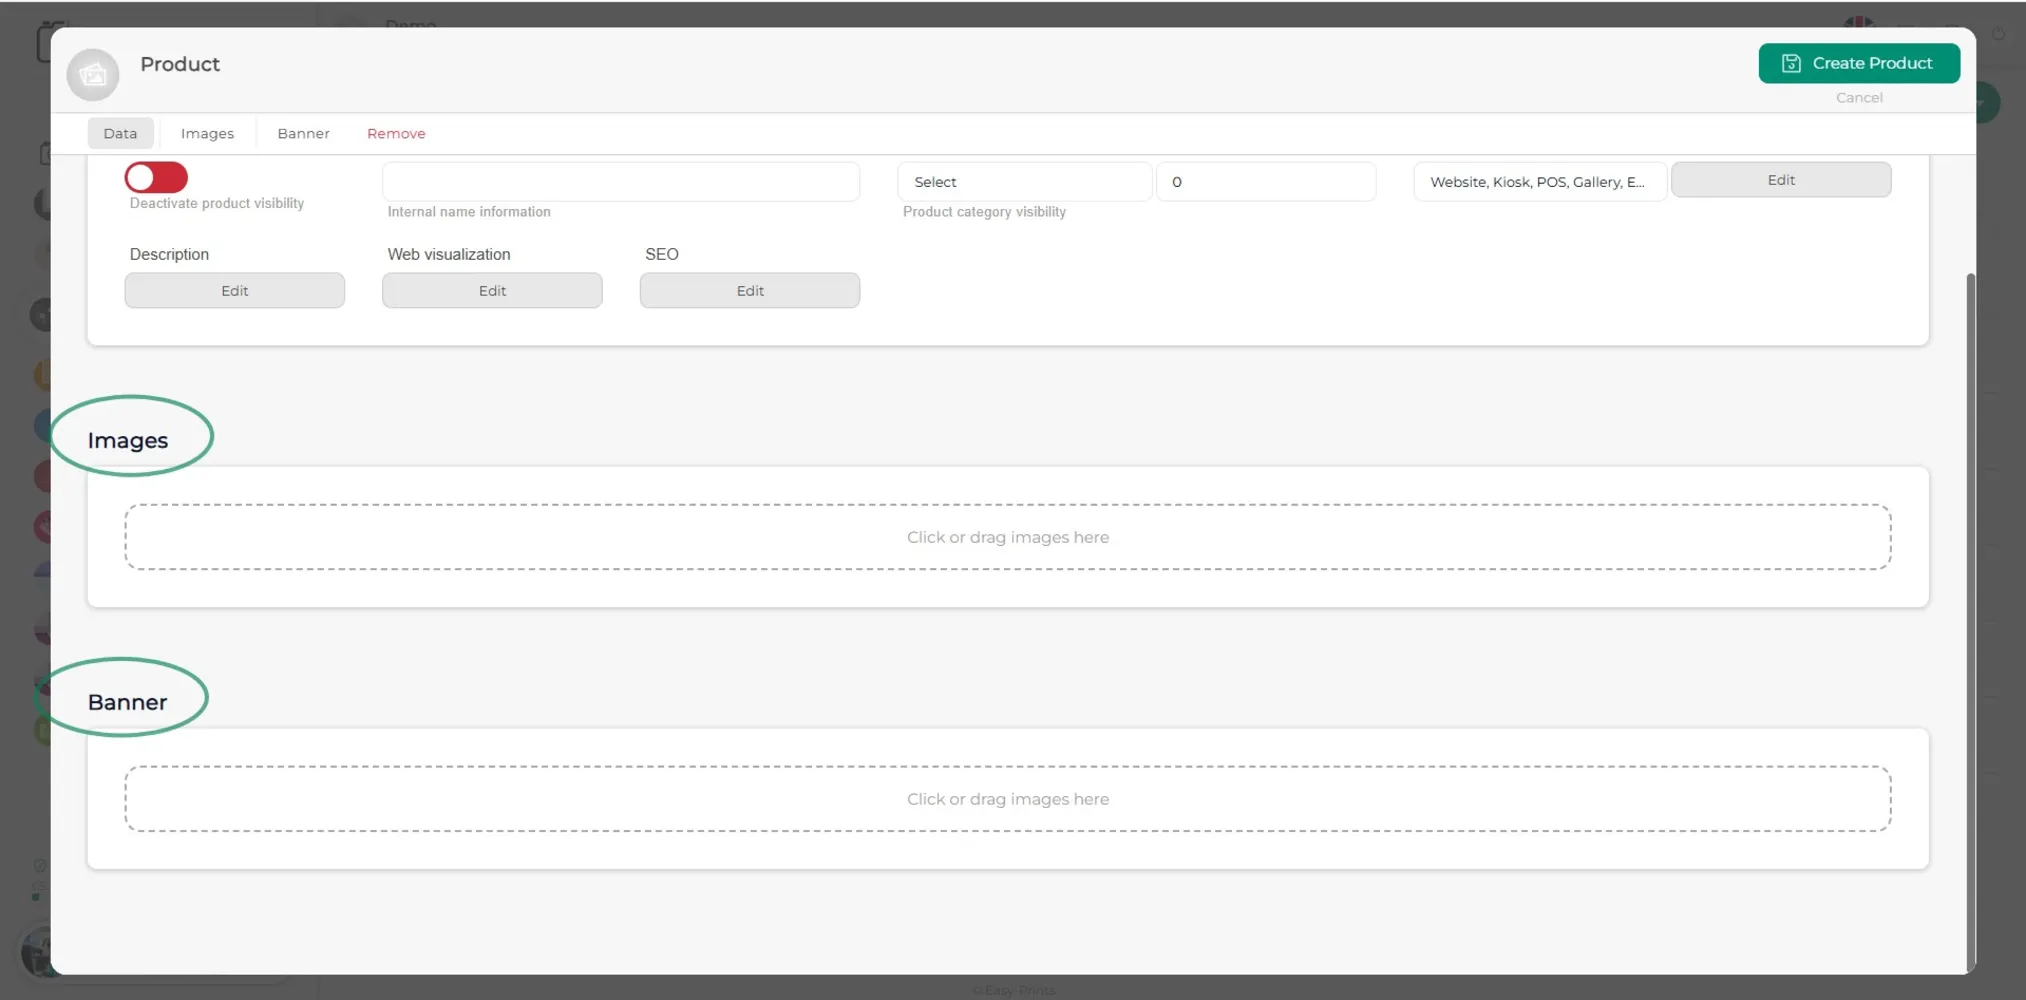
Add the image in the Image section. You can select it by clicking on the indicated box. A banner can also be included if desired.
Step 5
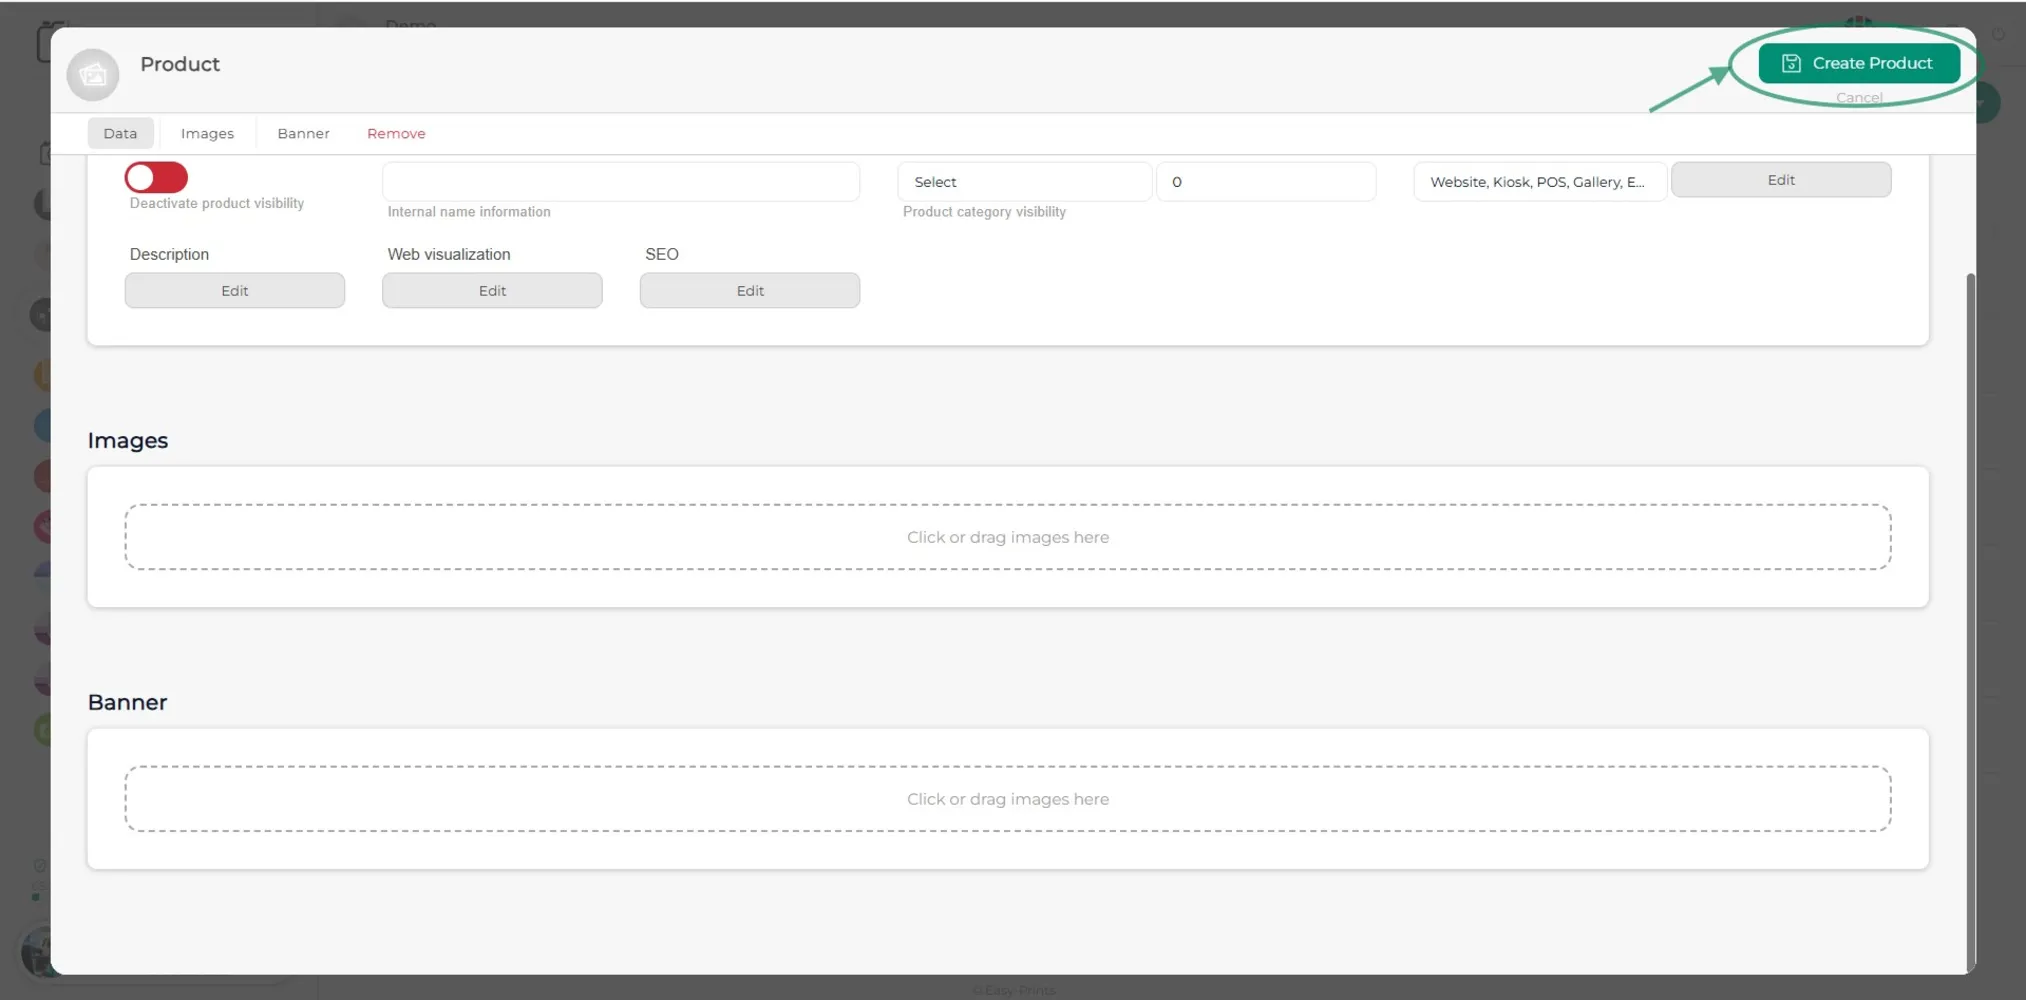
Once the data and the image have been entered, save the changes by clicking the green Create product button located at the top right of the window.
Go back to the Help Center or contact Easy-Prints.
← Back to Help Center